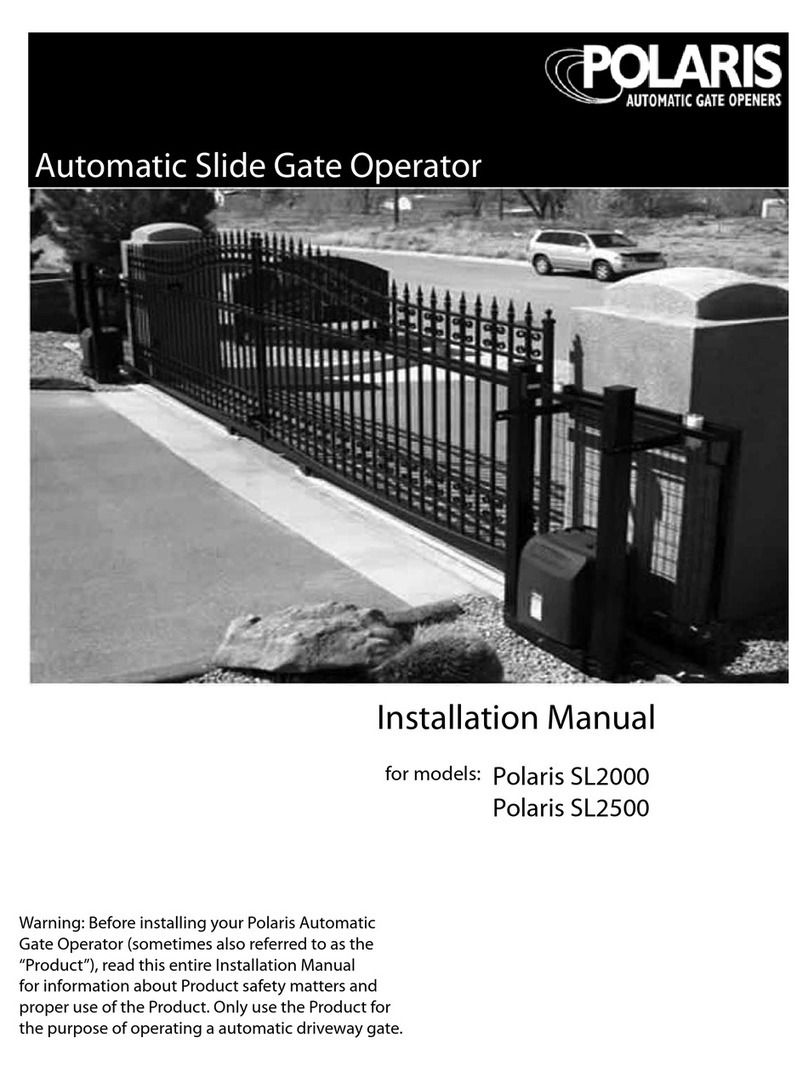
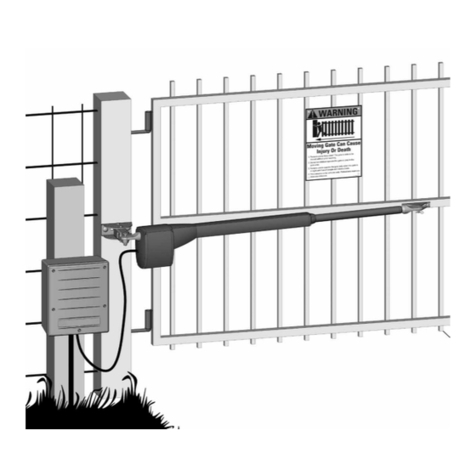
Polaris Automatic Gate Operators 500 Series User manual

Page1
User Manual 500 & 700
Warning: Before installing your Polaris
Automatic Gate operator (sometimes also
referred to as the “Product”), read this entire
Installation Manual for information about Product
safety matters and proper use of the Product.
Only use the Product for the purpose of
operating a driveway gate.
Document revision: 1.1
Polaris 700/702
Polaris 500/502

Page2
Table of Contents
Gate Operator Class Categories
.............................................................................. 4
Warnings and Precautions........................................................................................ 5
Installing The Polaris Operator(s).............................................................................8
Pull-to-Open Gate Operator Mounting .....................................................................9
Push-to-Open Gate Operator Mounting ................................................................. 11
Post Mount Brackets ............................................................................................... 13
Circuit Board Diagram............................................................................................. 16
Board Layout Description ....................................................................................... 16
Dip Switches............................................................................................................. 17
Wiring Operator........................................................................................................ 18
Pull-to-Open Limit Setting....................................................................................... 22
Push-to-Open Limit Setting..................................................................................... 24
Primary/Secondary Gate Movement....................................................................... 26
Obstruction Sensitivity Set Up ............................................................................... 27
Auto Close Timer ..................................................................................................... 28
Transmitter/Receiver ............................................................................................... 29
Accessory Hook Up Diagram.................................................................................. 30
Exit Wand Hook Up Diagram................................................................................... 33
Photo Eyes Hook Up Diagram ................................................................................34
Emergency Disconnect ........................................................................................... 36
Technical Specifications......................................................................................... 37
Parts List and Illustrations...................................................................................... 38
Troubleshooting/Maintenance................................................................................ 40
List of Accessories.................................................................................................. 42
Warranty ................................................................................................................... 43
Polaris Automatic Gate Operators
8617 Paseo Alameda NE
Albuquerque, NM 87113
Phone: 877-313-8902
Fax: 800-830-3952
Web: www.polarisgate.com

Page3
WARNING OF RISKS, PURCHASER’S RESPONSIBILITIES, AND ASSUMPTION OF
CERTAIN RISKS:
The directions for installation and use of the Product must be followed carefully. It is
impossible to eliminate all risks inherently associated with use of the Product. The
effectiveness of the Polaris Automatic Gate Operator depends on proper installation and
the manner of use or application, all of which are beyond the control of Polaris Professional
Products or the seller. All such risks are assumed by the purchaser, and by the purchaser’s
installation and use of the Product.
The Polaris Automatic Gate Operator is for use on driveway gates only. The Product meets
or exceeds the requirements of UL 325, the standard that regulates gate operator safety, as
established and made effective March 14, 2003, by Underwriters Laboratories, Inc.

Page4
Gate Operator Class Categories
Gate operator CLASS CATEGORIES*
The Polaris Automatic Gate Operator is intended for use with vehicular swing gates. The
operator can be used in Class I and Class II applications.
Residential Vehicular Gate Opener–Class I: A vehicular gate opener (or system) intended
for use in a home of one-to-four single family dwelling, or a garage or parking area
associated therewith.
Light Commercial/General Access Vehicular Gate Opener Class II: A vehicular gate
opener (or system) intended for use in a commercial location or building such as a
multifamily housing unit (five or less single family units), hotel, garages, retail store or
other building servicing the general public.
Industrial/Limited Access Vehicular Gate Opener–Class III:
A vehicular gate opener (or system) intended for use in an industrial location or building
such as a factory or loading dock area or other locations not intended to service the general
public.
Restricted Access Vehicular Gate Opener–Class IV: A
vehicular gate opener (or system) intended for use in a guarded industrial location or
building such as an airport security area or other restricted access locations not servicing
the general public, in which unauthorized access is prevented via supervision by security
personnel.
*Categories established by Underwriters Laboratories for vehicle gate operators
Polaris is a high end residential gate operator. Also suited for light commercial
applications. Not advised for continuous duty.
GATE OPERATOR CLASS CATEGORIES
FOR YOUR RECORDS
Please record the serial number
(found on the control box cover)
and purchase information below.
Keep this with your proof of purchase
(receipts) in case your product is lost, stolen
or requires service.
Serial number: _______________________
Purchase date: ____________________
Retailer/store name: __________________
Customer Service
8:00am to 5:00pm, MST, Monday – Friday
Polaris Gate Operators
8617 Paseo Alameda NE
Albuquerque, NM 87113
Phone: 877-313-8902 Fax: 800-830-3952
Email: [email protected]

Page5
Warnings and Precautions
General Safety Information
The Polaris Automatic Gate Operator is designed to
provide for safe operation. One of the most important
safety features of the gate operator is obstruction
sensing. When there is an obstruction that prevents
the gate from opening or closing, the gate will
immediately reverse direction and return to the fully
open or closed position. While in the process of
returning to the fully open or closed position, if the
gate senses an additional obstruction the gate will
stop immediately and sound an alarm. At this point
the gate operator will need to be reset by turning the
power switch on the control box OFF for a minimum
of ten seconds.
The Polaris gate operator includes an adjustment for
setting the sensitivity of the obstruction performance.
Refer to page 27 for Obstruction Sensitivity Set Up
details.
Vehicular gates are large heavy objects. Polaris
Automatic gate operators provide a convenient way
to open and close the gates. Since the gate system and
its components exert a high level of force to open and
close the gate, they can be dangerous, causing severe
injuries or death to you and others.
Your safety and the safety of others depend on the
installer of this system to read, understand, and
follow the information and instructions in this
manual.
The Polaris Automatic Gate Operator is designed to
comply with UL 325, the safety standard covering
automatic gate opening systems. UL 325 requires that
gate opening systems have provisions for, or be
supplied with, at least one independent primary and
one independent secondary means of protection
against entrapment. The primary means of
entrapment protection in the Polaris Automatic
Gate Operator is Type A, an inherent means of
entrapment protection. The secondary means of
entrapment protection in the Polaris Automatic Gate
Operator is Type B1, the provision for the connection
of a photo cell or other non contact sensor
The gate operator’s built-in means of entrapment
protection (Type A) may not be sensitive enough to
prevent bodily injury in some circumstances.
Secondary means of entrapment protection (Type
B1), such as a photo cell are suggested for enhanced
safety.
Safety overview checklist:
WARNING – To reduce the risk of injury or death:
•SAVE THESE INSTRUCTIONS
•Use this operator only with swing gates.
•READ AND FOLLOW ALL
INSTRUCTIONS.
•Never let children operate or play with gate
controls.
•Keep the remote control away from
children.
•Always keep people and objects away from the
gate.
•NO ONE SHOULD CROSS THE PATH
OF THE MOVING GATE.
•The entrance is for vehicles only.
Pedestrians must use a separate entrance.
•Remember that the Polaris Automatic Gate
Operator must only be installed on gate
systems meeting the requirements of the
application.
•Ensure that you are using the correct gate
operator for the type and size of gate, its
frequency of use and the class rating.
•Ensure that the gate and gate operator
installation comply with applicable
local codes.
•Contact local fire and law enforcement
to arrange emergency access
procedures.
•Keep people, animals, and property
away from the gate area. Do not let
children play in or near the gate area.
•Use caution with moving parts to avoid
injuring fingers or hands.
•Consider installing contact sensors, or
non-contact sensors to provide
additional safety and protection against
entrapment.
•Never activate the gate operator until
you ensure that the area is clear of
people, pets, or other obstructions.
•Watch the gate until it stops.
•Controls must be far enough from the
gate so that the user is prevented from
coming in contact with the gate while
operating the controls.

Page6
Protection against Entrapment
Important! Study the figure below and keep safety foremost at all times.
Entrapment areas for a proper pull-to-open installation
Entrapment Area 1
Hinged edge of the gate and the fence post
Entrapment Area 2
Between the gate and the gate post
Entrapment Area 3
The path of the gate
Entrapment Area 4
The space between the gate in the open position and
any object such as a wall, fence, tree, etc.
Entrapment Area 5
Pinch points between the operator and gate or post
Area 2
Area 1
Area 3
Area 4
Area 5
Gate in open
position
Driveway

Page7
Entrapment Alarm
(UL 325; 30.1)
In compliance with UL 325 the Polaris
Automatic Gate Operator is designed to
stop and reverse direction within two
seconds of sensing an obstruction. In
addition, the Polaris Automatic Gate
Operator activates an audible alarm if the
unit incurs an obstruction twice while
opening or closing. This alarm sounds for
five minutes, or until the operator receives
a renewed, intended input from a
hardwired control such as the Push Button
Control. At that point the gate returns to a
fully open or fully closed position. Turning
the power switch on the control box OFF
for ten seconds and back ON also
deactivates the alarm.
Warning Signs and Labels
Required Safety Precautions for Gates
Warning signs alert people of automatic
gate operation. They are required when
installing the Polaris Automatic Gate
Operator. If pedestrians will be in the area,
install a walkthrough gate for their use.
Warning Signs
The warning signs must be installed on
both sides of the gate.
These warning signs and decals must be
used. If any
were missing when the gate operator was
purchased,
immediately contact Polaris Automatic
Gate Operators for replacements.
Figure 2
Warning signs (two enclosed) to be
installed on each side of the gate
(three to five feet above the bottom
of the gate)
Figure 3
Install warning decals,
one on each side of gate
operator

Page8
INSTALLING THE POLARIS 500 & 700 SWING OPERATOR
WARNINGS---------------------
1. Read and follow all instructions.
2. NEVER let children operate the gate or play with the controls.
3. Keep people and objects away from the gate and its immediate areas, both open and closed.
4. After the limit adjustments are made, all auto reversing controls including the current
sensing circuit built into the Polaris must be checked. They must be working and set to proper
sensitivity. Failure to adjust and retest the gate system increases the chance of injury or
death.
5. Test the system MONTHLY. Check to make sure that all auto-reversing devices including
the current sensing circuit are working and set to the proper sensitivity.
6.Verify that the emergency (manual) release pin connected to the gate leaf can be easily
removed. This check should only be made with the battery disconnected to prevent the gate
from moving during the test.
7. This is a VEHILCLE GATE ONLY. Pedestrians must use a separate entrance.
8. NEVER install any control device on the outside of the Polaris cabinet or in such a way that
someone can reach through the gate to activate it.
9. SAVE THESE INSTRUCTIONS!
CAUTIONS-----------------------
1. NEVER operate the gate unless you can see it.
2. Do not enter the gate area while the gate is in motion.
3. Do not allow children near the gate and do not allow anyone to ride on the gate.
4. Do not attempt to drive through the gate opening while the gate is in motion.
ENTRAPMENT ZONES---------------------
Zone 1- Leading edge of the gate and catch-post
Zone 2- Area between gate and hinge post.
Zone 3- The gate path or "arc of the swing"
Zone 4- The area between the gate in its' open position and any obstruction like a fence,
building, landscaping feature, etc...
Zone 5- Not shown below but similar to zone 1- the point where two biparting gate leafs meet
when closed.

Page9

Page10

Page11
Bushings to be set
between bottom
side of actuator
rod ends and
mounting bracket

Page12

Page13
Amazing Gates Post Mount Brackets Pull and Push Arm
with Amazing Gates 3 1/2" Posts
With the purchase of a Polaris Opener System, you will receive the Amazing Gates Universal
Pull brackets and gate attach bracket(s).
The Amazing Gates post attachment arm does not require drilling of the post to be installed.
You simply set it into the position and bolt it tight. The correct angle is preset.
3 1/2" Post Push to Open
3 1/2" Post Pull to Open

Page14
Amazing Gates Post Mount Brackets Pull and Push Arm
with Amazing Gates 5" Posts
With the purchase of a Polaris Opener System, you will receive the Amazing Gates Universal
Pull brackets and gate attach bracket(s).
The Amazing Gates post attachment arm does not require drilling of the post to be installed.
You simply set it into the position and bolt it tight. The correct angle is preset.
5" Post Pull to Open 5" Post Push to Open

Page15
Amazing Gates Post Mount Brackets Pull/Push Arm
with customers existing Posts other than Amazing Gates.
With the purchase of a Polaris Opener System, you will receive the Amazing Gates Universal
Pull and Push brackets and gate attach bracket(s). These brackets can be used with your
exiting posts or any non-Amazing Gates posts, to include column mounting. Though the
Amazing Gates bracket system can be used on any post/column setup, the diagram shown
below must be followed concerning geometry of pivot point and hinge point.

Page16
Board Layout Description
LED’s
1. 18 VAC Power
2. 24V Converter
3. Gate Operator Retracting
4. Gate Operator Extending
5. Obstruction
6. Auto Close
7. Battery OK
8. Battery Charging
9. Status
10. Safety Loop
11. Shadow Loop
12. Exit Loop
13. Radio Receiver
Potentiometers
14. Stall Force Adjustment
15. Auto Close Adjustments
Buttons
16. Cycle – used as an input device
17. Set Limit
18. Learn Code
19. Power Save
Fuses
20. 15 amp Fuse
21. 4 amp Fuse
Connectors
22. Buzzer Connection
23. RF Board Connection

Page17
DIP SWITCHES
* - Default factory setting
Block 1, DIP Switch 1 – Auto Close
ON – Auto close feature enabled
OFF* – Auto close feature disable
Block 2, DIP Switch 2 – Pull-to-Open or Push-to-
Open for Primary Gate Operator
ON – Primary gate operator set up for push-to-open
operation
OFF* – Primary gate operator set up for pull-to-open
operation
Block 2, DIP Switch 3 – Pull-to-Open or Push-to-
Open for Secondary Gate Operator
ON – Secondary gate operator set up for push-to-
open operation
OFF* – Secondary gate operator set up for pull-to-
open operation
NOTE: Only active if Block 2, DIP Switch 1 is set in
the ON position
Block 2, DIP Switch 4 – Timing of Dual Gates
ON – One gate is delayed when opening or closing
OFF* – Gates open and close simultaneously
NOTE: Only active if Block 2, DIP Switch 1 is set in
the ON position
ON – Extended soft start/stop operation enabled
OFF* – Normal soft start/stop operation
Block 1, DIP Switch 4 – Time of Soft Start/Stop
ON – Max. extended time of soft start/stop operation
OFF* – Extended time of soft start/stop operation
NOTE: Only active if Block 1, DIP 3 is set to ON
Block 2, DIP Switch 1 – Single or Dual Gate
ON – Dual gate applications
OFF* – Single gate applications
Block 1, DIP Switch 2 – Audible Motion Alarm
ON – Audible motion alarm enabled
OFF* – Audible motion alarm disabled
Block 1, DIP Switch 3 – Extended Soft Start/Stop
NOTE: To adjust auto close time refer to figure 17.
Block 2
Block 1
NOTE: All DIP
Switches are
shown in the factor
y
Block 2, DIP Switch 5 – Sequencing of
Dual Gate
Opening and Closing
ON – Secondary gate operator opens
first and closes
second (2 second delay)
OFF* – Primary gate operator opens
first and closes
second (2 second delay)
NOTE: Only active if Block 2, DIP 4 is
in the ON position
Block 2, DIP Switch 6 – Dual Gate
Position Limit
Settings
ON – Set limit setting for secondary
gate operator
OFF* – Set limit setting for primary
gate operator
NOTE: Only active if Block 2, DIP
Switch 1 is set in the
ON position
Block 2, DIP Switch 7 – Off - Not Used
Block 2, DIP Switch 8 – Off - Not Used

Page18
WIRING OPERATOR
NOTE: Before powering, gate operator must be
connected to the control box – damage may occur if
gate operator is connected directly to a battery or
other power source.
Step 1
Ensure the control box power switch is in the OFF
position. The control box power switch is located on
the bottom of the control box.
NOTE: Use only 16 gauge dual conductor, multi-
stranded, direct burial wire for AC power hookup.
Follow local electrical codes.
Step 2
If using AC power to charge the battery, connect wire
to the control box as shown in fig. 19.
If charging battery with a solar panel(s), refer to
Accessory Hook-Up Diagram fig. 32 on page 28.
Connect wires from primary operator (and secondary
operator if installing on a dual gate) to the control box
as shown in fig. 19. Wire should be buried in
accordance with
local codes.
WARNING: DO NOT CONNECT BOTH
TRANSFORMER AND SOLAR PANEL. THIS
SYSTEM IS DESIGNED TO RUN ON ONLY ONE
POWER SOURCE. CONNECTING BOTH POWER
SOURCES
CAN RESULT IN DAMAGE TO CIRCUIT BOARD
AND WILL VOID WARRANTY.
Figure 19

Page19
Circuit Board
Step 5
Connect the battery terminal
wires to the battery.
Step 6
Plug in transformer. Turn control
box power switch to the ON position.
Step 3
The transformer provided is for dry
location use only. If used in an outside
outlet, the transformer must be enclosed
or covered for weather protection. Attach
AC power wire to the transformer.
NOTE: DO NOT PLUG TRANSFORMER
INTO AC POWER UNTIL ALL WIRING IS
COMPLETED.
Step 4
Install the battery by placing the battery
into the control box. The control box can
accommodate one or two batteries.
Warning:
Do not attempt to splice operator
wires for the purpose of extending your wiring
connections. Doing so can void your warranty.
Contact technical support for recommended
procedure. 1-877-313-8902.
Batte Second Battery
(
n
o
t in
c
l
uded)
Figure 22
Black (-)
Red (+) terminal
WARNING: Please make sure
the batteries are fully charged
before connecting and powering
up the new circuit board.
Undercharged batteries may
damage the circuit board and
void your warranty.

Page20
WIRING THE OPERATOR
LED Descriptions
Proper wiring and performance can be verified by
checking the operation of the LED’s located on the
circuit board.
LED #1: 18VAC OK
Lit when AC power is being supplied to the circuit
board.
LED #2: +24V OK
Lit when 24V converter is activated.
LED #3: IN
There are two “IN” LED’s. One near the Opener 1
terminals and one near the Opener 2 terminals.
One LED will light when a single gate operator is
retracting. Both LED’s will light when dual gate
operators are retracting.
LED #4: OUT
There are two “OUT” LED’s. One near the Opener 1
terminals and one near the Opener 2 terminals. One
LED will light when a single gate operator is
extending. Both LED’s will light when dual gate
operators are extending.
LED #5: OBSTR
Lit when an obstruction is sensed.
LED #6: TIMER ON
Blinks when auto close feature is enabled and gate is
in open position. Lit when gate arm cycle limiter is
automatically activated.
LED #7: BATT OK
Lit when battery is OK or “charged.”
LED #8: CHARGING
Lit when battery is being charged.
LED #9: STATUS
Blinks to indicate that the system is functioning
properly. Also used to indicate a user input during
installation.
LED #10: SAFETY LOOP
Lit when the safety loop contact is made.
LED #11: SHADOW LOOP
Lit when shadow loop contact is made.
LED #12: EXIT LOOP
Lit when an exit loop contact is made.
LED #13: RADIO RECVR
Lit while transmitter button is pushed.
Power Save Mode (Recommended for Solar
Applications)
Polaris Automatic Gate Operators come equipped
with a Power Save feature. The default mode is for all
LED’s to be operational as described. If it is desired
to conserve power to maximize battery life
Recommended for the following steps can be taken.
Press and hold the PWR SAVE button for three
seconds. An audible beep will sound confirming the
change to the power save mode. This will disable
several LED’s when not activated for five minutes. In
Power Save mode, the LED’s will operate as
described upon an input. When the gate sits idle for
five minutes, the LED’s will turn off to conserve
power.
When troubleshooting the installation it is
recommended to disable the Power Save feature. The
feature can be disabled by pressing and holding the
PWR SAVE button for three seconds. Two audible
beeps will sound confirming the change to normal
mode operation.
This manual suits for next models
7
Table of contents
Other Polaris Automatic Gate Operators Gate Opener manuals
Popular Gate Opener manuals by other brands

Matikgate
Matikgate HULK50 User& installer's manual

Maximum Controls
Maximum Controls MAX 1500 Quick install guide

Nice
Nice 4024 Instructions and warnings for installation and use

CAME
CAME Ferni Series Manaul

CAME
CAME G4000 installation manual

ZHEJIANG XIANFENG MACHINERY
ZHEJIANG XIANFENG MACHINERY DKC400 user manual