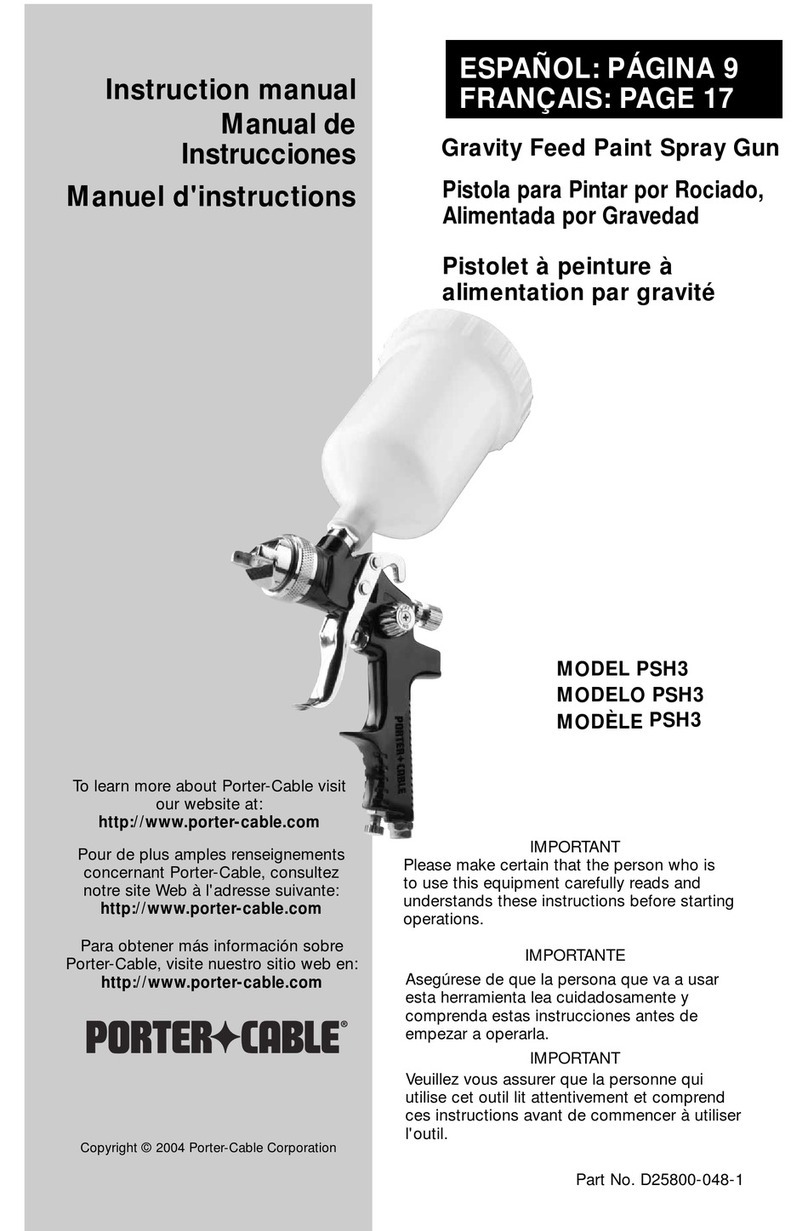
Porter-Cable 70-529 User manual

IMPORTANT
Please make certain that person who is
to use this equipment carefully reads and
understands these instructions before
operating.
IMPORTANT
S’assurer que l’utilisateur de l’outil lit
attentivement et comprend ces
instructions avant d’utiliser l’outil.
IMPORTANTE
Por favor asegúrese de que la persona que va a
usar este equipo lea cuidadosamente y
comprenda estas instrucciones antes de
operarlo.
PORTER-CABLE : Jackson, TN 38305
Tel 1-888-848-5175 www.portercable.com
US
70-529
•Adjustable fluid and spray
controls for precise operation
•Lightweight, durable die-cast
alloy gunbody
• Stainless steel 2.0mm fluid
nozzle and needle
• Cam Style Cup Holds 32 Ounces.
Makes setup and clean
up simple
Siphon Feed Spray
Gun - High Pressure
•Applications: Enamel,
lacquer, stain, and urethane

• All persons in the work area must always wear approved eye and ear protection
and approved breathing apparatus when this spray gun is in operation.
• Never aim spray gun at anyone. Do not spray near sparks, open flame, lit
cigarettes, pilot lights, space heaters or any other potential ignition source,
DO NOT SMOKE IN WORK AREA.
• Follow manufacturers instructions and safety information to ensure safe handling
and proper use of paints, laquers, thinners, base coats, etc. Do not use latex or
other heavy paints. They are not recommended for this spray gun.
• SAVE THESE INSTRUCTIONS•
SAFETY GUIDELINES - DEFINITIONS
indicates an imminently hazardous situation
which, if not avoided, will result in death or
serious injury.
indicates a potentially hazardous situation which,
if not avoided, could result in death or serious
injury.
indicates a potentially hazardous situation which,
if not avoided,may result in minor or moderate
injury.
used without the safety alert symbol indicates
potentially hazardous situation which, if not
avoided, may result in property damage.
This manual contains
information that is
important for you to know and
understand. This information
relates to protecting YOUR
SAFETY and PREVENTING
EQUIPMENT PROBLEMS.
To help you recognize this
information, we use the
symbols below.Please read
the manual andpay attention
to these sections.
IMPROPER OPERATION OR MAINTENANCE OF THIS PRODUCT COULD
RESULT IN SERIOUS INJURY AND PROPERTY DAMAGE. READ AND UN-
DERSTAND ALL WARNINGS AND OPERATING INSTRUCTIONS BEFORE USING THIS
EQUIPMENT.
IMPORTANT SAFETY INSTRUCTIONS
Before disassembly or removal of any part of gun or attached
components, shut off compressor, release pressure by depressing
trigger, and disconnect power source.
NEVER assume system pressure is zero!
TO AVOID CREATING AN EXPLOSIVE ATMOSPHERE, WORK ONLY
IN WELL VENTILATED AREAS.
USE OF A FACE MASK IS RECOMMENDED TO PREVENT
INHALATION OF TOXIC MATERIAL.
GENERAL INFORMATION
• Always keep work area free from obstructions and well ventiilated.
• Always disconnect spray gun from air source before disassembly.

The Following Hazards Can Occur During The Normal Use Of This Product:
HAZARD
Risk of explosion or fire - flammable materials
HAZARD
Risk of explosion - incompatible materials
HAZARD
Risk of breathing
Always wear hearing protection when operating
spray equipment.
Never place hands in front of nozzle.
Direct spray away from self and others.
HAZARD
Risk of flying objects
HAZARD
TI TNEVERP OT WOHNEPPAH DLUOC TAWH
Risk of injection
WHAT COULD HAPPEN HOW TO PREVENT IT
When paints or materials are sprayed, they are
broken into very small particles and mixed with air.
This will cause certain paints and materials to become
extremely flammable and could result in
serious injury or death.
Never spray near open flames or pilot lights in
stoves or heaters.
Never smoke while spraying.
Provide ample ventilation when spraying indoors.
WHAT COULD HAPPEN HOW TO PREVENT IT
The solvents 1,1,1-Trichloroethane and Methylene
Chloride can chemically react with the aluminum
used in most spray equipment, and this gun and
cup, to produce an explosion hazard and could
result in serious injury or death.
Read the label or data sheet for the material you
intend to spray.
1. Never use any type of spray coating material
containing these solvents.
2. Never use these solvents for equipment cleaning
or flushing.
3. If in doubt as to whether a material is compatible,
contact your material supplier.
WHAT COULD HAPPEN HOW TO PREVENT IT
Use a NIOSH approved mask or respirator and pro-
tective clothing designed for use with your specific
application and spray materials. Some masks
provide only limited protection against toxic materials
and harmful paint solvent. Consult with a Safety
Expert or Industrial Hygienist if uncertain about your
equipment or materials.
Some paints, coatings and solvents may cause lung
damage, and burns if inhaled or allowed to come
into contact with skin or eyes.
WHAT COULD HAPPEN HOW TO PREVENT IT
Certain parts are under pressure whenever the gun
is connected to a pressurized air line. These parts
may be propelled if the gun is disassembled.
Compressed air may propel dirt, metal shavings,
etc. and possibly cause an injury.
Prolonged exposure to air spray can result in per-
manent damage to hearing.
Disconnect the gun from the air line, or completely
depressurize the air line whenever the gun is to be
disassembled.
Never point any nozzle or sprayer toward a person
or part of the body.
Always wear ANSI 278.1 safety approved goggles
or glasses when spraying.
Spray guns operate at pressures and velocities
high enough to penetrate human and animal flesh,
which could result in amputation or other serious
injury.
! See a physician immediately !

Prior to shipment, this spray gun was treated with an
anticorrosive agent. Before use ,make sure that it is
carefully flushed with thinner.
1. Mix material according the manufacturer’s instructions.
Mixture should be smooth and easily pourable. Lumps or
foreign particles should be removed by straining through
a suitable paint filter.
NOTE: If not using the siphon feed setting, see “Remote
Pressure Feed” paragraphs.
2. Remove the material cup (e) from lid/gun assembly.
NOTE: Slide release lever (f) to the right, rotate lid, and
remove material cup (e).
3. Fill the material cup (e) ¾ full.
4. Attach material cup (e) to the lid/gun assembly and slide release lever (f) to clockwise to secure
in place.
5. Attach air supply line to ¼ NPS air inlet (c).
6. Adjust spray pattern.
a. The position of the air cap horns (g) will determine the spray pattern. Loosen air cap (h) and
rotate horns to achieve desired pattern. Tighten air cap.
b. Amount of material released (density of “fan spray”) is controlled by (d) fluid control knob.
Turn knob counterclockwise to increase, or clockwise to decrease, the fluid flow.
c. Width of “fan spray” is governed by (b) spray pattern control knob. Turn knob counter-
clockwise to increase, or clockwise to decrease, air flow.
7. Depress spray gun trigger fully to spray material. NOTE: Depress trigger partially will cause
only air to be released.
NOTE: Care should be exercised when handling spray gun to avoid damage to the orifice of the air
cap and tip of fluid nozzle. Damage to these part results in irregular spray patterns.
DO NOT ATTEMPT
TO UNCLOG (BACK
FLUSH) SPRAY GUN BY SQUEEZING
TRIGGER WHILE HOLDING FINGER IN
FRONT OF FLUID NOZZLE.
Pressure may vary
according to
viscosity of material used. Maximum
working pressure of gun is 50 psi. DO
NOT EXCEED PRESSURE LIMIT OF
GUN OR ANY OTHER COMPONENT IN
SYSTEM!
Prior to daily
operation, make
certain that all connections and fittings
are secure. Check hose and all con-
nections for a week or worn condition
that could render system unsafe. All
replacement components such as
hose or fittings must have a working
pressure equal to or grarter than
system pressure.
Horizontal position
Vertical position
OPERATION
h Air Cap
b Spray
Pattern
Knob
f
Lever
b Nut d Fluid
Control
Knob
c 1/4” NPS
Air Inlet
e Material Cup
g Horns

Spraying Tips
1. The stroke is made with a free arm motion, keeping the gun at a right angle
to the surface at all points of the stroke. Arching the stroke will result in
uneven application and excessive over spray at each end of the stroke.
2. Depress trigger just before reaching the edge of the surface to be sprayed.
Hold the trigger fully depressed and move the gun in one continuous
motion. Release the trigger when the other edge of the surface is reached,
shutting off the fluid flow, but continue motion a few inches until it is
reversed for the return stroke. When the edge of the surface is reached on
the return stroke, depress the trigger fully again and continue across the
surface.
3. Lap each stroke 50% over the preceding one. Less than 50% will cause
streaks on the finish surface.
NEVER point spray gun at self or any other person.
Accidental discharge of material may result in serious injury.
NOTE: When replacing lid assembly to gun assembly hand tighten nut ( b)
and tighten securely.
If the material to be sprayed is too heavy for siphon feed or fast application
is desired, convert to the pressure feed.
1. Remove the material cup (e)
lever (f) to the right, rotate lid, and
remove material cup (e).
2. Loosen nut (b). After the nut
is loosened hand turn until lid
assembly can be removed from gun.
3. The gun is now ready to be
connected to any pressure feed tank
with a standard 3/8" straight pipe
female connection. See manufacturer’s
manual for correct procedure.
4. To operate see steps 5-7 in the "Operation" section to continue.
CONVERT TO REMOTE PRESSURE FEED
3/8 NPS
Fluid
Connention
b Nut
a Lever

Always exercise extreme care when using any solvent or thinner.
Never clean gun near fire, flame, or any source of heat or sparks.
Properly dispose of used cleaning materials.
DO NOT soak entire spray gun in solvent or thinner for a long
period of time as this will destroy lubricants and possibly
impair operation. NEVER use lye or caustic alkaline solution for cleaning.
Such solutions will attack aluminum alloy parts of gun.
It is important that spray gun be cleaned after each use. Cleaning is accomplished by spraying
appropriate solvent or thinner through system. Wipe exterior of spray gun with solvent soaked
cloth or use cleaning brush(s) provided to remove any accumulated material.
Cleaning
(a) Empty material from gravity feed cup and replace with a suitable solvent.
(b) Operate trigger until all material traces have disappeared and gun is thoroughly clean.
(c) Clean air cap with brush.
IMPORTANT: Make certain air cap and fluid nozzle are kept clean at all times. If neces-
sary, remove these two components and soak them in solvent. DO NOT use hard objects
to clean clogged holes. The smallest amount of damage may cause irregular spray
pattern.
NOTE: If fluid nozzle is to be removed for thorough cleaning, squeeze trigger to prevent dam-
age of fluid needle tip when unscrewing nozzle.
Lubrication
Lubrication procedures must be observed after thoroughly cleaning the gun to ensure effective,
high quality performance of spray gun.
1. Lubricate working points with straight mineral oil, or castor oil.
2. Periodically, place a few drops of oil on tapered sections of fluid nozzle to ensure easy op-
eration of air cap. When spraying water base materials, coat fluid nozzle inside and
outside with straight mineral oil after each use.
3. Outer diameter of needle sleeve of fluid needle assembly must be lubricated occasionally
with straight mineral oil.
Change or Replace nozzle set
When changing nozzle set, make sure the complete nozzle set is exchanged. A set includes an
air cap, fluid nozzle, and fluid needle. NOTE: Assemble fluid nozzle before putting in fluid
needle.
MAINTENANCE
Exchange of the self-tensioning needle packing
The fluid needle seal is effected by a Teflon® packing with self-tensioning compression spring.
To change the packing during general overhaul, please use the socket spanner provided.

SPRAY PATTERNS
Dried material is clogging
side-port "A" and causing
side-port "B" to blow spray
towards theclogged side
Dried material at fluid
nozzle "C" restricts air flow
Loose air nozzle
Air pressure set too high
Remove air nozzle.
Wipe off fluid tip using a
cloth soaked in thinner
or by soft brush
Fasten nozzle securely
Reduce air pressure
Fluid nozzle cracked or worn
Leak at thread of fluid nozzle
Leak at fluid needle
Needle packing worn out Insufficient
fluid in cup
Vent hole in container cover clogged
Tighten or replace
Tighten fluid nozzle
Tighten compression nut
assembly or replace
needle packing
Replace packing
Fill cup with fluid
Clean Out
Air pressure too high Turn pattern control knob
clockwise to decrease fan width.
Turn fluid needle adjusting nut
counter-clockwise to increase
fluid flow
Soak side-ports in
thinner to clean clog.
DO NOT poke any
opening with hard objects.
Defective Pattern Likely cause Suggested Remedy
Material too heavy
Insufficient air pressure
Fluid pressure too high
Dried material on tip of fluid nozzle or
air jets of air cap
Thin material or use
larger orifice fluid nozzle set
Increase pressure to within limit
Reduce pressure
Clean
A. A
B
B. C
C.Spitting,
irregular
or fluttering
spray
D.Split spray
pattern
E.Unatomized
or spattered
spray
F.Inadequate
air delivery
Air needle partially closed
Dried material in air jets or air cap
Obstruction in air line
Oopen control knob
Clean
G.Excessive fog Air pressure to high for
viscosity of fluid
Remove obstruction
Reduce air pressure and/or
open fluid control knob
H.Material keaking
from fluid inlet
of cup.
Loose cup or foreign substances
on/between cup thread and
fluid inlet
Tighten and clean or replace it
I.Material leaking
from nozzle
when trigger is
released
Worn fluid needle
Dried material in tip of nozzle
Loose packing nut
Replace Clean
Tighten needle packing nut by
turning counterclockwise

IMPORTANT
Please make certain that person who is
to use this equipment carefully reads and
understands these instructions before
operating.
IMPORTANT
S’assurer que l’utilisateur de l’outil lit
attentivement et comprend ces
instructions avant d’utiliser l’outil.
IMPORTANTE
Por favor asegúrese de que la persona que va a
usar este equipo lea cuidadosamente y
comprenda estas instrucciones antes de
operarlo.
PORTER-CABLE : Jackson, TN 38305
Tel 1-888-848-5175 www.portercable.com
70-529
•Adjustable fluid and spray
controls for precise operation
•Lightweight, durable die-cast
alloy gunbody
• Stainless steel 2.0mm fluid
nozzle and needle
• Cam Style Cup Holds 32 Ounces.
Makes setup and clean
up simple
Siphon Feed Spray
Gun - High Pressure
•Applications: Enamel,
lacquer, stain, and urethane
F

•CONSERVER CES CONSIGNES •
DIRECTIVES DE SÉCURITÉ – DÉFINITIONS
Indique une situation dangereuse imminente qui, si
elle n’est pas évitée, causera le décès ou une
blessure grave.
Indique une situation dangereuse
potentielle qui, si elle n’est pas évitée,
pourrait causer le décès ou une blessure
grave.
Indique une situation dangereuse potentielle qui,
si elle n’est pas évitée, peut causer une blessure
mineure ou modérée.
Utilisé sans le symbole d’alerte de sécurité indique
une situation dangereuse potentielle qui, si elle n’est
pas évitée, peut causer des dommages aux biens.
Ce manuel contient des
informations qu’il est important
de connaître et de comprendre.
Cette information porte sur
VOTRE SÉCURITÉ et sur la
PRÉVENTION DES PROBLÈMES
D’OUTIL. Pour vous aider à
reconnaître cette information,
nous utilisons les symboles
ci-dessous. Veuillez lire ce
manuel attentivement et
accorder une attention
particulière à ces paragraphes.
LA MAUVAISE UTILISATION OU MAINTENANCE DE CE PRODUIT PEUT
CAUSER DES BLESSURES GRAVES ET DES DOMMAGES SÉRIEUX AUX
IMPORTANTES CONSIGNES DE SÉCURITÉ
Avant de procéder au démontage du pistolet ou au retrait d’une
pièce ou accessoire, fermer le compresseur, libérer la pression en
abaissant la gâchette, et débrancher la source d’air.
NE JAMAIS présumer que la pression du système est à zéro!
POUR ÉVITER DE CRÉER UN DANGER D’EXPLOSION, TOUJOURS
TRAVAILLER DAN UN LOCAL BIEN VENTILÉ.
IL EST RECOMMANDÉ DE PORTER UN MASQUE FACIAL POUR
ÉVITER DE RESPIRER DES TOXIQUES.
INFORMATION GÉNÉRALE
AVERTISSEMENT
ATTENTION
AVERTISSEMENT
BIENS. IL FAUT LIRE ET COMPRENDRE TOUS LES AVERTISSEMENTS ET LA NOTICE D’EMPLOI
AVANT D’UTILISER CET ÉQUIPEMENT.
• Les utilisateurs et les gens dans la zone de travail doivent porter des lunettes de
protection, une protection auditive et un respirateur homologués lorsqu’ils
utilisent le pistolet pulvérisateur.
• Ne jamais pointer le pistolet en direction des gens. Ne pas pulvériser près des
étincelles, des flammes nues, des cigarettes allumées, des flammes pilotes, des
appareils de chauffage autonomes ou de toute source d’inflammation possible.
NE PAS FUMER DANS LA ZONE DE TRAVAIL.
• Respecter la notice d’emploi et les consignes de sécurité du fabricant pour
assurer le maniement sécuritaire et le bon emploi des peintures, laques, diluants,
apprêts, etc. Ne pas utiliser de peinture au latex ou autres peintures lourdes.
Elles ne sont pas recommandées pour ce pistolet pulvérisateur.
• Toujours conserver la zone de travail sans obstruction et bien ventilée.
• Toujours débrancher le pistolet de la source d’air avant de démonter
l’outil.
AVERTISSEMENT
AVERTISSEMENT
AVERTISSEMENT
AVERTISSEMENT
ATTENTION

Les risques suivants peuvent survenir durant l’emploi normal de ce produit:
Les solvants 1,1,1 - trichloroéthane et
dichlorométhane peuvent avoir une réaction
chimique au contact de l’aluminium utilisé dans la
majorité des équipements de pulvérisation—et ce
pistolet et godet—peuvent provoquer un risque
d’explosion et entraîner des blessures graves ou
la mort.
Lire l’étiquette ou la fiche signalétique sur le matériau
utilisé pour la pulvérisation.
1. Ne jamais utiliser de matériau de revêtement qui
contient des solvants.
2. Ne jamais utiliser ces solvants pour nettoyer ou
purger l’équipement.
3. En cas de doute sur la compatibilité du matériau,
communiquer avec le fournisseur du matériau.
RISQUE
COMMENT PRÉVENIR
CE QUI POURRAIT ARRIVER
Risque d’explosion ou de feu – matériaux inflammables
En pulvérisant les peintures ou matériaux, ils
peuvent se briser en très petites particules et se
mélanger à l’air. Certaines peintures et matériaux
deviendront alors extrêmement inflammables et
cela pourrait entraîner des blessures graves ou la
mort.
Ne jamais vaporiser près des flammes nues ou des
flammes pilotes des cuisinières ou appareils de
chauffage.
Ne jamais fumer pendant les travaux de pulvérisation.
Prévoir une ventilation suffisante pour les travaux à
l’intérieur.
RISQUE
COMMENT PRÉVENIRCE QUI POURRAIT ARRIVER
Risque d’explosion – matériaux incompatibles
RISQUE
CE QUI POURRAIT ARRIVER
Risque d’inhalation
Quelques peintures, revêtements et solvants
peuvent endommager les poumons, et causer
des brûlures s’ils sont aspirés ou entrent en contact
avec la peau ou les yeux.
Porter le masque ou respirateur NIOSH approuvés
et les vêtements de protection conçus pour être
portés pour votre travail spécifique et les matériaux
de pulvérisation. Quelques masques offrent
seulement une protection limitée contre les toxiques
et les solvants nocifs. Consultez un expert en
sécurité ou un hygiéniste industriel si vous avez des
doutes au sujet de votre équipement ou les matériaux
L’exposition prolongée à la pulvérisation peut
causer des dommages auditifs permanents.
Les pistolets de pulvérisation fonctionnent à des
pressions et vélocités suffisamment élevées pour
pénétrer le corps humain et la chair des animaux,
et pourraient entraîner une amputation ou une
blessure grave.
1. Consulter un médecin immédiatement!
Ne jamais placer la main devant la buse.
Ne pas diriger la pulvérisation vers soi et autrui.
RISQUE
COMMENT PRÉVENIRCE QUI POURRAIT ARRIVER
Risque d’objets volants
Risque de pénétration
Certaines pièces sont sous pression lorsque le
pistolet est branché sur les conduites d’air sous
pression. Ces pièces peuvent être projetées si le
pistolet est démonté.
Débrancher le pistolet de la conduite d’air, ou
dépressuriser complèment la conduite d’air lorsque
le pistolet doit être démonté.
Ne jamais pointer la buse ou le pulvérisateur en
direction d’une personne ou d’une partie du corps.
Toujours porter de lunettes de protection ANSI 278.1
approuvées ou des lunettes pendant la pulvérisation.
Toujours porter une protection auditive pour utiliser
le pistolet.
L’air comprimé peut propulser la saleté, les copeaux
de métal, etc., et pourra entraîner des blessures
AVERTISSEMENT
COMMENT PRÉVENIR
RISQUE
COMMENT PRÉVENIRCE QUI POURRAIT ARRIVER

Prior to shipment, this spray gun was treated with an
anticorrosive agent. Before use ,make sure that it is
carefully flushed with thinner.
1. Mix material according the manufacturer’s instructions.
Mixture should be smooth and easily pourable. Lumps or
foreign particles should be removed by straining through
a suitable paint filter.
NOTE: If not using the siphon feed setting, see “Remote
Pressure Feed” paragraphs.
2. Remove the material cup (e) from lid/gun assembly.
NOTE: Slide release lever (f) to the right, rotate lid, and
remove material cup (e).
3. Fill the material cup (e) ¾ full.
4. Attach material cup (e) to the lid/gun assembly and slide release lever (f) to clockwise to secure
in place.
5. Attach air supply line to ¼ NPS air inlet (c).
6. Adjust spray pattern.
a. The position of the air cap horns (g) will determine the spray pattern. Loosen air cap (h) and
rotate horns to achieve desired pattern. Tighten air cap.
b. Amount of material released (density of “fan spray”) is controlled by (d) fluid control knob.
Turn knob counterclockwise to increase, or clockwise to decrease, the fluid flow.
c. Width of “fan spray” is governed by (b) spray pattern control knob. Turn knob counter-
clockwise to increase, or clockwise to decrease, air flow.
7. Depress spray gun trigger fully to spray material. NOTE: Depress trigger partially will cause
only air to be released.
NOTE: Care should be exercised when handling spray gun to avoid damage to the orifice of the air
cap and tip of fluid nozzle. Damage to these part results in irregular spray patterns.
DO NOT ATTEMPT
TO UNCLOG (BACK
FLUSH) SPRAY GUN BY SQUEEZING
TRIGGER WHILE HOLDING FINGER IN
FRONT OF FLUID NOZZLE.
Pressure may vary
according to
viscosity of material used. Maximum
working pressure of gun is 50 psi. DO
NOT EXCEED PRESSURE LIMIT OF
GUN OR ANY OTHER COMPONENT IN
SYSTEM!
Prior to daily
operation, make
certain that all connections and fittings
are secure. Check hose and all con-
nections for a week or worn condition
that could render system unsafe. All
replacement components such as
hose or fittings must have a working
pressure equal to or grarter than
system pressure.
Horizontal position
Vertical position
OPERATION
h Air Cap
b Spray
Pattern
Knob
f
Lever
b Nut d Fluid
Control
Knob
c 1/4” NPS
Air Inlet
e Material Cup
g Horns

Spraying Tips
1. The stroke is made with a free arm motion, keeping the gun at a right angle
to the surface at all points of the stroke. Arching the stroke will result in
uneven application and excessive over spray at each end of the stroke.
2. Depress trigger just before reaching the edge of the surface to be sprayed.
Hold the trigger fully depressed and move the gun in one continuous
motion. Release the trigger when the other edge of the surface is reached,
shutting off the fluid flow, but continue motion a few inches until it is
reversed for the return stroke. When the edge of the surface is reached on
the return stroke, depress the trigger fully again and continue across the
surface.
3. Lap each stroke 50% over the preceding one. Less than 50% will cause
streaks on the finish surface.
NEVER point spray gun at self or any other person.
Accidental discharge of material may result in serious injury.
NOTE: When replacing lid assembly to gun assembly hand tighten nut (b)
and tighten securely.
If the material to be sprayed is too heavy for siphon feed or fast application
is desired, convert to the pressure feed.
1. Remove the material cup (e)
lever (f) to the right, rotate lid, and
remove material cup (e).
2. Loosen nut (b). After the nut
is loosened hand turn until lid
assembly can be removed from gun.
3. The gun is now ready to be
connected to any pressure feed tank
with a standard 3/8" straight pipe
female connection. See manufacturer’s
manual for correct procedure.
4. To operate see steps 5-7 in the "Operation" section to continue.
CONVERT TO REMOTE PRESSURE FEED
3/8 NPS
Fluid
Connention
b Nut
a Lever

Il faut toujours faire très attention lorsque vous utilisez des solvants ou
des diluants. Il ne faut jamais nettoyer le pistolet près du feu, d’une
flamme ou toute autre source de chaleur ou d’étincelles. L’évacuation
des matériaux de nettoyage usés doit être conforme à la réglementation.
Il est important de nettoyer le pistolet pulvérisateur tous les jours. Le nettoyage s’effectue en
vaporisant le solvant ou le diluant approprié dans le système. Essuyer l’extérieur du pistolet
pulvérisateur avec un chiffon imbibé de solvant ou se servir des brosses de nettoyage fournies pour
supprimer les matériaux accumulés.
Nettoyage
(a) Vider le godet alimenté par différence de niveau et remplacer par un solvant convenable.
(b) Abaisser la gâchette jusqu’à ce que toutes les traces de matériau sont éliminées et que le
pistolet est entièrement propre.
(c) Nettoyer l’anneau déflecteur avec une brosse.
IMPORTANT : S’assurer que l’anneau déflecteur et la buse sont propres en tout temps. Si
nécessaire, retirer ces deux composantes et les plonger dans un solvant. NE PAS utiliser
d’objet dur pour nettoyer les orifices obstrués. Les dommages les plus minimes déformeront
la forme du jet.
REMARQUE : S’il faut retirer la buse pour un nettoyage en profondeur, comprimer la gâchette pour
éviter d’endommager l’embout du pointeau de réglage du mélange au moment de dévisser la buse.
Graissage
Il faut observer les procédures de graissage après avoir complètement nettoyé le pistolet pour assurer
un rendement efficace, de haute qualité du pistolet pulvérisateur.
1. Lubrifier les parties mobiles avec une huile pour laminage à froid ou de l’huile de ricin.
2. Verser régulièrement quelques gouttes d’huile sur les parties effilées de la buse pour favoriser le
fonctionnement en douceur de l’anneau déflecteur. Pour la pulvérisation des matériaux à base
d’eau, enduire d’huile pour laminage à froid l’intérieur et l’extérieur de la buse après chaque usage.
3. Le diamètre extérieur de la gaine de pointeau de l’ensemble pointeau de réglage du mélange doit
être graissé à l’occasion avec une huile pour laminage à froid.
Changer ou remplacer l’ensemble buse
Au moment de changer l’ensemble buse, s’assurer d’échanger l’ensemble buse complet.
L’ensemble comprend l’anneau déflecteur, la buse et le pointeau de réglage du mélange.
REMARQUE : Assembler la buse avant d’insérer le pointeau de réglage du mélange.
Échange de garniture d'aiguille à réglage automatique de tension
Le joint d’étanchéité du pointeau de réglage du mélange est obtenu par une garniture en Teflon®
avec ressort de compression à réglage automatique de tension. Pour changer la garniture durant
l’entretien complet, il faut utiliser la clé à douille fournie.
ENTRETIEN
ATTENTION
ATTENTION NE PAS immerger le pistolet pulvérisateur dans un solvant ou un diluant
pendant une longue période de temps, car cela détruira les lubrifiants et
pourrait perturber le fonctionnement des pièces mobiles. NE JAMAIS
utiliser de potasse ou de solution alcaline caustique pour nettoyer. Ces
solutions attaquent les pièces en aluminium allié du pistolet.

SPRAY PATTERNS
Dried material is clogging
side-port "A" and causing
side-port "B" to blow spray
towards theclogged side
Dried material at fluid
nozzle "C" restricts air flow
Loose air nozzle
Air pressure set too high
Remove air nozzle.
Wipe off fluid tip using a
cloth soaked in thinner
or by soft brush
Fasten nozzle securely
Reduce air pressure
Fluid nozzle cracked or worn
Leak at thread of fluid nozzle
Leak at fluid needle
Needle packing worn out Insufficient
fluid in cup
Vent hole in container cover clogged
Tighten or replace
Tighten fluid nozzle
Tighten compression nut
assembly or replace
needle packing
Replace packing
Fill cup with fluid
Clean Out
Air pressure too high Turn pattern control knob
clockwise to decrease fan width.
Turn fluid needle adjusting nut
counter-clockwise to increase
fluid flow
Soak side-ports in
thinner to clean clog.
DO NOT poke any
opening with hard objects.
Defective Pattern Likely cause Suggested Remedy
Material too heavy
Insufficient air pressure
Fluid pressure too high
Dried material on tip of fluid nozzle or
air jets of air cap
Thin material or use
larger orifice fluid nozzle set
Increase pressure to within limit
Reduce pressure
Clean
A. A
B
B. C
C.Spitting,
irregular
or fluttering
spray
D.Split spray
pattern
E.Unatomized
or spattered
spray
F.Inadequate
air delivery
Air needle partially closed
Dried material in air jets or air cap
Obstruction in air line
Oopen control knob
Clean
G.Excessive fog Air pressure to high for
viscosity of fluid
Remove obstruction
Reduce air pressure and/or
open fluid control knob
H.Material keaking
from fluid inlet
of cup.
Loose cup or foreign substances
on/between cup thread and
fluid inlet
Tighten and clean or replace it
I.Material leaking
from nozzle
when trigger is
released
Worn fluid needle
Dried material in tip of nozzle
Loose packing nut
Replace Clean
Tighten needle packing nut by
turning counterclockwise

E
IMPORTANT
Please make certain that person who is
to use this equipment carefully reads and
understands these instructions before
operating.
IMPORTANT
S’assurer que l’utilisateur de l’outil lit
attentivement et comprend ces
instructions avant d’utiliser l’outil.
IMPORTANTE
Por favor asegúrese de que la persona que va a
usar este equipo lea cuidadosamente y
comprenda estas instrucciones antes de
operarlo.
PORTER-CABLE : Jackson, TN 38305
Tel 1-888-848-5175 www.portercable.com
70-529
•Adjustable fluid and spray
controls for precise operation
•Lightweight, durable die-cast
alloy gunbody
• Stainless steel 2.0mm fluid
nozzle and needle
• Cam Style Cup Holds 32 Ounces.
Makes setup and clean
up simple
•Applications: Enamel,
lacquer, stain, and urethane
Siphon Feed Spray
Gun - High Pressure

• GUARDE ESTAS INSTRUCCIONES •
NORMAS DE SEGURIDAD – DEFINICIONES
Indica una situación inminentemente peligrosa que,
si no es evitada, podrá dar como resultado la muerte
o lesiones graves.
Indican situaciones potencialmente peligrosa las
cuales, si no son evitadas, podrán dar como
resultado la muerte o lesiones graves.
Indica una situación potencialmente peligrosa
que, si no es evitada, podrá resultar en lesiones
menores o moderadas.
Usada sin el símbolo de alerta de seguridad
indica una situación potencialmente peligrosa
que, si no es evitada, podrá resultar en daños a
la propiedad.
Este manual contiene información
que es importante que usted la
sepa y la comprenda. Esta
información está relacionada con
SU SEGURIDAD y EVITAR
PROBLEMAS CON EL EQUIPO.
Para ayudarle a reconocer esta
información, use los símbolos
mostrados abajo. Por favor lea el
manual y préstele atención a
esas secciones.
LA OPERACIÓN O EL MANTENIMIENTO INAPROPIADOS DE ESTE
PRODUCTO PODRÁN RESULTAR EN LESIONES GRAVES Y DAÑOS
INSTRUCCIONES DE SEGURIDAD IMPORTANTES
Antes de desarmar o remover cualquier pieza de la pistola o de algún
componente, apague el compresor, descargue la presión oprimiendo
PARA EVITAR CREAR UNA ADMOSFERA EXPLOSIVA, TRABAJE SÓLO
EN ÁREAS BIEN VENTILADAS.
SE RECOMIENDA EL USO DE UNA MÁSCARA PARA EVITAR INHALAR
MATERIALES TÓXICOS.
INFORMACIÓN GENERAL
PELIGRO
ADVERTENCIA
PRECAUCIÓN
PRECAUCIÓN
A LA PROPIEDAD. LEA Y COMPRENDA TODAS LAS ADVERTENCIAS E INSTRUCCIONES
DE OPERACIÓN ANTES DE USAR ESTE EQUIPO.
ADVERTENCIA
ADVERTENCIA
ADVERTENCIA
el gatillo y desconecte la fuente de energía. ¡NUNCA asuma que la presión del sistema es cero!
PRECAUCIÓN
ADVERTENCIA
ADVERTENCIA
• Todas las personas en el área de trabajo deberán siempre usar protección
aprobada para los ojos y oídos y un aparato para respirar aprobado cuando esta
pistola atomizadora esté siendo operada.
• Nunca le apunte la pistola atomizadora a nadie. No atomice cerca de chispas,
llamas vivas, cigarrillos encendidos, luces piloto, calentadores de espacio o
cualquier otra fuente potencial de ignición, NO FUME EN EL ÁREA DE TRABAJO.
• Siga las instrucciones del fabricante y la información de seguridad para garantizar
la manipulación y el uso seguro de pinturas, lacas, diluyentes, fondos, etc.
No use pinturas de látex u otras pinturas gruesas. Ellas no son recomendadas
para esta pistola atomizadora.
• Mantenga siempre el área de trabajo libre de obstrucciones y bien ventilada.
• Siempre desconecte la pistola atomizadora de la fuente de aire antes de
desarmarla.

Los siguientes peligros pueden ocurrir durante el uso normal de este producto:
Los disolventes 1,1,1-Tricloroetano y Cloruro de
Metileno pueden reaccionar químicamente con el
aluminio usado en la mayoría de los equipos de
atomizado y con esta pistola y taza, para producir
una explosión que puede resultar en lesiones
graves o en la muerte.
Lea la etiqueta o la hoja de datos del material que
intenta atomizar.
1. Nunca use ningún tipo de material de
revestimiento que contenga estos disolventes.
2. Nunca use estos disolventes para limpiar o
enjuagar el equipo.
3. Si tiene dudas si el material es compatible,
consulte con el proveedor del material.
PELIGRO
CÓMO EVITARLOQUE PUEDE PASAR
Riesgo de explosión o incendio - materiales inflamables
Cuando pinturas o materiales son atomizados, ellos
son separados en partículas muy pequeñas y
mezclados con aire. Esto causará que ciertas
pinturas y materiales se tornen extremamente
inflamables pudiendo resultar en lesiones graves o
en la muerte.
Nunca atomice cerca de llamas vivas o luces piloto
en estufas o calentadores.
Nunca fume mientras atomiza.
Provea amplia ventilación cuando atomice al interior.
PELIGRO
QUE PUEDE PASAR
Riesgo de explosión - materiales incompatibles
PELIGRO
QUE PUEDE PASAR
Riesgo de respiración
Algunas pinturas, revestimientos y disolventes
podrán causarle daños a los pulmones y
quemaduras si son inhalados o entran en contacto
con la piel o los ojos.
Use una máscara o respirador aprobados por la
NIOSH y ropa de protección diseñada para su
aplicación y materiales específicos. Algunas
máscaras proporcionan protección limitada contra
materiales tóxicos y disolventes de pintura
peligrosos. Consulte a un Experto en Seguridad o
a un Higienista Industrial si no está seguro sobre su
equipo o materiales.
Las pistolas atomizadoras operan a presiones y
velocidades lo suficientemente altas como para
penetrar la piel humana y animal, lo que puede
resultar en amputación o lesiones serias.
¡Vea inmediatamente a un médico!
Nunca coloque las manos enfrente de la boquilla.
Dirija la atomización lejos de usted y otros.
PELIGRO
CÓMO EVITARLOQUE PUEDE PASAR
Riesgo de objetos voladores
PELIGRO
Riesgo de inyección
Ciertas piezas están bajo presión cuando la pistola
esta conectada a una manguera de aire presurizada.
Estas piezas pueden ser disparadas si la pistola es
desarmada.
El aire comprimido puede propulsar mugre, virutas
de metal, etc. y posiblemente causar lesiones.
La exposición prolongada al aire atomizado puede
resultar en daños auditivos permanentes.
Desconecte la pistola del la manguera de aire o
despresurice completamente la manguera de aire
siempre que vaya a desarmar la pistola.
Nunca apunte ninguna boquilla o atomizador hacia
otra persona o parte del cuerpo.
Cuando atomice, siempre use gafas de seguridad o
anteojos aprobados por la ANSI 278.1.
Siempre use protección auditiva cuando opere
equipos atomizadores.
ADVERTENCIA
CÓMO EVITARLO
CÓMO EVITARLO
CÓMO EVITARLOQUE PUEDE PASAR

Prior to shipment, this spray gun was treated with an
anticorrosive agent. Before use ,make sure that it is
carefully flushed with thinner.
1. Mix material according the manufacturer’s instructions.
Mixture should be smooth and easily pourable. Lumps or
foreign particles should be removed by straining through
a suitable paint filter.
NOTE: If not using the siphon feed setting, see “Remote
Pressure Feed” paragraphs.
2. Remove the material cup (e) from lid/gun assembly.
NOTE: Slide release lever (f) to the right, rotate lid, and
remove material cup (e).
3. Fill the material cup (e) ¾ full.
4. Attach material cup (e) to the lid/gun assembly and slide release lever (f) to clockwise to secure
in place.
5. Attach air supply line to ¼ NPS air inlet (c).
6. Adjust spray pattern.
a. The position of the air cap horns (g) will determine the spray pattern. Loosen air cap (h) and
rotate horns to achieve desired pattern. Tighten air cap.
b. Amount of material released (density of “fan spray”) is controlled by (d) fluid control knob.
Turn knob counterclockwise to increase, or clockwise to decrease, the fluid flow.
c. Width of “fan spray” is governed by (b) spray pattern control knob. Turn knob counter-
clockwise to increase, or clockwise to decrease, air flow.
7. Depress spray gun trigger fully to spray material. NOTE: Depress trigger partially will cause
only air to be released.
NOTE: Care should be exercised when handling spray gun to avoid damage to the orifice of the air
cap and tip of fluid nozzle. Damage to these part results in irregular spray patterns.
DO NOT ATTEMPT
TO UNCLOG (BACK
FLUSH) SPRAY GUN BY SQUEEZING
TRIGGER WHILE HOLDING FINGER IN
FRONT OF FLUID NOZZLE.
Pressure may vary
according to
viscosity of material used. Maximum
working pressure of gun is 50 psi. DO
NOT EXCEED PRESSURE LIMIT OF
GUN OR ANY OTHER COMPONENT IN
SYSTEM!
Prior to daily
operation, make
certain that all connections and fittings
are secure. Check hose and all con-
nections for a week or worn condition
that could render system unsafe. All
replacement components such as
hose or fittings must have a working
pressure equal to or grarter than
system pressure.
Horizontal position
Vertical position
OPERATION
h Air Cap
b Spray
Pattern
Knob
f
Lever
b Nut d Fluid
Control
Knob
c 1/4” NPS
Air Inlet
e Material Cup
g Horns

Spraying Tips
1. The stroke is made with a free arm motion, keeping the gun at a right angle
to the surface at all points of the stroke. Arching the stroke will result in
uneven application and excessive over spray at each end of the stroke.
2. Depress trigger just before reaching the edge of the surface to be sprayed.
Hold the trigger fully depressed and move the gun in one continuous
motion. Release the trigger when the other edge of the surface is reached,
shutting off the fluid flow, but continue motion a few inches until it is
reversed for the return stroke. When the edge of the surface is reached on
the return stroke, depress the trigger fully again and continue across the
surface.
3. Lap each stroke 50% over the preceding one. Less than 50% will cause
streaks on the finish surface.
NEVER point spray gun at self or any other person.
Accidental discharge of material may result in serious injury.
NOTE: When replacing lid assembly to gun assembly hand tighten nut (b)
and tighten securely.
If the material to be sprayed is too heavy for siphon feed or fast application
is desired, convert to the pressure feed.
1. Remove the material cup (e)
lever (f) to the right, rotate lid, and
remove material cup (e).
2. Loosen nut (b). After the nut
is loosened hand turn until lid
assembly can be removed from gun.
3. The gun is now ready to be
connected to any pressure feed tank
with a standard 3/8" straight pipe
female connection. See manufacturer’s
manual for correct procedure.
4. To operate see steps 5-7 in the "Operation" section to continue.
CONVERT TO REMOTE PRESSURE FEED
3/8 NPS
Fluid
Connention
b Nut
a Lever

Siempre tenga extremo cuidado al usar cualquier disolvente o diluyente.
NO REMOJE la pistola completa en disolvente o diluyente por un
período de tiempo largo ya que esto destruirá los lubricantes
Es importante que la pistola atomizadora sea limpiada diariamente después de usarla. La limpieza
es ejecutada atomizando el disolvente o diluyente apropiado a través del sistema. Limpie el exterior
de la pistola atomizadora con un trapo mojado en disolvente o use el cepillo(s) suministrados para
remover cualquier acumulación de material.
Limpieza
(a) Desocupe el material de la taza de alimentación por gravedad y reemplácelo con el disolvente
apropiado.
(b) Opere el gatillo hasta que todo vestigio de material haya desaparecido y la pistola quede
completamente limpia.
(c) Limpie la tapa de aire con el cepillo.
IMPORTANTE: Asegúrese de que la tapa de aire y la boquilla de fluido sean mantenidas
limpias en todo momento. Si es necesario, remueva estos dos componentes y remójelos en
disolvente. NO USE objetos duros para destapar agujeros tapados. El más mínimo daño
podrá causará un patrón de atomización irregular.
NOTA: Si la boquilla de fluido será removida para limpieza, oprima el gatillo para evitarle
daños a la punta de la aguja cuando desatornille la boquilla.
Lubricación
Se deben observar los procedimientos de lubricación después de limpiar completamente la pistola
atomizadora para garantizar un rendimiento efectivo y de alta calidad.
1. Lubrique los puntos de trabajo con puro aceite mineral o aceite de ricino.
2. Coloque periódicamente algunas gotas de aceite en las secciones cónicas de la boquilla de
fluido para garantizar una operación fácil de la tapa de aire. Cuando atomice materiales a base de
agua, después de cada uso cubra la boquilla de fluido, por dentro y por fuera, con puro aceite
mineral.
3. El diámetro exterior de la manga de la aguja del ensamble de la aguja de fluido tiene que ser
lubricado ocasionalmente con puro aceite mineral.
Cambio o reemplazo del juego de boquilla
Cuando cambie el juego de boquilla, asegúrese de que el juego completo de boquilla sea
reemplazado. El juego incluye una tapa de aire, la boquilla de fluido y la aguja de fluido.
NOTA: Ensamble la boquilla de fluido antes de colocar la aguja de fluido.
Mantenimiento
Cambio de la empaquetadura de la aguja auto tensionante®
El sello de la aguja de fluido es obtenido por una empaquetadora de Teflón con un resorte de
compresión auto tensionante.
Para cambiar la empaquetadura durante una reparación general, por favor use la llave de copa
suministrada.
MANTENIMIENTO
PRECAUCIÓN
PRECAUCIÓN
Nunca limpie la pistola cerca de fuego, llamas o cualquier fuente de calor o chispas.
Deshágase apropiadamente de materiales de limpieza usados.
causando movimientos disparejos. NUNCA use agua alcalina o una solución alcalina
cáustica para limpieza. Tales soluciones atacarán la piezas de aleación de aluminio de la pistola.
Table of contents
Languages:
Other Porter-Cable Paint Sprayer manuals
Popular Paint Sprayer manuals by other brands

Graco
Graco ULTRA PLUS+ 1500 instruction manual

Parkside
Parkside 324133 1904 Original instructions

WAGNER
WAGNER HEAVYCOAT HC750 owner's manual

Nordson
Nordson Universal Series Customer product manual

Eastwood
Eastwood Concours PRO instructions

Harbor Freight Tools
Harbor Freight Tools 91603 Assembly and operating instructions