Page 4 <&(%$*4.8"4,7%K'*#$"&8#L%/7*,#*%4,77%HMNNNMNIIMOPQP1 Item 63387
?@<6AR ST6;@ACSE D@CEA6E@EU6?6AFT
W,(9*8"83%@//7",84*%F#*%,89%U,(*
1. @d&"9%Y,83*(&'#%68d"(&85*8$%M%
Y&%8&$%'#*%,//7",84*#%"8%9,5/%&(%)*$%7&4,$"&8#1
2. Y&%8&$%F#*%C8%;,"81
3. e**/%U."79(*8%@),>%M%@77%d"#"$&(#%#.&'79%
+*%J*/$%,$%,%9"#$,84*%2(&5%)&(J%,(*,1
4. When servicing use only identical replacement parts.
5. Use Right Appliance - Do not use appliance for
any job except that for which it is intended.
6. Do not Force Appliance - It will do the job
better and with less likelihood of injury at
the rate for which it was designed.
7. Store Idle Appliances Indoors - When not in use,
appliances should be stored indoors in dry, and
high or locked-up place - out of reach of children.
8. Maintain Appliance With Care - Keep cutting edge
sharp and clean for best performance and to reduce
the risk of injury. Follow instructions for lubricating
and changing accessories. Inspect appliance cord
periodically, and if damaged, have it repaired by
an authorized service facility. Inspect extension
cords periodically and replace if damaged. Keep
handles dry, clean, and free from oil and grease.
9. Check Damaged Parts - Before further use of the
appliance, a guard or other part that is damaged
should be carefully checked to determine that it will
operate properly and perform its intended function.
Check for alignment of moving parts, binding of
moving parts, breakage of parts, mounting, and any
other condition that may affect its operation. A guard
or other part that is damaged should be properly
repaired or replaced by a qualified technician
unless indicated elsewhere in this manual.
10. Y"#4&88*4$%@//7",84*%M%Y"#4&88*4$%$.*%,//7",84*%
2(&5%$.*%/&)*(%#'//7>%).*8%8&$%"8%'#*L%
+*2&(*%#*(d"4"83L%).*8%4.,83"83%
,44*##&("*#%#'4.%,#%+7,9*#L%,89%$.*%7"J*1
11. e**/%3',(9#%"8%/7,4*%,89%"8%)&(J"83%&(9*(1
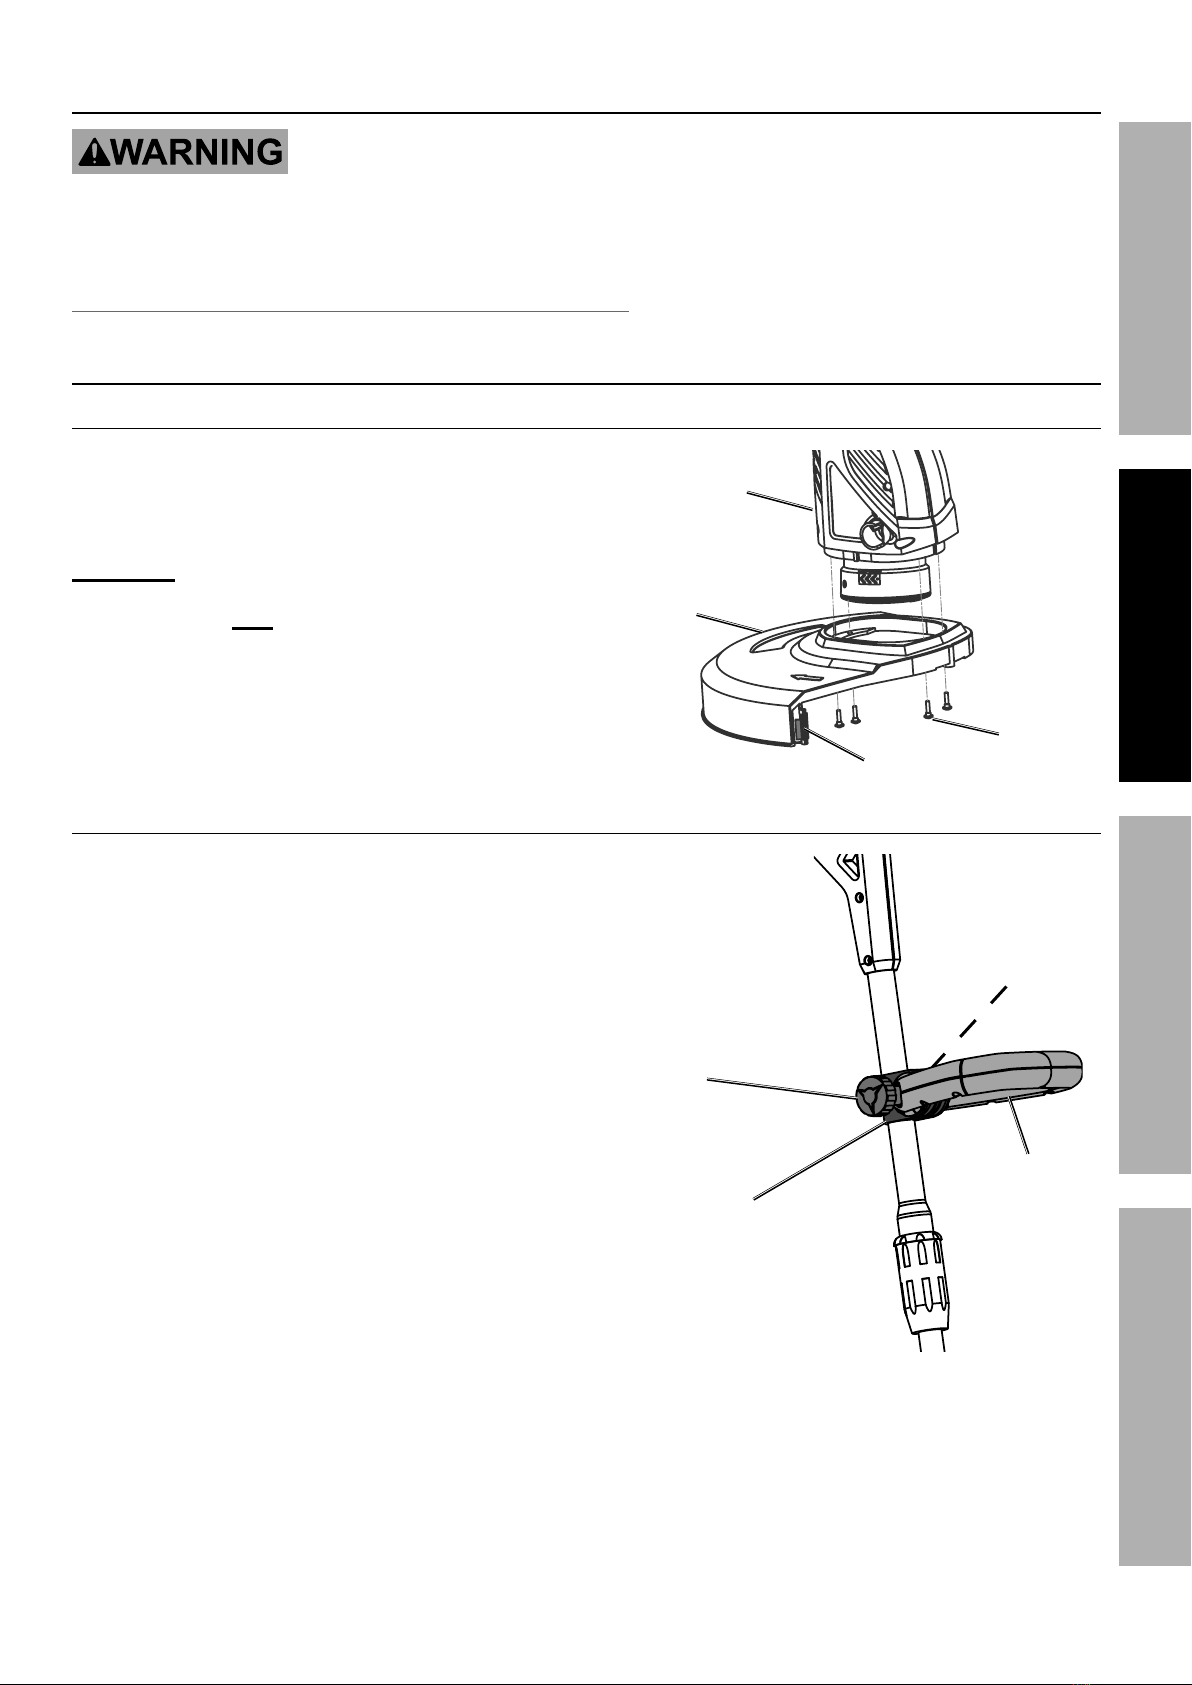
12. S87>%(*/7,4*%$.*%7"8*%&8%$."#%,//7",84*%)"$.%
$.*%7"8*%5,$*(",7%,89%9",5*$*(%&2%7"8*%7"#$*9%
&8%$.*%?/*4"2"4,$"&8#%$,+7*1%%S$.*(%5,$*(",7#L%
#'4.%,#%)"(*L%(&/*L%&(%+7,9*#%4,8%9,5,3*%$.*%
,//7",84*%,89%+*%2&(4*2'77>%,89%9,83*(&'#7>%
*=*4$*9%2(&5%$.*%,//7",84*%'/&8%+(*,J"831
!"+(,$"&8%B,],(9
This appliance vibrates during use.
Repeated or long-term exposure to vibration may
cause temporary or permanent physical injury,
particularly to the hands, arms and shoulders.
To reduce the risk of vibration-related injury:
1. Anyone using vibrating appliances regularly or for
an extended period should first be examined by
a doctor and then have regular medical check-
ups to ensure medical problems are not being
caused or worsened from use. Pregnant women
or people who have impaired blood circulation
to the hand, past hand injuries, nervous system
disorders, diabetes, or Raynaud’s Disease
should not use this appliance. If you feel
any symptoms related to vibration (such as
tingling, numbness, and white or blue fingers),
seek medical advice as soon as possible.
2. Do not smoke during use. Nicotine reduces
the blood supply to the hands and fingers,
increasing the risk of vibration-related injury.
3. Wear suitable gloves to reduce the
vibration effects on the user.
4. Use appliances with the lowest vibration when
there is a choice between different processes.
5. Include vibration-free periods each day of work.
6. Grip appliance as lightly as possible
(while still keeping safe control of it).
Let the appliance do the work.
7. To reduce vibration, maintain the appliance
as explained in this manual. If any abnormal
vibration occurs, stop use immediately.