1.Getting Started
2.Setup procedure
3.Default setting
.........................
..........................
4.Interface selection
5.Keyboard interface
5 - 1.Device selection
5 - 2.Function code selection ..................
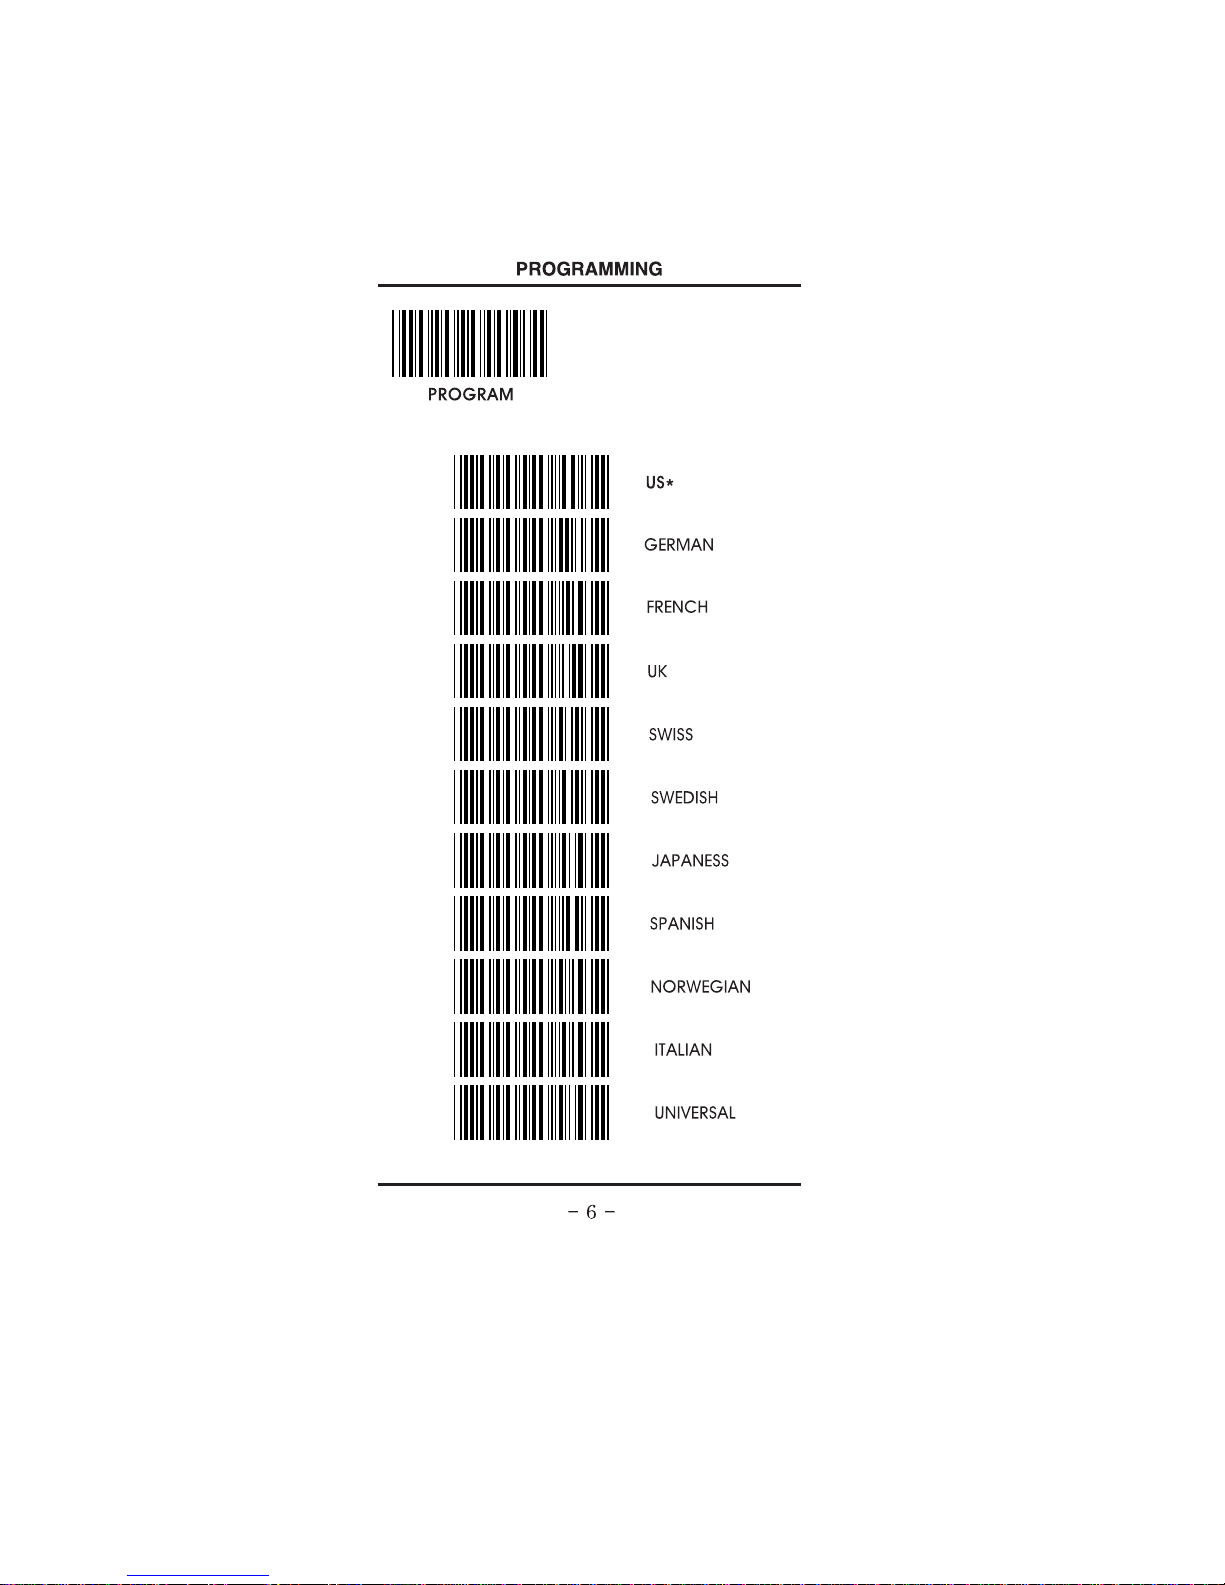
5 - 3.Language
...........................
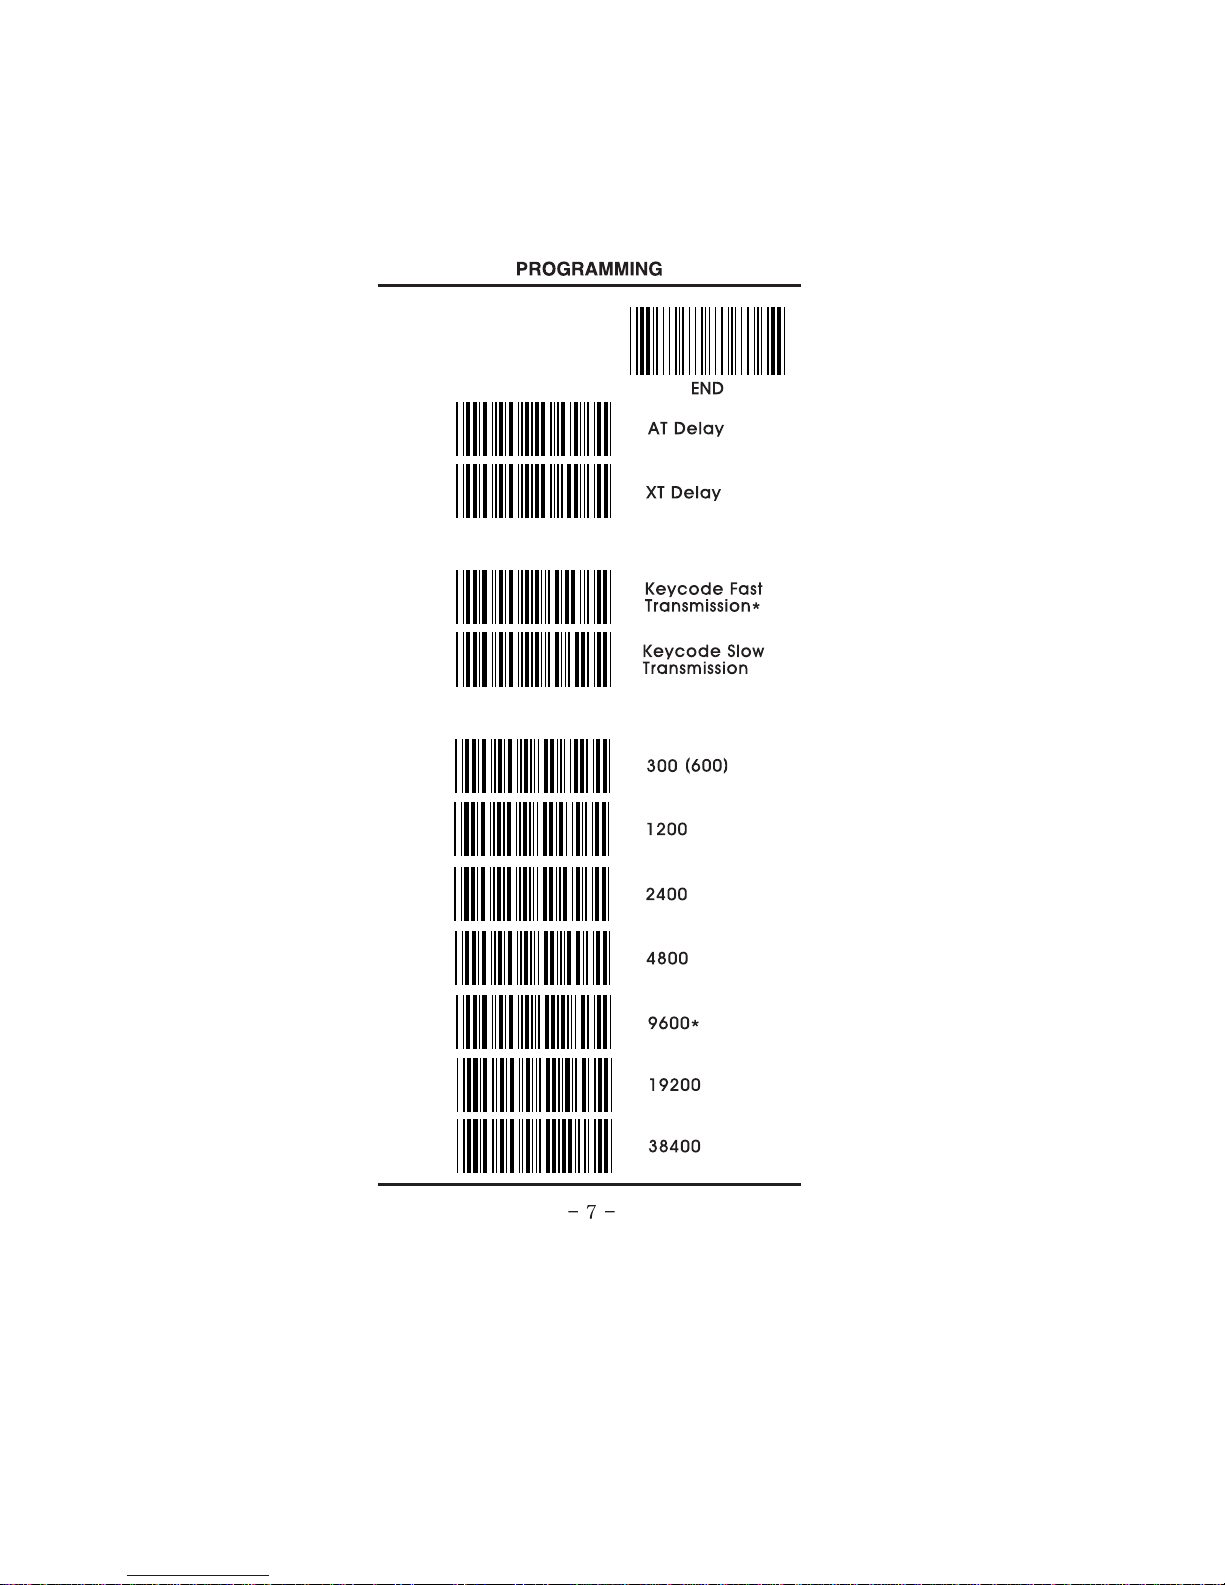
5 - 4.Scancode delay
6.RS - 232C setting
6 - 1.Baud rate
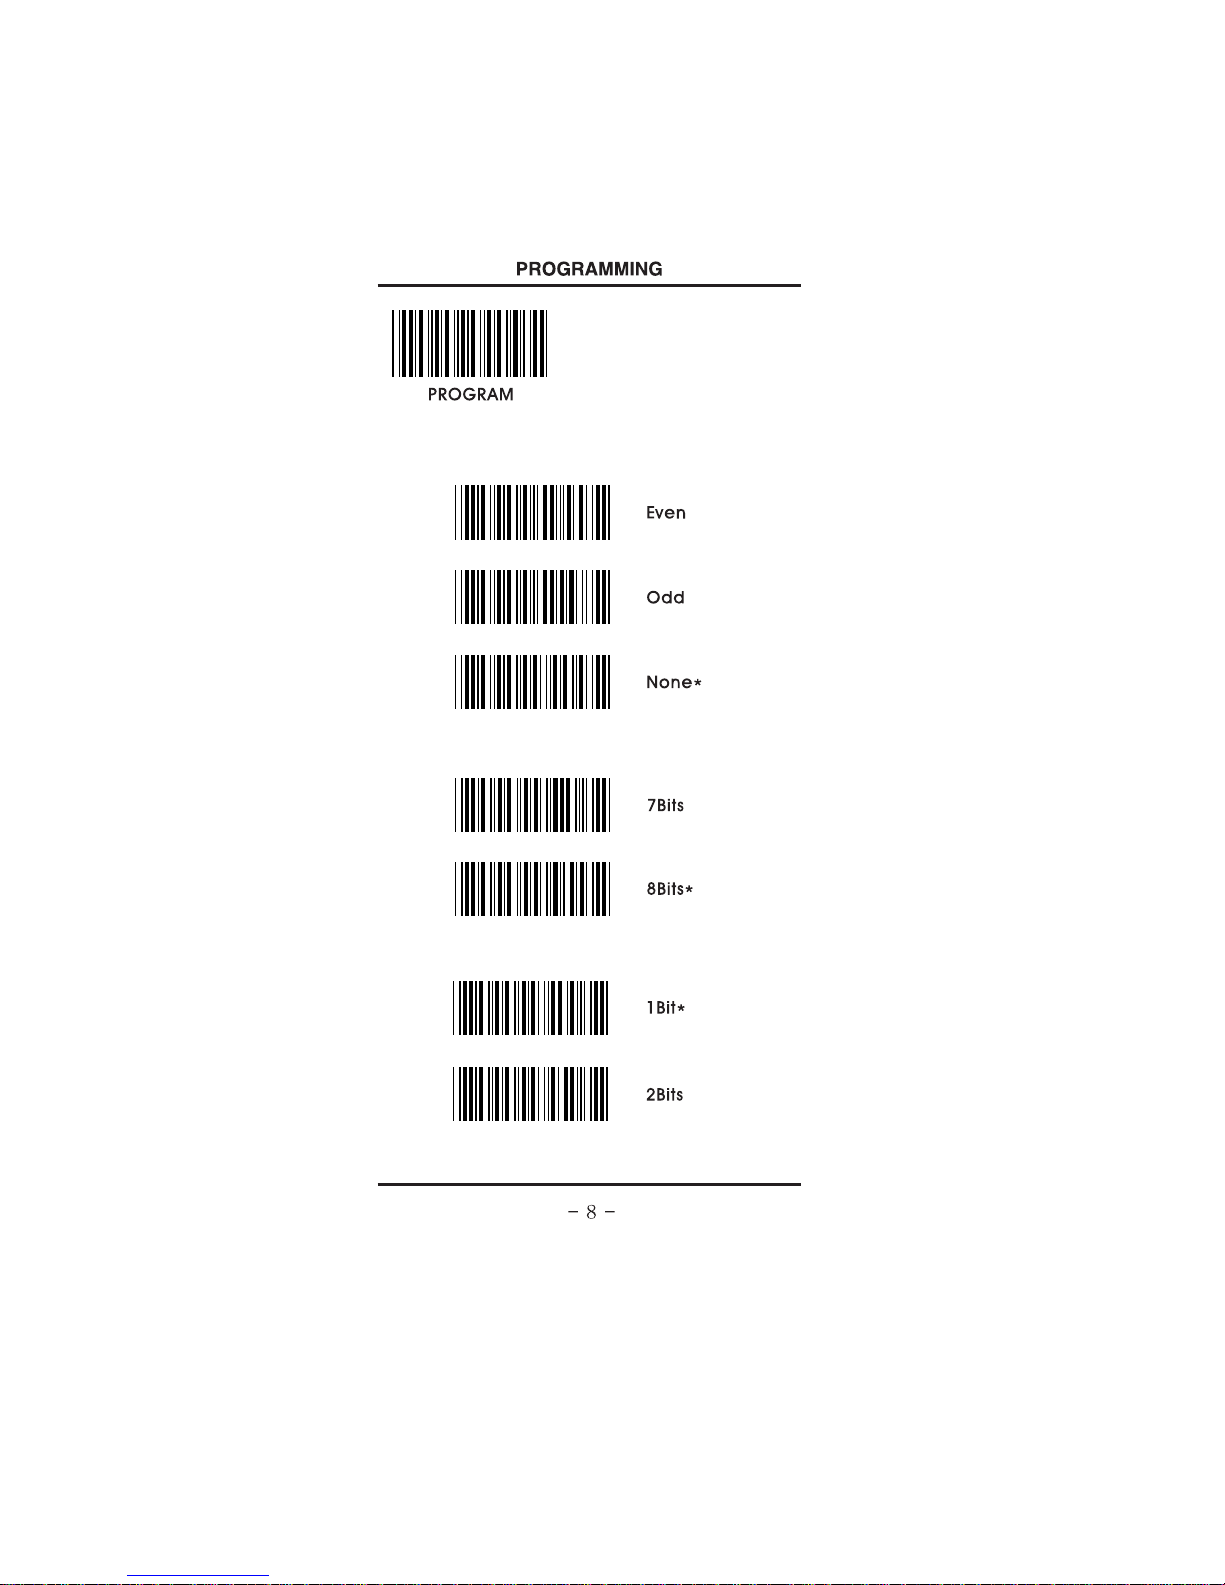
6 - 2.Parity
6 - 3.Data bits
6 - 4.Stop bits
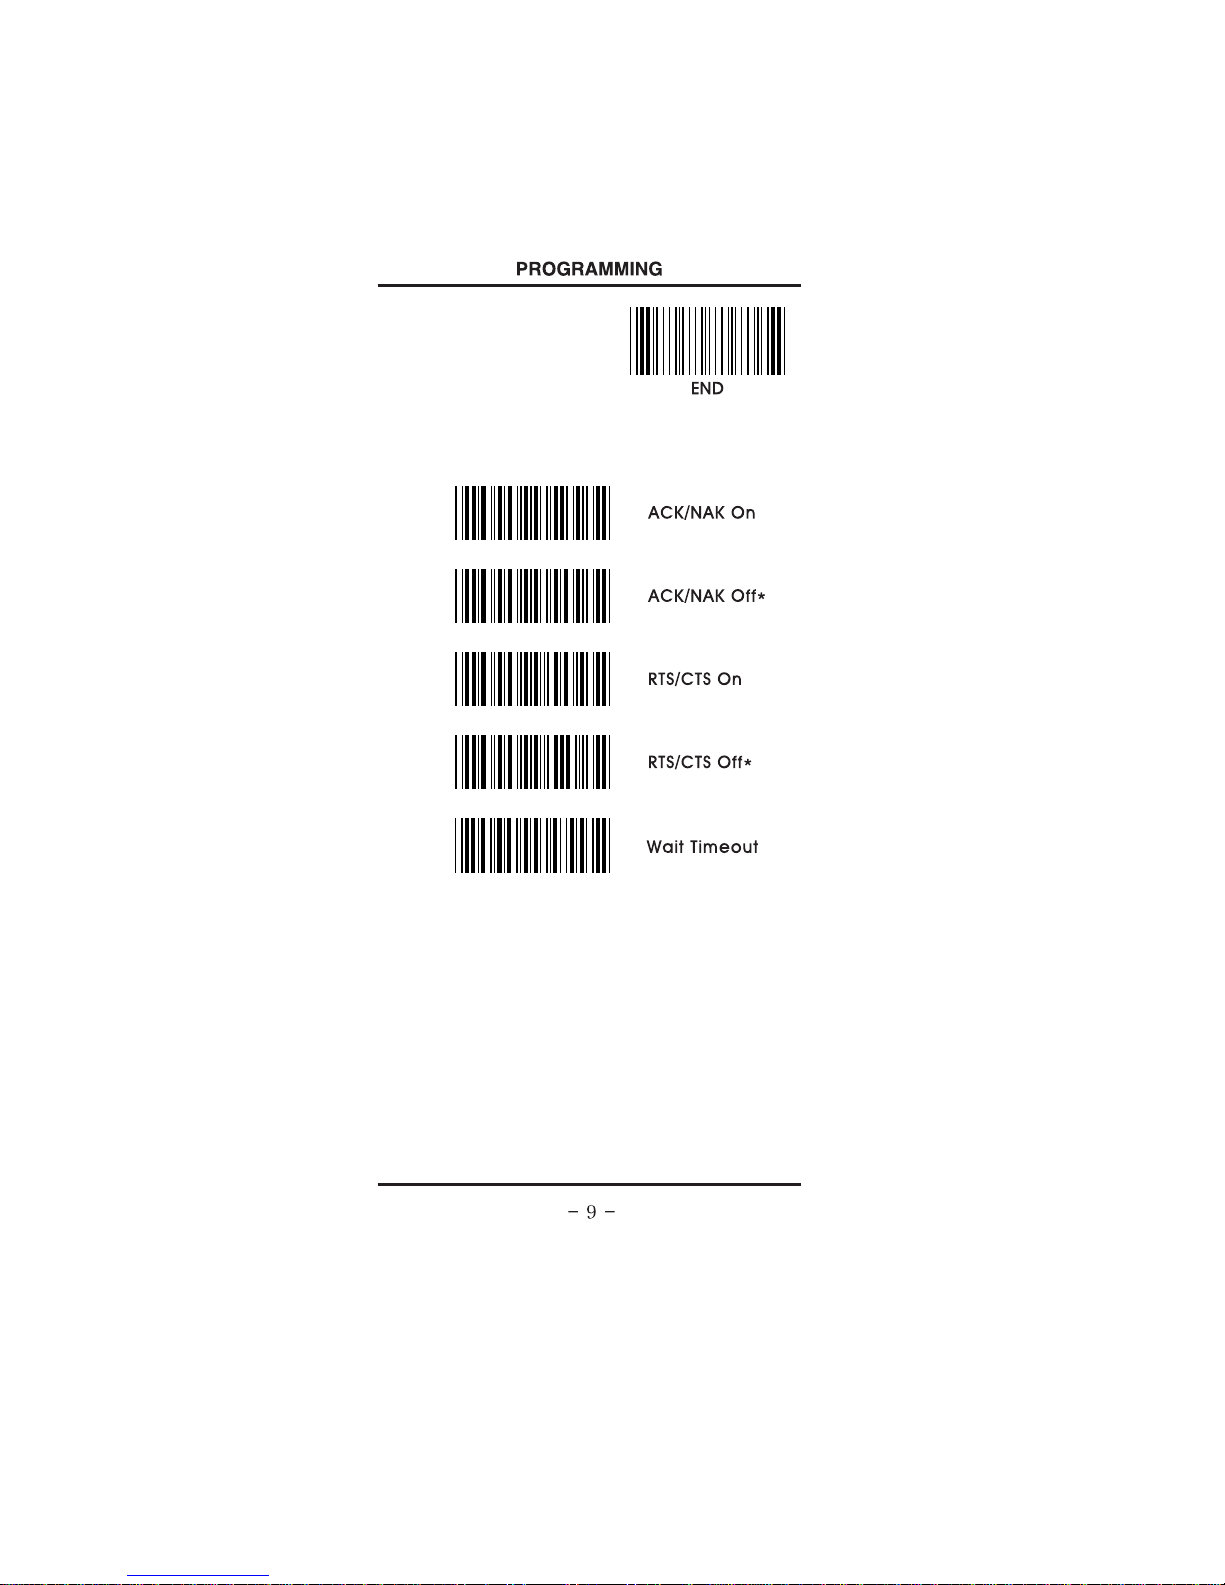
6 - 5.Hand shaking
7.Wand Emulation
7 - 1.Output
7 - 2.Output polarity
7 - 3.Scan speed
7 - 4.Check digit
8.Data Format
8 - 1.Terminator
8 - 2.Code ID
8 - 3.Code ID setting
8 - 4.Custom editing
8 - 5.Data Length
8 - 6.Preamble / Postamble
9.Barcode setting
9 - 1.Code 39
9 - 2.Interleaved 2 of 5
9 - 3.Standard 2 of 5
9 - 10.UPC - E
9 - 11.EAN - 8
9 - 9.UPC - A
9 - 8.Code 93
9 - 7.Code 128
9 - 6.China postage
9 - 5.Matrix 2 of 5
9 - 4.Industrial 2 of 5
9 - 12.EAN - 13
9 - 13.UPC/EAN Supplements
9 - 14.Codabar
9 - 15.MSI / Plessesy
10.Reading mode
12.Beep tones
13.Intercharacter delay
14.Intermessage delay
15.Set max. & min. Length
16.Barcode space setting
17.Minimum bar numbers
18.Show status
20.Appendix
20 - 1.Pin assignment
20 - 2.ASCII TABLE
20 - 3.FULL ASCII TABLE
.......................
.............................
........................
........................
.............................
.................................
..............................
...............................
................................
.........................
............................
............................
.............................
...............................
.........................
.........................
...........................
....................
..............................
.......................
.........................
..........................
...........................
.........................
.............................
..............................
...............................
...............................
...............................
..............................
..................
.............................
..........................
..........................
.............................
...........................
...................
.....................
...................
...................
....................
.............................
.......................
.........................
.....................
11.Redandancy.............................
32
19.Wireless scanner ........................