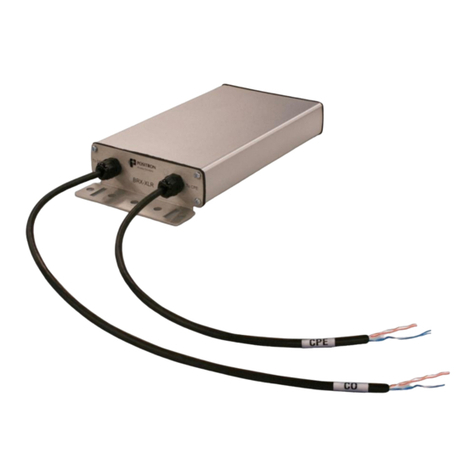
BRX-XLR-8 (8 pairs)
Summary Diagram of Typical Installation
DSLAM BRX-XLR-8
5-9 kft / 1.5-2.7 km from DSLAM (for 26 AWG / 0.4 mm equivalent gauge copper)
L1
Distance from DSLAM
L2
Distance to furthest CPE
Connecting the BRX-XLR-8
8 pairs from the CO
8 pairs to the
subscriber (CPE)
Shielded gel-lled
26 AWG / 0.4 mm cable
IMPORTANT NOTE: The BRX-XLR-8 unit is powered from the Sealing Current found on a standard POTS pair.
The BRX-XLR-8 will not work on a dry pair (line with no sealing current). Each pair of the BRX-XLR-8 is
powered independently with each pair requiring the presence of the sealing DC Voltage for proper operation.
Grounding Lug
Step 1: Select the location where the BRX-XLR-8 will be inserted
using the BRX-XLR Calculator for the longest loop.
Step 2: Connect the grounding lug of the unit to a proper ground
(usually available near the splice point).
Step 3: Insert a BRX-BYPASS-TEST module in slot 1 and ensure
that both switches are in BYPASS mode.
Step 4: Connect the rst two (2) pairs to be amplied to the rst
two (2) pairs of the BRX-XLR-8. Make sure to match the DSLAM
pair number to the CPE pair number.
Step 5: Test for continuity between the DSLAM pair and CPE
pair at the splice point. If the circuits are active, the LEDs on the
BRX-BYPASS-TEST module will be ON to conrm that the sealing
current is present on both lines. If either circuit is not active, the
continuity testing will conrm that the connections are reliable.
Step 6: Replace the BRX-BYPASS-TEST module with a BRX-
XLR-M module.
Step 7: The DSLAM and CPE will now retrain the circuit and bring
up the ADSL2+ / ADSL link with the amplied bandwidth. Note
that the performance may be limited (or capped) by a setting in
the DSLAM conguration.
Step 8: Repeat steps 3 to 7 for the other three (3) slots of the
BRX-XLR-8 enclosure.
Document 180-0164-001 R03
Slot
#
Channel
#
Line
#
Cable Pair
Colors
11 1 White / Blue
2 2 White / Orange
21 3 White / Green
2 4 White / Brown
31 5 Red / Blue
2 6 Red / Orange
41 7 Red / Green
2 8 Red / Brown
Mounting ange on both ends
of the sealed unit
