manuals.online logo
Brands
  1. Home
  2. •
  3. Brands
  4. •
  5. Poulan Pro
  6. •
  7. Lawn Mower
  8. •
  9. Poulan Pro PR185H42STG User manual

Poulan Pro PR185H42STG User manual

Other manuals for PR185H42STG

1

Other Poulan Pro Lawn Mower manuals

Poulan Pro COGT22H48A User manual

Poulan Pro

Poulan Pro COGT22H48A User manual

Poulan Pro XT 532 43 88-17 User manual

Poulan Pro

Poulan Pro XT 532 43 88-17 User manual

Poulan Pro 270451 User manual

Poulan Pro

Poulan Pro 270451 User manual

Poulan Pro 425179 User manual

Poulan Pro

Poulan Pro 425179 User manual

Poulan Pro 301ZX / 966681701 User manual

Poulan Pro

Poulan Pro 301ZX / 966681701 User manual

Poulan Pro 404402 User manual

Poulan Pro

Poulan Pro 404402 User manual

Poulan Pro 183041 User manual

Poulan Pro

Poulan Pro 183041 User manual

Poulan Pro Pro 960 42 00-35 User manual

Poulan Pro

Poulan Pro Pro 960 42 00-35 User manual

Poulan Pro 177937 User manual

Poulan Pro

Poulan Pro 177937 User manual

Poulan Pro PZ4822 User manual

Poulan Pro

Poulan Pro PZ4822 User manual

Poulan Pro PC17H42STA User manual

Poulan Pro

Poulan Pro PC17H42STA User manual

Poulan Pro 85-50 User manual

Poulan Pro

Poulan Pro 85-50 User manual

Poulan Pro Pro PB195H46YT User manual

Poulan Pro

Poulan Pro Pro PB195H46YT User manual

Poulan Pro PO15538LT User manual

Poulan Pro

Poulan Pro PO15538LT User manual

Poulan Pro PDGT26H48A User manual

Poulan Pro

Poulan Pro PDGT26H48A User manual

Poulan Pro 160886 User manual

Poulan Pro

Poulan Pro 160886 User manual

Poulan Pro PR17542STA User manual

Poulan Pro

Poulan Pro PR17542STA User manual

Poulan Pro 412412 User manual

Poulan Pro

Poulan Pro 412412 User manual

Poulan Pro 178500 User manual

Poulan Pro

Poulan Pro 178500 User manual

Poulan Pro 184210 User manual

Poulan Pro

Poulan Pro 184210 User manual

Poulan Pro PO550N22SH Owner's manual

Poulan Pro

Poulan Pro PO550N22SH Owner's manual

Poulan Pro PR20H42STD User manual

Poulan Pro

Poulan Pro PR20H42STD User manual

Poulan Pro 968999302 User manual

Poulan Pro

Poulan Pro 968999302 User manual

Poulan Pro PB22H54YT User manual

Poulan Pro

Poulan Pro PB22H54YT User manual

Popular Lawn Mower manuals by other brands

Toro 20047 Operator's manual

Toro

Toro 20047 Operator's manual

Toro Greensmaster TriFlex 3300 Operator's manual

Toro

Toro Greensmaster TriFlex 3300 Operator's manual

Global garden products 72 Workshop manual

Global garden products

Global garden products 72 Workshop manual

EINHELL 01045 operating instructions

EINHELL

EINHELL 01045 operating instructions

Toro Greensmaster 3120 Operator's manual

Toro

Toro Greensmaster 3120 Operator's manual

Baroness LM315GC Owner's operating manual

Baroness

Baroness LM315GC Owner's operating manual

GreenWorks Tools 25157 user manual

GreenWorks Tools

GreenWorks Tools 25157 user manual

Etesia MVEHH user manual

Etesia

Etesia MVEHH user manual

Husqvarna LTH125 owner's manual

Husqvarna

Husqvarna LTH125 owner's manual

Gravely 915034 - ZT1640 Owner's/operator's manual

Gravely

Gravely 915034 - ZT1640 Owner's/operator's manual

Jacobsen 63281 Technical manual

Jacobsen

Jacobsen 63281 Technical manual

GreenWorks Pro MO802524 Operator's manual

GreenWorks Pro

GreenWorks Pro MO802524 Operator's manual

Toro TimeMaster 20976 Operator's manual

Toro

Toro TimeMaster 20976 Operator's manual

Deutz-Allis 3000 Series parts manual

Deutz-Allis

Deutz-Allis 3000 Series parts manual

Craftsman 917.9998C owner's manual

Craftsman

Craftsman 917.9998C owner's manual

jobmate YT9108 user manual

jobmate

jobmate YT9108 user manual

Yard force GM R40A instructions

Yard force

Yard force GM R40A instructions

Husqvarna R 419TsX AWD Operator's manual

Husqvarna

Husqvarna R 419TsX AWD Operator's manual

manuals.online logo
manuals.online logoBrands
  • About & Mission
  • Contact us
  • Privacy Policy
  • Terms and Conditions

Copyright 2025 Manuals.Online. All Rights Reserved.

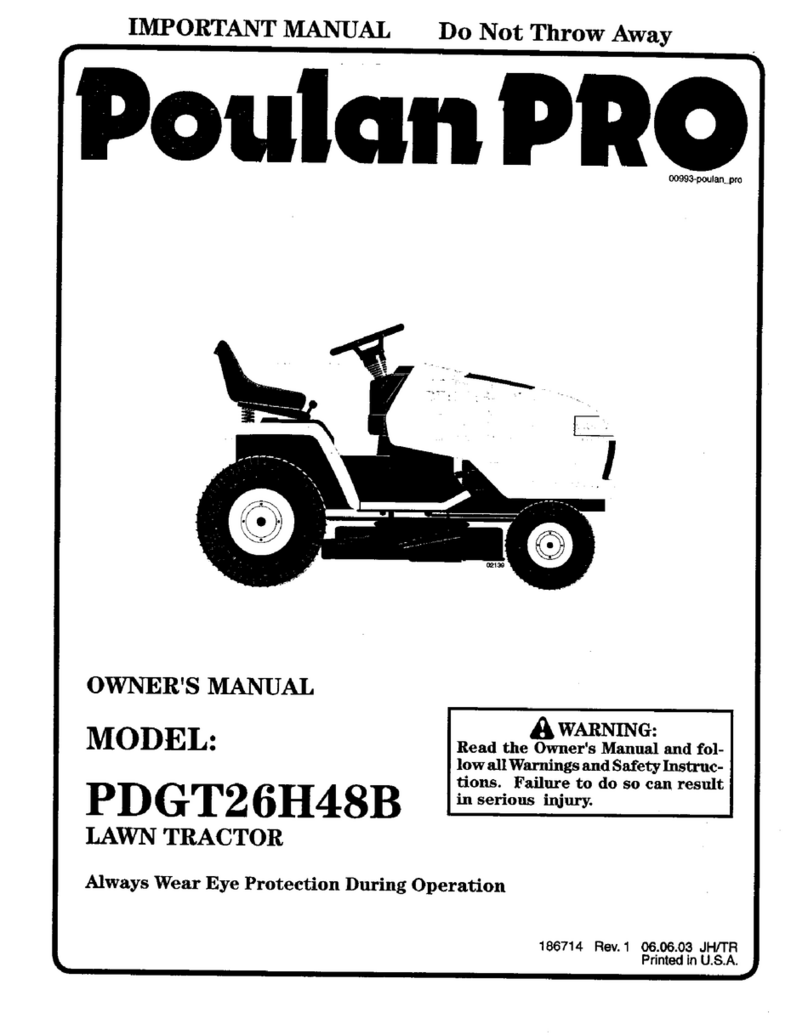
IMPORTANT MANUAL Do Not Throw Away
OWNER'S MANUAL
MODEL:
PR185H42STG
LAWN TRACTOR
WARNING:
Read this Owner's Manual and follow
all Warnings and Safety Instructions.
Failure to do so can result in serious
injury.
ALWAYS WEAR EYE PROTECTION DURING OPERATION
183113 3.502 RD
Pnnted m U.S A
SAFETY RULES
Safe Operation Practices for Ride-On Mowers
IMPORTANT: THIS CUTTING MACHINE IS CAPABLE OF AMPUTATING HANDS AND FEET AND THROWING OBJECTS
FAILURE TO OBSERVE THE FOLLOWING SAFETY INSTRUCTIONS COULD RESULT IN SERIOUS INJURY OR DEATH.
I. GENERAL OPERATION
Read, understand, and followa/I instructions mthe manual
and on the machine before starting.
Only allow responsible adults, who are familiar with the
instructions, to operate the machine.
•Clear the area of objects such as rocks, toys, w_re,etc.,
which could be picked up and thrown by the blade.
•Be sure the area isclear of other people before mowing.
Stop machine if anyone enters the area.
Never carry passengers.
Do not mow m reverse unless absolutely necessary.
Always look down and behind before and while backing.
Be awareofthemowerdischargedirectlon anddo notpoint
itat anyone. Do not operate the mower w_thoutertherthe
enbre grass catcher or the guard _nplace.
Slowdown beforetuming.
•Never leave a running machine unattended. Alwaystum
off blades, set parking brake, stop engine, and remove
keys before dismounting.
• Turn off bladeswhen not mowing.
• Stop engtne before removing grass catcher or unclogging
chute
• Mow only in daylight or good artificial light.
• Do not operate the machine while under the influence of
alcohol or drugs.
• Watch for traffic when operating near or crossing road-
ways
•Useextra carewhen loading or unloadingthe machine into
a trarier or truck.
Dataindlcatesthat operators, age 60 years and above, are
revolved _na large percentage of nd_ng mower-reTated
mjunes. These operators should evaluate their abxhtyto
operate the riding mower safely enough to protect them-
selves and others from serious injury.
Keep machine free of grass, leavesor otherdebns build-
up which can touch hot exhaust /engine parts and bum.
Do not allow the mower deck to plow leaves
or other debns which can cause build-up to occur. Clean
any oil or fuel spillage before operating or storing the
machine. Allow machine to cool before
storage.
II. SLOPE OPERATION
Slopes are a majorfactor relatedto loss-of-controland ttpever
acctdents,whichcan resultin severe InuP/or death. Allslopes
requtreextra cauton f youcannot backuptheslopeorIfyoufee!
uneasyon tt,donotmow=t
DO:
• Mow up and down slopes, not across.
Remove obstacles such as rocks, tree kmbs,etc.
• Watch for holes, ruts, or bumps. Uneven terrain could
overturn the machine. Tall grass can hide obstacles.
• Use slow speed. Choose a low gear so that you will not
have to stop or shift while on the slope.
• Follow the manufacturer's recommendations for wheel
weights or counterweights to tmprove stabildy.
• Use extra care w_thgrass catchers or other attachments.
These can change the stablhty of the machine.
• Keep all movement on the slopes slow and gradual Do
not make sudden changes in speed or dlrecbon.
2
Avoid starting or stopping on a slope. Ift_reslose tracbon,
disengage the blades and proceed slowly stralghtdown
the slope
DO NOT:
•Do not tum on slopes unless necessary, and then, tum
slowly and gradually downh(ll, ifpossible.
Do not mow near drop..offs, d_tches, or embankments.
The mower could suddenly tum over ifa wheel _sover the
edge of a cliff or drtch, or ifan edge caves _n
•Do notmow on wet grass. Reduced traction could cause
sliding.
Do not try tostab_hzethe machine byputting your foot on
theground.
•Do not use grass catcher on steep slopes.
III. CHILDREN
Tragic accidents can occur ifthe operatoris not alert to the
presence of children. Children are often attracted to the
machine and the mowing activity. Neverassumethatchddren
will remain where you last sew them.
• Keep children out of the mowing area and under the
watchful care of another responsible adult.
• Be alert and turn machine off ifchildren enter the area.
•Before and when backing, lookbehind and down forsmall
children.
• Never carry children. They may fall off and be senously
injured or interferewrth safe machine operation.
• Never allow children to operate the machine.
• Use extra care when approaching blind comers, shrubs,
trees, or other objects that may obscure vision.
IV. SERVICE
• Use extracare mhandhnggasohne and other fuels They
are flammable and vapors are expioswe.
- Use only an approved container.
- Never remove gas cap or add fuel with the engine
running. Allow engine to cool before refueling. Do not
smoke.
- Never refuel the machine indoors.
- Never store the machine orfuel container mside where
there is an open flame, such as a water heater.
• Never runa machine inside a closed area.
•Keep nuts and bolts, especially blade attachment bolts,
tight and keep equipment mgood condition.
• Never tamper wtth safety devices. Check their proper
operation regularly.
Keep machine free ofgrass, leaves, or other debns budd-
up. Cleanoilor fuelspmllage.AIIowmachlnetocoolbefore
stonng.
• Stop and inspect the equipment ifyou stnke an object.
Repatr, if necessary,before restarting.
•Never make adjustments or repairs w_ththe engine
runntng.
•Grasscatcher componentsara subjecttowear, damage,
and detedoratton,which could expose moving parts or
allowobjectstobethrown. Frequentlycheckcomponents
and replace with manufacturer's recommended pads,
whennecessary.
•Mower blades aresharp andcancut Wrap the blade(s)
or wear gloves, and use extra caution when servicing
them.
• Check brake operabon frequently Adjust and service
as requqred.

SAFETY RULES
& Safe Operation Practices for Ride-On Mowers
Be sure the area _sclear of other people before mowing.
Stop machine if anyone enters the area.
Never carry passengers or children even w_th the blades
off.
Do not mow in reverse unless absolutely necessary. Al-
ways look down and behind before and while backing
Never carry children They may fall off and be seriously
injured or interfere with safe machine operat=on
Keep children out of the mowing area and under the
watchful care of another responsible adult.
Be alert and turn machine off if children enter the area
Before and when backing, look behind and down for small
children
Mow up and down slopes (15° Max), not across.
Remove obstacles such as rocks, tree limbs, etc.
Watch for holes, rots, or bumps. Uneven terrain could
overturn the machine. Tall grass can hide obstacles.
Use slowspeed Choose a low gear so that you willnot have
to stop or shift while on the slope
Avoid starting or stopping on a slope If tires lose tract=on,
disengage the blades and proceed slowly stra=ght down
the slope
If machine stops while going uphdl, d=sengage blades, shift
into reverse and back down slowly.
Do not turn on slopes unless necessary, and then, turn
slowly and gradually downhill, if possible.
&
Look for this symbol to point out im-
portant safety precautions. It means
CAUTION!!! BECOMEALERT!t! YOUR
SAFETY IS INVOLVED.
CAUTION: In order toprevent acciden-
tal starting when setting up, transport-
rag, adjusting or making repairs, al-
ways disconnect spark plug wire and
placa wire where itcannot contact spark
plug.
CAUTION: Do not coast down a hill in
neutral, you may lose control of the
tractor.
WARNING
Engine exhaust, some of its constituents, and car-
tain vehicle components contain or emit chemicals
known to the State of California to cause cancer and
birth defects or other reproductive harm.
WARNING
Battery posts, terminals and related accessories
contain lead and lead compounds, chemicals known
to the State of California to cause cancer and birth
defects or other reproductive harm. Wash hands
after handling.
3
PRODUCT SPECIFICATIONS
GASOLINECAPACITY 2 0 GALLONS
AND TYPE UNLEADED REGULAR
!OILTYPE (API-SF-SJ) SAE 30 (above 32°F)
SAE 5W-30 (below 32°F)
OILCAPACITY: W/FILTER 4 0 PINTS
W/OFILTER 3 75 PINTS
SPARK PLUG CHAMPION RC12YC
GAP .040")
GROUND SPEED (MPH): Forward 0-5 5
Reverse 0-2.4
TIRE PRESSURE FRONT: 14 PSI
REAR 10 PSI
CHARGING SYSTEM: 3 AMPS BA'FI-ERY
5 AMPS HEADLIGHTS
BATI'ERY AMP/HR 35
MIN. CCA 280
CASESIZE. U1R
BLADE BOLTTORQUE 27-35 FT. LBS
CONGRATULATIONS on yourpurchase ofa new Tractor.
Ithas been des=gned,engineered and manufactured tog=ve
you the best posstble dependability and performance.
Should you experience any problem you cannot eas=ly
remedy, please contact your nearest authonzed service
center. We have competent, well-trained techmc=ansand
the proper tools to serv=ceor repair th=stractor
Please read and retain thts manual. The mstructtonsw_ll
enable you to assemble and maintain yourtractor properly
Always observe the "SAFETY RULES".
CUSTOMER RESPONSIBILITIES
•Read and observe the safety rules.
Follow a regular schedule mmaintaining, canngforand
using your tractor
• Follow the mstructtons under the "Customer Responsi-
bilities" and "Storage" sections of th=sowner's manual.
WARNING: Th=stractor is equipped with an internal com-
bustion engine and should not be used on or near any
untmproved forest-covered, brush-covered or grass-cov-
ered landunless the engine's exhaust system isequipped
wathaspark attester meeting apphcable localor state laws
(ffany). Ifa spark arrester isused, it shouldbe maintained
=neffective working order bythe operator.
A spark arrester for the muffler is available through your
nearestauthonzed serwcecenter/department (See REPAIR
PARTS sectton of this manual).
InthestateofCalifomiathe above _srequtredbylaw(Section
4442 oftheCalrfomta PubhcResources Code). Otherstates
may have stm=larlaws. Federal lawsapplyonfederal lands.
TABLE OF CONTENTS
SAFETY RULES ........................................................ 2-3
PRODUCT SPECIFICATIONS ....................................... 4
CUSTOMER RESPONSIBILITIES ...................... 4, 16-19
ASSEMBLY ................................................................ 6-8
OPERATION ............................................................. 9-15
MAINTENANCE SCHEDULE ....................................... 16
SERVICE AND ADJUSTMENTS ............................. 20-25
STORAGE ................................................................... 26
TROUBLESHOOTING ............................................. 27-28
REPAIR PARTS -TRACTOR .................................. 30-45
WARRANTY ................................................................ 46
4
TUNASSEMBLED PARTS
Steering Wheel
tg
Sleeve
Steering Adapter
(1) Large Flat
Washer
(t) Hex Bolt 1/4-28 x 1-1/4
Steenng
Wheellnse_
i
,- Steermg
,Extension
Shaft
(1) Locknut 1/2-20
@
(1) Locknut 1/4-28
Seat
(1) Washer
17/32 x 1-3/16 x 12 Gauge
(1) Knob_
Slope Sheet
(1) Oil Drain Tube
(2) Keys
ASSEMBLY
Your new tractor has been assembled at the factorywith exceptton of those parts leftunassembled for shipping purposes. To
ensure safe and proper operation of your tractor all parts and hardware you assemble must be tightened securely. Use the
correct tools as necessary to insure proper tightness
TOOLS REQUIRED FOR ASSEMBLY
A socket wrench set wdl make assembly easier. Standard
wrench stzes are hsted
Ut_[ttyknife Phers
(1) 3/4" wrenches Tire pressure gauge
(2) 7/16" wrenches
When nght or left hand tsmentioned tnthLsmanual, _tmeans
when you are _nthe operatmg pos_t_on(seated behind the
steenng wheel).
TO REMOVE TRACTOR FROM CARTON
UNPACK CARTON
•Remove all accessible loose parts and parts cartons
from carton.
• Cut, from top to bottom, along hneson all four comers
of carton, and lay panels flat.
• Check for any addtttonal loose parts or cartons and
remove.
BEFORE REMOVING TRACTOR FROM
SKID
ATTACH STEERING WHEEL (See Fig. 1)
ASSEMBLE EXTENSION SHAFT AND BOOT
Slide extension shaft onto lower steenng shaft Align
mountLng holes m extension and lower shafts and install
1/4 hex bolt and Iocknut Tighten securely.
IMPORTANT TIGHTEN BOLT AND NUT SECURELY TO
10-12 FT LBS TORQUE
Place tabs of steering boot over tab slots in dash and push
down to secure
INSTALL STEERING WHEEL
Posihon front wheels of the tractor so they are pointing
straight forward
Remove steering wheel adapter from steenng wheel and
slide adapter onto steenng shaft extension.
Position steenng wheel so cross bars are honzontal (left to
nght) and shde inside boot and onto adapter
•Assemble large flat washer, 1/2 hex nut and tighten se-
curely
Snap steenng wheel insert into center of steenng wheel.
Remove protective materials from tractor hood and gnll
IMPORTANT: CHECK FOR AND REMOVE ANY STAPLES
IN SKID THAT MAY PUNCTURE TIRES WHERE TRACTOR
IS TO ROLL OFF SKID.
EXTENSION SHAFT
1/4 HEX BOLT
FIG. 1
HOW TO SET UP YOUR TRACTOR
CHECK BATTERY (See Fig. 2)
Lift seat pan to raised position.
If this battery is put mto service after month and year
mdlcated on label (label located between terminals)
charge battery for mtmmum ofone hour at 6-10 amps.
(See "BA'I-FERY" inCUSTOMER RESPONSIBILITIES
section of this manual for charging mstructions).
6
IASSEMBLY
SEAT PAN_
FIG. 2
INSTALL SEAT (See Fig. 3)
Adjust seat before tightening adjustment knob.
•Remove adjustment knoband flatwasher secunngseat
tocardboard packingand setaside for assembly ofseat
to tractor.
Pivot seat upward and remove from the cardboard
packing. Remove the cardboard packing and discard.
Place seat on seat pan so head of shoulder bolt is
positioned over large slotted hole in pan.
•Push down on seat to engage shoulder bolt m slotand
pull seat towards rear oftractor.
•Pivot seat and pan forward and assemble adjustment
knob and flatwasher loosely. Do not tighten.
• Lower seat into operating position and s_ton seat.
Shde seat until a comfortable position isreached whrch
allows you topress clutch/brake pedal all the way down.
• Get off seat w_thout moving Its adjusted posttlon
Raise seat and t_ghten adjustment knob securely.
\\
SHOULDER
BOLT
FLAT
ADJUSTMENT
KNOB
NOTE: You may now roll or dnve your tractor off the skid.
Follow the appropriate mstruetTon below to remove the
tractor from the sktd.
TO ROLL TRACTOR OFF SKID (See Operation
section, page 10, for location and function of
controls)
Press liftlever plunger and raise attachment hftlever to
its h_ghest posrtlon.
Release parking brake bydepressing clutch/brake pedal
• Place freewheel control in freewheeling position to
disengage transmtssion (See"TO TRANSPORT" inthe
Operation section of this manual).
Roll tractor forward off skid.
Remove banding holding deflector shield up against
tractor.
TO DRIVE TRACTOR OFF SKID (See Opera-
tion section, page 10, for location and func-
tion of controls)
/kWARNING: Beforestarting,read, understand and follow
all instructions mthe Operabon section of thtsmanual. Be
sure tractor ;s Ina well-ventilated area. Be sure the area in
front oftractor isclear of other people and objects.
•Be sure all the above assembly steps have been
completed
•Check engine oillevel and fillfuel tank with gasoline
•Place freewheel control m"transmission engaged" po-
Slbon.
• Sit on seat in operabng position, depress clutch/brake
pedal and set the parking brake,
Place motion control lever mneutral (N) position.
• Press lift lever plunger and raise attachment hftlever to
its highest position.
• Start the engine. After engine has started, move throttle
control to tdle posatton.
• Release parking brake.
• Slowly move the motion control lever forward and slowly
drive tractor off skid.
• Apply brake to stop tractor, set parking brake and place
motton control lever in neutral posttton.
• Turn tgnibonkey to "OFF" position
Contmue with the instructions that follow.
FIG. 3
7
i. I i
ASSEMBLY
CHECK TIRE PRESSURE
IMPORTANT: FOR SHIPPING PURPOSES, THE
MULCHER PLATE WAS PREATTACHED TO YOUR
MOWER. THE MULCHER PLATE MUST ONLY BE USED
WITH THE MULCHING BLADES THAT CAME PACKED
SEPARATELY IN THE CARTON.
YOUR MOWER CAME FACTORY EQUIPPED WITH HIGH
PERFORMANCE BLADES, WHICH ARE THE BEST
BLADES FOR BAGGING AND DISCHARGING. TO USE
YOUR MOWER WITH THE HIGH PERFORMANCE BLADES
THE MULCHER PLATE MUST BE REMOVED FROM THE
MOWER (SEE FIG. 4).
TO SET UP YOUR MOWER FOR MULCHING
• Remove high performance blades and install mulcher
blades, (see BLADE REMOVAL in the CUSTOMER
RESPONSABILITY section of this manual).
TO INSTALL MULCHER PLATE (See Fig. 4)
NOTE: Ifyou installedthemulching bladesyouwill needtoinstall
the mulcher plate.
• Raise and hold deflector shield in upright position.
• Place front of mulcher plate over front of mower deck
opening and slide into place, as shown.
• Hook front latch into hole on front of mower deck.
• Hook rear latch into hole on back of mower deck.
ICAUTION: Do not remove deflector shield I
from mower. Raise and hold shield when
attaching mulcher plate and allow it to
rest on plate while in operation.
DEFLECTOR
SHIELD MULCHER
PLATE
LATCH
HOOKS
FIG. 4
TO CONVERT TO BAGGING OR
DISCHARGING
NOTE: The mulcher blades willdischarge and bag gins.s, but
for bestbaggingand discharginginstallthehighperformance
blades.
•Remove mulcher plate and mulcher blades and install
highperformanceblades, (see BLADE REMOVAL inthe
CUSTOMER RESPONSABILITY section ofthis manual).
•Store mulcher blades and mulcher plate ina sate place.
Your mower isnow ready for discharging or installation
ofoptional grass catcher accessory.
The tires on your tractor were overinflated at the factory for
shipping purposes. Correct tire pressure is important for
best cutting performance.
Reduce tire pressure to PSI shown in "PRODUCT
SPECIFICATIONS" section of this manual.
8
CHECK DECK LEVELNESS
For best cutting results,mower housing should be properly
leveled. See "TO LEVEL MOWER HOUSING" intheService
and Adjustments section of this manual•
CHECK FOR PROPER POSITION OF ALL
BELTS
See the figures that are shown for replacing motion and
mower blade drive belts in the Service and Adjustments
section of this manual. Verify that the belts are routed
correctly.
CHECK BRAKE SYSTEM
After you learn howto operateyour tractor,checkto seethat
the brake is properly adjusted. See "TO ADJUST BRAKE"
in the Service and Adjustments section of this manual.
/ CHECKL IS T
BEFORE YOUOPERA TEAND ENJOY YOUR NEW TRAC-
TOR, WE WISH TOASSURE THAT YOU RECEIVE THE
BEST PERFORMANCE AND SATISFACTION FROM THIS
QUALITY PRODUCT.
PLEASE REVIEW THE FOLLOWING CHECKLIST."
,/ All assembly instructions have been completed.
,/ No remaining loose parts in carton.
,/ Batteryisproperlypreparedandcharged. (Minimum1
hour at 6 amps).
J" Seat is adjusted comfortably and tightened securely.
J All tires are properly inflated. (For shipping purposes,
the tires were overinflated at the factory).
•/ Be sure mower deck is properly leveled side-to-side/
front-to-rear for best cutting results. (Tires must be
properly inflated for leveling).
,I Check mower and drive belts. Be sure they are routed
properly around pulleys and inside all belt keepers.
•/Check wiring. See that all connections are still secure
and wires are properly clamped.
,/ Before driving tractor, be sure freewheel control is in
drive position.
WHILE LEARNING HOW TO USE YOUR TRACTOR, PAY
EXTRA ATTENTION TO THE FOLLOWING IMPORTANT
ITEMS:
•/ Engine oil is at proper level.
,/ Fuel tank is filled with fresh, clean, regular unleaded
gasoline.
•/Become familiar with all controls - their location and
function. Operate them before you start the engine.
,/ Be sure brake system is in safe operating condition.
•/It isimportant to purge the transmission before operating
your tractor for the first time. Follow proper starting and
transmission purging instructions (See "TO START
ENGINE"and"PURGETRANSMISSION"in the Opera-
tion section of this manual).
I T •a - * a .
OPERATION
These symbols may appear on your tractor or in literature supplied with the product. Learn and understand their meaning.
BA'I-I'ERY CAUTION OR
WARNING REVERSE FORWARD FAST SLOW
ENG,NEONENG,NEOFFO,LPRESSOREL,GHTSONOVE,_MPI
FUEL CHOKE MOWER HEIGHT PARKING BRAKE UNLOCKED MOWER LIFT
LOCKED
R N H L
ATTACHMENT REVERSE NEUTRAL HIGH LOW
CLUTCH ENGAGED
IGNITION ATTACHMENT
CLUTCH DISENGAGED
PARKING BRAKE
KEEP AREA CLEAR SLOPE HAZARDS
(SEE SAFETY RULES SECTION)
DANGER, KEEP HANDS AND FEET AWAY
9
FREE WHEEL
(Automatic Models only)
r i i T[
OPERATION
KNOW YOUR TRACTOR
READ THIS OWNER'S MANUAL AND SAFETY RULES BEFORE OPERATING YOUR TRACTOR
Compare the dlustrat_onsw_thyour tractortofamdLanze yourself w_ththe locations of vanouscontrolsand adjustments. Save
th_smanual for future reference
AMMETER
CHOKE
CONTROL_ '_,
THROTTLE '
CONTROL_
CLUTCH/BRAKE \ _,
PEDAL _ _i
HEIGHT _
_.%_TMENT I/_ _-L
ATTACHMENT IGNITION _ _. LIGHT
C'OTC.LEVERSW.TCH/__ <-- _O..l_,_.
_22;22--222"2"2h_ _L,_LEVER
_-__ ', _ _ PLUNGER
// LI 'E,ER
YA
FIG. 5
Our tractors conform to the safety standards of the Amencan National Standards Inshtute.
ATTACHMENT CLUTCH LEVER: Used to engage the
mower blades, orotherattachments mounted toyourtractor.
LIGHT SWITCH POSITION: Turns the headlights on and
off.
AMMETER - Indicates charging (+) or discharging (-) of
battery.
CHOKE CONTROL - Used when starting a coldengine.
THROTTLE CONTROL: Used forcontrollmg engine speed.
CLUTCH/BRAKE PEDAL: Used for declutching and brak-
ing the tractor and starting the engine.
PARKING BRAKE: Locksclutch/brake pedal mtothe brake
posit=on.
FREEWHEEL CONTROL: Dtsengages transmission for
pushing or slowly towing the tractor with the engine off.
MOTION CONTROL LEVER: Selects the speed and
d_rect_onof tractor
ATTACHMENT LIFT LEVER Used to ra=se, lower, and
adjustthemower deckorotherattachments mountedtoyour
tractor.
LIFT LEVER PLUNGER: Used to release attachment hft
lever when changing _tspos_bon.
IGNITION SWITCH: Used for starting and stopping the
engine.
HEIGHT ADJUSTMENT KNOB - Used toadjustthe mower
cutting he=ght.
10