manuals.online logo
Brands
  1. Home
  2. •
  3. Brands
  4. •
  5. Power Craft
  6. •
  7. Planer
  8. •
  9. Power Craft PP-82 User manual

Power Craft PP-82 User manual

0210/09
UK Subject to change
UK USERS MANUAL
Art.nr. 819268
PP-82
2Powercraft
PLANER
TECHNICAL SPECIFICATIONS
PRODUCT INFORMATION
Fig. A
A. Control knob for adjustment of planing depth
B. Indication of planing depth
C. Cover, right
D. Operating Switch
E. Release Button
F. Handle
G. Cover, left
This doubly insulated electric tool is designed to be
manually operated. It has an appealing shape and small
dimensions, which facilitate easy transportation. It is safe
and reliable when in operation. It is driven by a single-
phase electric motor via a V-belt. It is suitable for planing
wooden beams or boards.
SAFETY INSTRUCTIONS
The following symbols are used in these instructions for
use:
Denotes risk of personal injury, loss of life or
damage to the tool in case of non-observance of the
instructions in this manual.
Denotes risk of electric shock.
Carefully read this manual before using the machine.
Make sure that you know how the machine functions and
how to operate it. Maintain the machine in accordance
with the instructions to make sure it functions properly.
Keep this manual and the enclosed documentation with
the machine.
ELECTRICAL SAFETY
Always check that the power supply corresponds to
the voltage on the rating plate.
The machine is double insulated in accordance with
EN50144; therefore no earth wire is required.
Replacing cables or plugs
Immediately throw away old cables or plugs when they
have been replaced by new ones. It is dangerous to insert
the plug of a loose cable in the wall outlet.
Using extension cables
•The planing machine is fitted with a three-core cable
and earthed plug. Therefore, always connect the plug
to an earthed socket. If you have to use an extension
cable, make sure it is three-core and fitted with an
earthed plug and connector.
•The minimum conductor size is 1.5 mm2.
GENERAL SAFETY INSTRUCTIONS
Warning! When using electric tools, basic safety pre-
cautions should always be followed to reduce the
risk of fire, electric shock and personal injury, inclu-
ding the following. Read all these instructions before
attempting to operate this product.
Retain for future refence.
1. Keep work area clean
Cluttered areas and benches invite injuries.
2. Consider work area environment
Do not expose power tools to rain. Don’t use power
tools in damp or wet locations. Keep work area well
lit. Do not use power tools in presence of flammable
liquids or gases.
3. Guard against electric shock
Prevent body contact with grounded surfaces (e.g.
pipes, radiators, ranges refrigerators).
4. Keep children away
Do not let visitors contact tool or extension cord. All
visitors should be kept away from work area.
5. Store idle tools
When not is use, tools should be stored in dry, high,
or locked-up place, out of reach of children.
Voltage | 230 V~
Frequency | 50 Hz
Power input | 600 W
No load speed | 16000/min
Max. planing width | 82 mm
Max. planing depth | 2 mm
Weight | 6.5 kg
Lpa (sound pressure) | 89 dB(A)
Lwa (sound power) | 103 dB(A)
Vibration | < 2.1 m/s2
Powercraft 7
EXPLODED VIEW
Powercraft 3
6. Do not force tool
It will do the job better and safer at the rate for which
it was intended.
7. Use right tool
Do not force small tools or attachments to do the job
of heavy duty tool. Don’t use tools for purposes not
intended.
8. Dress properly
Do not wear loose clothing or jewelry. They can be
caught in moving parts. Rubber gloves and nonskid
footwear are recommended when working out-
doors. Wear protective hair covering to contain long
hair.
9. Use safety glasses
Also use face or dust mask if cutting operation is
dusty.
10.Do not abuse cord
Never carry tool by cord or yank it to disconnect it
from receptacle. Keep cord from heat, oil and sharp
edges.
11.Secure work
Use clamps or a vise to hold work. It’s safer than using
your hand and it frees both hands to operate tool.
12.Do not overreach
Keep proper footing and balance at all times.
13.Maintain tools with care
Keep tools sharp and clean for better and safer per-
formance. Follow instructions for lubricating and
changing accessories. Inspect tool cords periodically
and, if damaged, have repaired by authorized service
facility. Inspect extension cords periodically and
replace if damaged. Keep handles dry, clean and free
from oil and grease.
14.Disconnect tools
When not in use, before servicing, and when chan-
ging accessories such as blades, bits and cutters.
15.Remove adjusting keys and wrenches
Form the habit of checking to see that keys and adjus-
ting wrenches are removed from tool before turning
it on.
16.Avoid unintentional starting
Do not carry plugged-in tools with finger on switch.
Be sure switch is off when plugging in.
17.Outdoor use extension cords
When tool is used outdoors, use only extension
cords intended for use outdoors and so marked.
18.Stay alert
Watch what you are doing. Use common sense. Do
not operate tool when you are tired.
19.Check damaged parts
Before further use of the tool, a guard or other part
that is damaged should be carefully checked to deter-
mine that it will operate properly and perform its
intended function. Check for alignment of moving
parts, binding of moving parts, breakage of parts,
mounting, and any other conditions that may affect its
operation. A guard or other part that is damaged
should be properly repaired or replaced by an autho-
rized service center unless otherwise indicated
elsewhere in this instructions manual. Have defective
switches replaced by an authorized center. Do not
use tool if switch does not turn it on and off.
20.Warning
The use of any other accessory or attachment other
than recommended in this operation instructions or
the catalog may present a risk of personal injury.
21.Have your tool repaired by an expert
This electric appliance is in accordance with the rele-
vant safety rules repairing of electric apliances may be
carried out only by experts otherwise it may cause
considerable danger for the user.
22.Connect the dust extraction device
Whenever there are facilities for fitting a dust extrac-
tion system, make sure it is connected and used.
BEFORE YOU OPERATE THE MACHINE
1. Make sure the switch is “OFF” before you plug in the
machine.
2. Keep the cable away from moving parts.
IMMEDIATELY SWITCH OFF THE MACHINE
WHEN
•Interruption in the mains plug, mains lead or mains
lead damage.
•Defect switch.
•Smoke or stench of scorched isolation.
OPERATION
Before setting up, repair or maintenance of the
appliance you must always turn off the operating
switch and pull out the mains plug!
Fig. B
BEFORE INITIAL OPERATION
•Check if the rated voltage and rated frequency of the
mains supply correspond to the details of the type plate.
•Place the workbench on a stable and even base.
OPERATION
Fig. A - B
•To adjust the planing depth, turn the control knob
(Fig. A, A) in a clockwise direction. On the control
knob there is a pointer (Fig. A, A) which shows the pla-
ning depth in mm. Turn the control knob until the
desired planing depth is shown.
6Powercraft
SPARE PARTS LIST PP-82
REF NR DESCRIPTION POWERCRAFT NR
5 CARBON BRUSH 406445
6SWITCH 406442
17 ADJUSTING PLATE 406506
20 STATOR 406447
28 ROTOR 406446
34 UPPER PRESSING BOARD 406502
35 BLADE 319266
36 LOWER PRESSING BOARD 406503
47 DRIVING BELT 406443
48 BASE 406449
49 LEFT COVER 406444
- DUST BAG 406504
CORRECTIVE ACTION IN CASE OF
FAILURE
1. The operating switch is switched on, but the
motor is not working
The electric circuit is broken.
•Have the electric circuit repaired.
Wires in the mains plug or in the socket are loose.
•Have socket and plug checked or repaired.
The switch is faulty.
•Have the switch replaced.
2. The operating switch is switched on, but unu-
sual noises can be heard, the motor is not wor-
king or only very slowly
Switch contact has fused.
•Have the switch replaced.
Component jammed.
•Have the electric tool checked or repaired.
Too much thrust, as a result the motor is dragging.
•Use less thrust during the task.
3. Motor gets hot
Foreign substances have got inside the motor.
•Have the foreign substances removed.
Lack of or contaminated lubricating grease.
•Have lubricating grease applied or replaced.
Pressure too high.
•Use less thrust during the task.
Planing tool blunt.
•Replace the planing tool.
4. The motor is working, but the planing tool is
not moving
V-belt worn.
•Have V-belt replaced.
5. Frequent or strong sparks on the commuta-
tor
Short circuit on the armature.
•Have the armature replaced.
Carbon brushes worn out or jammed.
•Have the carbon brushes checked.
Rough running of the commutator.
•Have the surface of the commutator cleaned or
ground.
For your own safety, never remove parts or accessories
of the electric tool during operation. In case of fault or
damage have the electric tool repaired only by a specia-
list workshop or by the manufacturer.
Use only original spare parts and original plane bla-
des!
We declare under our sole responsability that this
product is in conformity with the following
standards or standardized documents
EN50144-2-14, EN50144-1
EN55014-1, EN61000-3-2,
EN61000-3-3, EN55014-2
in accordance with the regulations:
98/37/EEC
73/23/EEC
89/336/EEC
from 01-05-2002
Im Park 20
50996 KÖLN BRD
E. Kok
Quality department
CE
ı
DECLARATION OF CONFORMITY (UK)
Powercraft 5
Never alter the planing depth during an operating
cycle, otherwise this will result in an uneven surface.
To prevent operating errors turn the control knob back to “0”
when planing is completed.
•Secure the work piece with clamps or similar.
•Place the front sole on the edge of the work piece in
such a way that the planing tool does not yet touch
the work piece. The work piece must be level.
•Now insert the mains plug into the socket. To switch
on, first press the release button (Fig. A, E), keep it
pressed down while you press the operating switch
(Fig. A, D). The appliance is now switched on and you
can let go of the release button.
•When the machine has reached full speed it can be
pushed to the front over the work piece. At the
beginning of the planing operation, put some pres-
sure on the front and at the end of the operation, on
the rear of the appliance. This results in the appliance
remaining flat on the work piece and prevents the
corners from getting rounded off.
•To obtain a level and smooth surface use a greater
planing depth when rough planing and a lesser planing
depth when planing a layer. Hold the electric tool
straight during the operation, otherwise you will
obtain an uneven surface. After the operation switch
off the electric tool and remove the mains plug.
Take care that your hand never comes in contact
with the work piece during the operation.
Only use the electric planer on the upper side of the work
piece, never from below or from the side.
Store the appliance only after it has come to a complete stand-
still.
•Use a suction device to suck off wood shavings or
dust. For this use the connecting pipe (Fig. B, A) and
connect a suction pipe to it.
•Use a holding device to work on small work pieces.
CARE AND MAINTENANCE
Before undertaking any care or maintenance
always remove the mains plug from the socket.
Fig.C
The planing tool becomes worn after a period of opera-
tion. If you use a blunt or damaged planing tool opera-
tional efficiency is reduced and the electric motor might
become overloaded. Check the planing tool regularly
with regard to wear or damage. Depending on its condi-
tion, the planing tool will have to be replaced.
REMOVAL OF PLANE BLADE
Fig. C
Use the enclosed open-jawed spanner (Accessories).
First unscrew the three clamping screws (6) with the
open-jawed spanner and remove the plane blade (3), the
plane blade holder (2) and the plane blade support (4)
from the holding shaft (1).
INSTALLATION OF PLANE BLADE
Fig. C
Take the new plane blade (3) and position it between the
plane blade support (4) and the plane blade holder (2).
Now turn the clamping screws (6) as far as possible into
the plane blade support.
But not so far that the plane blade and the plane
blade holder become detached again from the
plane blade support. Afterwards put the plane blade, plane
blade holder and plane blade support together into the hol-
ding shaft. The plane blade support, plane blade and plane
blade holder will now be fastened together in the holding shaft
by releasing the clamping screws with the open-jawed span-
ner and thus the plane blade, plane blade support and plane
blade holder are clamped in position.
Unscrew clamping screws as fas as possible so that
a sufficient attachment is ensured.
When installing and removing the plane blade,
care has to be taken that all parts (plane blade,
plane blade holder, plane blade support and holding shaft)
are clean. Dirt or possible existing layers of dirt have to be
removed.
The Allen screws (5) are secured with an adhesive. These
screws must not be adjusted. The position of these screws may
only be altered by the manufacturer!
Check regularly if the clamping screws are tightened
firmly. Always tighten screws firmly.
REPLACEMENT OF THE CARBON BRUSHES
The carbon brushes can become worn after frequent
use. A regular check after about every 100 running hours
is therefore necessary. If the carbon brushes are shorter
than 4 mm then these will have to be replaced with new
ones.
•Remove the cover on the right.
•Take out the carbon brushes and check these.
•Replace the carbon brushes.
•Replace the two screws and screw them tight.
1
2
3
4
5
6
4Powercraft

Other Power Craft Planer manuals

Power Craft 75045 User manual

Power Craft

Power Craft 75045 User manual

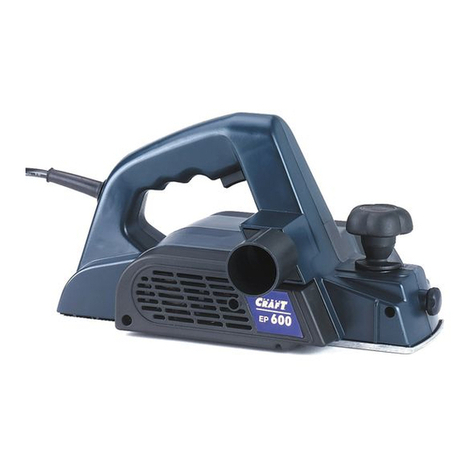
Power Craft EP 600 User manual

Power Craft

Power Craft EP 600 User manual

Popular Planer manuals by other brands

Worx WX625 Original instructions

Worx

Worx WX625 Original instructions

Makita KP0800X instruction manual

Makita

Makita KP0800X instruction manual

VITO PRO-POWER VIPL850 instruction manual

VITO

VITO PRO-POWER VIPL850 instruction manual

Cutech 40600H-CT user manual

Cutech

Cutech 40600H-CT user manual

GMC 420W instruction manual

GMC

GMC 420W instruction manual

Magnum Industrial MI-31170 operating manual

Magnum Industrial

Magnum Industrial MI-31170 operating manual

Makita PC5010C instruction manual

Makita

Makita PC5010C instruction manual

Bosch GHO 40-82 C Professional Original instructions

Bosch

Bosch GHO 40-82 C Professional Original instructions

Sealey SM1310 instructions

Sealey

Sealey SM1310 instructions

Craftsman 113.232240 owner's manual

Craftsman

Craftsman 113.232240 owner's manual

Virutex CE123N operating instructions

Virutex

Virutex CE123N operating instructions

Bosch GHO 40-82 C Professional instructions

Bosch

Bosch GHO 40-82 C Professional instructions

Grizzly G1021X2 Manual insert

Grizzly

Grizzly G1021X2 Manual insert

Festool EHL 65 E operating instructions

Festool

Festool EHL 65 E operating instructions

Jet JPT-8B-M operating instructions

Jet

Jet JPT-8B-M operating instructions

Jet JWP-15DX brochure

Jet

Jet JWP-15DX brochure

Ozito Power X Change PXPLS-082 instruction manual

Ozito

Ozito Power X Change PXPLS-082 instruction manual

Jet JWP-201 operating instructions

Jet

Jet JWP-201 operating instructions

manuals.online logo
manuals.online logoBrands
  • About & Mission
  • Contact us
  • Privacy Policy
  • Terms and Conditions

Copyright 2025 Manuals.Online. All Rights Reserved.