Power Soak Produce Soak User manual

Owner's Manual
Produce Soak –Fry Wash

Table of Contents
Introduction and Conventions......................................1
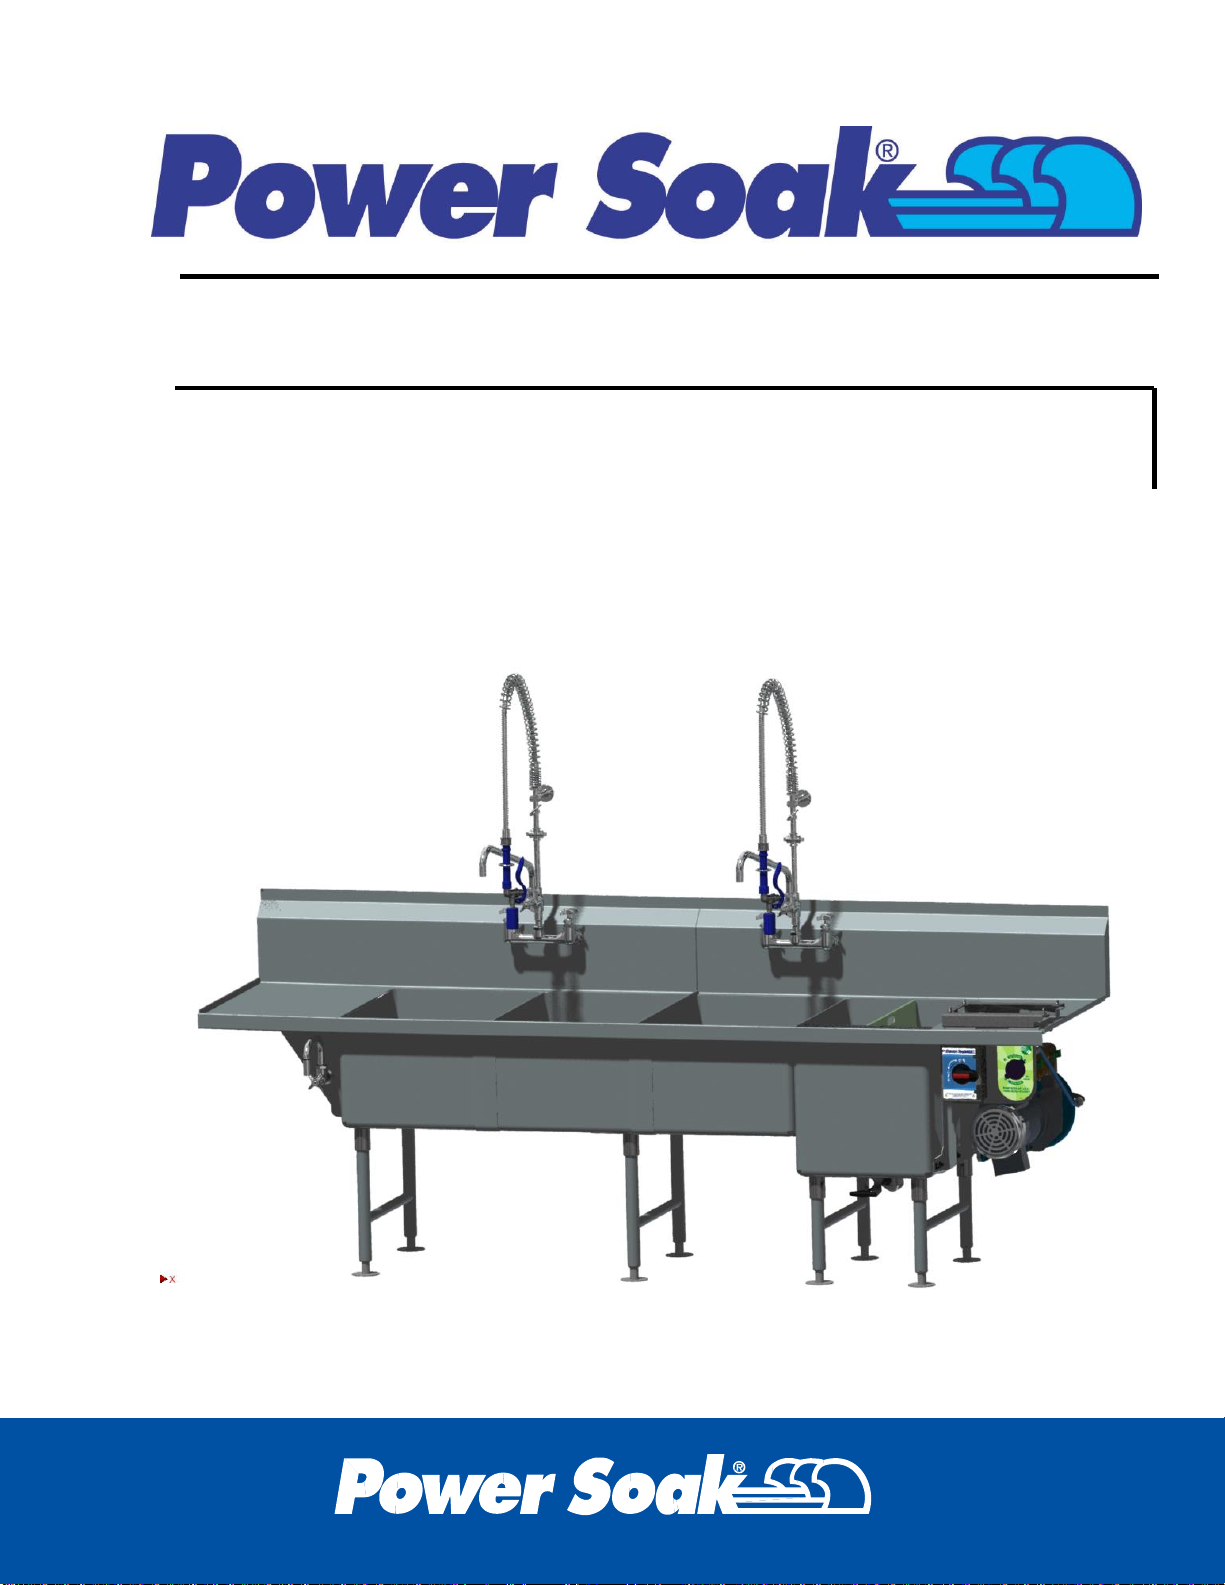
Product Introduction ....................................................2
Produce Washing Chemicals and Antimicrobials Error! Bookmark not
defined.
Explanation of Warning Messages...Error! Bookmark
not defined.
Danger................................................. Error! Bookmark not defined.
Warning ............................................... Error! Bookmark not defined.
Chemical Hazard ................................. Error! Bookmark not defined.
Operating Instructions..................................................5
Preparing the Produce Soak .......................................6
Placing the Wash Components............ Error! Bookmark not defined.
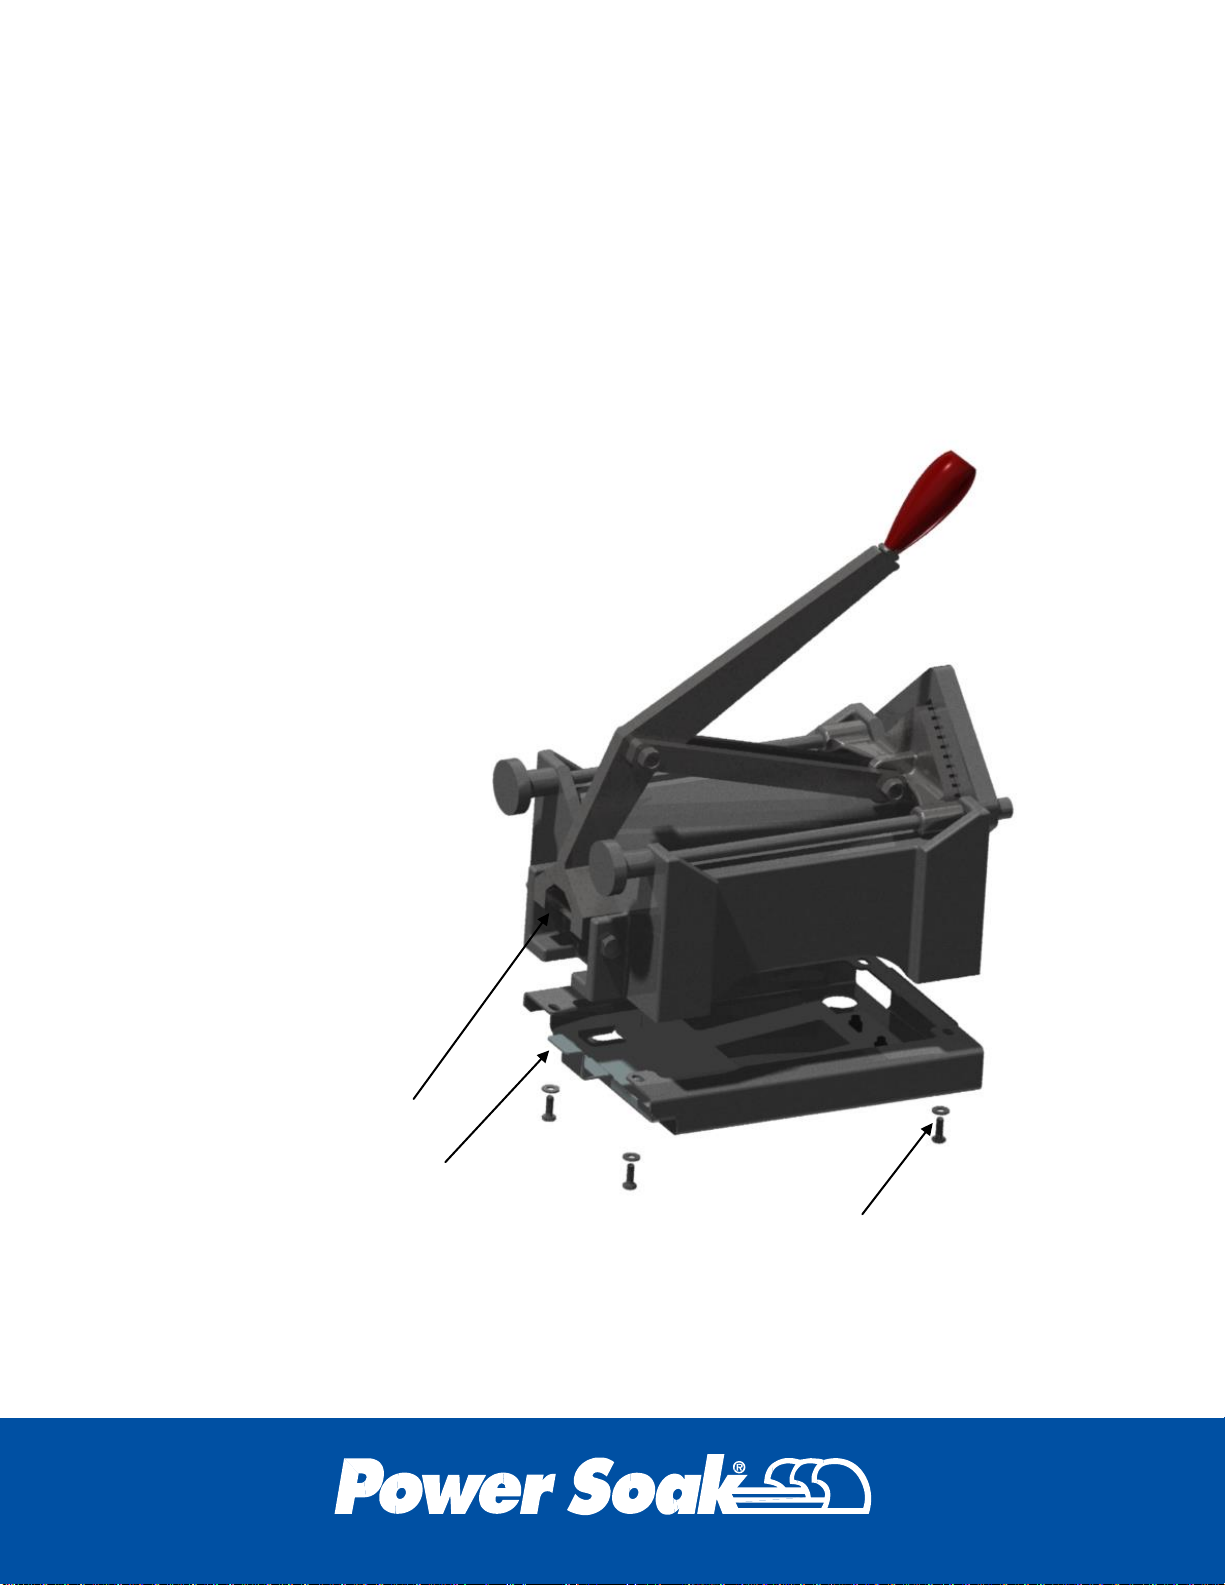
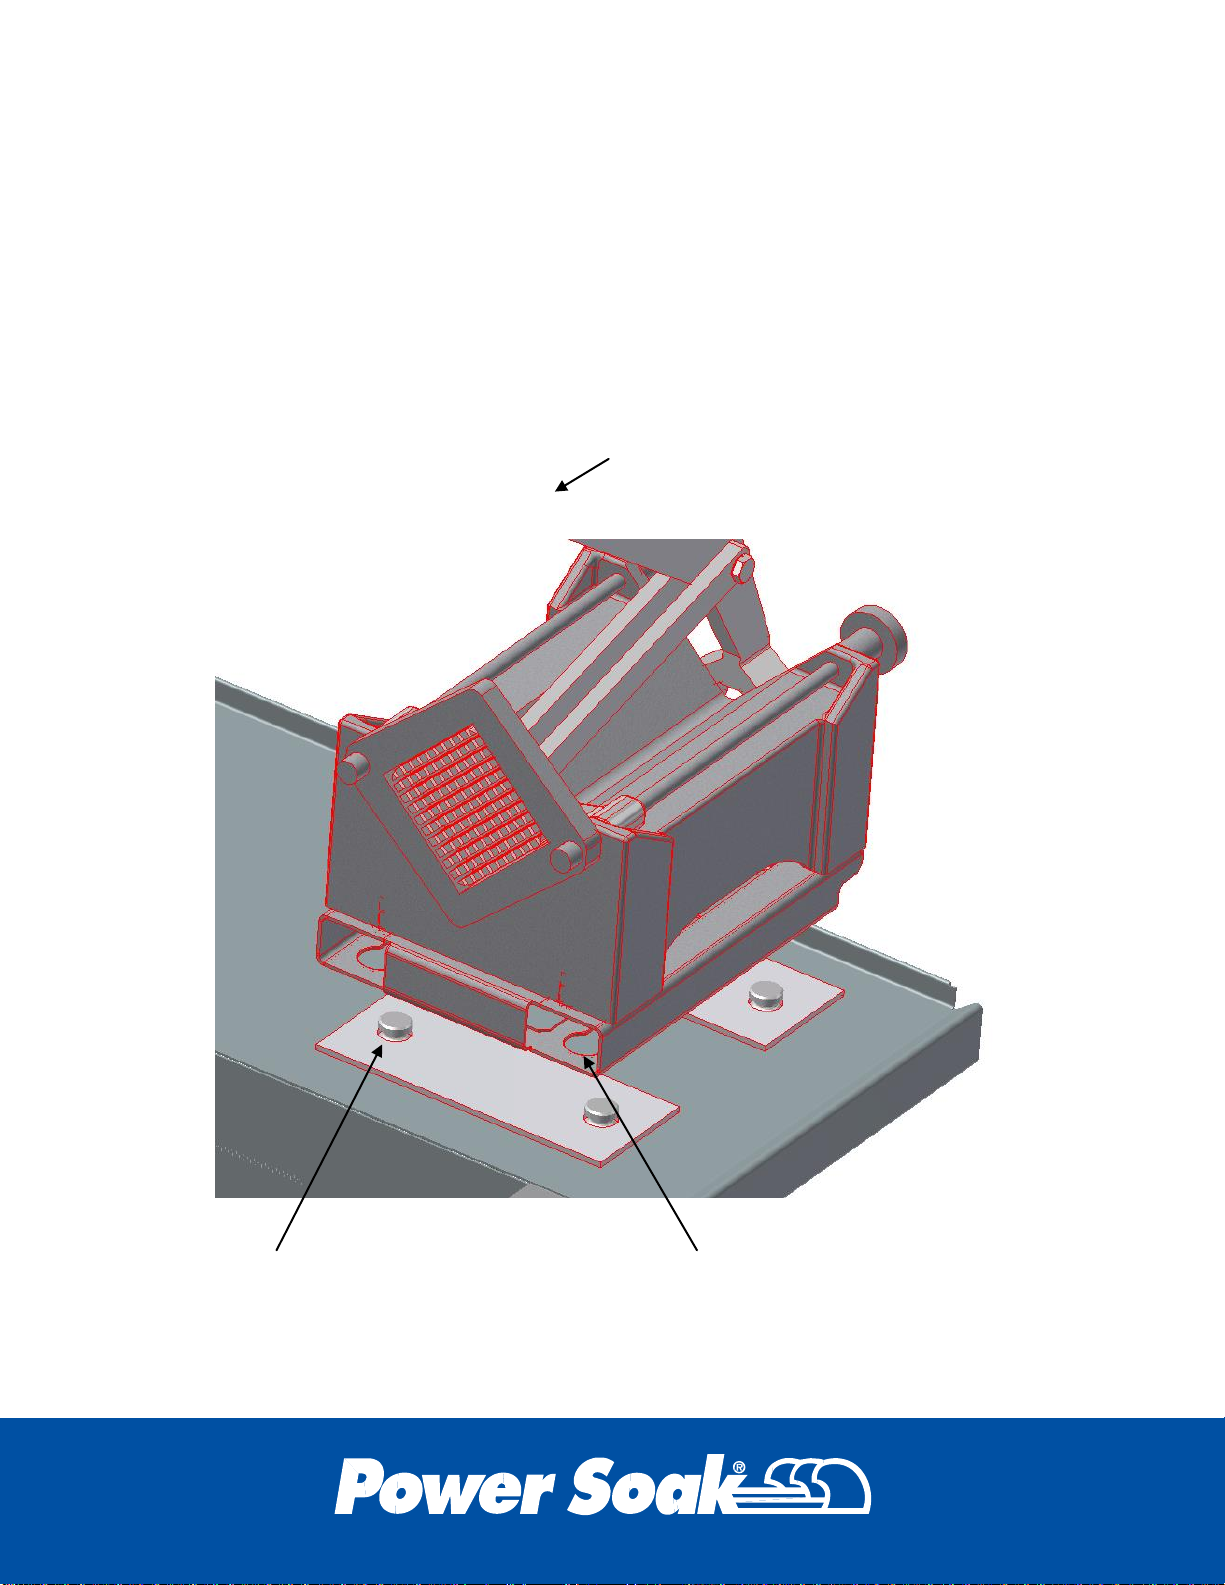
Rib sets............................................................................................7
Partitions.......................................... Error! Bookmark not defined.
Flow Guides..................................... Error! Bookmark not defined.
Filling the Produce Soak ........... Error! Bookmark not
defined.
Washing Tips .................................................................................19
Emptying the Produce Soak...... Error! Bookmark not
defined.
Preventive Maintenance ............................................23
Troubleshooting.........................................................25
Installation..................................................................29
Electrical Requirements.....................................................................31
Plumbing Requirements.....................................................................32

1
Introduction and Conventions
Produce Soak –Fry Wash

2
Product Introduction
Thank you for purchasing a Produce Soak potato fry washing system.
Your new Produce Soak washing system will provide years of dependable,
efficient and trouble-free service.
As a Produce Soak owner, you will benefit in numerous ways:
The Produce Soak washing operation will be more efficient.
The washing operation will remove starch from the surface and
improve the product quality.
The washing hours will decrease and your employee morale will
increase.
Water consumption will be reduced by more efficient washing
action.
Every system is manufactured to last, with only high-quality, heavy-duty, 14
gauge stainless steel used in its construction. All electrical components
used in a Produce Soak system are of the highest quality. The faucet and
drain are designed for quick filling and emptying of the system's sink.
At Power Soak Systems, we take pride in manufacturing the Produce Soak
and are committed to standing behind our customers and products 100%.
Should you ever need assistance, please contact us directly at the factory
by dialing 800-444-9624 or fax 816-761-0544.

3
Explanation of Warning Messages
Be sure to read, understand and follow all DANGER, WARNING, and
CAUTION messages located in this guide and on the equipment.
Personal Injury and Property Damage Hazard
Will result in serious injury or death.
Will cause extensive equipment damage.
Property Damage Hazard
Will result in property or equipment damage
Chemical Hazard
Will result in serious injury or death. Instructions, labels and
Material Safety Data Sheets (MSDSs) should be supplied with all
detergents and sanitizing chemicals. The manufacturers,
importers and distributors of the cleaning chemicals are
responsible for providing this information.
Personal Injury Hazard
Hazard from sharp objects, scalding, falling and/or drowning.
Will result in serious injury or death.
Children must not be allowed to play in the sinks, on countertops or with the
controls of the Power Soak equipment. Cleaning or use of this machine must not
be done by children without super vision. This machine can be used by children
aged 8 years or above and by persons with reduced physical, sensory or mental
capabilities or lack of experience and knowledge if they are given supervision
and instruction concerning use of the appliance in a safe way and understand
the hazards involved. There is a potential of drowning for any person whose
head becomes submerged in the fluid contained in the sinks along with other
hazards identified in this manual.

4
- -This page left intentionally blank - -

5
Operating Instructions
Produce Soak –Fry Wash

6
Preparing the Produce Soak
Installing the Potato Cutter
The potato cutter is not manufactured by Power Soak and must be
purchased from another source. Power Soak does provide a mounting
bracket for attaching the potato cutter to the drain board of the Produce
Soak. A bolt kit is provided with the mounting bracket that includes the
mounting bolts, washers and LOCTITE thread locker for preventing the
bolts from loosening after installation.
Position the potato cutter
on the mounting bracket
with the base of the handle
of the cutter oriented over
the release tab on the
mounting bracket.
Clean the threads of the
screws and coat the
threads with the LOCTITE.
Move quickly before the
LOCTITE dries and insert
the screw through the
washer, the hole in the
mounting bracket and
screw it into the base of
the potato cutter. Repeat
this on all four corners of
the potato cutter and
mounting bracket in order
to secure the cutter to the
bracket.
Release Tab
Base of the Handle
Clean the bolt threads and then coat with LOCTITE

7
The potato cutter assembly is attached to the drain board with the
mounting bracket using the studs that are located on the wash tank drain
board. Place the rubber mounting pads over the studs, one on the front
studs and one on the rear studs. Position the mounting bracket and cutter
so that the large opening on the bottom of the bracket aligns with the head
of the stud and lower the bracket over the stud, pressing the cutter and
bracket onto the rubber pads. Push the cutter forward until the latch drops
over the head of the stud, securing the mounting bracket in position on the
drain board.
Place the rubber pad over the
studs on the drain board
Align the large opening over the
stud and lower the cutter mount
onto the rubber pads
When the cutter mount is resting on
the pads, push it forward toward the
wash sink to latch it in place

8
To remove the cutter, lift on the tab at the rear of the cutter and slide the
mounting bracket away from the wash sink
Lift on the tab and slide the cutter away from the wash sink
to remove it from the drain board.

9
Installing the Components in the Wash Sink
Before installing the components in the wash sink, inspect the sink, the
channel in the back wall and all of the components to be sure they are
clean and free of debris.
Installing the Intake Screen
The intake screen is removable for cleaning. It must be installed before
operation of the fry wash in order to prevent the fries from entering the
pump intake. Operating the machine without the intake screen will cause
the pump to become clogged with fries.
The intake screen has a tab that prevents the screen from fitting into the
wash sink in the wrong orientation. The tab must be inserted into the
intake opening in order to place the screen into its operating position.
Failure to install the intake screen will allow fries to enter the
pump intake and clog the fluid flow to the pump. This will
prevent the machine from operating properly and possible
require a service call to remove the clog.
Tab on the intake screen
must insert into the intake
opening.
Intake opening

10
Installing the Jet Channel
The jet channel must be installed before starting the wash pump. Insert the
end with the long flat section into the opening in the rear wall. Rotate the
jet channel into the opening and then slide so that the short flat section is
covered by the sheet metal of the back wall
STARTING THE WASH PUMP WITH OUT THE JET CHANNEL IN PLACE WILL
CAUSE WATER TO BE SPRAYED OUT OF THE WASH SINK WITH ENOUGH
VELOCITY TO WET THE FLOOR AND THE OPERATOR.
IMPORTANT
Insert the long flat end into
the opening of the back wall
The illustration shows a “Left Hand” machine, a “Right
Hand” machine will insert into the other end of the opening.
The illustration shows a “Left Hand” machine, a “Right
Hand” machine will insert into the opening on the opposite
side of the machine.
Rotate the screen into
position against the back wall
and resting on the bottom of
the sink.

11
Instructions for installing the jet channel are imprinted on the face of the jet
channel. These instructions outline the same procedure that is printed in
this section of the manual.
Installing the Rib Sets
Begin by placing a rear rib set against one of the rear corners of the sink.
Place the other rear rib sets against the back wall of the sink leaving a
finger-size gap between them.
Rotate the jet channel into
the opening.
Slide the jet channel until the
short flat section is tucked
behind the sheet metal.
Gap

12
Place the front rib sets against the front wall of the sink. Leave a finger-
size gap between the rib sets in order to insert the divider board between
the rib sets.
Divider Board
Insert the divider board into the gap between the front and rear pairs of rib
sets. The divider board will also slide through the slot in the center of the
jet channel. Make sure the divider board slides all the way down to touch
the bottom of the sink. It may be necessary to reach into the sink and
separate the rib sets as the divider board is lowered into position.
Gap
Divider board passes through
the slot in the jet channel and
between the metal ends on
the rib sets until it rests on
the bottom of the sink

13
Flow Guides
The flat perforated sheets of plastic are the flow guides that direct the
water flow in a circular motion around the interior of the sink. The circular
motion of the water moves the fries to clean the surface of the pieces. Lay
the flow guide on the rib set and slide it under the hooked ends of the
corner ribs.
Tilt the front rib set forward and slide the flow guide under the hooks of the
front rib set and then place the front rib set back into position making sure
that the flow guide stays under the hooks of the rib set.
Slide the notches of the flow
guide under the hooks on the
rib set.
Slide the flow guide under
the hooks on the rib set and
then place the rib set back
against the wall of the sink.

14
Wave Guide
The last step of the sink component installation is to place the wave guide
sheet metal on top of the front rib set. This piece is used to prevent the
fries from falling down between the flow guide and the front wall of the sink.
Slide the back surface along the front wall of the sink, between the front rib
set and the sheet metal wall of the sink. Make sure the flow guide tucks
inside of the flanges on the end of the wave guide. The wave guide will
rest on top of the front rib set.
The back face of the wave
guide slides between the
front rib set and the wall of
the sink. It will rest on top of
the front rib set.

15
Filling the Wash Sink
The amount of water that is run into the wash sink will be dependent on the
amount of potatoes that are placed in the sink. Start by filling the sink
approximately half full of water. Limit the volume of potatoes that will be
placed into both sections of the sink to 50 pounds or less. Separate the
batch of potatoes into two equal groups. Cut and place all the potatoes
from one group into one section of the sink. Cut and place all the potatoes
from the other group and place them in the other section of the sink. It is
very important to the operation of the machine that the two sections of the
sink contain approximately the same amount of potatoes. Fill the sink with
water until the water level is approximately two inches below the top of the
sink rim.
Fill the sink with potatoes
until the level is
approximately 2” below the
top edge of the sink
OVER FILLING THE SINK WILL CAUSE WATER AND POTATOES TO FLOW OUT
OF THE SINK WHEN THE PUMP IS STARTED. IT IS BEST TO UNDER FILL THE
SINK AND ADD MORE WATER IF THE POTATOES DO NOT ROTATE WITH THE
WATER FLOW. THE MAXIMUM LOAD FOR EACH SECTION OF THE SINK IS 25
POUNDS OF POTATOES.
IMPORTANT

16
Washing Sliced Potato Fries
The wash sink must be filled prior to starting the wash pump motor. The
motor is operated directly by an “ON – OFF” selector switch. Turn the
switch to the ON position to start the pump.
When the pump is running, the water will become turbulent, and begin
rotating the potatoes from front to back. If the wash sink is heavily loaded
with potatoes, it may be necessary to give the potatoes a push to get the
rotation started.
When the pump is
operating, the fries should
circulate from front to back
in the wash sink. It may be
necessary to insert a hand
deep into the front of the
sink, lift and push the fries
to start the circulation.

17
The fries should be allowed to rotate in the wash sink for a time that is determined
by the management of the store (usually 3 to 5 minutes). At the end of the rotation
period, the fries can be removed from the wash water with the removal basket.
With the wash pump operating, insert the open end of the basket into the flow of
circulating fries. As the basket is rotated into position the fries will begin to fill the
basket.
When only a small volume of fries are remaining in the wash sink, let the basket
support pins rest on the sink and divider board to suspend the basket in the flowing
water. The circulating water will move the remaining fries into the basket.
Observe safe lifting procedures by not overloading the basket.
An overloaded basket will be heavy and may cause an injury
from trying to lift too much weight.
Do not place knives or other sharp objects in the
Produce Soak. Allowing knives or other sharp objects
to tumble freely in the Produce Soak tank may cause
damage to the equipment and bodily injury to the
user.
The fries can be scooped from
the flowing water by inserting
the open end of the basket
toward the rear of the wash
sink and moving it forward.
The water flow will push the
fries into the basket. Lift the
basket out when it is filled and
repeat until all the fries have
been removed from the wash
sink.

18
When all of the fries have been removed from the wash sink, turn the wash
pump motor off by rotating the control handle to the “OFF” position.
Drain Valve
The drain valve handle rotates ¼ turn to open or close the drain valve.
Counterclockwise rotation will open the drain valve; clockwise rotation will
close the valve.
When the drain valve handle is
horizontal the valve is close.
When the drain valve handle is
vertical the valve is open.
Table of contents
Other Power Soak Washer manuals