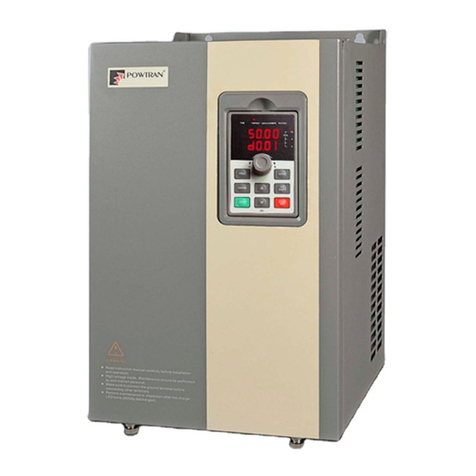
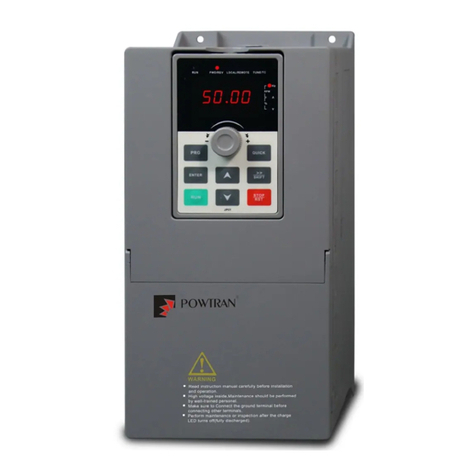
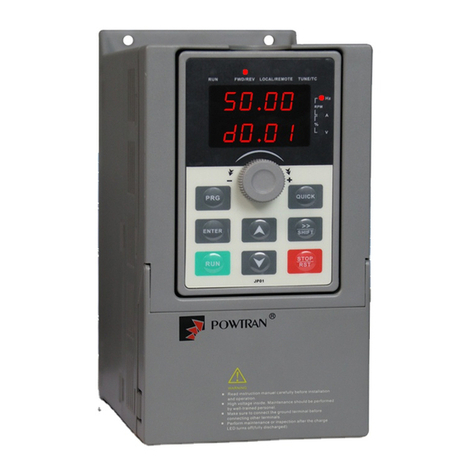
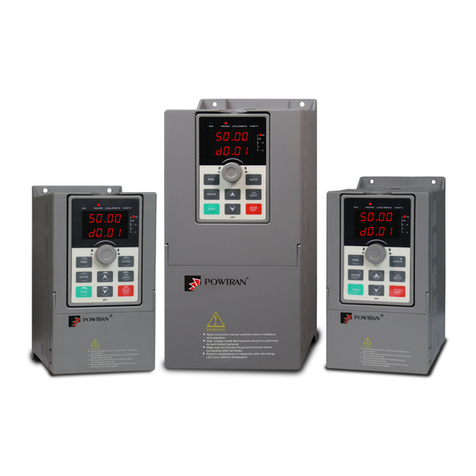
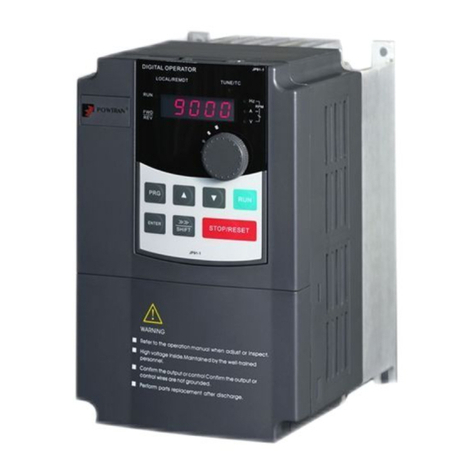
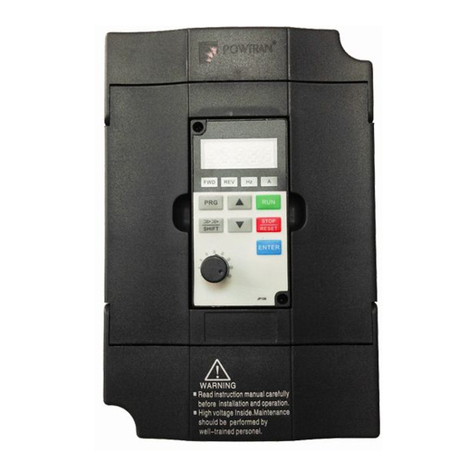
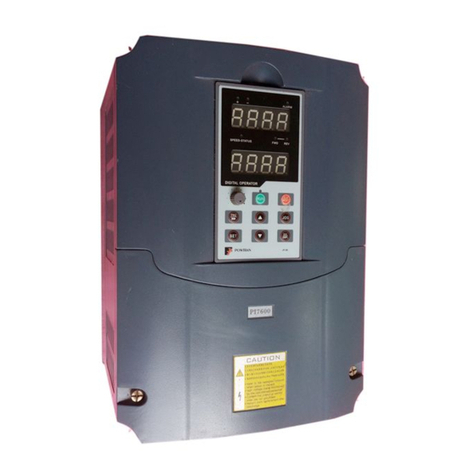
Powtran PI9000 series User manual

1
Foreword
Thank you for choosing POWTRAN PI9000 Series Frequency Inverter. This product
made by POWTRAN is based on years of experience in professional production and
sale, and designed for variety of industrial machinery, fan and water pump drive unit
and IF heavy-duty grinding unit.
This manual provides user the relevant precautions on installation, operational
parameter setting, abnormal diagnosis, routine maintenance and safe use. In order to
ensure correct installation and operation of the frequency converter, please carefully
read this manual before installing it.
For any problem when using this product, please contact your local dealer authorized by
this company or directly contact this company, our professionals are happy to serve you.
The end-users should hold this manual, and keep it well for future maintenance & care,
and other application occasions. For any problem within the warranty period, please fill
out the warranty card and fax it to the our authorized dealer.
The contents of this manual are subject to change without prior notice. To obtain the
latest information, please visit our website.
For more product information, please visit: http:// www.powtran.com。
POWTRAN
August, 2014

2
Table of contents
Foreword ............................................................................................................... 1
Table of contents.................................................................................................... 2
Chapter 1.Inspection and safety precautions ............................................................ 1
1-1. Inspection after unpacking............................................................................... 1
1-1-1. Instructions on nameplate.............................................................................1
1-1-2. Model designation........................................................................................ 1
1-2. Safety precautions...........................................................................................2
1-3. Precautions...................................................................................................... 4
1-4. Scope of applications....................................................................................... 6
Chapter 2 Standard specifications ........................................................................... 7
2-1. Technical specifications...................................................................................7
2-2. Standard specifications..................................................................................14
2-3. Dimensions................................................................................................... 18
2-3-1. Appearance and installation holes size......................................................... 18
2-3-2. PI9100 series.............................................................................................. 18
2-3-3. PI9200 series.............................................................................................. 21
2-3-4. PI9300 series.............................................................................................. 23
2-3-5. PI9400 series.............................................................................................. 24
2-3-6. Keyboard size diagram...............................................................................25
Chapter 3 Keyboard.............................................................................................. 27
3-1. Keyboard description..................................................................................... 27
3-2. Keyboard Indicators...................................................................................... 27
3-3. Description of operation panel keys................................................................28
3-4. Examples of parameter settings......................................................................28
3-4-1. Instructions on viewing and modifying function code.................................. 28
3-4-2. Theway to read parameters in various status............................................... 30
3-4-3. Password settings.......................................................................................30
3-4-4. Motor parameter auto tunning..................................................................... 30
Chapter 4 Commissioning.....................................................................................32
Chapter 5 Function parameter...............................................................................34
5-1. Menu grouping..............................................................................................34
5-1-1. d0 Group - Monitoring function group ........................................................ 35

3
5-1-2. F0 Group - Basic function group.................................................................38
5-1-3. F1 Gruop - Input terminals group................................................................41
5-1-4. F2 Group - Output terminals group .............................................................45
5-1-5. F3 Group - Start and stop control group.......................................................47
5-1-6. F4 Group - V/F control parameters..............................................................49
5-1-7. F5 Group - Vector control parameters..........................................................50
5-1-8. F6 Group - Keyboard and display................................................................51
5-1-9. F7 Group - Auxiliary function group...........................................................53
5-1-10. F8 Group - Fault and protection ................................................................57
5-1-11. F9 Group - Communication parameter.......................................................63
5-1-12. FA Group - Torque control parameters.......................................................64
5-1-13. Fb Group - Control optimization parameters..............................................65
5-1-14. FC Group - Extended parameter group ......................................................66
5-1-15. E0 Group - Wobbulate, fixed-length and counting......................................66
5-1-16. E1 Group - Multi-stage command, simple PLC..........................................67
5-1-17. E2 Group - PID function...........................................................................71
5-1-18. E3 Group –Virtual DI、Virtual DO..........................................................73
5-1-19. b0 Group - Motor parameters....................................................................76
5-1-20. y0 Group - Function code management .....................................................78
5-1-21. y1 Group - Fault query..............................................................................80
5-2. Function parameter description ......................................................................84
5-2-1. Basic monitoring parameters: d0.00-d0.41...................................................84
5-2-2. Basic function group: F0.00-F0.27..............................................................87
5-2-3. Input terminals: F1.00-F1.46.......................................................................97
5-2-4. Output terminals: F2.00-F2.19...................................................................111
5-2-5. Start and stop control: F3.00-F3.15........................................................... 116
5-2-6. V/F control parameters: F4.00-F4.14.........................................................120
5-2-7. Vector control parameters: F5.00-F5.15..................................................... 124
5-2-8. Keyboard and display: F6.00-F6.19........................................................... 126
5-2-9. Auxiliary function: F7.00-F7.54................................................................131
5-2-10. Fault and protection:F8.00-F8.35 ............................................................140
5-2-11. Communications parameters: F9.00-F9.07............................................... 148
5-2-12. Torque control parameters:FA.00-FA.07.................................................. 150
5-2-13. Control optimization parameters: Fb.00-Fb.09.........................................151

4
5-2-14. Extended parameter:FC.00-FC.02........................................................... 153
5-2-15. Wobbulate, fixed-length and counting:E0.00-E0.11 ................................. 154
5-2-16. Multi-stage command, simple PLC: E1.00-E1.51 .................................... 156
5-2-17. PID function: E2.00-E2.27...................................................................... 160
5-2-18. Virtual DI、Virtual DO:E3.00-E3.21 ...................................................... 165
5-2-19. Motor parameters: b0.00-b0.35............................................................... 170
5-2-20. Function code management:y0.00-y0.04 ................................................. 174
5-2-21. Fault query:y1.00-y1.30.......................................................................... 177
Chapter 6 EMC (Electromagnetic Compatibility) ................................................ 182
6-1. Definition.................................................................................................... 182
6-2. EMC standard............................................................................................. 182
6-3. EMC directive............................................................................................. 182
6-3-1. Harmonic effect........................................................................................ 182
6-3-2. Electromagnetic interference and installation precautions.......................... 182
6-3-3. Remedies for the interferences from the surrounding electromagnetic
equipments to the inverter................................................................................... 183
6-3-4. Remedies for the interferences from the inverter to the surrounding
electromagnetic equipments................................................................................ 183
6-3-5. Remedies for leakage current.................................................................... 183
6-3-6. Precautions on installing EMC input filter at the input end of power supply 184
Chapter 7 Troubleshooting.................................................................................. 185
7.1 Fault alarm and countermeasures................................................................... 185
Chapter 8 Installation and spare circuit................................................................ 191
8-1. Operating environment................................................................................ 191
8-2. Installation direction and space.................................................................... 191
8-3. Wiring diagram ........................................................................................... 191
8-3-1. Wiring diagram(< 11kW).......................................................................... 192
8-3-2. Wiring diagram(11kW to 15kW)............................................................... 193
8-3-3. Wiring diagram(18.5kW to 355kW).......................................................... 194
8-4. Main circuit terminal (G type)...................................................................... 195
8-4-1. PI9000 main circuit terminal..................................................................... 195
8-4-2. Function description of main circuit terminal............................................. 196
8-5. Control circuit terminals.............................................................................. 196
8-5-1. Description of control circuit terminals..................................................... 196
8-5-2. Arrangement of control circuit terminals................................................... 198

5
8-6. Wiring Precautions:..................................................................................... 198
8-7. Spare Circuit............................................................................................... 199
Chapter 9 Maintenance and Repair...................................................................... 200
9-1. Inspection and Maintenance.........................................................................200
9-2. Parts for regular replacement........................................................................201
9-3. Storage........................................................................................................ 201
9-4. Capacitor..................................................................................................... 201
9-4-1. Capacitor rebuilt....................................................................................... 201
9-5. Measuring and readings............................................................................... 202
Chapter 10 Options............................................................................................. 203
10-1. Options ..................................................................................................... 204
10-2. Molded case circuit breaker (MCCB) or earth leakage circuit breaker (ELCB)204
10-3. AC input reactor ........................................................................................ 204
10-4. Noise filter ................................................................................................206
10-5. Contactor...................................................................................................206
10-6. Braking unit and braking resistor................................................................ 206
10-7. Output EMI filter.......................................................................................207
10-8. AC output reactor ......................................................................................207
10-9. Input filter................................................................................................. 207
10-9-1. Input filter(380V)................................................................................... 207
10-9-2. Input filter(690V)................................................................................... 208
10-10. Output filter............................................................................................. 209
10-10-1. Output filter(380v)................................................................................209
10-10-2. Output filter(690v)................................................................................209
10-11. Input AC choke........................................................................................ 210
10-11-1. Input AC choke(380V)..........................................................................210
10-11-2. Input AC choke(690V)..........................................................................213
10-12. Output AC choke..................................................................................... 214
10-12-1. OutputAC choke(380V) .......................................................................214
10-12-2. OutputAC choke(690V) .......................................................................216
10-13. DC choke................................................................................................ 218
10-14. Specifications of circuit breakers, cables and contactors............................ 220
Chapter 11 Warranty........................................................................................... 222
Appendix I RS485 Communication protocol ....................................................... 223

6
I-1 Communication protocol............................................................................ 223
I-2 Check mode:.............................................................................................. 227
I-3 Definition of communication parameter address............................................. 229
Appendix II How to use universal encoder expansion card................................... 235
II-1 Overview..................................................................................................... 235
II-2 Description of mechanical installation and control terminals function............ 235
Appendix ⅢDescription on proportion linkage function ................................... 239
Appendix IV CAN bus communication card use description................................ 242
IV-1.Overview ................................................................................................... 242
IV-2.Mechanical installation and terminal functions ............................................ 242
IV-2-1 Mechanical installation modes:................................................................ 242
IV-2-2 Terminal function .................................................................................... 242
Appendix V Profibus-DP communication card use description............................. 244
V-1.Outline........................................................................................................ 244
V-2.Terminal function......................................................................................... 244
V-2-1.DIP switch description.............................................................................. 244
V-2-2.Terminal Function..................................................................................... 244
V-2-3.LED Indicator Functions........................................................................... 245
Warranty Card................................................................................................- 247 -

Chapter 1.Inspection and Safety Precautions
1
第
十
章
Chapter 1.Inspection and safety precautions
POWTRAN frequency inverters have been tested and inspected before leaving
factory. After purchasing, please check if its package is damaged due to careless
transportation, and if the specifications and model of the product are consistent with
your order requirements. For any problem, please contact your local authorized
POWTRAN dealer or directly contact this company.
1-1.Inspection after unpacking
※Check if that packing container contains this unit, one manual and one warranty
card.
※Check the nameplate on the side of the frequency inverter to ensure that the
product you have received is right the one you ordered.
1-1-1.Instructions on nameplate
POWER
INPUT
OUTPUT
DALIAN POWTRAN TECHNOLOGY CO.,LTD.
MODEL
7.5kW
AC 3PH 380V 50Hz/60Hz ±10%
AC 0 17A 0 400Hz3PH 380V
PI9100 7R5G3
ZPB1A0100001
1-1-2.Model designation
Type Code:
A:Single IGBT
B:Integrated intelligent
power module (omitted)
Powtran Inverter
Rated output capacity (●●●)
Example: 7R5: 7.5kW 132:132 kW
Function code (□)
General Type F: Light load
G: Standard load
Series Code
91:PI9100 series 93:PI9300 series
92:PI9200 series 94:PI9400 series Input Voltage Level
1: Single-phase 220V 2:Three-phase 220V
3:Three-phase 380V 4:Three-phase 480V
6: Three-phase 690V
Class Code:
0: Standard configuration
1: Special 1 configuration
2: Special 2 configuration
Version Number
0: Default (omitted)
1: Version upgrade
Derivative Code
3:With MCU keyboard

Chapter 1.Inspection and Safety Precautions
2
第
十
章
1-2.Safety precautions
Safetyprecautions in this manual are divided into the following two categories:
Danger: thedangers caused by failure to perform required operation, may result in
serious injury or even death;
Caution:the dangers caused by failure to perform required operation, may
result in moderate injury or minor injury, and equipment damage;
Process
Type
Explanation
Before
installation
Danger
● When unpacking, if control system with water, parts
missed or component damaged are found, do not
install!
● If packing list does not match the real name, do not
install!
● Gently carry with care, otherwise there is the risk of
damage to equipment!
● Please do not use the damaged driver or the frequency
inverter with missed pieces, otherwise there is the risk
of injury!
● Do not use your hand to touch the control system
components, otherwise there is the risk of electrostatic
damage!
When
installing
Danger
● Please install the unit on the metal or flame retardant
objects; Away from combustible material. Failure to do
so may cause a fire!
● Never twist the mounting bolts of the equipment
components, especially the bolt with the red mark!
Note
● Do not let the lead wires or screws fall into the driver.
Otherwise which may cause damage to the driver!
● Keep the driver installed in the place where less
vibration, avoid direct sunlight.
● When two or more converters are installed in a
cabinet, please pay attention to the installation location,
ensure the good heat dissipation effect.
When
wiring
Danger
● Must comply with this manual's guidance, any
construction shall be performed by a professional
electrician, otherwise there would be the unexpected
risk !
● A circuit breaker must be set between the inverter and
the power supply to separate them, otherwise it may
cause a fire!
● Verify if power is a zero-energy status before wiring,
otherwise there is a risk of electric shock!
● The inverter shall be grounded correctly according to
standard specifications, otherwise there is a danger of
electrical shock!
● Ensure that the distribution line meets the regional
safety standards of EMC requirements. The diameter of

Chapter 1.Inspection and Safety Precautions
3
used wire shall refer to the recommendations of this
manual. Otherwise it may cause an accident!
● Never directly connect braking resistor to the DC bus
P(+) and P(-) terminals. Otherwise it may cause a fire!
● Encoder must use the shielded wire, and the shielding
layer must ensure the single-ended grounded!
Before
energizing
Note
● Please confirm whether the input power voltage is
same as the inverter rated voltage; wiring positions of
power input terminals(R, S, T) and output terminals(U,
V, W) are correct or not; and note that if there is a short
circuit in the peripheral circuit connected to driver, if
the connected lines are tight, otherwise it may cause
damage to the driver!
● Do not need to perform withstand voltage test for any
part of the inverter, this product has been tested before
leaving factory. Otherwise it may cause an accident!
Danger
● The inverter's cover plate must be closed before
power on. Otherwise it may cause an electric shock!
● Wiring of all external accessories must comply with
the guidance of this manual, please correctly wiring in
accordance with the circuit connection methods
described in this manual. Otherwise it may cause an
accident!
After
energizing
Danger
● Do not open cover plate after energizing. Otherwise
there is a risk of electric shock!
● Do not touch the driver and peripheral circuits with
wet hands. Otherwise there is a risk of electric shock!
● Do not touch any input and output terminals of the
inverter. Otherwise there is a risk of electric shock!
● The inverter automatically perform the safety testing
for the external strong electrical circuit in the early
stages of energizing, therefore never touch the driver
terminals(U, V, W) or motor terminals, otherwise there
is a risk of electric shock!
● If you need to identify the parameters, please pay
attention to the danger of injury during motor rotation.
Otherwise it may cause an accident!
● Please do not change the inverter manufacturer
parameters. Otherwise it may cause damage to this unit!
During
operation
Danger
● Do not touch the cooling fan and the discharge
resistor to feel the temperature. Otherwise it may cause
burns!
● Non-professional personnel is not allowed to detect
signal when operating. Doing so may cause personal
injury or damage to this unit!
Note
● When the inverter is operating, you should avoid that
objects fall into this unit.Otherwise cause damage to this
unit!

Chapter 1.Inspection and Safety Precautions
4
● Do not start/stop the driver by switching on/off
contactor. Otherwise cause damage to thisunit!
When
maintaining
Danger
● Do not perform repairs and maintenance for the live
electrical equipment. Otherwise there is a risk of
electric shock!
● The repairs and maintenance task can be performed
only when the inverter bus voltage is lower than
36V,Otherwise, the residual charge from capacitor would
cause personal injury!
● Non-well-trained professional personnel is not
allowed to perform repairs and maintenance of inverter.
Doing this may cause personal injury or damage to this
unit!
● After replacing the inverter, parameter settings must
be redone, all pluggable plugs can be operated only in
the case of powering off!
1-3.Precautions
N
o.
Type
Explanation
1
Motor
insulation
inspection
Please perform motor insulation inspection for the first time use,
re-use after leaving unused for a long time as well as regular
check, in order to prevent damage to the inverter because of the
motor's winding insulation failure. Wiring between motor and
inverter shall be disconnected, it is recommended that the 500V
voltage type megger should be adopted and insulation resistance
shall be not less than 5MΩ.
2
Motor thermal
protection
If the rated capacity of the selected motor does not match the
inverter, especially when the inverter rated power is greater than
the motor rated power, be sure to adjust the motor protection
parameter values inside inverter or install thermal relay in the
front of motor for motor protection.
3
Run over
power
frequency
The inverter output frequency rang is 0Hz to 3200Hz(Maz.vector
control only supports 300Hz). If the user is required to run at
50Hz or more, please consider the endurance of your mechanical
devices.
4
Vibrations of
mechanical
device
Inverter output frequency may be encountered mechanical
resonance point of the load device, you can set jump frequency
parameter inside inverter to avoid the case.
5
Motor heat
and noise
The inverter output voltage is PWM wave that contains a certain
amount of harmonics, so the temperature rise, noise and vibration
of motor show a slight higher than frequency power frequency
operation.
6
Output side
with
piezoresistor
or capacitor
for improving
The inverter output is PWM wave, if the piezoresistor for
lightning protection or the capacitor for improving power factor
is installed in the output side, which easily cause the inverter
instantaneous overcurrent or even cause damage to the inverter.
Please do not use.

Chapter 1.Inspection and Safety Precautions
5
power factor
7
Contactor or
switch used in
the inverter
input/output
terminals
If contactor is installed between power supply and inverter, the
contactor is not allowed to start/stop the inverter. Necessarily
need to use the contactor to control the inverter start/stop, the
interval should not be less than one hour. Frequent charging and
discharging may reduce the service life of the inverter capacitor.
If the contactor or switch is equipped between output terminals
and motor, the inverter should be turned on/off without output
status, otherwise which easily lead to damage to the inverter
module.
8
Use other than
the rated
voltage
PI series inverter is not suitable for use beyond the allowable
operating voltage described in this manual, which easily cause
damage to the parts inside inverter. If necessary, please use the
corresponding transformer to change voltage.
9
Never change
3-phase input
to 2-phase
input
Never change PI series 3-phase inverter to 2-phase one for
application. Otherwise it will lead to malfunction or damage to
the inverter.
10
Lightning
surge
protection
The series inverter is equipped with lightning overcurrent
protection device, so it has the ability of self-protection to
lightning induction. For the area where lightning is frequent, user
should also install the extra protection in the front of the inverter.
11
High altitude
and derating
application
When the inverter is used in areas over 1000m altitude, it is
required to reduce frequency because the thin air will decrease
the cooling effect of inverter. Please consult our technician for
details on the application.
12
Special use
If the user need to use methods other than the suggested wiring
diagram provided in this manual, such as common DC bus,
please consult our technician.
13
Precautions
for scrap
disposal of the
inverter
When electrolytic capacitors on the main circuit and printed circuit
board as well as plastic parts are burned, it may produce toxic
gases.Please disposing as industrial waste.
14
Adaptive
motor
1) Standard adaptive motor shall be four-pole asynchronous
squirrel-cage induction motor or permanent magnet synchronous
motor. Apart from the said motors, please select the inverter
according to the motor rated current.
2) The cooling fan and the rotor shaft for non-inverter motor are
coaxially connected, the fan cooling effect is reduced when the
rotational speed is reduced, therefore, when the motor works in
overheating occasions, a strong exhaust fan should be retrofitted
or replace non-inverter motor with the inverter motor.
3) The inverter has built-in the adaptive motor standard
parameters, according to the actual situation, please identify
motor parameters or accordingly modify the default values to try
to meet the actual value, otherwise it will operation affect and
protection performance;
4) When short-circuit of cable or motor internal will activate the

Chapter 1.Inspection and Safety Precautions
6
inverter alarm, even bombing. Therefore, firstly perform
insulation short-circuit test for the initial installation of the motor
and cable, routine maintenance often also need to perform such
test. Note that the parts to be tested and the inverter shall be
disconnected completely when testing.
15
Others
1) Never connect the AC power to the inverter output
terminals(U, V, W).
2) Properly fix and lock the panel before powering on, so as to
avoid hurting the personal safety due to internal poor capacitors.
3) Never perform wiring, checking and other operations after
power is turned on.
4) Do not touch the internal circuit board and its components in
order to avoid the risk of electric shock after this unit is powered,
5) Do not touch internal circuit board and any parts after
powering off and within five minutes after keyboard indicator
lamp goes out, you must use the instrument to confirm that
internal capacitor has been discharged fully, otherwise there is a
danger of electric shock.
6) Body static electricity will seriously damage the internal MOS
field-effect transistors, etc., if there are not anti-static measures,
do not touch the printed circuit board and IGBT internal device
with hand, otherwise it may cause a malfunction.
7)The ground terminal of the inverter(E or ) shall be earthed
firmly according to the provisions of the National Electrical
Safety and other relevant standards. Do not shut down(power off)
by pulling switch, and only cut off the power until the motor
stopping operation.
8) It is required to add the optional input filter attachment so as to
meet CE standards
1-4.Scope of applications
※This inverter is suitable for three-phase AC asynchronous motor and permanent
magnet synchronous motor.
※This inverter can only be used in those occasions recognized by this company, an
unapproved use may result in fire, electric shock, explosion and other accidents.
※If the inverter is used in such equipments(e.g: equipments for lifting persons,
aviation systems, safety equipment, etc.) and its malfunction may result in
personal injury or even death. In this case, please consult the manufacturer for
your application.
Only the well-trained personnel can be allowed to operate this unit, please
carefully read the instre1tions on safety, installation, operation and
maintenance before use. The safe operation of this unit depends on proper
transport, installation, operation and maintenance!

Chapter 2 Standard Specifications
7
第
十
章
Chapter 2 Standard specifications
2-1.Technical specifications
Inverter
model
Input
voltage
Rated
output
power(k
W)
Rated input
current(A)
Rated
output
current(
A)
Adaptive
motor
Base No.
PI9100-0R4G1
1-phase
220V
±1 0%
0.4
5.4
2.5
0.4
9S2
PI9100-0R7G1
0.75
8.2
4
0.75
9S2
PI9100-1R5G1
1.5
14
7
1.5
9S2
PI9100-2R2G1
2.2
23
10
2.2
9S3
PI9100-004G1
4.0
35
16
4.0
9S4
PI9200-5R5G1
5.5
50
25
5.5
9L1
PI9100-0R4G2
3-phase
220V
±1 0%
0.4
4.1
2.5
0.4
9S2
PI9100-0R7G2
0.75
5.3
4
0.75
9S2
PI9100-1R5G2
1.5
8.0
7
1.5
9S2
PI9100-2R2G2
2.2
11.8
10
2.2
9S3
PI9100-004G2
4.0
18.1
16
4.0
9S4
PI9200-5R5G2
5.5
28
25
5.5
9L1
PI9200-7R5G2
7.5
37.1
32
7.5
9L1
PI9200-011G2
11
49.8
45
11
9L2
PI9200-015G2
15.0
65.4
60
15.0
9L3
PI9200-018G2
18.5
81.6
75
18.5
9L3
PI9200-022G2
22.0
97.7
90
22.0
9L4
PI9200-030G2
30.0
122.1
110
30.0
9L4
PI9200-037G2
37.0
157.4
152
37.0
9L4
PI9200-045G2
45.0
185.3
176
45.0
9L5
PI9200-055G2
55.0
214
210
55.0
9L5
PI9200-075G2
75
307
304
75
9L6
PI9100-0R7G3
3-phase
380V
±1 0%
0.75
4.3
2.5
0.75
9S2
PI9100-1R5G3
1.5
5.0
3.8
1.5
9S2
PI9100-2R2G3
2.2
5.8
5.1
2.2
9S2
PI9100-004G3
4.0
10.5
9
4.0
9S3

Chapter 2 Standard Specifications
8
Inverter
model
Input
voltage
Rated
output
power(k
W)
Rated input
current(A)
Rated
output
current(
A)
Adaptive
motor
Base No.
PI9100-5R5G3
5.5
14.6
13
5.5
9S3
PI9100-7R5G3/
PI9100-011F3
7.5/11
20.5/26
17/25
7.5/11
9S4/9S4
PI9200-011G3/
PI9200-011F3/
PI9200-015F3
11/11/15
26/26/35
25/25/32
11/11/15
9L1/9L1/9
L1
PI9200-015G3/
PI9200-018F3
15/18.5
35/38.5
32/37
15/18.5
9L1/9L1
PI9200-018G3/
PI9200-022F3
18.5/22
38.5/46.5
37/45
18.5/22
9L2/9L2
PI9200-022G3/
PI9200-030F3
22/30
46.5/62
45/60
22/30
9L2/9L2
PI9200-030G3/
PI9200-037F3
30/37
62/76
60/75
30/37
9L3/9L3
PI9200-037G3/
PI9200-045F3
37/45
76/91
75/90
37/45
9L3/9L3
PI9200-045G3/
PI9200-055F3
45/55
91/112
90/110
45/55
9L4/9L4
PI9400-045G3/
PI9400-055F3
45/55
91/112
90/110
45/55
9P4/9P4
PI9200-055G3/
PI9200-075F3
55/75
112/157
110/150
55/75
9L4/9L4
PI9400-055G3/
PI9400-075F3
55/75
112/157
110/150
55/75
9P4/9P4
PI9200-075G3/
PI9200-093F3
75/93
157/180
150/176
75/93
9L4/9L4
PI9400-075G3/
PI9400-093F3
75/93
157/180
150/176
75/93
9P5/9P5
PI9200-093G3/
PI9200-110F3
93/110
180/214
176/210
93/110
9L5/9L5
PI9400-093G3/
PI9400-110F3
93/110
180/214
176/210
93/110
9P5/9P5
PI9200-110G3/
PI9200-132F3
110/132
214/256
210/253
110/132
9L5/9L5
PI9400-110G3/
PI9400-132F3
110/132
214/256
210/253
110/132
9P6/9P6
PI9200-132G3/
PI9200-160F3
132/160
256/307
253/304
132/160
9L6/9L6
PI9400-132G3/
PI9400-160F3
132/160
256/307
253/304
132/160
9P6/9P6
PI9200-160G3/
PI9200-187F3
160/187
307/345
304/340
160/187
9L6/9L6

Chapter 2 Standard Specification
9
Inverter
model
Input
voltage
Rated
output
power(k
W)
Rated input
current(A)
Rated
output
current(
A)
Adaptive
motor
Base No.
PI9400-160G3/
PI9400-187F3
160/187
307/345
304/340
160/187
9P6/9P6
PI9300-187G3/
PI9300-200F3
187/200
345/385
340/380
187/200
9C1/9C1
PI9300-187G3/
PI9300-200F3
187/200
345/385
340/380
187/200
9C2/9C2
PI9300-200G3/
PI9300-220F3
200/220
385/430
380/426
200/220
9C1/9C1
PI9300-200G3/
PI9300-220F3
200/220
385/430
380/426
200/220
9C2/9C2
PI9400-187G3/
PI9400-200F3
187/200
345/385
340/380
187/200
9P7/9P7
PI9400-200G3/
PI9400-220F3
200/220
385/430
380/426
200/220
9P7/9P7
PI9300-220G3/
PI9300-250F3
220/250
430/468
426/465
220/250
9C1/9C1
PI9300-220G3/
PI9300-250F3
220/250
430/468
426/465
220/250
9C2/9C2
PI9400-220G3/
PI9400-250F3
220/250
430/468
426/465
220/250
9P7/9P7
PI9300-250G3/
PI9300-280F3
250/280
468/525
465/520
250/280
9C3/9C3
PI9300-280G3/
PI9300-315F3
280/315
525/590
520/585
280/315
9C3/9C3
PI9300-315G3/
PI9300-355F3
315/355
590/665
585/650
315/355
9C3/9C3
PI9300-355G3/
PI9300-400F3
355/400
665/785
650/725
355/400
9C3/9C3
PI9100-0R7G4
3-phase
480V
±1 0%
0.75
4.1
2.5
0.75
9S2
PI9100-1R5G4
1.5
4.9
3.7
1.5
9S2
PI9100-2R2G4
2.2
5.7
5.0
2.2
9S2
PI9100-004G4
4.0
9.4
8
4.0
9S3
PI9100-5R5G4
5.5
12.5
11
5.5
9S3
PI9100-7R5G4/
PI9100-011F4
7.5/11
18.3/23.1
15/22
7.5/11
9S4/9S4
PI9200-011G4/
PI9200-011F4/
PI9200-015F4
11/11/15
23.1/23.1/2
9.8
22/22/27
11/11/15
9L1/9L1/9
L1
PI9200-015G4/
PI9200-018F4
15/18.5
29.8/35.7
27/34
15/18.5
9L1/9L1
PI9200-018G4/
18.5/22
35.7/41.7
34/40
18.5/22
9L2/9L2

Chapter 2 Standard Specifications
10
Inverter
model
Input
voltage
Rated
output
power(k
W)
Rated input
current(A)
Rated
output
current(
A)
Adaptive
motor
Base No.
PI9200-022F4
PI9200-022G4/
PI9200-030F4
22/30
41.7/57.4
40/55
22/30
9L2/9L2
PI9200-030G4/
PI9200-037F4
30/37
57.4/66.5
55/65
30/37
9L3/9L3
PI9200-037G4/
PI9200-045F4
37/45
66.5/81.7
65/80
37/45
9L3/9L3
PI9200-045G4/
PI9200-055F4
45/55
81.7/101.9
80/100
45/55
9L4/9L4
PI9400-045G4/
PI9400-055F4
45/55
81.7/101.9
80/100
45/55
9P4/9P4
PI9200-055G4/
PI9200-075F4
55/75
101.9/137.4
100/130
55/75
9L4/9L4
PI9400-055G4/
PI9400-075F4
55/75
101.9/137.4
100/130
55/75
9P4/9P4
PI9200-075G4/
PI9200-093F4
75/93
137.4/151.8
130/147
75/93
9L4/9L4
PI9400-075G4/
PI9400-093F4
75/93
137.4/151.8
130/147
75/93
9P5/9P5
PI9200-093G4/
PI9200-110F4
93/110
151.8/185.3
147/180
93/110
9L5/9L5
PI9400-093G4/
PI9400-110F4
93/110
151.8/185.3
147/180
93/110
9P5/9P5
PI9200-110G4/
PI9200-132F4
110/132
185.3/220.7
180/216
110/132
9L5/9L5
PI9400-110G4/
PI9400-132F4
110/132
185.3/220.7
180/216
110/132
9P6/9P6
PI9200-132G4/
PI9200-160F4
132/160
220.7/264.2
216/259
132/160
9L6/9L6
PI9400-132G4/
PI9400-160F4
132/160
220.7/264.2
216/259
132/160
9P6/9P6
PI9200-160G4/
PI9200-187F4
160/187
264.2/309.4
259/300
160/187
9L6/9L6
PI9400-160G4/
PI9400-187F4
160/187
264.2/309.4
259/300
160/187
9P6/9P6
PI9300-187G4/
PI9300-200F4
187/200
309.4/334.4
300/328
187/200
9C1/9C1
PI9300-187G4/
PI9300-200F4
187/200
309.4/334.4
300/328
187/200
9C2/9C2
PI9300-200G4/
PI9300-220F4
200/220
334.4/363.9
328/358
200/220
9C1/9C1
PI9300-200G4/
PI9300-220F4
200/220
334.4/363.9
328/358
200/220
9C2/9C2

Chapter 2 Standard Specification
11
Inverter
model
Input
voltage
Rated
output
power(k
W)
Rated input
current(A)
Rated
output
current(
A)
Adaptive
motor
Base No.
PI9400-187G4/
PI9400-200F4
187/200
309.4/334.4
300/328
187/200
9P7/9P7
PI9400-200G4/
PI9400-220F4
200/220
334.4/363.9
328/358
200/220
9P7/9P7
PI9300-220G4/
PI9300-250F4
220/250
363.9/407.9
358/400
220/250
9C1/9C1
PI9300-220G4/
PI9300-250F4
220/250
363.9/407.9
358/400
220/250
9C2/9C2
PI9400-220G4/
PI9400-250F4
220/250
363.9/407.9
358/400
220/250
9P7/9P7
PI9300-250G4/
PI9300-280F4
250/280
407.9/457.4
400/449
250/280
9C3/9C3
PI9300-280G4/
PI9300-315F4
280/315
457.4/533.2
449/516
280/315
9C3/9C3
PI9300-315G4/
PI9300-355F4
315/355
533.2/623.3
516/570
315/355
9C3/9C3
PI9300-355G4/
PI9300-400F4
355/400
623.3/706.9
570/650
355/400
9C3/9C3
PI9200-055G6/
PI9200-075F6
3-phase
690V
±1 0%
55/75
70/90
62/85
55/75
9L4/9L4
PI9400-055G6/
PI9400-075F6
55/75
70/90
62/85
55/75
9P4/9P4
PI9200-075G6/
PI9200-093F6
75/93
93/105
85/102
75/93
9L4/9L4
PI9400-075G6/
PI9400-093F6
75/93
93/105
85/102
75/93
9P5/9P5
PI9200-093G6/
PI9200-110F6
93/110
105/130
102/125
93/110
9L5/9L5
PI9400-093G6/
PI9400-110F6
93/110
105/130
102/125
93/110
9P5/9P5
PI9200-110G6/
PI9200-132F6
110/132
130/170
125/150
110/132
9L5/9L5
PI9400-110G6/
PI9400-132F6
110/132
130/170
125/150
110/132
9P6/9P6
PI9200-132G6/
PI9200-160F6
132/160
170/200
150/175
132/160
9L6/9L6
PI9400-132G6/
PI9400-160F6
132/160
170/200
150/175
132/160
9P6/9P6
PI9200-160G6/
PI9200-187F6
160/187
200/210
175/198
160/187
9L6/9L6
PI9400-160G6/
PI9400-187F6
160/187
200/210
175/198
160/187
9P6/9P6
PI9300-187G6/
187/200
210/235
198/215
187/200
9C2/9C2

Chapter 2 Standard Specifications
12
Inverter
model
Input
voltage
Rated
output
power(k
W)
Rated input
current(A)
Rated
output
current(
A)
Adaptive
motor
Base No.
PI9300-200F6
PI9300-187G6/
PI9300-200F6
187/200
210/235
198/215
187/200
9C1/9C1
PI9400-187G6/
PI9400-200F6
187/200
210/235
198/215
187/200
9P7/9P7
PI9300-200G6/
PI9300-220F6
200/220
235/247
215/245
200/220
9C2/9C2
PI9300-200G6/
PI9300-220F6
200/220
235/247
215/245
200/220
9C1/9C1
PI9400-200G6/
PI9400-220F6
200/220
235/247
215/245
200/220
9P7/9P7
PI9300-220G6/
PI9300-250F6
220/250
247/265
245/260
220/250
9C2/9C2
PI9300-220G6/
PI9300-250F6
220/250
247/265
245/260
220/250
9C1/9C1
PI9400-220G6/
PI9400-250F6
220/250
247/265
245/260
220/250
9P7/9P7
PI9300-250G6/
PI9300-280F6
250/280
265/305
260/299
250/280
9C3/9C3
PI9300-280G6/
PI9300-315F6
280/315
305/350
299/330
280/315
9C3/9C3
PI9300-315G6/
PI9300-355F6
315/355
350/382
330/374
315/355
9C3/9C3
PI9300-355G6/
PI9300-400F6
355/400
382/435
374/410
355/400
9C3/9C3
PI9300-400G6/
PI9300-450F6
400/450
435/490
410/465
400/450
9C3/9C3
PI9300-450G6/
PI9300-500F6
450/500
490/595
465/550
450/500
9C3/9C3
※Remarks: PI9100G3 distinguish between A and B two series,A is single IGBT, B is
integrated intelligent power modules, the specification of both parameters are the same.
※Remarks:PI9300 9C1and 9C2 has the same power range,with the following
differences:
○
1Main power calbe layout is different,9C1 is to power in from upside and
output from the underside,9C2 is to power in from the left side and output from
the right side
○
29C1‟s bottom fix base is removable
○
3Construction and dimension is different
※Remarks:PI9130/PI9230/PI9330/PI9430 bold version of the software on behalf of the
inverter to C3.00 and above the keyboard with MCU.
※Remarks:The technical specifications of PI9130/PI9230/PI9330/PI9430 is same as

Chapter 2 Standard Specification
13
PI9100/PI9200/PI9300/PI9400.

Chapter 2 Standard Specifications
14
2-2.Standard specifications
Items
Specifications
Power
Voltage and frequency
levels
Single-phase 220V, 50/60Hz Three-phase 220V,
50/60Hz
Three-phase 380V, 50/60Hz Three-phase 480V,
50/60Hz
Three-phase 690V, 50/60Hz
Allowable fluctuation
Voltage:±10% Frequency:±5%
Control system
Control system
High performance vector control inverter based on
DSP
Control method
V/F control, vector control W/O PG, vector control
W/ PG
Automatic torque
boost function
Realize low frequency (1Hz) and large output torque
control under the V/F control mode.
Acceleration/decelerat
ion control
Straight or S-curve mode. Four times available and
time range is 0.0 to 6500.0s.
V/F curve mode
Linear, square root/m-th power, customized definition
V/F curve
Over load capability
G type:rated current 150% - 1 minute, rated current
180% - 2 seconds
F type:rated current 120% - 1 minute, rated current
150% - 2 seconds
Maximum frequency
Vector control:0 to 300Hz
V/F control:0 to 3200Hz
Carrier Frequency
0.5 to 16kHz; automatically adjust carrier frequency
according to the load characteristics.
Input frequency
resolution
Digital setting: 0.01HzAnalog setting: maximum
frequency×0.1%
Start torque
G type: 0.5Hz/150% (vector control W/O PG)
F type: 0.5Hz/100% (vector control W/O PG)
Speed range
1:100 (vector control W/O PG) 1:1000 (vector
control W/ PG)
Steady-speed
precision
Vector control W/O PG: ≤ ± 0.5% (rated synchronous
speed)
Vector control W/ PG: ≤ ± 0.02% (rated synchronous
speed)
Torque response
≤ 40ms (vector control W/O PG)
Torque boost
Automatic torque boost; manual torque boost(0.1% to
30.0%)
DC braking
DC braking frequency: 0.0Hz to max. frequency,
braking time:
0.0 to 100.0 seconds, braking current value: 0.0% to
Other manuals for PI9000 series
1
Table of contents
Other Powtran Inverter manuals

Powtran
Powtran PI9100 Series User manual

Powtran
Powtran PI7500 Series User manual

Powtran
Powtran PI160 Series User manual

Powtran
Powtran PI8600 Series User manual

Powtran
Powtran PS9500 Series User manual

Powtran
Powtran PI9000-S Series User manual

Powtran
Powtran PI7800 User manual

Powtran
Powtran PI500-S Series User manual

Powtran
Powtran PI500A Series User manual

Powtran
Powtran pi130 series User manual