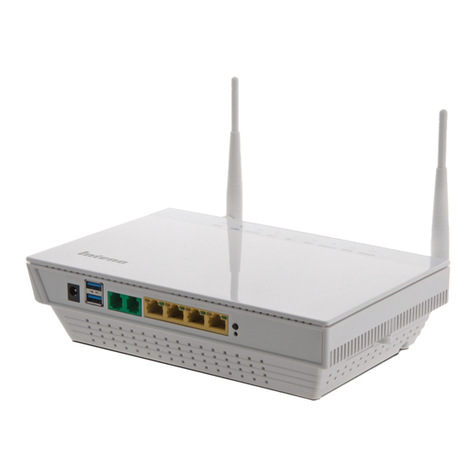
PREDICTWIND DATAHUB User manual

DataHub by PredictWind User Manual
1
DataHub
By PredictWind
User Manual
GPS POWER
N2K WAN LAN USB

DataHub by PredictWind User Manual
1
Welcome
Welcome to the DataHub by PredictWind, your gateway to sharing your voyage with friends and family
using PredictWind GPS Tracking and Blogs. The DataHub is full of powerful additional features that will
make your oshore tracking, data and communications easier than ever.
The DataHub can track, blog, save and broadcast all your onboard data sources including GPS and your
NMEA 2000 instrumentation network. Additional features allow you to Broadcast WiFi, Broadcast GPS
data via WiFi, Broadcast Wind Data, Log Data, create custom Boat Polars and access Remote Support.
Simply connect the DataHub to an existing internet connection and your vessels NMEA 2000 network
to get started. Internet connections supported are Android or iOS hotspots, USB connected Android or
iOS devices, , Netgear Aircard, Verizon JetPack, or an ethernet connection to a satellite terminal or vessel
router.
Wind
Anemometer
Mobile
Hotspot
Tablet
Satellite
Connection
Chart
Plotter
Laptop
Smart TV
Gyro
Compass
External
GPS
GPS POWER
N2K WAN LAN USB
GPS
Tracking
Log Data Wifi Router GPS via WifiConnect Wifi
GPS, N2K, Ethernet

DataHub by PredictWind User Manual
2
Table of Contents
Powering the DataHub
Accessing the Web User Interface
Access via WiFi
Access via Ethernet
Accessing the Web UI
Configuring the DataHub
Configuring the GPS feed
Using the built-in GPS
Using NMEA 2000 for GPS
Verifying your GPS data feed
NMEA 2000 to NMEA 183 Repeater via WiFi
Configuring Internet Access
Internet via USB connected iOS device
Internet via Android
Internet via Ethernet WAN port
Internet connection via WiFi Tethering
Tracking and Blogging
Setting up your GPS Tracking page
DataHub Status LEDs
Invalid GPS
No Internet
Spooled Position Reports
Verifying Internet Connectivity
Logging
Log Rotation
Tracking Logger
NMEA Logger
Polars
Remote Support
Securing The DataHub
Changing the WiFi SSID and Securing with a Password
Changing the Admin Password
Firmware Updates
Factory Reset
Software
Hardware Reset Switch
Legal
3
4
4
5
5
6
6
6
7
7
8
10
10
12
12
12
17
18
22
22
22
22
23
24
24
25
26
29
33
34
34
36
37
38
38
38
39
Table of Contents

DataHub by PredictWind User Manual
3
Powering up the DataHub
DataHub can be powered with either the supplied AC/DC power supply or directly from the vessel’s
house battery bank. The unit requires 9-60 VDC and is reverse polarity protected. The centre pin of the
power connector is positive.
To wire the DataHub directly to the vessel’s house battery, start by cutting the power lead o of the
supplied AC/DC adapter. Connect a 1 amp fuse to the positive power lead (The black wire is positive, the
wire with a white stripe is negative) and wire to the vessel’s switch panel. Before powering the DataHub
use a voltmeter to ascertain that the centre pin in the connector has a positive voltage. Reversing the
polarity on the connector will not damage the DataHub, but it will prevent it from powering on.
You will notice a blue status LED on the top of the unit illuminates when the unit is correctly powered on.
Powering up the DataHub

DataHub by PredictWind User Manual
4
Accessing the Web User Interface
Once powered on, the DataHub needs to be configured to select the GPS data source, establish an
internet connection, enable and set the tracking interval, and secure its WiFi with a password.
Before you can start the configuration process, you must first establish a connection either via Ethernet or
WiFi to log in to the web administrative interface.
The DataHub web interface is mobile friendly and supports all popular web browsers.
The DataHub advertises itself via WiFi with an SSID PW-Hub-XXXX where XXXX is an alphanumeric
sequence specific to the device. By default, the DataHub WiFi is unprotected. As part of the configuration
process, you may change the SSID of the unit and encrypt and password protect the unit. Procedures for
assigning a password are discussed later on in the Securing DataHub section of this document.
To WiFi connect to the DataHub scan for available access point SSIDs and select the one that
corresponds to your unit. The following image depicts the process for Mac OS X. Other OS’s use a similar
process.
Access via WiFi
Accessing the Web User Interface

DataHub by PredictWind User Manual
5
To access the unit via a wired connection, run an ethernet cable between the RJ45 port on your laptop
computer and the LAN port on the DataHub. The LAN port is the RJ45 port closest to the power
connector.
To login to the DataHub’s administrative web
page, open a web browser and browse to
http://10.10.10.1
You should see a login page pop up in your
browser. Login with the default details below.
Username: admin
Password: admin
Then push the Login button to access the
administration pages.
Access via Ethernet
Accessing the Web UI
Accessing the Web User Interface

DataHub by PredictWind User Manual
6
Configuring the DataHub
A GPS feed, an internet connection, and tracking at minimum need to be configured to allow the tracking
of your vessel on your tracking and blogging page at PredictWind.
Once logged into DataHub’s administrative
website, browse to Services > NMEA to
configure the GPS feed.
On a mobile device, you do this by clicking on
the Hamburger Icon on the top left of the
page and under Services selecting NMEA. On
a laptop with a larger display area, you will see
the Services menu on the left.
Configuring the GPS feed
Use the Source pull-down menu to select the GPS source. If using the built-in GPS, make sure that the
DataHub is installed with the supplied GPS antenna and with good access to the GPS signal.
The built-in GPS in the DataHub should only be used if you do not have an NMEA 2000 instrument
system with external GPS. By interfacing with the NMEA 2000 instrumentation (with the optional
PredictWind Cable/Tee) you will also be able to transmit Wind Speed and Direction from your
instrumentation so friends and family can see the conditions you are experiencing. Note: An externally
mounted GPS will be more accurate.
Using the built-in GPS
Configuring the DataHub

DataHub by PredictWind User Manual
7
If using your vessels NMEA 2000 network (recommended), then connect the optional device cable from
the M12 connector on the back of the DataHub to a tee on your NMEA 2000 backbone. NMEA 2000
device cables and tees can be purchased directly from PredictWind with your DataHub order.
Once connected to the NMEA 2000 network, select NMEA 2000 on CAN0 as the GPS source.
Using NMEA 2000 for GPS
Selecting the Status tab in the NMEA section
will display live GPS data as it streams into the
device.
ACTIVE under Status means that you have
valid GPS data. A Status of VOID indicates
that NO or invalid GPS data is being received.
Please confirm that you are indeed getting
valid GPS data before proceeding.
Verifying your GPS
data feed
Configuring the DataHub

DataHub by PredictWind User Manual
8
One of the nice features of the DataHub is that it will broadcast NMEA0183 data via WiFi regardless of the
GPS input source. This WiFi broadcast allows external navigation applications such as Aqua Map, GPS
Nav X, Navionics Boating etc to use your vessel’s GPS for navigation. This results in much more accurate
GPS data with the addition of other NMEA 2000 data such as wind speed and direction, depth, etc.
NMEA0183 data is broadcast by default via UDP on port 11101 and TCP on port 11102. The ports are user
selectable and can be changed under Settings in the NMEA configuration section.
To configure your charting application to use DataHub generated data, please refer to the software
documentation for the software. You will need to configure the following:
Host: 10.10.10.1
Protocol: UDP or TCP
Port number: 11101 (for UDP) or 11102 (for TCP)
WiFi connection between mobile or laptop and DataHub.
NMEA 2000 to NMEA 183 Repeater via WiFi
Configuring the DataHub

DataHub by PredictWind User Manual
9
The following are the configuration settings for the iOS version of Aqua Map and Navionics Boating apps.
Note that Aqua Map has a predefined configuration for the PredictWind Datahub.
Aqua Map Navionics Boating
Configuring the DataHub

DataHub by PredictWind User Manual
10
Configuring Internet Access
Access to the internet is required to send position information from the DataHub to PredictWind. Although
a dedicated internet connection is desired for real-time updates to your tracking website it is not required.
DataHub will store acquired position reports internally for later transmission if an internet connection is
not available.
This, for example, might be used by sailors sailing oshore away from cell phone coverage who do not
own satellite phones. Someone could cross the North Atlantic from Newfoundland, CA to Ireland while
tracking their voyage. Initially, their tracks while cruising in coastal Canada will be updated in real-time.
As they leave Canada and spend a full month oshore in the North Atlantic, position reports will be stored
in the DataHub’s internal non-volatile memory. Once the vessel arrives in Ireland and cell phone internet
access is arranged, all the stored position reports will be uploaded to PredictWind for display on the
tracking page. Real-time tracking can only occur while there is internet access, but users can track their
global voyages without it.
DataHub provides four dierent ways to connect to the internet. These include:
• USB Connected iOS devices
• USB Connected Android Devices
• Ethernet connected router with internet access such as a broadband satellite device (Iridium Certus,
Inmarsat Fleet Broadband, KVH Vsat, etc) or an LTE enabled router such as a Pepwave.
• WiFi bridge to Android or iOS devices and MyFi devices such as a Netgear Aircard, Cricket wireless
router, Verizon Jetpack, and others.
Multiple internet connections can be configured at the same time. For example, users could use a USB
connected Android phone as well as an Ethernet-connected satellite terminal. When the satellite phone
is on, then data is routed through it. If the satellite phone is o, then data is routed through the Android
connected device. If none of the two is available, then the position reports are stored internally in non-
volatile memory until an internet connection is available.
Use a standard lightning iOS USB charging cable to connect your iPhone or iPad to the USB port on the
DataHub.
Once connected, iOS will prompt you whether the DataHub should be trusted or not. Select Trust.
Internet via USB connected iOS device
Configuring Internet Access

DataHub by PredictWind User Manual
11
On the iOS device, navigate to Settings > Personal Hotspot and enable it as depicted below.
The DataHub should now be connected to the internet if your iOS device has internet connectivity.
See section below called Verifying Internet Connectivity to confirm that the device is connected to
the internet.
Configuring Internet Access

DataHub by PredictWind User Manual
12
To establish an internet connection via Android, connect the device’s USB charging cable to the
DataHub’s USB connection.
On the Android device now navigate to Settings > Network & Internet > Hotspot & Tethering and
enable USB tethering.
The DataHub should now be connected to the internet. See the section below called Verifying Internet
Connectivity to confirm that the device is connected to the internet.
You will need to repeat the process every time you disconnect and reconnect the Android device to the
DataHub’s USB port. However, there is a good trick that allows you to automate this process so that the
phone enters USB tethering mode automatically when you plug it in. Detailed instructions on configuring
automatic USB tethering are beyond the scope of this guide but are described in detail in the following
article.
This is the simplest of all methods. Run an Ethernet cable from your vessels router LAN port to the port
labelled WAN on the DataHub. DataHub’s WAN port is the RJ-45 jack furthest away from the power
connector.
The DataHub should now be connected to the internet. See the section below called Verifying Internet
Connectivity to confirm that the device is connected to the internet.
Although WiFi tethering is the most complex of all internet connectivity methods, it is quite eective and
once configured very convenient to use. The DataHub will persistently search for the remote access point
and once found will automatically connect to it. No buttons or settings need to be changed between
power up/down. The DataHub searches and automatically connects.
Access points can be your phone in mobile hotspot mode or a dedicated WiFi access point. When using
your phone, enable hotspot mode and the DataHub will automatically connect to it. This for many is more
convenient than plugging the phone into the USB port on the DataHub since the DataHub connects to
the phone wirelessly. If you have your DataHub installed in a cabinet, then you will probably want to use
this method for internet connectivity.
To configure WiFi tethering, WiFi connect to the DataHub, login into the web administrator, browse to
Services > Settings and navigate to the WiFi tab.
Internet via Android
Internet via Ethernet WAN port
Internet connection via WiFi Tethering
Configuring Internet Access

DataHub by PredictWind User Manual
13
Under WiFi Overview you will see two Wi-Fi transmitters listed. The first called WiFi Network to Internet
is used to establish a WiFi link to a remote hotspot that provides internet access. This transmitter in
essence can be used to connect the DataHub to the internet via a WiFi link.
The second transmitter called WiFi Access Point Hotspot is the transmitter used by the DataHub to
provide WiFi connectivity to devices on the vessel wishing to access the web administrator and the
internet. Notice the SSID for this transmitter is listed as SSID: PW-Hub-XXXX where the Xs represent
alphanumeric digits unique to the unit. This is the SSID that clients use to WiFi connect to the DataHub.
We will return to this transmitter later in the guide when we discuss how to password protect the WiFi
connection to your DataHub and change its broadcast WiFi name or SSID.
Push the SCAN button to list all the available WiFI access points near you. Select the one you desire to
connect to and tap JOIN NETWORK. In the example below, the iPhone hotspot is selected. Next, enter
the passphrase for the WiFi access point then tap SUBMIT at the bottom of the page.
Note the WPA passphrase field will not be present for open WiFi networks without passwords.
Configuring Internet Access

DataHub by PredictWind User Manual
14
On the following page, review and hit SAVE at the bottom of the page. Back on the wireless overview
page, scroll to the bottom and push SAVE & APPLY to confirm your settings and activate them. You can
push the UNSAVED CHANGES button at the top right of the page if you want to discard the session
without connecting.
Configuring Internet Access

DataHub by PredictWind User Manual
15
To confirm if you have successfully WiFi tethered to the remote access point, look at the status in
Associated Stations and Connected Devices.
Configuring Internet Access

DataHub by PredictWind User Manual
16
You will see the SSID of the remote station listed with signal strength and a transmit (TX) and receive
(RX) rate. You will know that the station is not available, or you were not successful (if say you entered the
password incorrectly) when the signal bounces between 0 and some value and the RX/TX rates drop to
zero.
Note there are easier and better ways to know if you are connected to the internet as described in the
Verifying Internet Connectivity section.
Configuring Internet Access

DataHub by PredictWind User Manual
17
Tracking and Blogging
PredictWind provides a tracking and blogging service that allows friends and family to experience,
participate, and interact with you during your travels. The service posts tracks for your vessel and
hosts blog posts with pictures of your travels. The tracking and blogging service requires a Standard or
Professional forecast subscription, a DataHub or a satellite device compatible with the service, and a one-
time setup and registration.
Below, are screenshots of a tracking page at http://tracking.predictwind.com/MV_Bliss showing current
location, current weather conditions, latest tracks and a list of blog posts. The tracks were acquired and
posted to the site using the PredictWind DataHub described in this document.
Tracking and Blogging

DataHub by PredictWind User Manual
18
1. Get started by scanning the QR code on the
back of your DataHub device. This will take you
to the tracking setup page for your DataHub.
Setting up your
GPS Tracking page
Tracking and Blogging

DataHub by PredictWind User Manual
19
2. Select New Customer or Existing Customer.
3. Input your account email, vessel type and boat name (if you are a new customer). The mac address will
be autofilled and is also on the back of the DataHub device.
Tracking and Blogging
000A5206E683
000A5206E683
Other manuals for DATAHUB
1
Table of contents
