manuals.online logo
Brands
  1. Home
  2. •
  3. Brands
  4. •
  5. Premier Tech Aqua
  6. •
  7. Water Heater
  8. •
  9. Premier Tech Aqua Montana User manual

Premier Tech Aqua Montana User manual

Lieferung ohne Wasserhahn
Delivery without tap
Livraison sans robinet
Montageanleitung
Regenspeicher
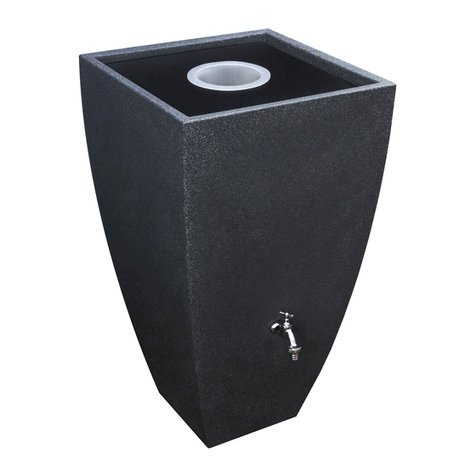
Montana 225 l
Instruction sheet
Rainwater Tank
Montana 225 l
Notice de montage
du réservoir d´eau
de pluie
Montana 225 l
Zum Befüllen des Regenspeichers
empfehlen wir die Regenfilter Filter-
sammler oder Sammelfilter mit Hahn
We recommend our filter collectors
to fill the rainwater tank
Pour remplir le réservoir nous recom-
mandons les collecteurs d´eau de pluie
Montana
Art.-Nr. 9000570
Art.-Nr. 9000575
Art.-Nr. 9000577
www.premiertechaqua.de
1. Mise en place du
réservoir d´eau de pluie
Positionnez le réservoir d´eau
de pluie sur une surface plane à
proximité de la descente de gout-
tière. Faites attention au notice
de montage de collecteur filtrant
et de niveau d´eau maximal de
réservoir.
1. Setting up
Site the raiwater tank on a
firm level surface adjacent
to a downpipe. Now install the
downpipe filter according to the
installation instructions. Please
observe the maximum water
level.
1. Aufstellen des
Regenspeichers
Regenspeicher auf festem
geradem Untergrund in der Nähe
des Fallrohres aufstellen und aus-
richten. Montieren Sie nun gemäß
Einbauanleitung den Fallrohrfilter.
Achten Sie auf den maximalen
Wasserstand.
unser Anschluss-Set für Montana
(Art.-Nr. 9000333). Verschluss-
stopfen mit einer Zange oder
großem Schraubendreher entfernen
und Anschlussfitting in das untere
Gewinde (3/4“ IG-Messing) gut
einschrauben. Zulaufschlauch
aufstecken, Schlauchklemme
gut anziehen.
For the connection we recommend
our Connection Set for Montana
(item. no. 9000333). Remove the
plug with a gripper or a big screw-
driver and screw the connection
fitting in the lower thread (3/4”
internal thread brass). Attach the
inlet hose and torque the hose
clamp properly.
Enlevez le bouchon en bas et fixez
le joint de connection. Fixez le
tuyau avec le collier de serrage.
2a. Anschließen an Fallrohr
Einspeisung von unten
Fallrohrfilter installieren, Über-
laufkante als erstes festlegen:
Von unten gemessen auf 125 cm
Höhe Regenspeicher. Anschluss-
winkel und Schlauch anbringen,
auf die gewünschte Länge kürzen.
Für den Anschluss empfehlen wir
2a. Connection
to the downpipe filter
Feeding is made from the bottom
of the tank. Install the downpipe
filter, first define the overflow edge:
measured from the bottom to the
height of 125 cm rainwater tank.
Connect the angle cleat and hose
and shorten it to the desired length.
2a. Connection à la descente de
gouttière l´alimentation en bas:
Installez le filtre, faites attention
au niveau de déservoir, il est en
125 cm hauteur. Montez le joint
angulaire et le tuyau.
Utilisez le Kit de connection pour
le Montana (art. nr. 9000333).
Überlaufkante
125 cm
Bohrung
für Entlüftung
Für den Anschluss benötigen Sie das
Lochsägen-Set mit den beiliegenden
Dichtungen für den Anschluss eines
Filters an den Montana. Erstellen Sie
mit der Lochsäge die Öffnung gemäß
der gewählten Dichtung. Setzen Sie
die Dichtung in die Öffnung, passen
den Schlauch an, montieren ihn zuerst
am Filter und schieben das andere
For the connection you need the
Hole Saw Set with the included
sealing’s for the connection of a
filter to the Montana. Make the cut
with the hole saw according to the
chosen sealing. Place the sealing
into the hole, adjust the hose,
mount it first on the filter and push
the other end through the sealing.
A cet effet, il est indispensable
d‘utiliser la scie cloche de kit
scie cloche avec des joints en
faisant attention au diamètre
utilisé: Ø 45 mm pour 32 mm
tuyau. Qui doit être adapté au
diamètre du tuyau (voir photos
ci-dessus). Ensuite, raccorder
2b. Anschließen an Fallrohr
Einspeisung von oben
An der Oberkante des Speichers
findet man rechts und links eine
ebene Fläche, an der man die
Öffnung für den Anschluss des
Filters anbringen kann.
2b. Connection
to the downpipe filter
Feeding is made from the top of
the tank. On the top of the tank
there is a flat surface on the right
and on the left side on which you
can make the hole for the connec-
tion of the filter.
2b. Raccordement à
la descente de gouttière
l´alimentation en haut:
Sur la partie supérieure du
réservoir, vous trouverez
une partie plane où il convient
de brancher le raccordement
à la descente de gouttière.
le réservoir à la descente
de gouttière à l‘aide du tuyau.
Please observe the installation
instructions of the chosen down-
pipe filter.
Ende durch die Dichtung. Bitte
beachten Sie die Montageanleitung
des gewählten Fallrohrfilters.
www.premiertechaqua.de
Bohrung
für Entlüftung Ø 45 mm
3. Wasserentnahme
Bei dem Regenspeicher befindet
sich in ca. 30 cm Höhe ein 3/4“
Innengewinde aus Messing.
Geeignet für den Anschluss von
Wasserhähnen oder Schläuchen.
3. Collecting water
There is a 3/4“ BSP thread
at 30 cm above tank base
to connect a tap or other
3/4“ fitting.
3. Prise d‘eau
La récupération d’eau est
possible via une ouverture de
3/4“ filetage intérieur en laiton
à 30 cm au-dessus de la base
du réservoir, pour robinet ou
tout autre dispositif de 3/4.
!
!
!
4. Préparatifs pour l‘hiver
Avant la période de gelée dévissez
les bouchons de fermeture latéraux
pour vider complètement le réser-
voir. Ne revissez plus le bouchon
après. Séparez le réservoir de la
conduite d´arrivée d´eau de pluie
pour garantir qu´aucune eau pluviale
ne puisse entrer dans le réservoir.
4. Wintertime
Before periods of frost the tank
has to be drained down comple-
tely by removing the lateral plugs.
Please do not screw in these
plugs once again. Loose the tank
from the filling machines as water
can trail if there is any leakage.
4. Wintervorkehrung
Vor der Frostperiode muss der
Tank durch Herausdrehen der
seitl. Verschlussstopfen völlig ent-
leert werden. Diese Stopfen nicht
mehr eindrehen. Den Tank vom
Regenwasserzulauf abklemmen,
damit sichergestellt ist, dass kein
Regenwasser nachfließen kann.
On peut connecter deux où
plusieurs réservoirs.
Utilisez s.v.p. le kit de connection
25 mm (art. nr. 9000326).
Seulement possible si l´alimen-
tation vient d´en haut.
It is possible to connect two
tanks together. Please use
the Connection Set 25 mm
(item no. 9000326).
Only possible, if the feeding
is not made from the bottom
of the tank.
Es besteht die Möglichkeit zwei
Tanks mit dem Verbindungsset
25 mm (Art.-Nr. 9000326) zu
verbinden.
Nur möglich, wenn nicht von
unten eingespeist wird.

This manual suits for next models

4

Other Premier Tech Aqua Water Heater manuals

Premier Tech Aqua Rewatec Modena 200L Guide

Premier Tech Aqua

Premier Tech Aqua Rewatec Modena 200L Guide

Premier Tech Aqua PHT-390 User manual

Premier Tech Aqua

Premier Tech Aqua PHT-390 User manual

Popular Water Heater manuals by other brands

Garanterm ES 50-H user manual

Garanterm

Garanterm ES 50-H user manual

Bradford White UPDX series Service manual

Bradford White

Bradford White UPDX series Service manual

Navien NP-180 Service manual

Navien

Navien NP-180 Service manual

Atwood GE6-240V owner's manual

Atwood

Atwood GE6-240V owner's manual

Quick BX 16 user manual

Quick

Quick BX 16 user manual

Genvex Vanvex Optima 180 user manual

Genvex

Genvex Vanvex Optima 180 user manual

Drazice NAD 1500 v1 Operation and installation instructions

Drazice

Drazice NAD 1500 v1 Operation and installation instructions

Havells Quatro-25 L operating instructions

Havells

Havells Quatro-25 L operating instructions

ASKOMA AHIR-BI-plus-3.5 user manual

ASKOMA

ASKOMA AHIR-BI-plus-3.5 user manual

STIEBEL ELTRON DHC 6 XG Operation and installation instructions

STIEBEL ELTRON

STIEBEL ELTRON DHC 6 XG Operation and installation instructions

German pool DEX12 user manual

German pool

German pool DEX12 user manual

State Water Heaters GS6 40 YBVIT, GS6 40 HBVIT, GS6 50 YBVIT, GS6 50 HBVIT, GS6 40 YBVIT 2, GS6 40 HBVIT 2, GS6 50 YBVIT 2, GS6 50 HBVIT... Service parts

State Water Heaters

State Water Heaters GS6 40 YBVIT, GS6 40 HBVIT, GS6 50 YBVIT, GS6 50 HBVIT, GS6 40 YBVIT 2, GS6 40 HBVIT 2, GS6 50 YBVIT 2, GS6 50 HBVIT... Service parts

Rotenso Thermos Series Installation and user manual

Rotenso

Rotenso Thermos Series Installation and user manual

Thermor VM 050 D400S-3E instruction manual

Thermor

Thermor VM 050 D400S-3E instruction manual

Siemens DG10016R2 Assembly and operating instructions

Siemens

Siemens DG10016R2 Assembly and operating instructions

Midea D50-15ED2 instruction manual

Midea

Midea D50-15ED2 instruction manual

Gabarron GTV Installation, setup, maintenance

Gabarron

Gabarron GTV Installation, setup, maintenance

Whale WH0822 Installation & user's instructions

Whale

Whale WH0822 Installation & user's instructions

manuals.online logo
manuals.online logoBrands
  • About & Mission
  • Contact us
  • Privacy Policy
  • Terms and Conditions

Copyright 2025 Manuals.Online. All Rights Reserved.