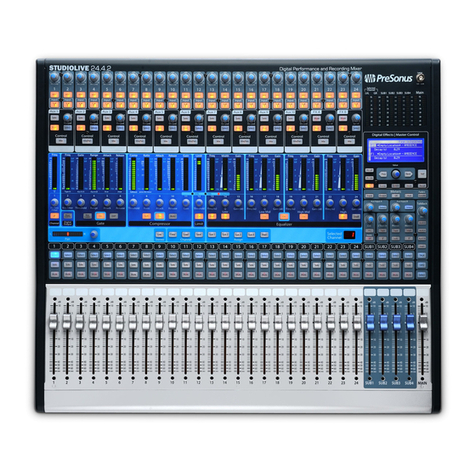
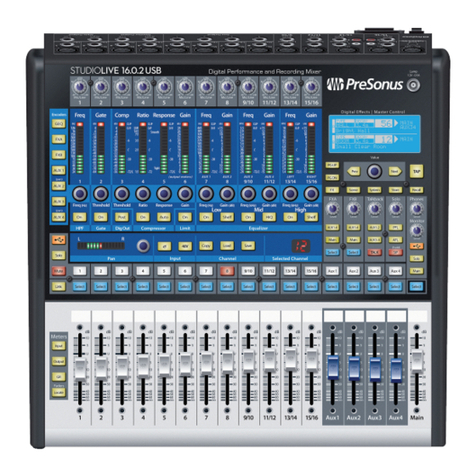
PreSonus StudioLive™24.4.2
2
Quick Start:
Level
Setting
Overview Controls Connecting
to a
Computer
Scenes,
Presets &
System
Menu
Technical
Information
Tutorials Trouble-
shooting
& Warranty
Table of Contents 02Owner’s Manual
3
Quick Start:
Level
Setting
ControlsScenes,
Presets &
System
Menu
TutorialsTechnical
Information
Trouble-
shooting
& Warranty
Software
Universal Control,
Capture, and
Studio One Artist
Hookup
OverviewHookupConnecting
to a
CXomputer
Software
Universal Control,
Capture, and
Studio One Artist
0.1 Important Safety Instructions
0 Mandatory Stu
The exclamation point within an equilateral triangle is intended
to alert the user to the presence of important operating and
maintenance (servicing) instructions in this manual.
The lightning ash with arrowhead symbol within an equilateral
triangle is intended to alert the user to the presence of
uninsulated“dangerous”voltage within the product’s enclosure that may
be of sucient magnitude to constitute a risk of electric shock to humans.
CAUTION: TO REDUCE THE RISK OF ELECTRIC SHOCK, DO NOT
REMOVE THE COVER. NO USER-SERVICEABLE PARTS INSIDE. REFER
SERVICING TO QUALIFIED PERSONNEL.
CAUTION: To reduce the risk of electric shock, do not expose this
appliance to rain and moisture.The apparatus shall not be
exposed to dripping or splashing liquids and no object lled with
liquids, such as vases, shall be placed on the apparatus.
CAUTION: These service instructions are for use by qualied
service personnel only.To reduce the risk of electric shock, do not
perform any servicing other than that contained in the operation
instructions. Repairs must be performed by qualied service personnel.
1. Read these instructions.
2. Keep these instructions.
3. Heed all warnings.
4. Follow all instructions.
5. Do not use this apparatus near water.
6. Clean only with dry a cloth.
7. Do not block any ventilation openings. Install in
accordance with the manufacturer’s instructions.
8. Do not install near any heat sources, such as radiators, heat registers,
stoves, or other apparatus (including ampliers) that produce heat.
9. Do not defeat the safety purpose of the polarized or grounding-
type plug. A polarized plug has two blades, with one wider than
the other. A grounding-type plug has two blades and a third
grounding prong. The wide blade and the third prong are provided
for your safety. If the provided plug does not t into your outlet,
consult an electrician for replacement of the obsolete outlet.
10. Protect the power cord from being walked on or pinched,
particularly at plugs, convenience receptacles, and
the point where they exit from the apparatus.
11. Use only attachments/accessories specied by PreSonus.
12. Use only with the cart, stand, tripod, bracket, or table
specied by the manufacturer or sold with this apparatus.
When a cart is used, use caution when moving the cart/
apparatus combination to avoid injury from tip-over.
13. Unplug this apparatus during lightning storms or
when unused for long periods of time.
14. Servicing is required when the apparatus has been damaged in
any way, such as if a power-supply cord or plug is damaged; or
liquid has been spilled, or objects have fallen, into the apparatus;
or if the apparatus has been exposed to rain or moisture, does not
operate normally, or has been dropped. All PreSonus products in
the USA should be serviced at the PreSonus factory in Baton Rouge,
Louisiana. If your StudioLive requires a repair, contact techsupport@
presonus.com to arrange for a return-authorization number.
Customers outside the USA should contact their local distributor. Your
distributor’s contact information is available at www.presonus.com.
15. The apparatus shall be connected to a Mains power outlet
with a protective grounding/earthing connection.
16. Where the Mains plug or an appliance coupler
is used as the disconnect device, the disconnect
device shall remain readily operable.
EU Directives on the Protection of the
Environment and Other Euro Stu
RoHS This product is compliant with the EU Directive 2002/95/
EG for the Restriction of the use of Certain Hazardous Substances in
Electrical and Electronic Equipment. No lead (Pb), cadmium (Cd),
mercury (Hg), hexavalent chromium (Cr+6), PBB or PBDE is intentionally
added to this device. Any traces of impurities of these substances
contained in the parts are below the RoHS specied threshold levels.
REACh This product is compliant with the European Union Directive
EC1907/206 for the Registration, Evaluation, Authorization, and
Restriction of chemicals (REACh) and contains none or less than 0.1% of
the chemicals listed as hazardous chemicals in the REACh regulation.
WEEE As with the disposal of all old electrical and electronic
equipment, this product is not to be treated as
regular household waste. Instead it shall be handed
over to the applicable collection point for the
recycling of electrical and electronic equipment.
CE This product complies with the European Union Council Directives
and Standards relating to electromagnetic compatibility (EMC
Directive 89/336/EEC) and the LowVoltage Directive (73/23/EEC).
0.1 Important Safety Instructions 0.2 Table of Contents
StudioLive 24.4.2
1.0 Quick Start 5
2.0 Overview 7
2.1 Introduction 7
2.2 Summary of StudioLive™ 24.4.2 Hardware
Features 8
2.3 Summary of Capture™ Software Features 9
2.4 Summary of StudioOne™ Artist Software
Features 9
2.5 Summary of Virtual StudioLive™ Software
Features 10
2.6 What is in the Box 11
3.0 Hookup 12
3.1 Rear-Panel Connections 12
3.2 Basic Hookup Diagram 17
3.3 Typical Band Hookup 18
3.4 Typical Church Hookup 20
3.5 Typical Recording Hookup 22
4.0 Controls 24
4.1 The Fat Channel 24
4.1.1 Select Buttons, Meters and the Fat Channel 24
4.1.2 What You Can Process with the Fat Channel
and FireWire Sends 25
4.1.3 Fat Channel: Dynamics Processing and EQ 26
4.1.4 Fat Channel Panning and Stereo Link 35
4.1.5 Fat Channel: Output Assignments 36
4.1.6 Copying, Loading, and Storing Fat Channel
Settings 36
4.2 Metering 37
4.2.1 StudioLive Metering Controls 37
4.3 Input Channel Strip 38
4.3.1 Input Channel Controls 38
4.4 Aux Sends 40
4.4.1 Analog Aux Send Controls 40
4.4.2 Internal Aux Send Controls 42
4.5 Subgroups 43
4.5.1 Subgroup Controls 43
4.6 Main Output Bus 44
4.7 Master Section 45
4.7.1 Aux Inputs A and B 45
4.7.2 Talkback System 45
4.7.3 2 Track In 46
4.7.4 Solo Bus 47
4.7.5 Monitor Bus 48
4.8 Digital Eects | Master Control 49
4.8.1 The Digital FX (Eects) Menu 49
4.8.2 Digital Eects Library 51
5.0 Scenes, Presets, and the
System Menu 52
5.1 Creating and Recalling a Scene 52
5.2 Saving and Loading Channel Presets 55
5.2.1 Channel Presets Library 56
5.3 Graphic Equalizers 57
5.4 System Menu 59
6.0 Connecting to a Computer 62
6.1 System Requirements 62
6.2 Installation for Windows 63
6.3 Installation for Mac OS X 64
6.4 Using the StudioLive as an
Audio Interface 65
6.4.1 Using the StudioLive with Popular Audio
Applications 65
6.4.2 FireWire Sends and Returns 66
6.4.3 Using Plug-In Eects As Inserts 68
6.4.4 Advanced WDM Features (PC only) 69
6.4.5 Conguring the StudioLive For Core Audio
(Mac Only) 70
7.0 Software: Universal Control,
Capture, and Studio One
Artist DAW 72
7.1 Universal Control 72
7.1.1 Universal Control: Launch Window 73
7.2 VSL: Virtual Studio Live 76
7.2.1 VSL: Browser 77
7.2.2 VSL: Overview Tab 80
7.2.3 VSL: Channel Tab 82
7.2.4 Loading Scenes and Presets from VSL 82
7.2.5 VSL: GEQ Tab 84
7.2.6 VSL: Setup Tab 85
7.2.7 Enabling Lockout Mode 86
7.2.8 Remotely Controlling StudioLive with VSL 87
7.3 Capture 88


