7. Loading.
Refer to “Loading the Autoclave” at Section 14, page
19 and “Specifications” on page 15 for the maximum
permissible load.
Failure to follow instructions may cause the unit to
malfunction and result in an unsuccessful cycle. Before
loading, ensure instruments are cleaned and rinsed
thoroughly.
Always use the instrument trays or racks, which are
supplied or are available as recommended accessories
through your supplier
Load instruments so that they do not touch each other
and that the load does not touch other trays or the
chamber.
Only one item should be placed in a pouch.
Linen loads should be formed into a rectangular pack of
size 110mm x 110mm x 50mm. (maximum), weighing no
more than 1 kg. Place on a pouch tray in the middle of the
chamber.
Linen loads should not be sterilized in combination with
other loads.
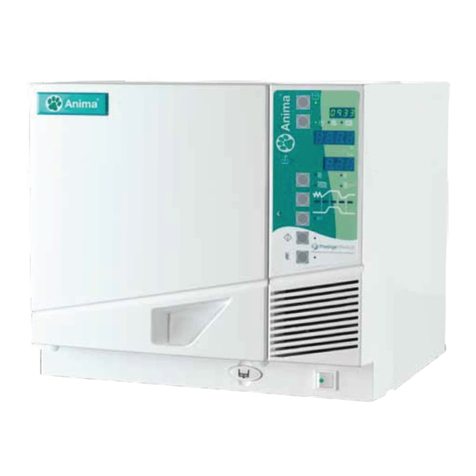
8. Door closing.
Once the trays are in place, close the door by pushing until
a “click” is heard. The LED next to the door open button
(C) will then flash for a period of 20 seconds during which
time entry in to the unit is restricted. This ‘dwell’ period
is used to ensure correct pressure sensing readings are
made prior to a cycle being initiated. Access to the unit
can be made once this period is complete.
9. Cycle options.
After each cycle the unit will return to the default cycle.
On Vacuum units this is the 134ºC /3½min
Vacuum cycle for porous loads, wrapped,
pouched, solid / hollow instruments with
drying (B cycle).
Cycle options available on the vacuum autoclave are:
Press F to select the vacuum cycles these are: -
134ºC /3½min. Vacuum cycle for porous loads,
wrapped, pouched, solid / hollow instruments
with drying.
134ºC /18min. Vacuum cycle for porous loads,
wrapped, pouched, solid / hollow instruments
with drying.
134ºC /3½min. Cycle for bagged solid
instruments, without drying. Additional drying
should be added.
134ºC /3½min. Steam penetration test
without drying. Suitable for Bowie Dick Test
Pack or Helix.
Press G to select non-vacuum cycles.
121ºC /15½min. Non-vacuum cycle for
unwrapped solid instruments, without drying.
134ºC /3½min. Non-vacuum cycle for unwrapped
solid instruments, without drying.
On non-vacuum units pressing G allows you to scroll round
all the 121°C. and 134°C. cycles.
Non-vacuum cycle for unwrapped solid
instruments, with drying. Either 121°C
/15½min. or 134°C/3½min.
Non-vacuum cycle for unwrapped solid
instruments, without drying. Either 121°C
/15½min. or 134°C/3½min.
Press H to select “Additional Drying”.
Additional drying.
This option can be added before or after a cycle.
NB. Additional drying is inactive for the Steam Penetration Test
cycle (TP). Drying on this cycle can only be obtained after the
cycle has ended by selecting additional drying as described
below in (ii).
(i) To select before starting a cycle:
(i) Press button (H) once. L4 illuminates to
indicate 5 additional minutes.
(ii) Press (H) a second time. L4 & L5 illuminate
to indicate 10 additional minutes.
(iii) Press (H) a third time. L4 L5 & L6 illuminate
to indicate 15 additional minutes.
(iv) Press (H) a fourth time. This cancels
additional drying.
(v) Select, then start the required cycle. See “10”.
(ii) To select after a cycle has been completed:
(i) With the door closed press and hold button
(H) for 10seconds. L7 flashes to indicate 5
minute drying in progress.
(ii) Press button (H) once. L4 illuminates to
indicate 5 additional minutes. Now press
and hold button (H) for 10seconds. L4 and
L5 are illuminated. Then L7 flashes to
indicate 10minute drying in progress.
(iii) Press button (H) twice. L4 & L5 illuminated
to indicate 10 additional minutes. Now press
and hold button (H) for 10seconds. L4 L5
and L6 are illuminated. L7 now flashes to
indicate 15minute drying in progress.
3 3✖
7


