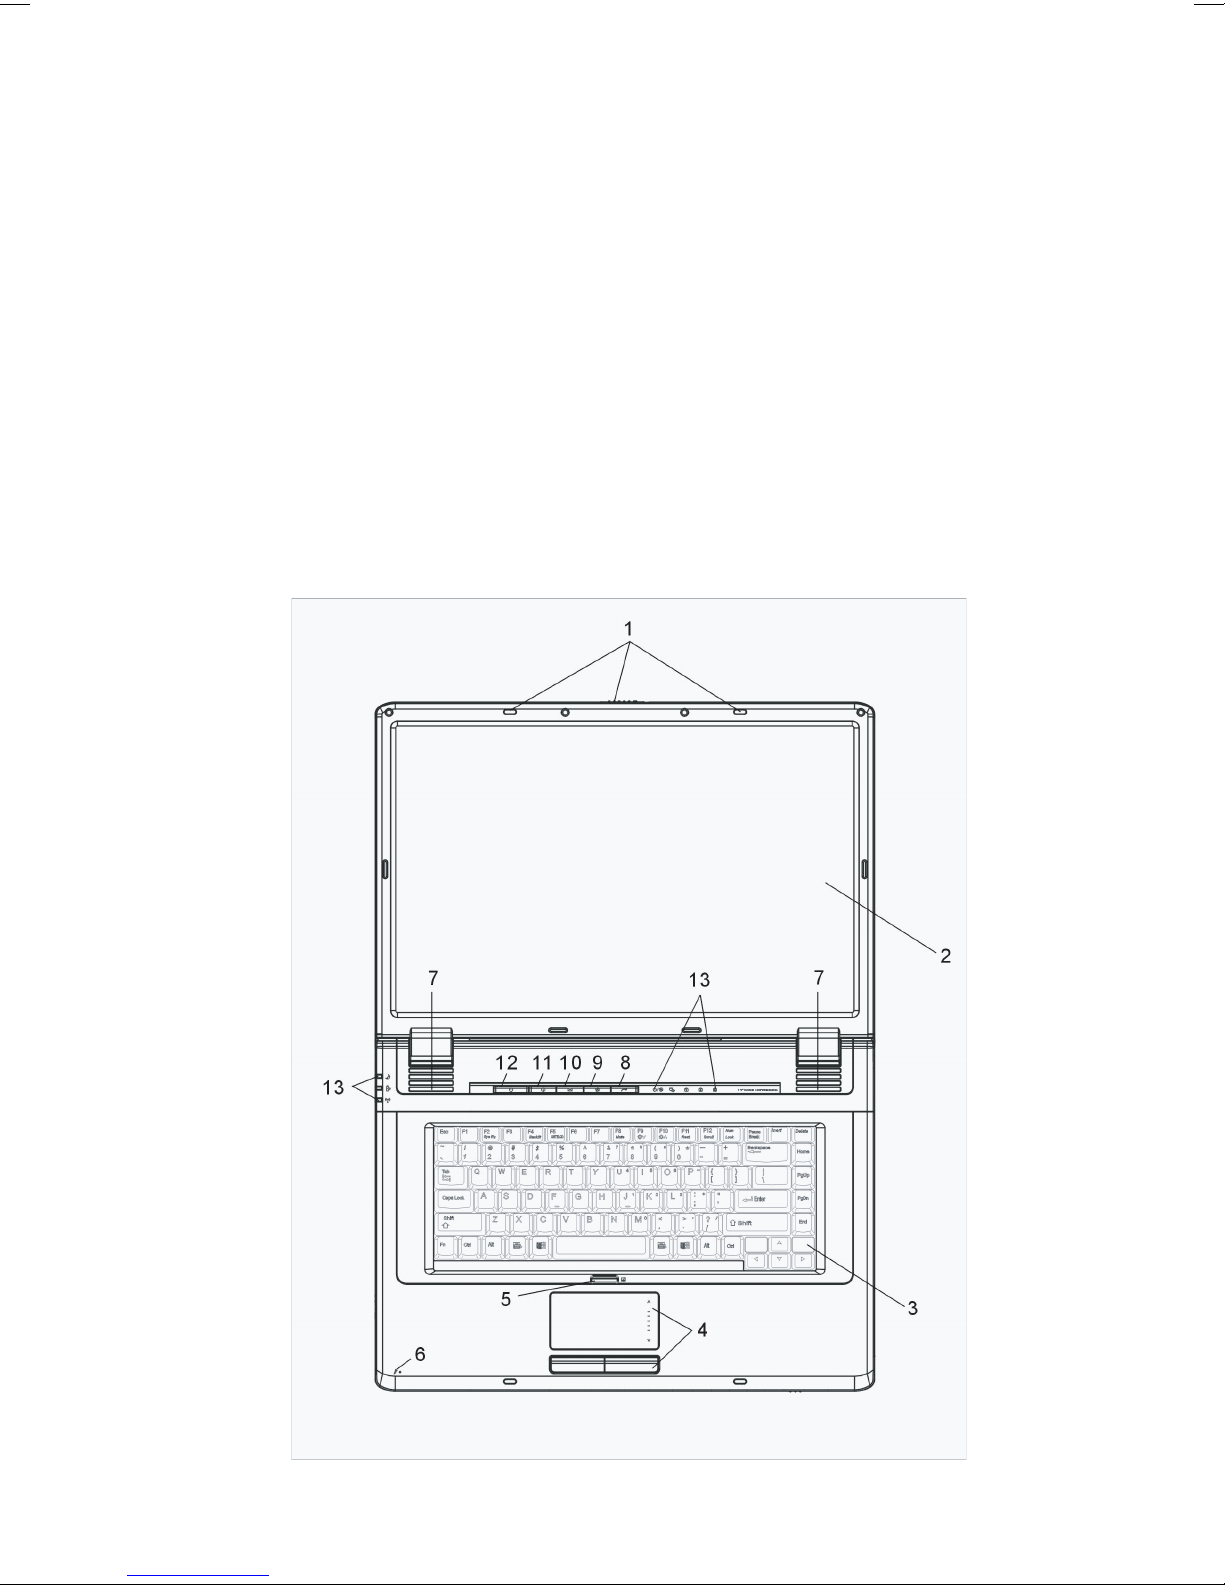
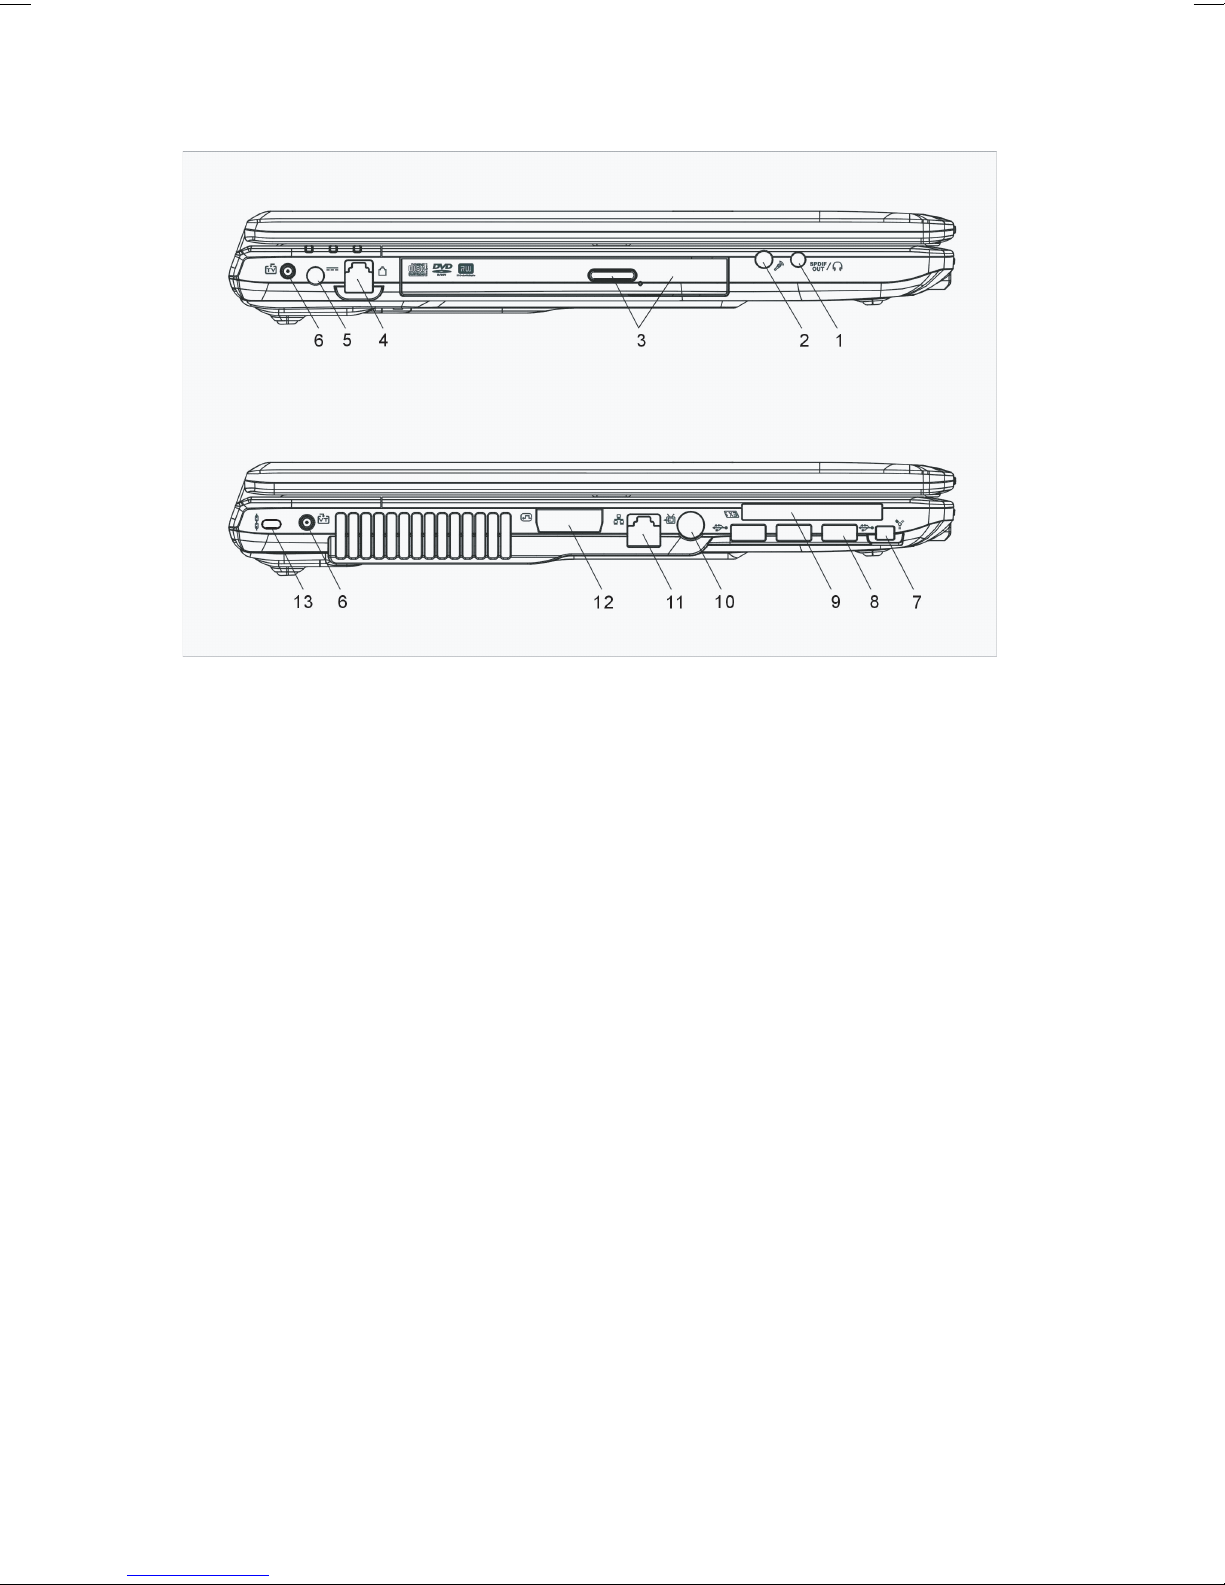
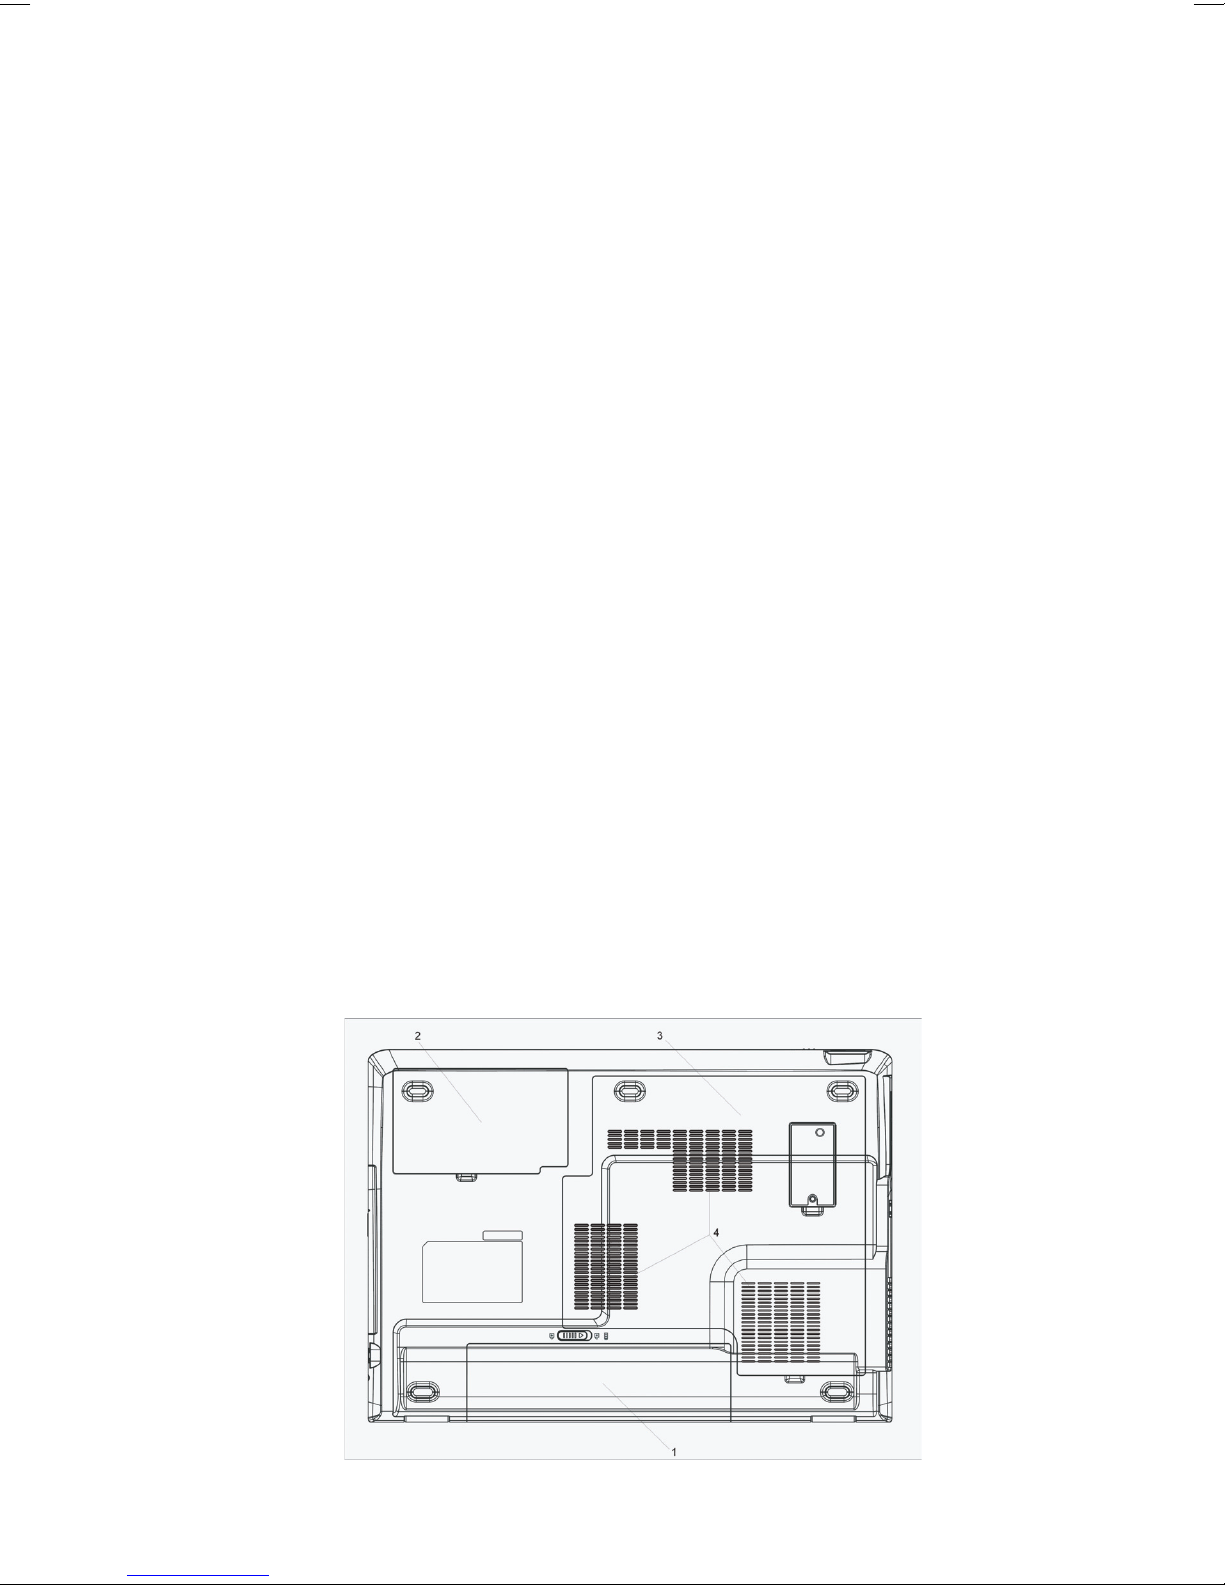
2 PRESTIGIO AVANTI 1770W
ENG
Preface
Using This Manual
This User’s Manual contains general information about the hardware and software setup,troubleshooting,and technical
specifications of the notebook computer.
Symbols and Conventions
The following conventions and symbols are used in this manual:
When keys are to be pressed at the same time, a plus (+) symbol is used. For instance, Fn+F7 means
holding Fn and F7 keys at the same time.
When a series of clicking actions is needed in Windows O/S, [ ] and > symbols are used. For instance,
[Start > Settings > Control Panel > Display] means clicking the Start icon first, then the Settings, then
the Control Panel, then the Display icon.
When you need to make a selection with the touch pad (or mouse),you will be asked to ‘select’or ‘click’or
‘double-click’,‘right-click’theitem.
Note: Text in this format and symbol means specific instructions, commentary, sidelights, or any
additional information or notes that you should be aware of.
Warning: Text in this format and symbol means that failures to comply with the given instructions
or information could result in damage to your computer or could cause bodily harm or loss of
life.
Protecting Your Computer - Avoid Abusive Handling and Adverse
Environment
Follow the advice below will help ensure that you get the most out of your Investment.
Your computer will serve you well if you take good care of it.
Do not expose the computer to direct sunlight or place it near sources of heat.
Do not subject it to temperatures below 0oC (32oF) or above 30oC (86oF).
Do not expose the computer to magnetic fields.
Do not expose the computer to moisture or rain.
Do not spill water or liquid on the computer.
Do not subject the computer to adverse shock and vibration.
Do not expose the computer to dust and dirt.
Do not place objects on top of the computer to avoid damaging the computer.
Do not place the computer on rocky surfaces.
Here are some ways of taking care of your AC adapter.
Do not connect the adapter to any devices other than your computer.
Do not let water get into the adapter.