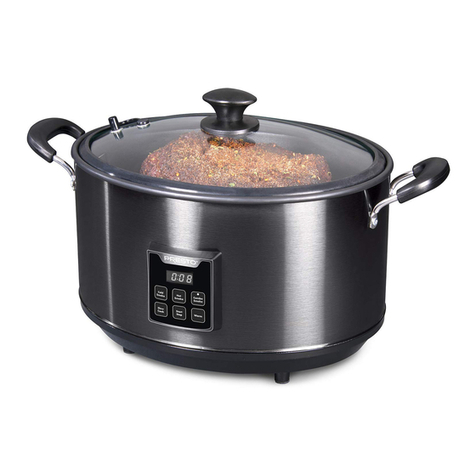
Presto 06013 User manual

1
Indoor Electric Smoker
• Quickly and easily smokes food right on your
kitchen counter.
• Infuses foods with authentic smoked flavor.
• Digital touchpad with settings for cold smoke,
hot smoke, or a combination of both.
INSTRUCTIONS ©2019 National Presto Industries, Inc.
Form 4057-102A
This is an Listed appliance. The following important safeguards are recommended by most portable appliance manufacturers.
IMPORTANT SAFEGUARDS
To reduce the risk of personal injury or property damage, when using electrical appliances, basic safety precautions should always be
followed, including the following:
1. Read all instructions.
2. Do not touch hot surfaces. Use handles or knobs. Any accessible surface may become hot during use. Always use potholders or
oven mitts when handling hot materials.
3. To protect against electrical shock or burns, do not immerse the smoker base, cord, or plug in water or other liquid.
4. Close supervision is necessary when any appliance is used by or near children.
5. WARNING! Spilled food can cause serious burns. Keep appliance and cord away from children. Never drape cord over edge of
counter. Never plug cord into outlet below counter or use an extension cord.
6. Do not let cord hang over edge of table or counter or touch hot surfaces.
7. Unplug from the wall outlet when not in use and before cleaning. Allow to cool before putting on or taking off parts, and before
cleaning the appliance.
8. Do not operate any appliance with a damaged cord or plug or in the event the appliance malfunctions or has been damaged in any
manner. Return the appliance to the Presto Factory Service Department for examination, repair, or electrical or mechanical adjustment.
9. The use of accessory attachments not recommended by the appliance manufacturer may cause injuries. Use only genuine Presto®
accessory attachments and replacement parts.
10. Intended for countertop use only.
11. Do not place on or near a hot gas or electric burner or in a heated oven.
12. Extreme caution must be used when moving any appliance containing hot oil or other hot liquids.
13. Do not use outdoors.
Estas instrucciones también están disponibles en español.
Para obtener una copia impresa:
• Descargue en formato PDF en www.GoPresto.com/espanol.
• Llame al 1-800-877-0441, oprima 2 y deje un mensaje.
Visit www.GoPresto.com

2
14. Always attach plug to appliance first, then plug cord into the wall outlet. To disconnect, press the stop button, then remove plug
from wall outlet.
15. This appliance is not intended for use by persons (including children) with reduced physical, sensory or mental capabilities, or lack
of experience and knowledge, unless they have been given supervision or instruction concerning use of the appliance by a person
responsible for their safety.
16. Children should be supervised to ensure that they do not play with the appliance.
17. This appliance is intended to be used in household applications.
18. The heating element surface is subject to residual heat after use.
19. Do not use the appliance for other than intended use.
SAVE THESE INSTRUCTIONS
THIS APPLIANCE IS FOR HOUSEHOLD USE ONLY.
Important Cord Information
To reduce the risk of electric shock, this appliance has a 3-prong grounded plug. If the plug on this appliance does not fit into your outlet,
contact a qualified electrician. Do not attempt to modify the plug in any way.
A short power supply cord is provided to reduce the risk of it being grabbed by children or becoming entangled in or tripping over a
longer cord. DO NOT USE WITH AN EXTENSION CORD.
Connect the power supply cord to a 120VAC electrical outlet only.
Important Safety Information
CAUTION!
Always use the smoker in a well ventilated area to prevent smoke irritation. Place it under a range hood vented to the outside or an open
window. Do not use the unit near a smoke alarm or smoke detector.
To prevent burns, always allow smoker to cool completely before removing charring cup and lid, wood chips/pellets, or any grease or
liquid that has accumulated in the smoker base.
To prevent the risk of fire, always soak the wood chips/pellets in water before discarding. Do not place the smoker on or near combustible
materials such as tablecloths or curtains, nor store any materials, other than the manufacturer’s recommended accessories, in this smoker
when not in use.
This appliance is not intended to
melt wax, gels, plastics, glue, or
other materials for making candles
or for other hobbyist activities,
or in any commercial or business
application. Using this product
for purposes different from those
specified in this instruction manual
may cause serious bodily injury or
damage to the product.
Before First Use
Before using the Presto®Indoor
Electric Smoker for the first time,
become familiar with the various
parts (Fig. A) and read the instruc-
tions carefully.
Remove all packaging from the
smoker. Wash the cover and
smoking racks in warm, soapy
water. Rinse and dry thoroughly.
These parts can also be cleaned in
the dishwasher. Wipe the inside of
the smoker base with a damp cloth.
Digital touchpad
Smoking racks
Charring
cup
Cover
Vent plug
Charring
cup lid
Smoker base
Carrying
handle
Cover knob
Fig. A
Base rack
(rack with handles)
Carrying
handle
Cover
gasket
Charring
cup holes
Handle
Handle
Bar
SMOKER PARTS

3
For easier cleaning, cover the charring cup lid with aluminum foil before
using the smoker.
CAUTION! To protect against electrical shock or burns, never immerse
the smoker base or power cord in water or other liquid.
Introduction
With your new Presto®Indoor Electric Smoker, you’ll be able to infuse
authentic smoked flavor into meats, poultry, fish, seafood, vegetables
and more.
The digital touchpad (Fig. C) has settings for cold smoke, hot smoke, or a
combination of both (combo smoke). The following describes the smoking
modes and for which foods they work best.
Hot smoke cooks and smokes food at the same time, which makes this
setting ideal for smaller cuts of meat, poultry, fish, seafood, and vegetables.
Cold smoke adds smoke flavor, but does not cook food. Cold smoking
is used for food that is already cooked, will be cooked at a later time, or
does not require cooking. Nuts, cheese, vegetables, salt, and hard-cooked eggs can be successfully cold smoked.
Combo smoke first cold smokes and then hot smokes the food. Combination smoke is well suited for large pieces of meat, such as pork
and beef roast, brisket, and ribs, that require a longer cooking time. The combo smoke setting is programmed for a maximum
time of
6 hours, with the first 40% of the time in cold smoke and the last 60% in hot smoke.
How to Use the Digital Touchpad
Whenever you plug the unit in, it will beep once and dashes will appear in the display window (Fig. C). This is the standby mode.
To smoke foods:
1. Press the desired smoke mode button on the digital touchpad (Cold Smoke, Hot Smoke, or Combo Smoke). The light on the smoke
mode button you have selected will flash and the default starting time will appear (:05 for cold and hot smoke and :30 for combo
smoke).
2. Press the timer button to adjust the smoking time. The time will flash in the display window
(Fig. C). For cold smoke and hot smoke, the time will increase in 5-minute increments and
for combo smoke the time will increase in 30-minute increments. To rapidly increase the time,
hold down the button.
3. Once you have set the desired time, press the start button to begin smoking. To end the smoking
function at any time, press the stop button.
NOTE: The time will flash in the display window while you are programming the unit. Once you
press start, the time and light on the smoke mode button will stop flashing. If you forget to press
the start button, after 30 seconds you will hear 2 beeps. The unit will then go into standby mode
and you will need to reprogram it following the steps above.
The maximum programmed times for the smoke settings are: 2 hours for cold smoke, 4 hours for hot smoke, and 6 hours for combo smoke.
How to Use
Check the rubber pads on the bottom of the smoker base before each use to be sure they are free of oil or other debris. If needed, wipe
with a warm, soapy cloth and dry thoroughly.
1. Position the smoker base on a clean, dry, level, and stable surface in the center of the
countertop, away from combustible materials. Always make sure the appliance and
cord are out of reach of children.
2. Position the charring cup around the heating element so the holes are towards the top
(Fig. D).
3. Place wood chips loosely around the heating element. Be sure to also place wood chips
in the center of the element. NOTE: Wood pellets may be substituted for wood chips.
For foods with smoking times up to 2 hours, fill the charring cup half full with wood
chips, or use 2 tablespoons (.5 ounces) of wood pellets.
If smoking time is more than 2 hours, fill the cup to the top with wood chips, or use
¼ cup (1 ounce) of wood pellets.
INSIDE VIEW OF SMOKER BASE
Heating element
Charring
tray
Fig. B
Fig. D
Charring
cup holes
Heating
element
Charring cup
Fig. C
Display
window

4
4. Cover the charring cup with the charring cup lid. NOTE: If the lid does not rest on the charring cup, the cup is overfilled. Remove
excess wood chips/pellets. Never smoke with an overfilled cup.
5. Position the base rack (rack with handles) so the legs are resting on the counter and the handles are extended out (Fig. A, page 2). Grasp
the handles and lift the rack into the smoker base. Release the handles and move them so they rest against the smoker base sidewalls.
6. Load the base rack with food. See the Helpful Hints below for guidance on positioning food and other tips.
7. If additional racks are needed, position another rack on top. Be sure to rest the leg indents of the
added rack onto the bars of the rack below (Fig. A, page 2). Load the rack with food. Repeat this
process if a third rack is needed.
8. Place the cover onto the smoker base, ensuring the gasket is seated against the base rim. Also ensure
both ends of the vent plug have been pushed into place in the cover (Fig. E).
9. Plug cord into a 120VAC electrical wall outlet only.
10. Press the desired smoke mode button. Then press the timer button to adjust the smoking time, if
necessary. Refer to the time charts and recipes on pages 5 through 8 as a guide for recommended
times. Then press the start button to begin the smoking process.
NOTE: It will take a few minutes for the wood chips/pellets to heat up. The unit will not begin counting down until the warmup occurs.
During cooking, the light on the smoke mode button in use will flash intermittently. This indicates the unit is cycling on and off to
maintain the temperature.
The cover and gasket are designed to provide a closed environment to optimize smoke infusion into the food. To maximize smoke
flavor, do not open the cover during smoking. While smoking, you will probably notice a light smoky odor and some condensation
on the cover. Both are normal.
11. When smoking time expires, the unit will beep 3 times and automatically go into the keep warm mode when using hot smoke or
combo smoke. The timer will begin to count down. The unit will remain in this mode for 8 hours or until the stop button is pressed.
When cold smoke time expires, the unit will go into standby mode.
12. Remove the smoker cover. NOTE: With long smoke times, a vacuum seal may form between the smoker base and cover. If the cover
is difficult to remove, pull the taller end of the vent plug (Fig. E) from the cover to break the seal.
13. If smoking meat, check the internal temperature with a meat thermometer to assure it is done after the smoking time has expired.
14. Once the food is done, use potholders to grasp the base rack handles and carefully lift the rack(s) out of the smoker. Remove food
from the rack(s).
15. Unplug the smoker and allow it to cool completely before removing parts and cleaning.
Helpful Hints
• Experiment with different types of wood chips/pellets to find your favorite. Alder, maple, and fruit woods such as apple and cherry
impart a subtle, sweet flavor. These woods work well for fish, chicken, and smaller pieces of pork. Hickory, oak, and pecan impart a
heavier flavor and work well for large cuts of meat, such as pork, beef, and game. The boldest flavor is imparted by mesquite.
• It is not necessary to soak wood chips/pellets. Wet wood chips/pellets will increase the time it takes for the wood to begin smoking.
• Thaw meat before smoking.
• Place meat on racks with fat side up and meatier portion towards the charring cup. It is not necessary to flip the meat during cooking.
NOTE: It is normal for the portion of the food positioned directly above the charring cup on the base rack to be darker than the sur-
rounding surface. This is especially true with foods requiring a longer smoking time.
• Position food on its flattest surface in the center of the rack to prevent shifting while cooking. The exception is a bone-in turkey breast
which should be positioned breast side up.
• Place aluminum foil on top of the smoking racks when smoking smaller foods, such as nuts, or when smoking foods that may melt,
such as cheese.
• When food has cooked the minimum time suggested in the time charts, check the internal temperature of the food. Avoid frequent
opening of the smoker as it reduces the temperature and adds 10 to 15 minutes to the smoking time for every opening.
• Hot smoking foods for long periods of time can dry out the foods’ exterior surface. Brining or marinating food before smoking will
help the food retain moisture and add flavor. Placing a rub on the surface of the food will also help maintain moisture and add flavor.
• If smoking large quantities of food, multiple racks may be needed. For convenience, place one rack at a time into the smoker base,
starting with the base rack (the one with handles). Load food onto each rack as it is placed in the smoker.
Taller end of
vent plug
Fig. E

5
Cold Smoke Time Chart
Food Cold Smoking Time
Eggs, hard-cooked 15 to 30 minutes
Cheese, semi-rm 30 minutes
Nuts, shelled 30 minutes
Sea salt 1 to 2 hours
Vegetables, whole (garlic and mushrooms) 30 minutes to 1 hour
Vegetables, halved or quartered
(onions, peppers, and tomatoes) 30 minutes to 1 hour
Hot Smoke Time/Temperature Chart
The smoking times in the chart are meant to be a guideline, as the times may be affected by the cut, thickness, and weight of meat, as
well as personal preference. The temperature of the meat, poultry, and sh determines when it is adequately smoked, so smoke food to
temperature rather than to time. Use a meat thermometer to assure food is done.
Food (thaw before smoking) Smoking Time
Smoking
Method
Internal Food
Temperature
Beef
Brisket (3 to 4 pounds) 5 to 6 hours Combo Smoke 190° to 200°F
Ribs (3 to 4 pounds) 3 to 4 hours Combo Smoke 190° to 200°F
Roast–arm, top/bottom round,
boneless rump
(3 to 4 pounds) 3 to 4 hours Combo Smoke 190° to 200°F
Pork
Ribs (3 to 4 pounds) 3 to 4 hours Combo Smoke 180° to 185°F
Roast–butt and shoulder
(3 to 4 pounds) 5 to 6 hours Combo Smoke 190° to 200°F
Poultry
Chicken drumsticks or thighs 1 to 1½ hours Hot Smoke 190° to 195°F
Whole chicken
(3½ to 4 pounds) 1 to 1½ hours Hot Smoke 190° to 195°F
Turkey breast, bone-in
(4 pounds) 4½ to 5 hours Combo Smoke 190° to 195°F
Turkey breast, boneless
(2 to 3 pounds) 2½ to 3½ hours Combo Smoke 190° to 195°F
Turkey drumsticks 1½ hours Hot Smoke 190° to 195°F
Fish
Fillets–salmon, tuna, white sh 30 minutes Hot Smoke 145°F
Whole sh 1 hour Hot Smoke 145°F
Sausage-uncooked
Made from beef, pork, veal 1 to 1½ hours Hot Smoke 160°F
Made from poultry 1 to 1½ hours Hot Smoke 165°F
Venison
Roast (1½ to 2 pounds) 2 to 2½ hours Combo Smoke 160°F

6
Smoker Recipes
Baby Back Ribs
4 pounds baby back pork ribs
2 tablespoons packed brown sugar
1 tablespoon salt
2 teaspoons paprika
½ teaspoon black pepper
½ teaspoon chili powder
½ teaspoon fennel seeds
½ teaspoon garlic powder
½ teaspoon onion powder
¼ teaspoon cayenne pepper
Remove thin membrane on one side of the ribs and discard. Cut the meat into pieces of 3 to 4 rib sections so they t easily in the smoker.
Mix brown sugar, salt, paprika, pepper, chili powder, fennel seeds, garlic powder, onion powder, and cayenne in a small bowl. Rub even-
ly over ribs and place meat in a shallow dish. Cover meat tightly with plastic wrap and refrigerate 8 hours or overnight.
Position charring cup around heating element and ll with wood chips/pellets.* Cover with charring cup lid. Place base rack in smoker
and lay ribs on rack. Stack additional rack(s) onto base rack and ll with ribs. Place cover on smoker. Combo Smoke 4 hours. Remove
ribs.
8 to 10 servings (serving size 4 ounces)
Smoked Brisket
1 tablespoon packed brown sugar
1 tablespoon salt
2 teaspoons paprika
1 teaspoon parsley flakes
1 teaspoon black pepper
1 teaspoon chili powder
1 teaspoon garlic powder
1 teaspoon onion powder
¼ teaspoon red pepper flakes
1 (3–3½ pound) flat brisket
Mix brown sugar, salt, paprika, parsley akes, pepper, chili powder, garlic powder, onion powder, and pepper akes in a small bowl.
Rub evenly over surface of brisket.
Position charring cup around heating element and ll with wood chips/pellets.* Cover with charring cup lid. Place base rack in smoker.
Put brisket on rack, fat side up; place cover on smoker. Combo Smoke 5 hours. Remove brisket to a cutting board and wrap with
aluminum foil. Allow to rest for 30 minutes. Slice brisket against the grain.
8 to 10 servings (serving size 4 ounces)
Tip: Smoke brisket to 190° to 200°F to ensure tenderness.
Smoked Pulled Pork
2 tablespoons packed brown sugar
1 tablespoon salt
2 teaspoons paprika
½ teaspoon black pepper
½ teaspoon chili powder
½ teaspoon fennel seed
½ teaspoon garlic powder
½ teaspoon onion powder
¼ teaspoon cayenne pepper
1 (3–4 pound) pork shoulder roast
Mix brown sugar, salt, paprika, pepper, chili powder, fennel seed, garlic powder, onion powder, and cayenne in a small bowl. Rub evenly
over pork roast. Place roast in a shallow dish and cover tightly with plastic wrap; refrigerate 8 hours or overnight.
Position charring cup around heating element and ll with wood chips/pellets.* Cover with charring cup lid. Place base rack in smoker.
Put roast on rack and place cover on smoker. Combo Smoke 6 hours. Remove pork to cutting board; allow to rest for 10 minutes.
Remove and discard excess fat and connective tissue. Using two forks, shred meat.
Serve with barbecue sauce if desired.
8 to 10 servings (serving size 4 ounces)
Cajun Smoked Turkey Breast
1 tablespoon sugar
1 teaspoon black pepper
1 teaspoon paprika
1 teaspoon salt
½ teaspoon garlic powder
½ teaspoon onion powder
½ teaspoon oregano
½ teaspoon thyme
¼ teaspoon cayenne pepper
1 (3–pound) boneless turkey
breast roast**
**A 4-pound bone-in turkey breast may be substituted.
Mix sugar, pepper, paprika, salt, garlic powder, onion powder, oregano, thyme, and cayenne in a small bowl. Rub evenly over surface
of turkey roast.
*See page 3, step 3: ”How to Use”

7
Position charring cup around heating element and ll with wood chips/pellets.* Cover with charring cup lid. Place base rack in smoker.
Put turkey roast on rack; place cover on smoker. Combo Smoke 2½hours. Remove roast to a cutting board and wrap in aluminum foil.
Allow roast to rest for 15 minutes before slicing.
12 servings
Tip: If using a bone-in turkey breast, Combo Smoke 4½ hours.
If turkey roast is secured in netting, leave it in place for smoking. Remove just prior to slicing.
Smoked Salmon with Dill
2 tablespoons brown sugar
1 teaspoon black pepper
1 teaspoon salt
½ teaspoon dill weed
1 pound salmon fillet, cut into 4 pieces
Mix brown sugar, pepper, salt, and dill in a small bowl. Rub over top of salmon llets. Cover and refrigerate 1 hour.
Position charring cup around heating element and ll half full with wood chips/pellets.* Cover with charring cup lid. Place base rack in
smoker and put llets, skin side down, on rack.** Stack additional rack onto base rack and place llets on rack as described above. Place
cover on smoker. Hot Smoke 30 minutes. Remove llets with a spatula and serve hot or cold.
4 servings
**If skin has been removed from the salmon, line the rack with aluminum foil.
Brined Smoked Salmon
2 tablespoons salt
2 tablespoons sugar
1 tablespoon black pepper
1 tablespoon garlic powder
2 cups water
1 pound salmon fillet, cut into 4 pieces
Mix salt, sugar, pepper, garlic powder, and water in a small bowl. Place salmon in a shallow dish and pour brine over llets. Cover and
refrigerate 1 hour.
Position charring cup around the heating element and ll half full with wood chips/pellets.* Cover with charring cup lid. Remove llets
from dish and pat dry. Place base rack in smoker and put llets, skin side down, on rack.** Stack additional rack onto base rack and place
llets on rack as described above. Place cover on smoker. Hot Smoke 30 minutes. Remove llets with a spatula and serve hot or cold.
4 servings
**If skin has been removed from the salmon, line the rack with aluminum foil.
Smoked Santa Fe Pizza
2 7-inch naan bread**
1 tablespoon olive oil
1½ teaspoons ground cumin
½ cup prepared spicy black bean dip
4 ounces cooked shredded chicken
¼ cup taco seasoning
3 tablespoons prepared chipotle salsa,
or preferred type
⅓cup fresh or frozen (thawed) corn kernels
2 tablespoons green onions
1 tablespoon chopped cilantro
⅔cup shredded pepper jack cheese
**Instead of naan, use focaccia or other flatbread.
Lightly brush each piece of bread with oil and dust with cumin. Spread black bean dip evenly on each piece of bread, leaving 1-inch rim.
Add chicken and taco seasoning to a resealable plastic bag and shake to evenly coat chicken. Remove chicken from bag and mix with
salsa in small mixing bowl. Place chicken mixture evenly over bean dip. Sprinkle with corn, green onions, and cilantro. Top with cheese.
Position charring cup around heating element and ll half full with wood chips/pellets.* Cover with charring cup lid. Place one pizza
on base rack. Place rack in smoker. Stack additional rack onto base rack and position other pizza on rack. Place cover on smoker.
Hot Smoke 15 to 20 minutes until cheese is melted.
2 pizzas
Create a specialty pizza using your favorite ingredients or try these combinations:
Alfredo sauce, pizza sauce, pesto
Pita bread, or any type of at bread
Blue cheese crumbles, parmesan cheese shavings, fresh mozzarella
Crumbled bacon, pepperoni, cooked sausage
Sun dried tomatoes, colored pepper slices
*See page 3, step 3.

8
Smoked Nuts
12 ounces whole or halved nuts
2 teaspoons olive oil
1 teaspoon seasoned salt
Add nuts to a medium bowl; drizzle with olive oil and sprinkle with salt. Stir to coat.
Position charring cup around heating element and ll half full with wood chips/pellets.* Cover with charring cup lid.
Line top of all racks with aluminum foil. Add a single layer of nuts to each foil-lined rack after it is placed in the smoker. Place cover on
smoker. Cold Smoke 30 minutes. Remove nuts.
12 servings (serving size 1 ounce)
Smoked Gouda
7 ounce wheel Gouda cheese**
**Any type of semi-firm cheese, such as Cheddar, Colby, Edam, Mozzarella, or Swiss can be substituted for Gouda.
Position charring cup around heating element and ll half full with wood chips/pellets.* Cover with charring cup lid.
Line top of base rack with aluminum foil. Place foil-lined rack in smoker. Put cheese on rack; place cover on smoker. Cold Smoke 30
minutes. Remove cheese; wrap tightly with plastic wrap. Refrigerate cheese for at least 24 hours to intensify the smoky avor and aroma.
7 servings (serving size 1 ounce)
Smoked Salsa
6 Roma tomatoes, halved and seeded
1 large jalapeño, halved and seeded**
½ large red onion, peeled and halved
1 cup chopped cilantro
2 cloves garlic, minced
2 tablespoons lime juice (juice from about 1 lime)
½ teaspoon salt
¼ teaspoon cumin
**If hotter salsa is desired, leave seeds in jalapeño.
Position charring cup around heating element and ll half full with wood chips/pellets.* Cover with charring cup lid.
Line top of base rack and one additional rack with aluminum foil. Put tomatoes, pepper, and onion on foil-lined racks after each one is
placed in smoker. Place cover on smoker. Cold Smoke 30 minutes. Remove tomatoes, pepper, and onion. Chop into coarse pieces; place
into a medium bowl. Add cilantro, garlic, lime juice, salt, and cumin; stir until mixed.
Makes 2 cups
Smoked Eggs
Hard-cooked eggs, shells removed Seasoned salt**
**Use your favorite seasoned salt blend.
Position charring cup around heating element and ll half full with wood chips/pellets.* Cover with charring cup lid. Place rack(s) in
smoker and position eggs on rack(s). Sprinkle eggs liberally with seasoned salt. Place cover on smoker. Cold Smoke 15 to 30 minutes.
Remove eggs. Eggs should be refrigerated if not immediately consumed.
Care and Cleaning
1. Allow smoker to cool completely before cleaning.
2. Remove the smoking racks, charring cup lid, and charring cup. Then remove the wood chips/pellets.
CAUTION! To prevent a fire, always soak the wood chips/pellets in water before discarding.
3. Wash the smoking racks, charring cup, charring cup lid, and cover in warm, soapy water. Do not remove the cover gasket. Rinse and
dry thoroughly. These parts can also be cleaned in the dishwasher.
4. Pour a small amount of warm, soapy water into the smoker base and clean the inside of the base, including the charring tray. A nylon
mesh pad can be used, if necessary. Empty water, rinse, and dry thoroughly. Do not use steel wool scouring pads or abrasive
cleaners on the smoker base.
CAUTION! To protect against electrical shock or burns, never immerse the smoker base or power cord in water or other liquid.
5. Store the charring cup and smoking racks in the smoker base.
*See page 3, step 3.

9
Glass Cover Care and Use Instructions
CAUTION! The glass cover may break for no apparent reason if you fail to follow these instructions. Broken glass can cause personal
injury or property damage.
Handle the cover carefully. Do not scrape or gouge glass with hard or sharp utensils. Do not handle a hot cover with a wet towel or place
it on a cold or wet surface. Sudden extreme changes in temperature may cause the glass to break. Do not use the cover if it is chipped
or cracked.
Allow the cover to cool before washing. Do not use steel wool or abrasive powders which can scratch or weaken the glass. Nonabrasive
pads or powders may be used if necessary.
Periodically check the screw on the cover handle for looseness. Retighten, if necessary.
NOTICE: Continuing to tighten, once secure, can result in the stripping of the screw or cracking of the handle.
Any other servicing should be performed by an authorized service representative.
Consumer Service Information
If you have any questions regarding the operation of your Presto®appliance or need parts for your appliance, contact us by any of these
methods:
• Call 1-800-877-0441 weekdays 8:00 AM to 4:00 PM (Central Time)
• Email us through our website at www.GoPresto.com/contact
• Write: National Presto Industries, Inc.
Consumer Service Department
3925 North Hastings Way, Eau Claire, WI 54703-3703
Inquiries will be answered promptly by telephone, email, or letter. When emailing or writing, please include a phone number and a time
when you can be reached during weekdays if possible. When contacting the Consumer Service Department, please indicate the model
and series numbers for the smoker. These numbers can be found on the bottom of the smoker base. Please record this information:
Model ___________________________ Series _________________________ Date Purchased ___________________________
The Presto Factory Service Department is equipped to service Presto®appliances and supply genuine Presto®replacement parts. Genuine
Presto®replacement parts are manufactured to the same exacting quality standards as Presto® appliances and are engineered specically
to function properly with its appliances. Presto can only guarantee the quality and performance of genuine Presto®replacement parts.
“Look-alikes” might not be of the same quality or function in the same manner. To ensure that you are buying genuine Presto®replacement
parts, look for the Presto®trademark.
Canton Sales and Storage Company
Presto Factory Service Department
555 Matthews Drive, Canton, MS 39046-3251
Product Registration
IMPORTANT: Please go online and register this product within ten days of purchase. Proper registration will serve
as proof of purchase in the event your original receipt becomes misplaced or lost. Registration will not affect warranty
coverage, but it may expedite the processing of warranty claims. The additional information requested will help us develop
new products that best meet your needs and desires. To register the product, visit www.GoPresto.com/registration or simply
scan this QR code. If you do not have computer access, contact the Consumer Service Department at 1-800-877-0441.
(Applies only in the United States)
This quality Presto®appliance is designed and built to provide many years of satisfactory performance under normal household use. Presto pledges to the original
owner that should there be any defects in material or workmanship during the rst year after purchase, we will repair or replace it at our option. Our pledge does not
apply to damage caused by shipping. Outside the United States, this limited warranty does not apply.
To obtain service under the warranty, please call our Consumer Service Department at 1-800-877-0441. If unable to resolve the problem, you will be instructed
to send your Presto®appliance to the Presto Factory Service Department for a quality inspection; shipping costs will be your responsibility. When returning an
appliance, please include your name, address, phone number, and the date you purchased the appliance as well as a description of the problem you are encountering
with the appliance.
We want you to obtain maximum enjoyment from using this Presto®appliance and ask that you read and follow the instructions enclosed. Failure to follow
instructions, damage caused by improper replacement parts, abuse, misuse, disassembly, alterations, or neglect will void this pledge. This warranty gives you specic
legal rights, and you may also have other rights which vary from state to state. This is Presto’s personal pledge to you and is being made in place of all other express
warranties.
National Presto Industries, Inc.
Eau Claire, WI 54703-3703
Presto®Limited Warranty
Other manuals for 06013
1
Table of contents
Other Presto Smoker manuals