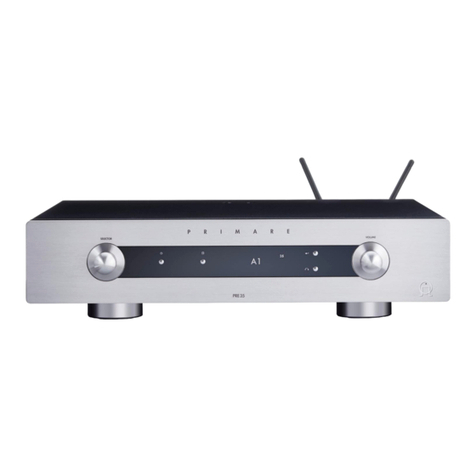
Primare PRE35 User manual

R
P R E 3 5 D A C P R E A M P L I F I E
User Guide 사용설명서 (한글대역)

PRE35 DAC Preamplifier User Guide2
CAUTION
화재의 위험을 방지하기 위해서 휴즈는 같은 타입과 용
량의 것으로 교환하십시오.
Safety compliance
본제품은 전기안전에 관한 국제규격 IEC 60065 을
준수합니다.
CAUTION
RISK OF ELECTRIC SHOCK DO NOT OPEN .
감전의 위험이 있으니 커버를 열지 마십시오.
번개 마크는 위험한 전압이 존재함을 경고합니다.
The lightning flash symbol is intended to alert the user
to the presence of uninsulated 'dangerous voltage'
within the product's enclosure .
느낌표는 주의를 요하는 중요사항이 있음.
The exclamation point is intended to alert the user to
the presence of important operating the product.
CAUTION: 감전의 위험이 있으니 커버를 열지 마십시오.
내부에 사용자가 수리할 수 있는 부품이 없습니다.
WARNING: 화재 및 감전의 위험이 있으니 본 제품을 비
에 젖거나 습기에 노출 시키지 마십시오.
CAUTION: (카나다 및 미국 관련내용)
본 제품은 엄격한 품질 및 안전 기준을 준수하여 설계
및 제조되었습니다. 그러나 안전을 위하여 다음 사항
에 주의하여 사용하십시오.
1. Take heed of warnings & instructions
본 제품을 사용하기 전에 사용설명서를 읽고 충분히 이
해한 다음 사용하십시오.
2. Water and moisture
물기가 있는 곳에서 사용은 위험합니다.
물기 있는 곳 - 욕조 주방 젖은 지하실 수영장 등 근처에
서 사용하지 마시십시오.
3. Object or liquid entry
이물질이나 액체가 케이스 안으로 흘러 들어가지 않도록
주의바랍니다. 꽃병 같은 액체 용기는 기기 주변에 두지 마
십시오.
4. Ventilation
환기가 좋지 않은 침대, 소파, 천으로 된장소, 밀폐된 책
장, 캐비닛 등에는 사용하지 마십시오. 본 기기 주변에 최
소 5센티 이상 여유를 두어 통풍이 잘 되도록 하시기 바랍
니다.
5. Heat
열기가 있는 곳, 라디에터, 스토브, 기타 열이 발생하는
기기에서 멀리 떨어져 설치하십시오.
6. Climate
본 제품은 보통의 기후 조건에서 사용할 수 있습니다.
7. Racks and stands
랙이나 스탠드를 사용할 때에는 오디오 전용의 랙이나 스
탠드를 사용하십시오.
8. Cleaning
제품의 청소를 할 때는 먼저 전원코드를 차단하십시오
부드러운 천에 물기를 적셔 가볍게 닦아주십시오. 페인트
씬너 혹은 화학 솔벤트는 절대 사용하지 마십시오. 가구
용 스프레이 광택제 등도 사용하지 마십시오.
9. Power sources
제품과 함께 공급된 전원코드를 사용하여 전원을 연결하
십시오. 사용전압을 확인하십시오.
본제품은 Class 1 으로서 전원 접지연결하여야 합니다.
This is a Class 1 device and must be earthed.
전원스위치는 single-pole switch로서 전원스위치를 끄더
라도 한선은 연결되어 있어 완전히 전원히 차단되는 것
이아님을 주의바랍니다.
10. Power-cord protection
전원코드는 사람이 밟거나 접히거나 손상이 가지 않도록
주의해서 배선하여 연결하십시오.
11. Grounding
접지를 무력하지 않도록 주의바랍니다.
12. Power lines
실내외 안테나에 전원코드가 접촉하지 않도록 주의바랍
니다.
13. Non-use periods
스탠바이 중에도 전원은 소모됩니다. 장기적으로 사용하
지 않을 때는 전원코드를 뽑아 놓으십시오.
14. Abnormal smell
제품에서 이상한 냄새가 날 때에는 즉시 전원을 끄고 전
원코드를 제거한 다음 수리점에 연락하십시오.
15. Servicing
본제품을 수리하려 하지 마십시오. 사용자가 수리할 수
있는 부품이 없습니다. 수리 전문가에게 의뢰하십시오.
16. Damage requiring service
다음에 경우 사용을 중지하고 전문가에게 수리를 의뢰하
십시오.
A. 전원 코드가 파손된 경우
B. 본체 내부에 물 또는 이물질이 들어 간 경우
C. 비를 맞은 경우
D. 작동하지 않거나 작동 중 이상 증상을 보일 때
E. 본체를 떨아트리거나 파손되었을 때

PRE35 DAC Preamplifier User Guide 3
2.4G and 5G FCC Statements
This device complies with Part 15 of the FCC Rules.
Operation is subject to the following two conditions:
1. This device may not cause harmful interference, and
2. This device must accept any interference received,
including interference that may cause undesired
operation.
Cet appareil est conforme à la section 15 des
réglementations de la FCC. Le fonctionnement de
l’appareil est sujetaux deux conditions suivantes :
1. cet appareil ne doit pas provoquer d’interférences
néfastes, et
2. cet appareil doit tolérer les interférences reçues,
y compris celles qui risquent de provoquer un
fonctionnement indésirable.
Note: This product has been tested and found to comply
with the limits for a Class B digital device, pursuant to Part
15 of the FCC Rules. These limits are designed to provide
reasonable protection against harmful interference in a
residential installation. This product generates, uses, and
can radiate radio frequency energy and, if not installed
and used in accordance with the instructions, may cause
harmful interference to radio communications. However,
there is no guarantee that interference will not occur in a
particular installation. If this product does cause harmful
interference to radio or television reception, which can be
determined by turning the equipment off and on, the user
is encouraged to try to correct the interference by one or
more of the following measures:
•Reorient or relocate the receiving antenna.
• Increase the separation between the equipment and
receiver.
•Connect the equipment into an outlet on a circuit
different from that to which the receiver is connected.
•Consult the dealer or an experienced radio/TV
technician for help.
Please take attention that changes or modification
not expressly approved by the party responsible for
compliance could void the user’s authority to operate the
equipment.
This equipment should be installed and operated with a
minimum distance 20cm between the radiator and your
body.
Cet équipement doit être installé et utilisé à une distance
minimale de 20 cm entre le radiateur et votre corps.
This device complies with Industry Canada licence-exempt
RSS standard(s). Operation is subject to the following two
conditions:
1. this device may not cause interference, and
2. this device must accept any interference, including
interference that may cause undesired operation of the
device.
Le présent appareil est conforme aux CNR d’Industrie
Canada applicables aux appareils radioexempts de
licence. L’exploitation est autorisée aux deux conditions
suivantes :
1. l’appareil ne doit pas produire de brouillage, et
2. l’utilisateur de l’appareil doit accepter tout brouillage
radioélectrique subi, même si le brouillage est
susceptible d’en compromettre le fonctionnement.
Under Industry Canada regulations, this radio transmitter
may only operate using an antenna of a type and
maximum (or lesser) gain approved for the transmitter by
Industry Canada. To reduce potential radio interference
to other users, the antenna type and its gain should be so
chosen that the equivalent isotropically radiated power
(e.i.r.p.) is not more than that necessary for successful
communication.
Conformément à la réglementation d’Industrie Canada,
le présent émetteur radio peut fonctionner avec une
antenne d’un type et d’un gain maximal (ou inférieur)
approuvé pour l’émetteur par Industrie Canada. Dans le
but de réduire les risques de brouillage radioélectrique
à l’intention des autres utilisateurs, il faut choisir le type
d’antenne et son gain de sorte que la puissance isotrope
rayonnée équivalente (p.i.r.e.) ne dépasse pas l’intensité
nécessaire à l’établissement d’une communication
satisfaisante.
The CE symbol indicates that this Primare product
complies with the EMC (Electromagnetic Compatibility)
and LVD (Low Voltage Directive) standards of the
European Community.
The WEEE symbol indicates this Primare product complies
with the European Parliament and Council Directive
2002/96/EC concerning Waste Electrical and Electronic
Equipment (WEEE). This product must be appropriately
recycled or processed in accordance with these directives.
Consult your local waste disposal authority for guidance.
The RoHS symbol indicates that Primare products are
designed and manufactured to comply with the Restriction
of Hazardous Substances (RoHS) as stated in the European
Parliament and Council Directive 2002/95/EC.
Copyright and acknowledgments
Copyright © 2018 Primare AB.
All rights reserved.
Primare AB
Limstensgatan 7
21616 Limhamn
Sweden
http://www.primare.net
Issue: PRE35DAC/2 (20/11/2018)
The information in this guide is believed to be correct as
of the date of publication. However, our policy is one of
continuous development and so the information is subject
to change without notice, and does not represent a
commitment on the part of Primare AB.
Primare is a trademark of Primare AB.
This guide was produced by
Human-Computer Interface Ltd.
http://www.interface.co.uk

PRE35 DAC Preamplifier User Guide4

PRE35 DAC Preamplifier User Guide 5
CONTENTS
Welcome! 6
Getting Started 7
1 Unpack the PRE35 7
2 Connect to a power amplifier 7
3 Connect inputs 7
4 Connect power 7
Back-panel connections 8
Using the remote control 9
Selecting PRE35 mode 9
Fitting the batteries 9
Using the PRE35 10
Front panel controls 10
Changing the volume 10
Selecting a source 10
Changing the display brightness 10
Connecting sources 11
Configuring the settings 12
Using the settings menus 12
INPUT SETTINGS 12
AUDIO SETTINGS 13
GENERAL SETTINGS 13
Technical specification 14
Analogue inputs 14
Analogue outputs 14
Digital inputs 14
Digital output 14
Wireless output 14
Performance 14
General 14
Additional information 15
Phase 15
Burn-in 15
RS232 and trigger 15
Using the PRE35 with a CD35 15
Error messages 15
Factory reset 15
Index 17
NTS
처음 시작하기
후면의 연결 단자
리모컨 사용하기
PRE35 본격 사용하기
입력 소스 연결
환경 설정
차 례
제품 사양
유용한 정보

PRE35 DAC Preamplifier User Guide6
WELCOME!
Congratulations on selecting your new
PRE35 DAC Preamplifier
This user guide describes the features and explains how
to set up the preamplifier for the best sound quality and
ease of operation in order to allow for the most enjoyable
reproduction of sound from all your sources.
For additional support and assistance please contact your
local authorized Primare dealer, or visit our website at
www.primare.net.
환영의 인사 말씀
PRE35 DAC 선택을 축하드립니다.
이 사용 설명서는 본 제품의 특징과 기능을 설명하
고어떻게 설치하며 가장 최선의 사운드를 얻을 수
있고 가장 즐거운 음악 감상을 할 수 있는 방법을
설명하고 있습니다.
보다 자세한 도움이 필요한 경우 구입하신 대리점
에서 자문을 구하거나 www.primare.net을 방문
하여 정보를 얻으시길 받으시기 바랍니다.
감사합니다.

PRE35 DAC Preamplifier User Guide 7
GETTING STARTED
1 Unpack the PRE35 포장 내용물
Your PRE35 is supplied with:
This User Guide
Mains cable 전원코드
IR cable 적외선 (리모컨) 케이블
Trigger cable트리거 연결 케이블
C25 remote control with batteries
AC Polarity Pen 전원위상 체크기
If any of these items are missing please contact your supplier. We
recommend you retain the packaging in case you need to transport
the unit at a later date. 포장 박스를 잘 보관하여 이사 이동
및 아프터 서비스 시에 사용하십시오.
Note that the PRE35 is supplied with a protective film on the display
glass. Remove the film for a clearer whiter display.
2 Connect to a power amplifier 파워앰프
연결
The PRE35 is designed to be connected to a power amplifier with
either balanced or unbalanced inputs. If the power amplifier
provides balanced inputs, such as the Primare A35.2: 본 프리앰
프에 파워앰프를 XLR / RCA 케이블로 연결할 수 있습니
다.
Connect the PRE2 or PRE3 L and R outputs from the
PRE35 to the L and R balanced inputs in the power
amplifier, using high quality XLR cables.
If the power amplifier only provides unbalanced inputs:
Connect the PRE1 L and R outputs from the PRE35 to the L
and R inputs on the power amplifier, using high quality
RCA cables.
l
l
l
l
l
l
l
l
Fixed-level analogue output 고정출력 단자
The PRE35 also provides a fixed-level analogue output on the
LINE output on RCA connectors, to allow you to connect to active
speakers or an analogue recorder. 앰프내장스피커나 녹
음기 등에 연결할 수 있습니다.
Digital output 디지털 출력단자
The PRE35 also provides a coax digital output on an RCA
connector. 동축의 디지털 출력단자
3 Connect inputs 입력단자 연결하기
2개의 발런스 소스, 3개의 언밸런스 소스, 6개의 디지털
소스를 연결할 수있습니다.
Balanced inputs 밸런스 입력단자 2개
Connect balanced sources, such as the Primare CD35
CD player, to balanced inputs A1 and A2 using high
quality XLR cables.
Unbalanced inputs 언밸런스입력단자 3개
Connect unbalanced sources to the unbalanced inputs
A3, A4, and A5 using high quality RCA cables.
Digital inputs 디지털 입력단자 6개
Connect digital optical sources to the digital optical inputs
D6 to D9 using optical cables.
Connect digital coax sources to the digital coax inputs D10
and D11 using digital RCA cables.
You can also connect a PC or Mac to the USB-B input to use
the PRE35 as an audio output device for your computer.
USB-B 단자에 PC를 연결하여 컴퓨터 음악
을 오디로를 통해 들으실수 있습니다.
l
l
l
l
4 Connect power 전원 연결
Plug one end of the mains cable supplied with the PRE35
into the power connector on the back panel, and connect
the other end to a wall socket. 제공된 전원코드를 이
용하여 전원을 연결하십시오.
If this cable is not suitable for your power outlets please contact
your supplier for an alternative cable.
Note: See
Phase
, page 15, for information about getting the
best sound from your PRE35.
WARNING: Always disconnect the PRE35
from the mains power before connecting or
disconnecting any cables.
Switch on the PRE35, using the switch on the back
panel. 후면의 주전원스위치를 켜면 전면에 스탠
바이 표시등이 켜집니다.
PRIMARE
l
l
The standby indicator will light up on the front panel.
To switch on from standby
lPress Oon the front panel or remote control.
The display shows: 전면 좌측의 전원스위치나 리모
컨의 전원 스위치를 누르면 다음과 같이 표시등 켜
지며 전원이 들어 옵니다.
앰프에 스피커를 다른 기기 혹은 스피커를 연
결하거나 제거할 때는 반드시 전원코드를 제거
한 다음에 하십시오.
처음 시작하기

PRE35 DAC Preamplifier User Guide8
The following diagram explains the function of each of the
connectors on the back panel: 아래 그림은 후면에 있는
연결단자를 보여 줍니다.
BACK-PANEL CONNECTIONS
RLR L
PRE1 PRE2 PRE3
ANALOG OUT
SPS
Slot for
network module
Unbalanced
analogue inputs
Analogue
outputs
IR
in/out
Trigger
RS232 Balanced
analogue inputs
Power and
fuse
On/off
Optical
digital inputs
Coax
digital inputs
Balanced
analogue outputs
Digital
output
USB-B
input
WiSA
transmitter
SPS
button
and status
트리거 출력 적외선입출력
(리모컨)
밸런스입력(2) 언밸런스입력(3) 아나로그출력 아나로그출력 전원코드 인렛
퓨즈
네트웍모듈 장착용 슬롯 光입력(4) 코액셜 USB-B입력 디지털출력
디지털입력(2)
후면의 연결단자

PRE35 DAC Preamplifier User Guide 9
스탠바이 스위치 Switch
between on and standby Press
and hold to switch all Primare
products to standby
Press briefly to
mute the sound
Select item in settings menus
Navigate left in settings menus or
select previous input
Select remote mode.
Press twice to select
device on second line
Decrease the volume
Increase the volume
Step between dim levels
Increase the volume,
or navigate up in settings menus
Navigate right in settings menus or
select next input
Reduce the volume,
or navigate down in settings menus
In the settings menus navigates back
or cancels editing a setting
Display the front panel settings menus
Indicators light when
pressing a button
Top: AMP, PRE, or CD mode
Bottom: AV, SC, or AUX mode
숫자 입력 / 입력선택
Select an input
Selecting PRE35 mode 통합 리모컨 사용하기
The remote control can operate any associated Primare products
you have in your system.
To make the remote control operate the PRE35
Press the AMP AV button once. 리모컨에서 AMP AV 버튼
을 한번 눌러야 Pre35에 사용할 수 있습니다.
To make the remote control operate another product
Press the AMP AV, CD SC, or PRE AUX button as appropriate.
다른 기기를 사용하려면 해당기기의 버튼을 누르십시오.
Press once to select the product on the top line of the button, or
twice to select the product on the second line. 참고로 위에 있는 기
기는 버튼을 한번만 누르고, 아래에 있는 기기는 버튼을 두번 눌러
선택합니다.
The indicators at the top of the remote control light when pressing
a button to show which mode the remote control is in. 리모컨 좌측
상단의 LED 불빛으로 어느 것이 선택되어 있는지 알 수 있습니다.
Fitting the batteries
Before using the remote control you need to insert the two AAA
cells supplied with the C25.
Open the cover on the back of the remote control by
pressing the back cover gently near the centre of the
remote control, and sliding it towards the edge of the
remote control.
Insert the two batteries, with the polarity as indicated
on the bottom of the battery compartment.
Replace the cover and push until it clips into place.
Note: Replace only with 1.5V alkaline cells type
AAA or equivalent.
When disposing of old batteries please be considerate to
the environment.
l
l
l
l
l
USING THE REMOTE CONTROL 리모컨 사용하기
사용 기기 선택표시등
위에것: AMP CD PRE
아래것: AV SC AUX
음소거 버튼
밝기 조절
메뉴에서 좌측 이동 메뉴에서 우측 이동
사용 기기 선택
취소 또는 이전 메뉴로 이동
메뉴 보기

PRE35 DAC Preamplifier User Guide10
Front panel controls 전면패널 기능
Selector 전면패널 기능
Selects an input. In the settings menus navigates between
settings.
Standby O 스탠바이 전원스위치
Switches the PRE35 to standby, or switches it on from
standby.
Menu @ 메뉴 (다시 누르면 메뉴에서 빠져나감)
Displays the settings menus or exits from the menus.
Select R 환경설정을 선택하거나 저장함.
In the settings menus selects a setting or saves an edited
setting.
Back 전 단계 메뉴로 돌아거나 취소함
In the settings menus navigates back or cancels editing a
setting.
Volume 음량을 조절함.
Changes the volume.
Changing the volume 음량 조절
The PRE35 allows you to vary the volume from 0 (silence)
to 99 (maximum). 볼륨은 0~99까지 100단계 조절 가능함
To change the volume
Rotate the VOLUME control on the front panel, or press
the +or –buttons or the Aor Vbuttons on the remote
control. 전면 우측의 볼륨을 돌리거나 리모컨으로 조정
The current volume setting is shown on the front panel; for
example: 현재 볼륨이 숫자로 표시됩니다.
VOL 28
l
Selecting a source 입력소스 선택하기
The PRE35 provides a choice of 12 inputs. Initially these are
labelled as shown in the following table, but you can give them
your own aliases to suit the sources in your system; see
ALIAS
,
page 12. 본제품에는 총12개의 입력단자가 준비되어
있습니다
Label Description
A1, A2 Balanced analogue on XLR
connectors.
A3–A5 Unbalanced analogue on RCA
connectors.
D6–D9 Digital optical on TOSLINK
connectors.
Digital coax on RCA connectors.
Digital on USB-B connector.
D10, D11
PC/MAC
To select a source
Turn the SELECTOR until the source is indicated on the
front panel display; for example:
A1
전면패널에 선택한 입력이 표시됩니다.
Alternatively, press the <or >buttons on the remote
control to step between sources, or enter 1to 12 on
the remote control to select the corresponding source
directly.
전면의 셀렉터 노브를 좌으로 회전하거나 리머
컨의 화살표 버튼을 눌러서 입력 소스를 변경
할 수 있습니다.
l
l
Changing the display brightness
밝기조절
To change the front panel display brightness
전면패널 불빛밝기 조절
Press the DIM button on the remote control to step
through the three levels of illumination and blank.
리모컨에서 DIM 버튼을 루르면 밝기를 조절하
거나 끌 수 있습니다.
If you turn the display off it will be restored briefly when
you operate any control.
조명을 끈 상태에서 어느 기능을 선택하면 잠시 불빛으
로 보여 주고 다시 꺼진 상태로 돌아갑니다.
The display automatically dims after ten minutes; you can
adjust this delay in the settings menus; see
GENERAL
SETTINGS
, page 13.
10분이 지나면 자동적으로 조명이 어두어 집니다. 이
상태에서 기능이라도 선택하면 다시 조명이 켜집니다.
시간은 조절 가능합니다.
l
USING THE PRE35 본격 사용하기

PRE35 DAC Preamplifier User Guide 11
CONNECTING SOURCES
PRE35
Power Amplifier
Digital optical source Digital optical cable
Digital coax source Digital coax cable
XLR cable XLR cable
Phono RCA cable
Balanced analogue
source
Unbalanced analogue
source
USB-A to USB-B cable
PC/Mac
To play music from a source
Connect the source via a suitable cable:
적당한 케이블을 사용하여 입력단
자와 소스기기를 연결하세요.
Balanced analogue XLR cable
Unbalanced analogue Phono RCA cable
Digital optical source Digital optical cable
Digital source Digital coax cable
Select the source from the front panel, or using the
remote control. 전면패널의 셀렉터 또는 리모
컨으올 입력을 선택하십시어.
l
l
To use the PRE35 as a PC/Mac sound output device
Connect the Mac or PC to the PRE35 via a USB-A to
USB-B cable. 피씨 오디오 연결 방법:
USB A-B 케이블을 사용하여 PC와 연결하
십시오.
PC
Windows 7, 8, 8.1, or 10 (32/64-bit) is required. You
need to install the Primare xmos audio driver, available
on primare.net.
(1)Windows 7 이후 최신 버젼의 OS 필요함.
(2)www.primare.net에서 XMOS audio driver
다운로드 받아서 PC에 설치하세요.
(3)제어판에서 사운드 장치로 Primare USB
Audio DAC 가나타나면 선택하십시오.
Connect the computer’s USB port to the USB B input on
the PRE35 using a USB A to USB B cable.
The PRE35 will then appear as a sound output device
called Primare USB Audio DAC in the Sound control panel
(PC) or Sound system preferences panel (Macintosh).
ll
lSelect the PC/MAC source on the PRE35.
Select the Primare USB Audio DAC as the sound output
device in the Mac Sound system preferences panel or
the PC Sound control panel.
l
입력 소스 연결하기
디지털 소스
디지털 소스
아나로그 소스
밸런스
아나로그 소스
언밸런스
USB 단자
(PC / MAC)
Loudspeakers 스피커
파워앰프

PRE35 DAC Preamplifier User Guide12
CONFIGURING THE SETTINGS
Using the settings menus
PRE35 의 환경설정은 전면패널이나 리모컨컨에서 가
능합니다.
To display the settings menu
전면패널에서 @button 을 누르거나 리모컨의
MENU button 을 누르면 아래와 같이 표시됩니다.
The settings menu is displayed:
PRE35 SETTINGS 20
INPUT
AUDIO
GENERAL
전면에서 SELECTOR 노브를 돌리거나 리모컨에서 A
or Vbutton 을 눌러서 선택합니다.
The current setting is shown highlighted.
To change a setting
전면에서 Rbutton 누르거나 리모컨에서SELECT
button 을눌러서 선택합니다.
The current value is shown highlighted.
전면에서 SELECTOR 노브를 돌리거나 리모컨에서 A
or Vbutton 을눌러서 설정을 변경합니다.
As you change it the new value is shown in the menu.
변경된 환경을 저장하려면 전면에서 R누르거나
리모컨에서 SELECT button 을눌러서 선택합니다.
To navigate back or cancel editing a setting
前 메뉴로 돌아가거나 설정을 취소하려면
전면이나 리모컨에서
누르면 취소되거나 뒤로 돌아갑니다.
To exit from the settings menu
l
l
l
l
l
l
l
INPUT SETTINGS
The INPUT SETTINGS menu allows you to customise the
inputs to suit the sources in your system:
A1 SETTINGS 20
INPUT A1
ALIAS A1
STATUS ENABLED
INPUT (입력)
맨처음 현재 선택된 입력의 환경설정을 보여줍니다. 그
다음으로 입력단 사이를 옮겨 다닐 수도 있습니다. 입력
마다 부수적인 옵션을 변경됩니다.
ALIAS (입력에 이름 붙이기)
입력에 이름을 붙일 수 있습니다. 예 RADIO.
ALIAS 를 선택하고 리모컨에서 SELECT button 을누릅
니다.
RENAME INPUT 메뉴가 표시됩니다:
RENAME INPUT 20
A
전면에서 SELECTOR 를누르거나 리모컨에서 <or
>buttons 을눌러서 첫 글자를 선택합니다.
전면에서 Rbutton 를누르거나 리모컨에서 SELECT
을눌러서 선택을 저장합니다.
글자를 입력한 뒤 다음 명령을 선택하십시오:
ADD NEW CHARACTER
CONFIRM ‘A’
CLEAR ALIAS
CONFIRM 은 입력을 확정합니다.
ADD NEW CHARACTER 다음 글자를 추가합니다 (6
자까지).
CLEAR ALIAS 입력된 이름을 삭제합니다.
l
l
l
l
l
STATUS (입력 사용여부)
입력의 사용여부를 결정합니다.
사용 ENABLED (default) 혹은 사용안함 DISABLED.
AUTO SENSE (자동 감지 스위칭)
SELECT 입력신호가 들어면 그입력을 자동적으로 선택하여
작동하도록 합니다.
WAKE+SELECT 스탠바이상태에서 입력신호가 들어면 그입
력을 자동적으로 선택하여 작동하도록 합니다.
OFF (default) 자동감지 스위칭 기능을 끕니다.
VOLUME (볼륨)
VARIABLE (default) 볼륨 조절이 가능한 가변 볼륨;
FIXED 볼륨조절 없이 입력 신호 그대로.
FIXED 는0dB gain으로서 최대 volume setting 66에해당
함. MAXIMUM VOLUME in AUDIO SETTINGS은무력화됩
니다.
주의: FIXED을선택하면 고음에 대한 경고가 뜹니다. YES
를눌러 선택하거나 NO 를눌러서 취소하십시오
참고로 Fixed gain 기능은 멀티 채널 서라운드 앰프로의
출력이 필요할 때 유용하게 사용할 수 있습니다.
INPUT GAIN (입력 게인 설정)
-30dB to -1dB, 0dB (default), or +1dB to +30dB 사이에서
선택한 입력의 게인을 설정할 수 있습니다. .
If the gain is set too high on an input clipping may occur,
and the message: 선택한 입력의 게인이 너무 높으면 음
이 찌그러지며 아래 경고표시가 뜰 수 있습니다.
DECREASE INPUT GAIN
이경우 입력 게인을 낮추십시오.
설정 메뉴
To step between settings 메뉴간 이동
설정의 변경
메뉴 표시
메뉴에서 나가기
전면패널에서 @button 을 누르거나 리모컨의
MENU button 을 누르면 메뉴에서 나갑니다.
입력 설정
환경 설정

13
AUDIO SETTINGS 오디오 환경설정
The AUDIO SETTINGS menu allows you to customise the
balance and start-up volume, and the maximum and mute
volume.
AUDIO SETTINGS 20
BALANCE 00LR00
STARTUP VOLUME 30
MAXIMUM VOLUME 99
BALANCE (좌우 음균형)
좌측으로 00LR-9 (far left), 중앙 00LR00 (centred, default)
우측으로 -9LR00 (far right) 조절 가능합니다.
STARTUP VOLUME (시동 볼륨)
전원을 켯을 때첫볼륨을 0 and 60 사이에서 결정할 수있
습니다. 기본 설정은 20 입니다.
MAXIMUM VOLUME (최대 볼륨)
최대 조절 가능한 볼륨을 0 and 99 사이에서 결정할 수있
습니다. 기본 설정은 99.
MUTE VOLUME (뮤트 볼륨)
S뮤트 기능을 선택했을 때 볼륨 크기를 0 (default) and
30 사이에서 선택할 수 있습니다. 기본은 0.
단, 만약 현재 볼륨이 설정치 보다 낮을 때 뮤트를 누르면
0으로 됩니다.
DIGITAL OUTPUT (디지털 아웃 설정)
Allows you to choose the sample rate for analogue inputs
on the digital output as 96kHz (default) or 48kHz. For
digital inputs the output format is the same as the input.
디지털 출력에서 샘플비를 96kHz(기본) 혹은 48kHz 선
택할 수 있습니다. 포맷은 입력과 동일합니다.
PRE35 DAC Integrated Amplifier User Guide
GENERAL SETTINGS 일반 환경 설정
The GENERAL SETTINGS menu allows you to configure the
general operation of the PRE35:
GENERAL SETTINGS 20
FRONT PANEL UNLOCKED
AUTO-DIM AFTER 10MIN
LED BRIGHTNESS
SHOW INPUTS (입력표시 선택)
모든 입력을 표시하려면 ALL (default), 입력신호가 있는
것만 보여주려면 WITH SIGNAL 선택합니다.
FRONT PANEL (전면 패널)
전면패널의 기능을 사용하지 않으려면 LOCKED 을, 사용
하려면 UNLOCKED (default) 선택합니다.
사용하지 않는 상태에서 사용하려면 PRE35 전원을 수
초간단절하거나 리모컨으로 취소하십시오.
AUTO-DIM (자동 밝기조절)
사용 중 자동적으로 어두워지는 지연 시간을 선택할 수
있다. AFTER 1MIN, AFTER 5MIN, AFTER 10MIN (default),
or OFF.
LED BRIGHTNESS (밝기의 세기 조절)
LED BRIGHTNESS를1 and 5 사이에서 5단계롤 조절할 ㅅ
있습니다. :
DIM HIGH (default 3), DIM MID (default 2), DIM LOW
(default 1), or DIM OFF (default 1).
STANDBY SETTINGS (자동 스탠바이 설정)
STANDBY SETTINGS menu 에서 다음과 같이 선택 가능합
니다.
STANDBY MODE 에서 ECO 는 소비전력을 0.5와트로 줄이
고 아나로그/디지털 입력신호시 자동으로 작동하고,
NORMAL는PC에서 입력신호가 있으면 작동합니다.
AUTO-STANDBY 는일정시간 동안 입력 신호가 없으면
자동적으로 스탠바이 상태로 들어가도록 설정합니다.
AFTER 10MIN, AFTER 15MIN, AFTER 20MIN (default), or
OFF. 무신호 시 자동 스탠바이 까지 경과 시간을 10분
15분 20분(초기상태) OFF 등 4가지 중 하나늘 선택할
수 있습니다. OFF 상태는 자동스탠바이 기능이 꺼지고
무신호 시에도 항상 앰프가 켜져 있습니다.
FACTORY RESET (공장 초기화)
본 앰프의 모든 설정을 취소하고 공장 출고 상태
로 초기화 합니다.
앰프가 이상 증상을 보일 때 우선적으로 공장 초
기화 하십시오.
Resets the PRE35 to the factory default settings.
You are prompted to confirm. Select YES to proceed or
NO to cancel.
FIRMWARE VERSIONS 펌웨어 버젼
현재 본 앰프에 설치된 펌웨어의 버젼을 표시합니
다.
Displays the FIRMWARE VERSIONS menu to allow you to
view the versions of firmware installed.

PRE35 DAC Preamplifier User Guide14
Analogue inputs
Balanced inputs
2 x XLR, 30kΩimpedance
Unbalanced inputs
3 x RCA, 15kΩimpedance
Analogue outputs
Preamplifier output
2x XLR, 380Ωimpedance
1 x RCA, 100Ωimpedance
Line output
1 x RCA, 100Ωimpedance
Digital inputs
4 x Optical/TOSLINK 192kHz/24 bit
2 x RCA 192kHz/24 bit
1 x USB-A up to 192kHz/24 bit; up to DSD128
(5.6MHz)
1 x USB-B up to 768kHz/32 bit; up to DSD256
(11.2MHz)
Digital output
1 x RCA
Analogue input = selectable between 48 or 96kHz
Digital input = native output
Performance
Gain
Preamplifier output: 16.5dB
Line output: 0dB
Speaker output: 42.5dB
Analogue frequency response
20Hz – 20kHz: ±0.1dB
Distortion
THD + N: < 0.002%, 20Hz – 20kHz
Signal to noise
>100dB (AES17 filter)
General
Control
C25 system remote control
RS232
IR in/out
Trigger out
Power Consumption
Off: 0W
Standby (ECO): 0.3W
Operating: <33W
Dimensions
430 x 420 x 106 mm (w x d x h) with knobs and
connectors
430 x 382 x 106 mm (w x d x h) without knobs and
connectors
Weight
11 kg
Colour
Black or titanium
TECHNICAL SPECIFICATION 제품 사양

15
These instructions help you get the best possible sound
from your PRE35.
Live
Burn-in 에이징
프라이메어는 최소 24시간 이상 에이징하여야 제
소리를 들을 수 있으며, 3일 이상 더 에이징하면
음질에 상당한 개선이 있습니다
Your Primare will start to sound best after an initial burn-in
of approximately 24 hours. You will notice a further
smaller improvement in sound quality for at least another
3 days’ playing.
RS232 and trigger
RS232단자는 PC등에 연결을 위한 단자입니다.
트리거 아웃 단자는 다른 기기와의 스위치 연결을
위한 단자 입니다.
The RS232 input allows you to connect the PRE35 to a
controller system. Use a twisted (null modem) cable. For
visit www.primare.net.
The Trigger output allows the PRE35 to switch on other
devices, such as a CD32.
PRE35 DAC Preamplifier User Guide
Using the PRE35 with a CD35
본 앰프와 CD35를 연결할 때 두 기기 사이를 제공된
트리거 케이블로 연결하면 PRE35 전원 스위치와 연동
하여 CD35를 동시에 켜고 끌 수 있습니다. :
To connect the trigger cable
The Trigger cable ensures that the CD35 switches on, or
to standby, when you operate the Obutton on the front
panel of the PRE35.
Connect the Trigger cable from the PRE35 TRIG OUT
to the CD35 TRIG IN.
트리커 단자가 있는 다른 기기와 트리거 연결을
하면 한 기기에서 다른 기기의 전원스위치를 동
시에 끄고 켤 수 있습니다.
l
Factory reset
간편한 공장 초기화
13쪽에 설명되어 있는 공장초기화 방법 이외에 간
단히공장초기화 할 수 있는 방법으로서 전면의 스
탠바이 버튼을 10초 이상 누르고 있으면 됩니다.
보다 짧게 누르면 펌웨어 버젼을 보여 줍니다.
Press and hold the Ostandby button on the front panel to
display the main firmware version number.
Press and hold the Ostandby button on the front panel for
10 seconds to perform a factory reset of the PRE35.
You can also do a factory reset from the Prisma app,
or from the GENERAL SETTINGS menu; see
GENERAL
SETTINGS
, page 13.
ADDITIONAL INFORMATION 유용한 정보
Phase
전원의 위상을 맞추면 음질이 현저히 좋아집니다.
제공된 극성체크펜으로 전원의 Live선을 찾아서 기기
의 Live 선에 맞추십시오.
본 앰프의 후면에서 AC Inlet의 좌측핀에 Live
선이 연결되도록 하십시오.
위상 맞춤
전원을 끄고 모든 연결을 제거한 후 전원 연결후 체크
Power off PRE35 and disconnect all input connections.
입력을 제거한 상태에서 앰프가 정상 작동하면 입력
소스에서 DC가 나오고 있음.
Contact your dealer for service arrangements.
제거한 상태에서도 에러가 뜬다면 본앰프이상이
니전문 수리점에 의뢰하십시오.
Error messages 에러 메시지
다음 상태일 때 전면에 에러 메시지가 뜹니다.
DECREASE INPUT GAIN 입력게인이 너무 높다.
입력게인이 너무 높아서 크리핑상태가 발생할 때:
입력게인을 낮추세요. 12쪽 참조
DC ERROR DC 전류 흐른다.
다음 사항을 체크 바랍니다.
전원과 스피커 연결을 제거한 후 전원 연결 후 체크
Power off PRE35 and disconnect the speaker connections.
l
l

PRE35 DAC Preamplifier User Guide16

PRE35 DAC Preamplifier User Guide 17
INDEX
A
Alias (settings menus) 12
Analog inputs and outputs 8
Audio settings menu 13
Auto-dim (settings menus) 13
Auto sense (settings menus) 12
B
Back panel 8
Balance (settings menus) 13
Balanced inputs 8
C
Clipping 12
Coax inputs 8
D
Digital inputs and output 8
Digital output (settings menus) 13
Display brightness, changing 10
E
Error messages 15
F
Factory reset 15
Factory reset (settings menus) 13
Firmware (settings menus) 13
Front panel (settings menus) 13
Front panel controls 10
G
General settings menu 13
I
Input (settings menus) 12
Input gain (settings menus) 12
Inputs, connecting 7
Input settings menu 12
IR input 8
L
LED brightness (settings menus) 13
M
Maximum volume (settings menus) 13
Menus
Audio settings 13
General settings 13
Input settings 12
Mute volume (settings menus) 13
N
Network module 8
O
Optical inputs 8
P
PC/Mac sound output device 11
Phase 15
Power, connecting 7
R
Remote control 9
Fitting batteries 9
RS232 input 8, 15
S
Settings menus 12
Show inputs (settings menus) 12, 13
Sources
Connecting 7, 11
Selecting 10
Standby settings (settings menus) 13
Startup volume (settings menus) 13
Status (settings menus) 12
T
Technical specification 14
Trigger outputs 8
U
Unbalanced inputs and outputs 8
V
Volume (settings menus) 12
Volume, changing 10

LIMSTENSGATAN 7,
216 16 LIMHAMN, SWEDEN
More information at primare.net
THE SOUND AND VISION OF SCANDINAVIA SINCE 1986
Other manuals for PRE35
2
Table of contents
Languages:
Other Primare Amplifier manuals
Primare
Primare DAC30 User manual
Primare
Primare PRE32 User manual
Primare
Primare PRE60 User manual
Primare
Primare A30.1 MK2 User manual
Primare
Primare A30.2 User manual
Primare
Primare A33.2 User manual
Primare
Primare A31.2 User manual
Primare
Primare SP33 User manual
Primare
Primare A32 User manual
Primare
Primare SPA20 User manual
Primare
Primare 122 User manual

Primare
Primare A33.2 User manual

Primare
Primare PRE35 User manual
Primare
Primare A10 User manual
Primare
Primare A34.2 User manual
Primare
Primare A30.2 User manual

Primare
Primare A32 User manual
Primare
Primare R15 User manual

Primare
Primare A31.2 User manual
Primare
Primare R35 User manual
