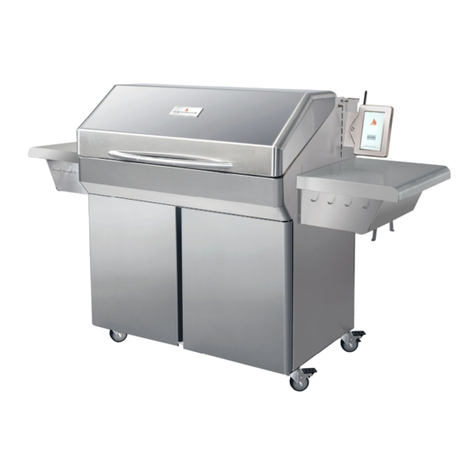
Prime Grill 3R12 Setup guide

www.bbqsandmore.co.nz made In cHIna
Owner’s Instruction Manual
Please retain this manual for future reference.
3R12 / 4L12/ 5L12/ 6L12
4LBI / 5LBI / 6LB1
Prime Grill Build In Models
Prime Grill Models

www.bbqsandmore.co.nz
Table of Contents
Important Safety Precautions
01
Fasteners Supplied 03
BBQ Assembly Instructions
04
Gas Bottle Safety Information
14
Lighting Instructions
14
Storage
15
Care, Cleaning and Maintenance
15
Trouble Shooting
17
Grilling Hints 17
Using the Rotisserie
18
Warranty
19
Customer Service Contact Information 20

www.bbqsandmore.co.nz 01
Important
Safety Precautions
• Improperinstallation,adjustmentalteration,
service or maintenance can cause property
damage,injuryordeath.Pleasereadthe
installation, operation and maintenance
instructionsthoroughlybeforeuse.
• Foroutdooruseonly.
• Donotstoreorusegasolineoranyother
ammable vapors and liquids in the vicinity
oftheBBQ.
• Childrenshouldnotbeleftaloneorunattended
inanareawheretheBBQisbeingused.Never
allow them to sit, stand or play on or around
theBBQatanytime.Wheninuse,portionsof
thecartmaygethotenoughtocauseburns.
• Donotstoreitemsofinteresttochildrenaround
orbelowthegrillorinthecartenclosure.Never
allowchildrentocrawlinsideacart.
• Neverletclothing,potholdersorother
ammable materials come in contact with or
too close to any grate, burner or hot surface
untilithascooled.Fabricmayigniteandresult
inpersonalinjury.
• Donotheatunopenedfoodcontainersasa
build-up of pressure may cause the container
toburst.
• WhenusingtheBBQ,donottouchthegrill,
burner, grate or immediate surrounding area
as these areas become extremely hot and
couldcauseburns.
• Greaseisammable.Lethotgreasecoolbefore
attemptingtohandleit.Avoidlettinggrease
depositscollectinthedriptray.Cleanoften.
• KeeptheareasurroundingtheBBQfreefrom
combustible materials, trash or combustible
uids and vapors such as petrol or charcoal
lighteruid.Donotobstructtheowof
combustionandventilationair.
• NeverusetheBBQinwindyconditions.If
located in a consistently windy area (oceanfront,
mountaintop,etc.)awindbreakwillberequired.
• Cleanthegrillwithcaution.Avoidsteamburns;
do not use a wet sponge or cloth to clean the
grillwhileitishot.Somecleanersproduce
noxious fumes or can ignite if applied to a
hotsurface.
• BesureallBBQcontrolsareturnedoand
the grill is cool before using any type of aerosol
cleaneronoraroundthegrill.Thechemical
that produces the spraying action could, in the
presenceofheatorignite.
• Nevergrillwithoutthedriptrayinplace
andpushedallthewaytothebackoftheBBQ.
Without it hot grease could leak downward and
produceareorexplosionhazard.
• OnlyusetheBBQinwellventilatedareas.Does
not use in buildings, garages, sheds, breezeway
orothersuchenclosedareas.Keepclearoftrees
andshrubsThisBBQisforoutdooruseonly.
• IftheBBQisstoredindoorsensurethatitis
coolbeforemoving.Thegascylindermustbe
unhooked and the cylinder stored outside in a
wellventilatedareaoutofreachofchildren.
• DonotusecharcoalintheBBQ.Neveruseina
windyarea.Keepanyelectricalsupplycordor
the rotisserie motor cord away from the heated
areasoftheBBQ.

www.bbqsandmore.co.nz 02
Important
Safety Precautions
• NeveruseadentedorrustyLPGtank.Keepthe
ventilation openings of the gas cylinder enclosure
freeandclearfromdebris.
• Useonlydry,heatresistantBBQmittsorgloves;
moist or damp potholders on hot surfaces may
causeburnsfromsteam.Donotuseatowelor
bulkyclothinplaceofBBQmittsorgloves.
• Shouldtheburnersgooutwhileinoperation,
turnallgasvalveso.Openthelidandwaitve
minutes before attempting the relight, using
thelightinginstructions.
• Spidersandotherinsectscannestintheburners
of the grill and block the gas and airow to the
burnerports.Thiscreatesadangerouscondition
thatcanresultinarebehindthevalvepanel.
Inspectandcleantheburnersperiodically;
follow guidelines in the Cleaning and
Maintenancesectionofthismanual.
• WhentheBBQisnotinuse,besuretoturno
thegasattheLPGtank.
• Neverleavethegrillandsideburnersunattended
whileusinghighamesettings.Boil-overscause
smokingandgreasyboil-oversmayignite.
• Donotusewaterongreaseres.Neverpick
upaamingpan.TurnBBQoandsmotherthe
aming pan with a tight-tting lid, cookie sheet
orattray.Foraminggreaseoutsideofthe
pan, smother with baking soda, or use a dry
chemicalorfoam-typereextinguisher.
• Anymodicationofthisapplianceisnot
permittedandmaybedangerous.
• Lockcastersoncartwheelsevenwheninstalled
onatlevelsurfaces.

www.bbqsandmore.co.nz 03
Fasteners Supplied

www.bbqsandmore.co.nz 04
Assembling
Your BBQ Cart
aSSEMbLing YOur bbQ cart
Makesureyourgrillisassembledproperly.
Detailedassemblyinstructionsarepacked
with each grill model giving specic assembly
proceduresforeachmodel.Followthese
instructions carefully to ensure the correct and
safeassemblyofthegrill.
Caution: Although we take every eort to ensure
that the assembly process is as easy as possible,
it is inherent with fabricated steel parts that
corners and edged can cause cuts if improperly
handled during assembly procedures. Use
caution while handling any parts during
assembly. It is strongly recommended that you
protect hands with a pair of work gloves.
StEp 2 (3r1/4L1)
Use 2 screwws/washers to x the door stop
withmagnetonthebottompanel.
StEp 1 (3r/4L)
Use16 screws/washers to assemble four casters,
twobrakecastersneedtoberightend.

www.bbqsandmore.co.nz 05
Assembling
Your BBQ Cart
StEp 4 (3r1/4L1)
Using2 screws/washerstoxtherightcartpanel.
StEp 3 (3r1/4L1)
Using2 screws/washerstoxtheleftcartpanel.

www.bbqsandmore.co.nz 06
Assembling
Your BBQ Cart
StEp 6 (3r1/4L1)
Fit front tie with 2 screws/washers. This tie is
fitted to the inside.
StEp 5 (3r1/4L1)
Using6 screws/washerstoxtherearcartpanel.

www.bbqsandmore.co.nz 07
Assembling
Your BBQ Cart
StEp 8 (3r/4L)
Fit the LH door by placing the bottom hinge pin in the hole in the base and with a small screwdriver depress the
spring loaded top hinge pin and release when lined up iwth the hole in the front tie top.
StEp 7 (3r1/4L1)
Fix door handles with screws
and plastic spacers

www.bbqsandmore.co.nz 08
Assembling
Your BBQ Cart
StEp 10 (3r10/4L10)
Fit the firebox and hood assembly to the top
of the cart. This is made easier by removing
the grill and hotplate. Using 4 shoulder
screws to both sides of the cart.
StEp 9 (3r1/4L1)
Fit RH door as in step 8

www.bbqsandmore.co.nz 09
Assembling
Your BBQ Cart
StEp 123--
Screw the RH tray onto the firebox by screwing 2 screws/washers from the inside of the firebox and
2 screws/washers from the outside.
StEp 113--
Fit the hooks to the RH side tray using screws, nuts and washers

www.bbqsandmore.co.nz 10
Assembling
Your BBQ Cart
StEp 14 (3-
Fit side trays as previous step.
StEp 13 (4L1
Mount the LH side tray with the burner using the same method as Step 12. Connect the side burner gas hose
to threadded connection underneth the burner and tighten with wrench.Plug ignition cable into igniter .
%
$

www.bbqsandmore.co.nz 11
Assembling
Your BBQ Cart
45&1"MM.PEFMTFYDFQU3
"TTFNCMF44SPUJTTFSJFSPEBTJOEJBHSBN
StEp 15 "MMNPEFMTFYDFQU3
Screw rotisserie motor mount using 2 screws/washers on the RH side of the firebox.

www.bbqsandmore.co.nz
Assembling
Your BBQ Cart
45&1-
4DSFXTJEFUBCMFUPCPEZPG-GSPNJOTJEFPGGJSFCPYBOEGSPNPVUTJEF
StEp ("MM.PEFMTFYDFQU3)
Screw rotisserie motor mount using 2 screws on the RH side of the firebox.

www.bbqsandmore.co.nz
Assembling
Your BBQ Cart
$POHSBUVMBUJPOTZPVS1SJNF(SJMM##2JTOPXDPNQMFUFZPVXJMMOPUJDFBTNBMMIPMFPOUIF3)TJEFPGUIFCPEZ
FYDFQU3UIJTJTGPSTUPSJOHUIFSPUJTTFSJFSPEXIFOOPUJOVTF
StEp (3---
Mount warming rack hook using truss head screws and washer.

www.bbqsandmore.co.nz
Using Your BBQ
LPG Safety Information
You will need to purchase a 9kg LPG cylinder to
operate this gas BBQ which can be obtained from
yournearestLPGdealer.
When ready to use your gas BBQ insert the
regulatorintotheLPGcylinderandtightenrmly.
Leak Testing
Perform a leak test at least once each year whether
the gas supply cylinder has been disconnected
ornot.Inaddition,anytimethegascylinderis
connected to the regulator or any part of the gas
system is disconnected or replaced, conduct a
leaktest.
As a safety precaution, remember to always leak
testyourBBQoutdoorinawell-ventilatedarea.
Neversmokeorpermitsourcesofignitioninthe
areawhiledoingaleaktest.Donotuseaame,
suchasalightedmatchtotestforleak.Useonly
aleaktestingsolutionasspeciedbelow.
Leak Testing Procedure
1. Preparealeaktestingsolutionofsudsywater
by mixing in a spray bottle half liquid soap
andhalfwater.
2. Checkandmakesureallthecontrolknobsare
intheOFFposition
3. Turncylindervalveknobcounterclockwise
oneturntoopen.
4. Applyleaktestingsolutionbyspraying
onjointsofthegasdeliverysystem.
5. Blowingbubblesinthesoapsolutionindicates
thataleakispresent.
6. Stopaleakbytighteningtheloosejointor
by replacing the faulty part with a replacement
partrecommendedbythemanufacturer.Do
not attempt to repair the cylinder valve if it
shouldbecomedamaged.Thecylindermust
bereplaced.
7. Ifyouareunabletostopaleak,shutothegas
supplyatthecylindervalve.Removethe
cylinderfromtheBBQ.Callanauthorizedgas
applianceservicetechnicianorLPGdealer.
DonotusetheBBQuntiltheleakiscorrected.
8. Pushinandturnanycontrolknobtorelease
pressureinthehoseandmanifold.
9. Turnothecontrolknob.
Lighting instructions
Caution: The lid must be open when lighting the
burner.Donotstandwithyourfacedirectlyover
thegasgrillwhenlightingit.
Pilot Gas Control Ignition:
WithallgascontrolsontheBBQinthe‘OFF’
position, turn the gas cylinder valve to the on
positionattheregulator.Eachcontrolknobhas
itsownigniterelectrodebuiltin.Tocreateaspark
youmustpushthecontrolknobin(A)andholdin
this position for 3-5 seconds to allow gas ow and
thenturnanticlockwiseto’HIGH’(B).Itcanspark
totheburnerlightingtube(C).Youwillheara
‘snap’fromtheigniterandyouwillalsoseea
3’-5’orangeamecomingfromtheburner
lightingtubeattheleftsideoftheburner(D).
Continue to hold the burner control knob in for
twosecondsafterthe‘snap’,thiswillallowgasto
owcompletelydowntheburnertube(E)and
insureignition.
Whentheburnerisalight,adjacentburnerswill
cross light when their controls are turned to
‘HIGH’.AtHighsettingtheburnerameshould
be approximately 12-20mm long with a minimum
oforangeame.Turnthegascontrolfully
anticlockwiseforminimumsetting.
Should you have any diculty lighting your gas
grill following the above steps, contact your
dealerforadvice.
When heating your bbq make sure that the rotisserie rod
is not in the BBQ - heating to such high temperatures can
melt the rod handles.

www.bbqsandmore.co.nz
Using Your BBQ
Lighting the rear Infrared Burner
(for rotisserie)
The location of the rotisserie burner makes it more
susceptible to strong wind conditions, more so
thantheprotectedgrillburners.Forthisreason
you should avoid operating the rotisserie during
windyconditions.
Openthelid.Pushandholdtheignitionbutton.
You’llhearasnappingsound.Turnthecontrol
knobto‘HI’,continuetoholduntiltheburneris
lit.Oncelit,turncontrolknowtodesiredsetting.
If the burner does not light within 4 to 5 seconds,
release the ignition button and turn the control
knowto‘OFF’andwaitafewminutesbefore
tryingagain.
Storage of your Prime Grill BBQ
Your Gas Bottle must be stored outdoors in a well
ventilated area and must be disconnected from
yourBBQwhennotbeingused.Ensurethatyour
BBQ is away from any sources of ignition before
attempting to disconnect your gas bottle from
yourBBQ.
When using your BBQ after a period of storage,
please ensure to check for gas leaks and check for
anyobstructionsintheburnersetc.beforeusing.
Also follow the cleaning instructions to ensure
BBQisclean.
If BBQ is stored outdoors ensure to check that
all areas under the front panel are free from any
obstructions(insectsetc.)Thisareamustbekept
freeasthismayaecttheowofcombustionor
ventilationair.
Cleaning & Maintenance of your Grill
As with any piece of ne equipment, you new
BBQ must be kept clean and properly maintained
tomaximizeitsperformanceandlongevity.
Cleaning internal parts of the BBQ regularly as
determined by the amount of use and foods
cooked.TheentireBBQshouldbecleanedat
leastonceayear.Toassuresafeandproper
maintenance, we recommend you follow these
directionscarefully.
iMpOrtant – DiScOnnEct anY gaS Or
ELEctricaL SuppLY bEFOrE cLEaning anY
part OF YOur bbQ.
Cleaning the Stainless Grill
The easy way to clean the grill racks is to scrub the
immediately after you have nished cooking and
turnedotheame.Wearagrillmitttoprotect
yourhandfromtheheatandsteam.Dipabrass
bristleBBQbrushinwaterandscrubthehotgrill.
Dipthebrushfrequentlytoincreasetheamount
ofsteam.Steamiscreatedaswatercontactswith
the hot grill, assists in the cleaning process by
softeningfoodparticles.Thefoodparticleswill
fallintothedriptray.Ifthegrillisallowedtocool
before cleaning, the removal of those residual
particlesoffoodwillbemorediculttoremove.
WARNING : If the burner still does not light,
turn the burner control knob to‘OFF’and
wait 5 minutes to let the gas clear before
lighting again.

www.bbqsandmore.co.nz
Using Your BBQ
If desired, when completely cool, remove the
grillracksforthoroughcleaning.Usesoapand
waterforthiscleaning.Specksofgreasecan
either gather on the surface of the stainless steel
and bake onto the surface rack and give the
appearanceofrust.Forremoval,useanabrasive
pad(likeScotchBrite)inconjunctionwitha
stainlesssteelcleaner.Thisneedtobedonein
extreme cases only, or before storing the grill for
anextendedperiod.
Cleaning the Enameled
Cast Iron Hot Plate
Clean enameled cast iron surfaces before you use
themforthesttimewithwarmsoapywater.
Use a sponge soaked in soapy water or a
degreasingproductappliedwithasoftcloth.
Neveruseanyabrasivesandavoidexcessiveor
harsh rubbing when cleaning which can leave
permanentmarksontheenamel.
cautiOn:DoNOTallowanymetal,castiron,
or brass polish/cleaners (Brasso, Copper Brite,
Flitz,etc.)tocomeincontactwithanyenameled
surfaces.Thechemicalswillcausepermanent
damagetotheenamelednish.
Useful hint: ‘Seasoning’ the enameled
cast iron hot plate before using it and
keeping it ‘seasoned’ will protect it
against oxidation (rust). ‘Seasoning’ is
just using a paper towel/cloth and coating
the cast iron with high-temperature oil/
fat (coconut oil) when it is warm and
letting it dry. After each use, and while
the plate is still warm, clean it o with a
cleaning pad (Scotch Brite, for example)
and a damp cloth.
Use of steel wool is not recommended because
if there is any metal residue left behind it will
promoteoxidation.Removingspillsimmediately
willmakecleaningeasier.
Dryingthesurfaceaftercleaningandkeepingthe
surface free of moisture will prevent oxidation
(rust).Ifthecastironisheavilysoiled,useanon-
metallicscouringpadorstibristlenylonbrushto
clean.Afteranyheavycleaningitisrecommended
thatyou‘season’thegrillagain(asyoudidbefore
youuseditthersttime)toreplacethehigh-
temperatureoil/fatandpreventoxidation.Ifyou
ever need to remove heavy oxidation, rust or
other marks you can sand the surface with an
emerycloth.
Cleaning Drip Tray
The full width drip pan with grease tray will collect
grease from the grill section and any spills from
theburners.Allowthepananditscontentstocool
beforeattemptingtoclean.Cleangreasefromthe
trayoftentoavoidthepossibilityofagreasere.
Cleaning the Stainless Steel
All stainless steel parts should be cleaned regularly
with hot, soapy water or any other non-abrasive
detergentattheendofeachcoolingperiod.Wipe
upanyspillsimmediately.
Whensoapywaterwillnotdothejob,special-
purposeproductsmadejustforstainlesssteel
can be purchased at your local hardware store or
kitchenstore.Donotusesteelwoolpads,abrasive
cloths,abrasivecleanersorpowderstoclean.Do
not use a metal knife, spatula, or any other metal
tooltoscrapestainlesssteel.Scratchesarealmost
impossibletoremove.
Donotpermitcitrusortomatojuiceorformsof
brine(concentrationsofsalt,sauerkraut,etc.)to
remain on the stainless steel surface, as citric acid
oranythingacidicwillcausecorrosion(pitting)
andpermanentlydiscolorstainlesssteel.

www.bbqsandmore.co.nz
Using Your BBQ
cautiOn:DoNOTuseanychlorinatedcleansers
(bleachofanykind)orammoniatocleanthe
stainless steel, as it will permanently discolor
stainlesssteel.
Covering Your Stainless Steel BBQ
When not in use and after cooling, cover your
PrimeGrillBBQwiththecoverincluded.The
cover will help protect your cart from detrimental
eectsofweatherandenvironmentalpollutants.
Troubleshooting
If Grill Fails to Operate Properly:
1. Turnogasatsource,turntheControlKnobs
tothe‘OFF’positionandwait5minutesbefore
tryingagain.
2. Checkgassupplyatconnection.
3. Regulatormaybefaulty
4. Checkburnerforobstructions
Low Flame or ashback (re in burner tube
– a hissing or roaring noise may be heard
1. Checkburnerforobstructions
2. Conditionsforgrillingmaybetoowindy
Grilling Hints
The cooking of meat, whether rare, medium, or
welldoneisaectedtolargedegreebythe
thicknessofthecut.Expertchefssayitisimpossible
tohaveararepieceofmeatwithathincut.
Thecookingtimeisaectedbythekindofmeat
also by the size and the shape of the cut, the
temperature of the meat when cooking begins
andthecookingdegreedesired.
When defrosting meats it is recommended that it
be done overnight in the refrigerator as opposed
toamicrowave.Thisgenerallyyieldsajuicercut
ofmeat.
Usetongsinsteadofaforktoturnthemeat.The
tongswillnotpuncturethemeatandletthejuices
runout.
Togetthejuiciestmeatsaddsaltafterthecooking
isnishedandturnthemeatonlyonce(juicesare
lostwhenthemeatisturnedseveraltimes).Turn
themeatjustafterthejuicesbegintobubbleto
thesurface.
Trimanyexcessfatfromthemeatbeforecooking.
To prevent steaks or chops from curling during
cooking, slit the fat around the edges at 5cm
intervals.
DonotleavetheBBQunattendedwhilecooking.

www.bbqsandmore.co.nz
Using the Rotisserie
Preparation
Butcherstring,scissors,broilerpan(tinfoilOK),
instantreadthermometerandfoil.
Meat Preparation:
Use a piece of meat that is equally balanced
fromtoptobottominsize.Themeatwillcook
moreevenlywhileontheRotisserie.Tiemeat
withbutcherstringinthreeareas.Forpoultry,tie
wings and legs to the body using butcher string to
preventoppingwhileturning.
1. Determinethecenterplacementforthefood,
putrstprongonrod,turnscrewtotighten.
2. Centertiedmeat/poultryonrod,placesecond
prongon,turnscrewtotighten.
3. Pickuprod,rotateittocheckforbalance.Ifnot
balanced,adjustprongsandfoodtobalance.
4. Placepreparedrodintorotisseriemotor.
Layacrosstoothersideingrove.
5. Placebroilerpan(ortinfoilpan)undermeat
tocollectdrippings.
6. Igniterearinfraredburner,startrotisseriemotor.
7. Tochecktemperatureofmeat,turnomotor
andinsertthermometer.
Minimum temperatures:
a. Poultry 74°C.
b. BeefRoasts 53°C
c. Ham 77°C
8. Whencookingisnished,removerodand
place meat or poultry on broiler pan and
removeprongs.
9. Coverwithfoilfor15minutes.Meatwillcarve
betterandjuiceswillowbackintomeat.
Never use the grill burners (bottom burners) on during Rotisserie cooking. It will
burn your meat and make it very dry. Use only one section at a time – grill or rotisserie.
For more grilling tips and recipes – see our website.
www.bbqsandmore.co.nz
Preparation
%DWWHU\,QVWDOODWLRQ
8QVFUHZWKHFKURPHDQGEODFNNQREORFDWHG
/+VLGHRIWKH%%4DQGLQVHUWWKH$$$EDWWHU\
VXSSOLHG(QVXUHWKDWWKHSRVLWLYHHQGLV
IDFLQJRXWEHIRUHUHSODFLQJWKHNQREEDFNRQ
'HSUHVVWKHEODFNUXEEHUEXWWRQ<RXZLOOKHDU
WKHLJQLWLRQVSDUNLQJLIWKHUHLVQRVRXQGFKHFN
WKHEDWWHU\LVLQVHUWHGFRUUHFWO\
This manual suits for next models
6
Table of contents
Other Prime Grill Grill manuals
