Prime Tech ECF-60L User manual
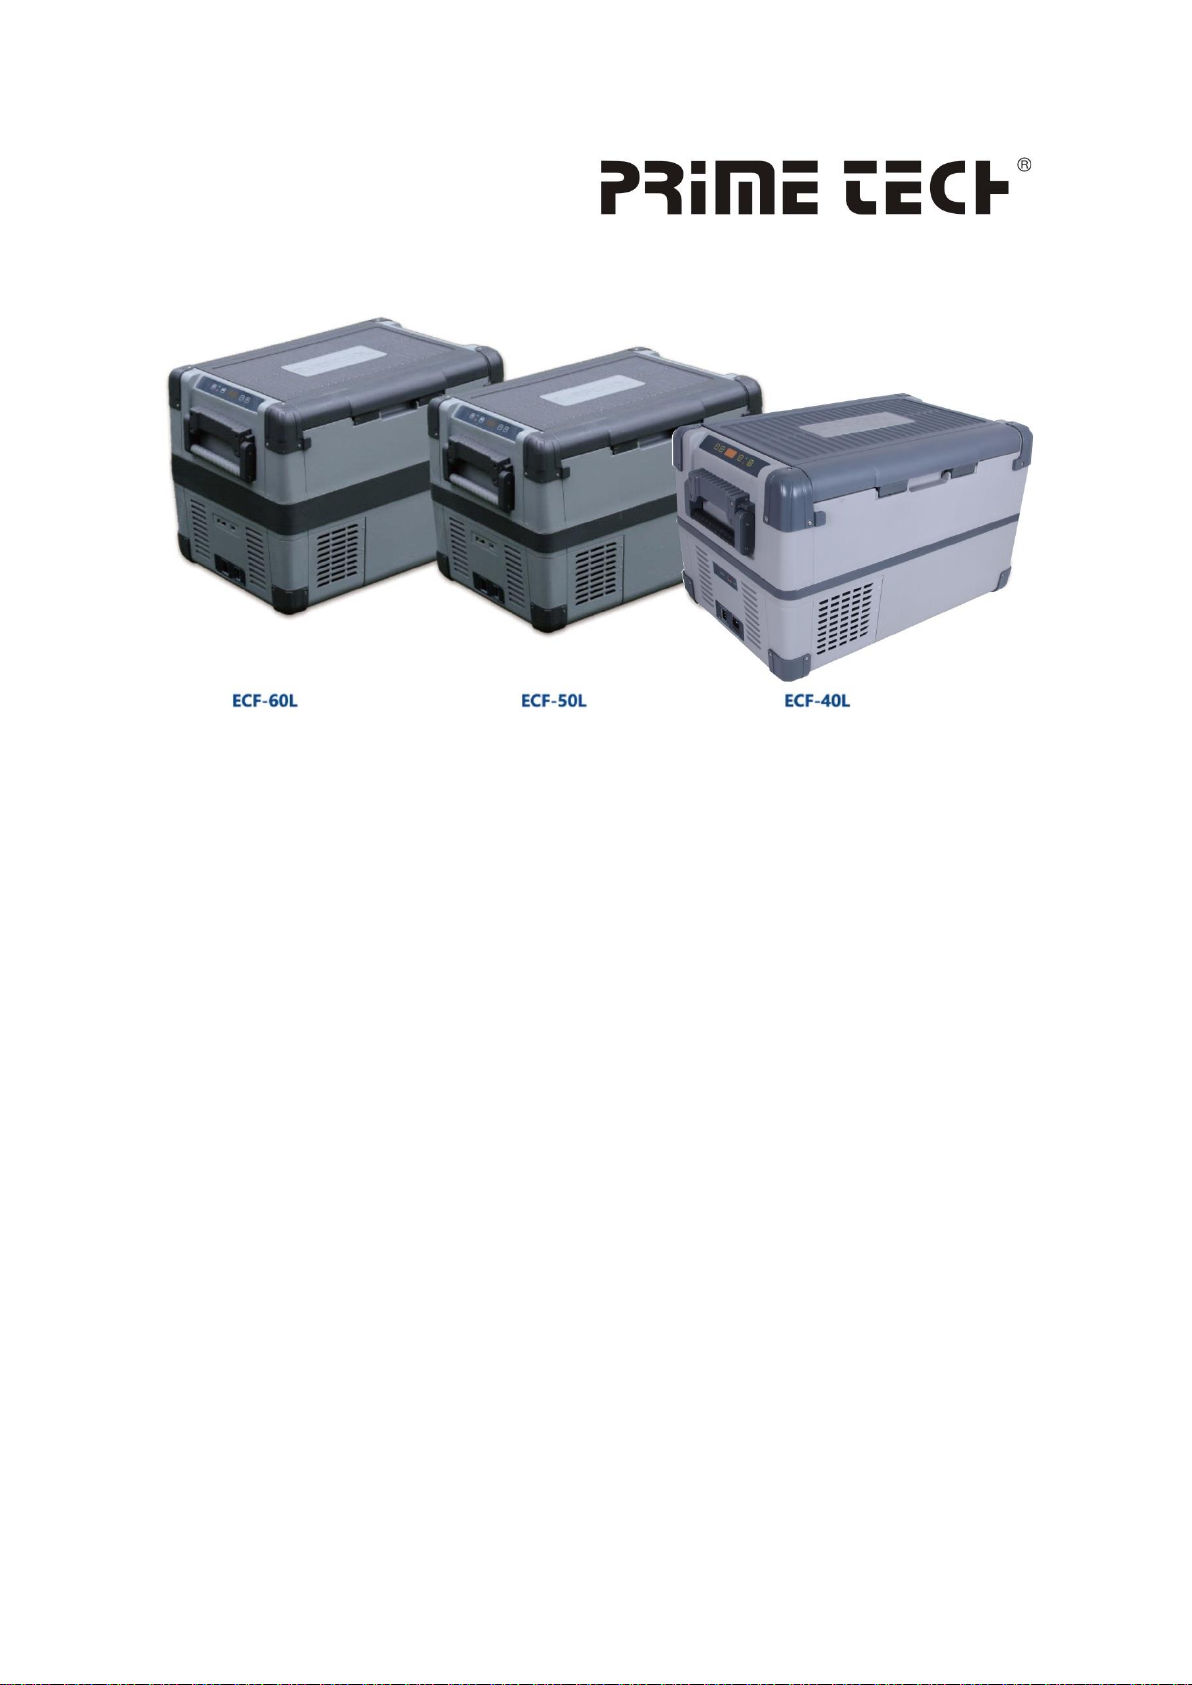
Kompressor-Kühlbox
Compressor Coolbox
Bedienungsanleitung
lnstruction Manual

Thank you for purchasing our product.
Before using this device, please read this manual in order to avoid improper handling and use
of the device.
Safety instructions
1 . General safety
Danger: On boats: If the device is powered from the mains, make sure that the power supply has a
residual current circuit breaker.
Warning:
* Do not operate the device if it is visibly damaged.
* This device may only be repaired by qualified personnel.
* lmproper repairs can lead to considerable hazards.
* Persons whose physical, sensory or mental capacities or whose lack of experience or knowledge
prevent them from using this product safely should not use it without the supervision or instruction
by a responsible person.
* Electrical devices are not toys.
* Always keep and use the device out of the reach of children.
* Children must be supervised to ensure that they do not play with the device.
* If this device's power cable is damaged, it must be replaced by the manufacturer, customer
service or a similar qualified person in order to prevent safety hazards.
* Do not store any explosive substances such as spray cans with propellants in the device.
Caution:
* Disconnect the device from the mains
- before cleaning and maintenance
- after use
* Food may only be stored in its original packaging or in suitable containers.
Notice:
* Only connect the device as follows:
- With the DC cable to a DC plug socket in the vehicle (e.g. cigarette lighter)
- Or with the 230 V connection cable to the 230 V AC mains supply
* Check that the voltage specification on the type plate corresponds to that of the energy supply.
* The cooling device is not suitable for transporting caustic materials or materials containing
solvents.
* Never pull the plug out of the socket by the cable.
* If the freezer is connected tc the DC socket: Disconnect the cooler or switch it off when you turn
off the engine. Otherwise you may discharge the battery.
1

2. Operating the device safely
Danger: Do not touch exposed cables with your bare hands. This especially applies when opera-
ting the device with an AC mains power supply.
Caution:
* Before starting the device, ensure that the power supply line and the plug are okay.
Notice:
* Do not use electrical devices inside the cooler unless they are recommended by the manufactu-
rer for this purpose.
* Do not place the device near naked flames or other heat sources (heaters, direct sunlight, gas
ovens etc.).
* Danger of overheating!
* Ensure at all times that there is sufficient ventilation so that the heat that is generated during
operating does not build up. Make sure that the device is sufficiently far away from walls and other
objects so that the air can circulate.
* Ensure that the ventilation slots are not covered.
* Do not fill the inner container with ice or fluid.
* Never immerse the device in water.
* Protect the device and the cable against heat and moisture.
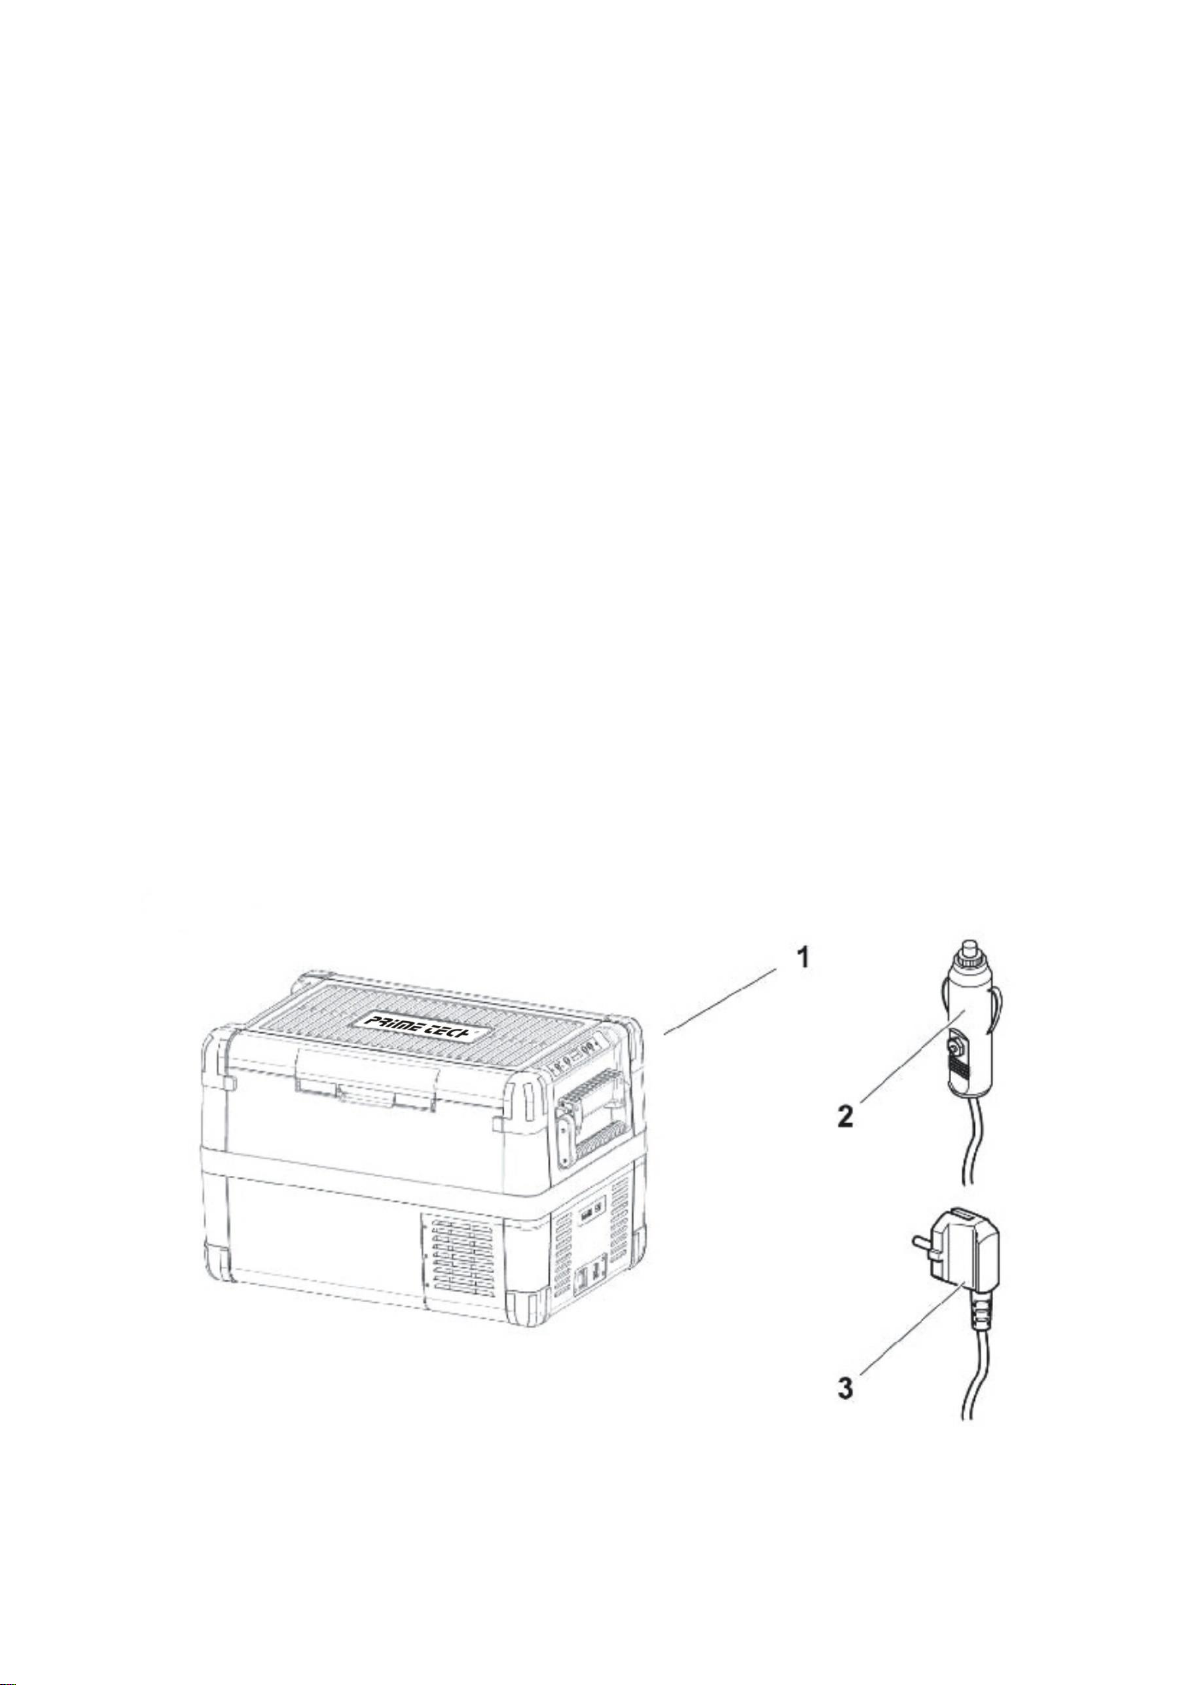
Scope of delivery
1. Cooler
2. Connection cable for 12/24 V----connection
3. Connection cable for 220-240 V ~connection
2

Intended use
The freezer is suitable for cooling and freezing foods. The device is also suitable for use on boats.
The device is designed to be operated from a 12 V---or 24 V---on-board supply socket of a vehicle
(e.g. cigarette lighter), boat for caravan as well as from a 22O~24O V AC mains.
Function description
The Freezer can chill products, keep them cool as well as freeze them. A low maintenance refrige-
rant circuit with compressor provides the cooling. The generous insulation and a powerful compre-
ssor ensure efficient and fast cooling.
The freezer is portable.
The freezer can withstand a constant inclination of 30°, for example when used on boats.
Scope of functions
* Power supply with priority circuit for connecting to the AC mains
* Three-level battery monitor to protect the vehicle battery
* Temperature display in °C and °F
* Switches off and automatically at low battery voltage
* Temperature setting: With two buttons in steps of 1°C (2°F)
* Foldable carrying handles
* Emergency switch (where fitted)
* Removable wire basket
3
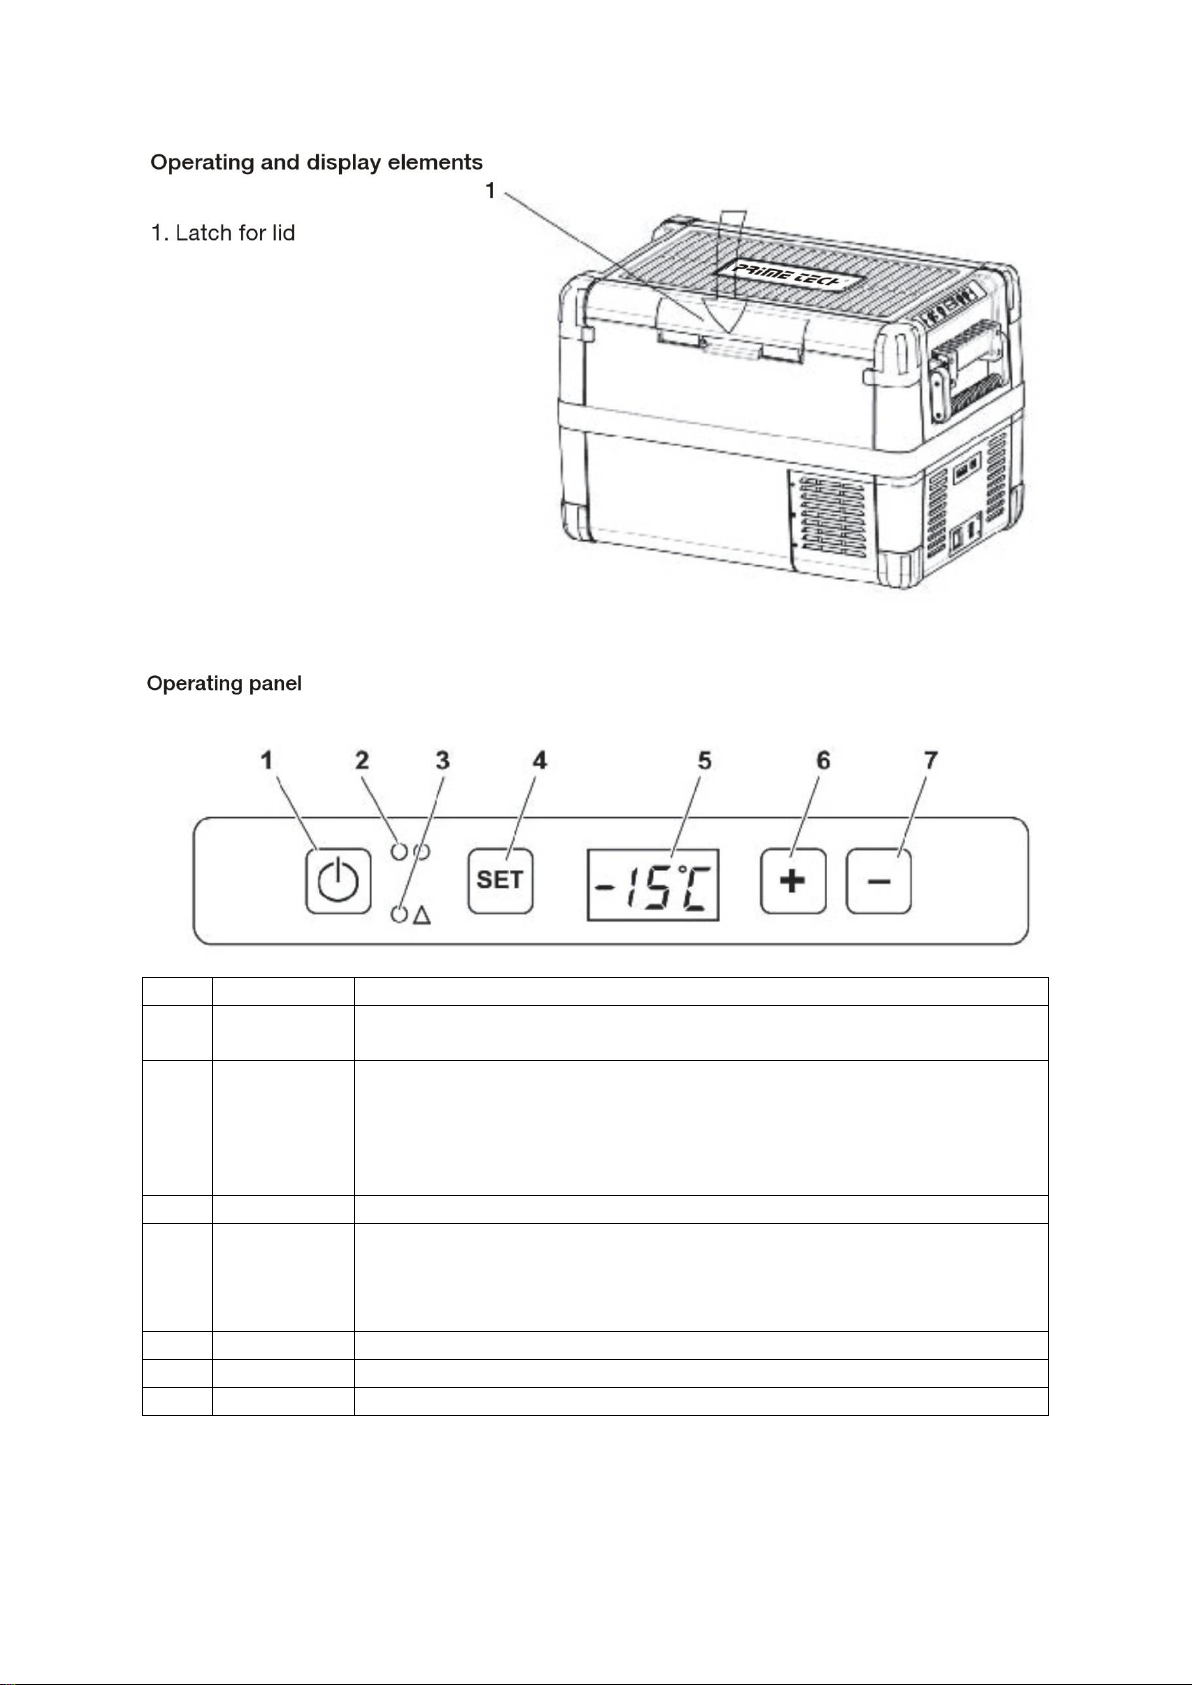
Item
Description
Explanation
1
ON
OFF
Switches the cooler on or off when the button is pressed between one and
two seconds
2
POWER
Status indication
LED lights up green: Compressor is on
LED lights up orange: Compressor is off
LED flashes orange: display switched off automatically due to lowbattery
voltage
3
ERROR
LED flashes red: Device is switched on but not ready for operation
4
SET
Selects the input mode
- Temperature setting
- Celsius or Fahrenheit display
- Set battery monitor
5
DISPLAY
Display, shows temperatures / battery monitor mode etc.
6
UP +
Press once to increase the value
7
DOWN -
Press once to decrease the value
4

Connectors
Item
Explanation
1
Connection socket AC voltage supply
2
Fuse holder
3
Connection socket DC voltage supply
Emergency switch
5

Operation
Before initial use
Note: Before starting your new cooler for the first time, you should clean it inside and outside with
a damp cloth for hygienic reasons.
The lid can be removed, or can be opened from either side in an instant, - left
or right.
Selecting the temperature units
Temperature display units can be swltched between Celsius and Fahrenheit as follows:
* Switch on the cooler.
* Press the “SET”button twice.
* Use the UP+ or DOWN - buttons to select Celsius or Fahrenheit.
The selected temperature unit then appears in the display for a few seconds. The display flashes
several times before it returns to the current temperature.
Energy saving tips
* Choose a well ventilated installation location which is protected against direct sunlight.
* Allow warm food to cool down first before placing it in the device to keep cool.
* Do not open the cooling device more often than necessaıy.
* Do not leave the cooler unit open for longer than necessary.
* Defrost the cooler once a layer of ice forms.
* Avoid unnecessary low temperatures.
6

Connecting the cooler
Connecting to a battery (vehicle or boat)
The cooler can be operated with 12 V or 24 V
Notice: Danger of damage!
* Overvoltage can damage the electronics of the device.
* For safety reasons the cooler is equipped with an electronic system to prevent a polarity rever-
sal. This protects the cooler against short-circuiting when connecting to a battery.
* Plug the 12/24 V connection cable into the device DC voltage socket and also into a 12 V or
24 V cigarette lighter socket.
Connecting to a 220-240 V AC mains
Danger: Danger of electrocutionl
* Never handle plugs and switches with wet hands or if you are standing on a wet surface.
* lf you are operating your cooler on board a boat from a mains connection of 220-240 V~, you
must install a residual current circuit breaker between the 220-240 V AC mains and the cooler.
* Seek advice from a trained technician.
* The cooler has an integrated multi-voltage power supply with priority circuit automatically swit-
ches the cooler to mains operation if the device is connected to a 220-240 V AC rnains, even if the
12/24V connection cable is still attached.
* Plug the 220-240 V connection cable into the device AV voltage socket and connect it to the
22O~240 V AC voltage mains
Notice: Danger of damage!
When switched off by the battery monitor, the batteıy is probably not enough charged. Avoid star-
ting the motor repeatedly or operating current consumers without longer charging phases. Ensure
that the battery will be recharged!
In "HIGH" mode, the battery monitor responds faster than at the levels "LOW" and “MED"(see the
following table).
Battery monitor mode
LOW
MED
HIGH
Switche-off voltage at 12 V
10,1 V
11,4 V
11,8 V
Restart voltage at 12 V
11,1 V
12,2 V
12,6 V
Switch-off voltage at 24 V
21,5 V
24,1 V
24,6 V
Restart voltage at 24 V
23,0 V
25,3 V
26,2 V
The battery monitor mode can be selected as follows:
* Press the “SET" button three times
* Use the “UP+ " or “DOWN - " buttons to select the battery monitor mode.
* Digital display will be as follows:
Lo(LOW), Md(MED), Hi(HlGH)
* The selected mode then appears in the display for a few seconds. The display flashes several
times before it returns to the current temperature.
7

Using the freezer
Caution: Danger of overheating!
Ensure at all times that there is sufficient ventilation so that the heat that is generated during opera-
tion can dissipate. Ensure that the ventilation slots are not covered. Make sure that the device is
sufiiciently far away from walls and other objects so that the air can circulate.
* Place the Freezer on a solid ground.
Place the freezer as shown. If you operate the box in a different position it can be damaged.
Notice: Danger from excessively low temperature!
Ensure that the only those objects are placed in the cooler that are intended to be cooled at the
selected temperature.
* Press the "ON/OFF" button for between one and two seconds.
* The LED lights up
* The display switches on and shows the current cooling temperature.
Note: The temperature displayed is that of the middle of the large interior compartment.
Note: When operating with the battery, the display switches off automatically if the battery voltage
is low. The LED flashes orange.
Latching the cooler lid
* Close the lid.
* Press the latch down, until it latches in place audibly.
Setting the temperature
* Press the "SET" button once.
* Use the “UP + and “DOWN - buttons to select the cooling temperature.
The cooling temperature appears in the display for a few seconds. The display flashes several
times then the current temperature is displayed again.
Using the emergency switch
The emergency switch is located below the control panel. For normal operation the switch is in the
“NORMAL USE" position.
lf an electronic control failure occurs, slide the switch to “EMERGENCY OVERRIDE" position
Note: If the switch is in the “EMERGENCY OVERRIDE” position, the cooler freezes with full cooling
capacity.
Switching off the Freezer
* Empty the Freezer.
* Switch the Freezer off.
* Pull out the connection cable.
lf you do not want to use the freezer for a longer period of time:
Leave the cover slightly open. This prevents odour build-up.
8
Defrosting the cooler
Humidity can form frost in the interior of the cooling devices or on the evaporator. This reduces the
cooling capacity. Defrost the device in good time to avoid this.
Notice: Danger of damage!
Never use hard or pointed tools to remove ice or to loosen objects which have frozen in place.
To defrost the freezer, proceed as follows:
* Take out the contents of the cooling device.
* Switch off the deivice.
* Leave the lid open.
* Wipe off the defrosted water.
Replacing the device fuse
Danger of electrocutionl
Disconnect the connection cable before you replace the device fuse.
* Pull off the connection cable.
* Pry out the fuse insert with a screwdriver.
* Replace the defective fuse with a new one that has the same rating.
* Press the fuse insert back into the housing.
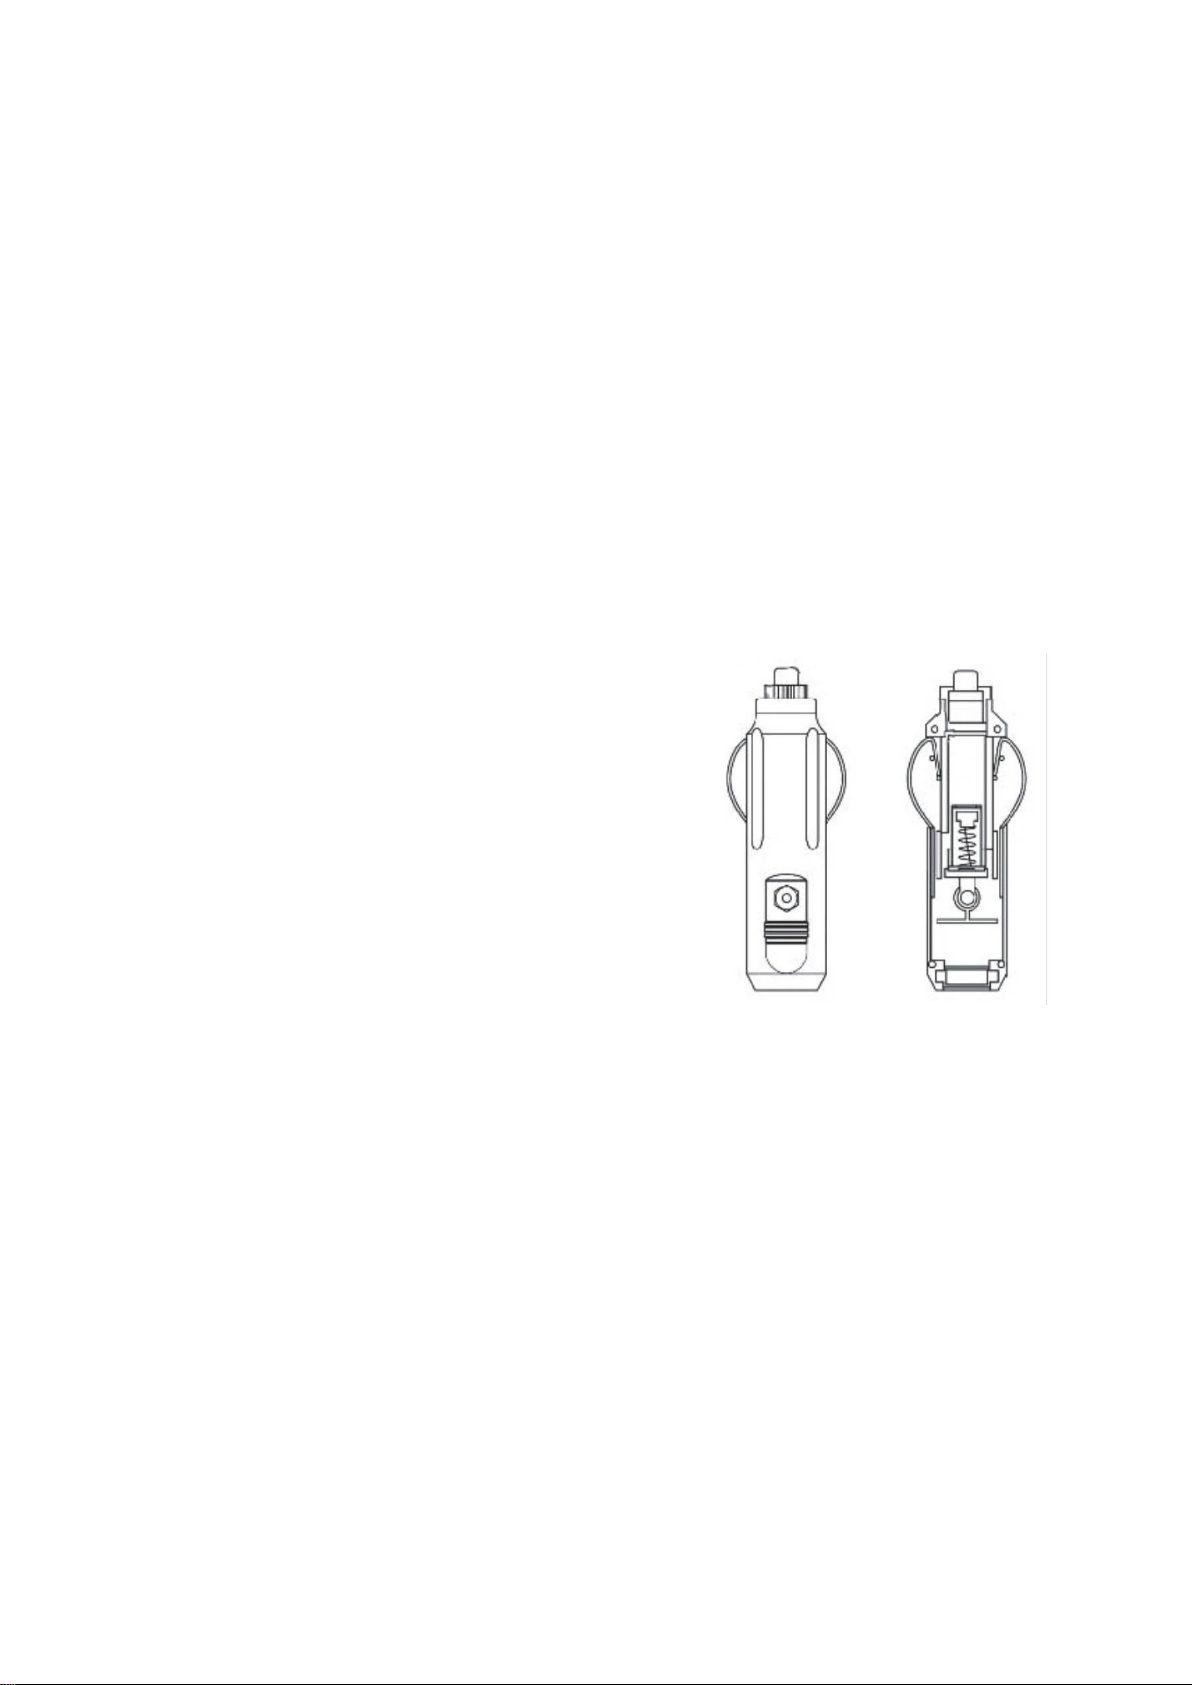
Replacing the plug fuse (12/24 V)
* Turn anticlockwise the cap to move it and pin from
the plug.
* Replace the defective fuse with a new one that
has the same rating
* Re-assemble the plug in the reverse order.
Cleaning and maintenance
Warning: Always disconnect the device from the mains before you clean and service it.
* Never clean the cooler under running water or in a dishwasher.
* Do not use abrasive cleaning agents or hard objects during cleaning as these can damage the
cooler.
* Occasionally clean the device interior and exterior with a damp cloth.
9

Troubleshooting
Fault
Possible cause
Suggested remed
Device does not function,
LEDs do not glow.
There is no voltage present in
the 12/24 V socket
(cigarette lighter) in your
vehicle.
The ignition must be switched
on in most vehicles to apply
current to the cigarette lighter.
No voltage present in the AC-
voltage socket.
Try using another plug socket.
The device fuse is defective.
Replace the device fuse, see
“Replacing the device fuse".
The integrated mains
adapter is defective.
This can only be repaired by an
authorized electro technican.
The device does not cool
(plugis inserted "POWER" LED
is lit).
Defective compressor.
This can only be repaired byan
authorized customer servi-ces
unit.
The device does not cool
(plugis inserted, "POWER"
LEDflashed orange, display is
swit-ched off).
Battery voltage is too low.
Test the battery and charge
it as needed.
When operating from
the12/24-V socket (cigarette
ligh-ter): The ignition is on and
thedevice is not working and
theLED is not lit. Pull the plug
outof the socket and make the
fo~llowing checks.
The cigarette lighter socketis
dirty. This results in a
poorelectrical contact.
If the plug of your cooler
be-comes very warm in the
ciga-rette lighter socket, either
thelighter socket must be
clea-ned or the plug has not
beenassembled correctly.
The fuse of the 12/24 V
plughas blown.
Replace the fuse(10A) in
the12/24 V plug, see “
Replacingthe plug fuse(12/24
\/)".
The Vehicle fuse has blown.
Replace the vehicle's 12/24
Vsocket fuse(usually 15 A).
Please refer your
vehicle'soperating manual.
The display shows an
errormessage (e.g. “Err1") and
the device does not cool.
The appliance has switchedoff
due to an internal fault.
This can only be repaired by
anauthorized technical
personnel.
10

Note: If the ambient temperature is above +32°C (+90°F), the minium temperature cannot be
attained.
The cooling circuit contains R -134a
lmages used in this manual are for illustrational purposes only and may differ from the actual
product.
11

Vielen Dank, dass Sie sich für unser Produkt entschieden haben.
Lesen Sie bitte vor dem Gebrauch diese Gebrauchsanweisung sorgfältig durch.
Sicherheitshinweise
1. Allgemeine Sicherheitsanweisungen
Gefahr: Auf Schiffen: Wenn das Gerät vom Netz versorgt wird, dann muss sichergestellt werden,
dass die Stromversorgungsleitung einen Fehlerstromschutzschalter hat.
Warnung:
* Betreiben Sie das Gerät nicht, wenn es sichtbare Beschädigungen aufweist.
* Dieses Gerät darf nur von Fachpersonal repariert werden.
* Durch unsachgemäße Reparaturen können erhebliche Gefahren entstehen.
* Personen, deren physische, sensorische oder geistige Fähigkeiten oder
denen ein Mangel an Erfahrungen oder Kenntnissen es verwehren dieses Produkt zu verwenden, soll-
ten dieses Gerät nicht ohne Aufsicht oder Anweisung durch eine verantwortliche Person benutzen.
* Elektrische Geräte sind keine Spielzeuge.
* Halten Sie das Gerät fern von Kindern und benutzen Sie es so, dass es nicht in die Hände von
Kindern gelangen kann.
* Kinder müssen beaufsichtigt werden, um sicherzustellen, dass sie nicht mit dem Gerät spielen.
* Wenn das Netzkabel des Gerätes beschädigt wird, muss es vom Hersteller, dem Kundendienst
oder einer qualifizierten Person ersetzt werden, um Sicherheitsrisiken zu verhindern.
* Es dürfen keine explosiven Stoffe, wie z.B. Spraydosen mit Treibmitteln im Gerät gelagert werden.
Vorsicht:
* Trennen Sie das Gerät vom Stromnetz
- vor Reinigung und Wartung
- nach dem Gebrauch
* Lebensmittel dürfen nur in der Originalverpackung oder in geeigneten Behältern aufbewahrt
werden.
Hinweis:
* Schließen Sie das Gerät wie folgt an:
- Mit dem Gleichstromkabel an eine 12V/24V-Steckdose im Fahrzeug (z.B. Zigarettenanzünder),
- oder mit dem 230 V Verbindungskabel an das 230 V Wechselstromnetz
* Überprüfen Sie, ob die Spannungsangaben auf dem Typenschild den Angaben ihrer Energie-
versorgung entsprechen.
* Die Kühlvorrichtung ist nicht geeignet für den Transport von ätzenden Materialien oder lösemit-
telhaltigen Stoffen.
* Ziehen Sie niemals am Kabel um den Netzstecker aus der Steckdose zu ziehen.
* Wenn das Gefriergerät an das 12V/24V-Bordnetz angeschlossen ist: Ziehen Sie den Stecker aus der
12
Steckdose oder schalten Sie das Gerät aus, wenn Sie den Motor abstellen. Ansonsten könnten Sie die
Batterie entladen.
2. Der sichere Betrieb des Geräts
Gefahr: Berühren Sie nie mit bloßen Händen freieliegende Kabel. Dies gilt insbesondere beim Be-
trieb des Geräts mit 230 V Netzversorgung.
Vorsicht:
* Vergewissern Sie sich vor dem Einschalten des Gerätes, dass die Stromversorgungsleitung und
der Stecker in Ordnung sind.
Hinweis:
* Benutzen Sie keine elektrischen Geräte innerhalb des Kühlers, es sei denn, sie sind vom Her-
steller zu diesem Zweck empfohlen worden.
* Stellen Sie das Gerät nicht in die Nähe von offenem Feuer oder anderen Wärmequellen (Heizkör-
per, direkte Sonneneinstrahlung, Gasöfen etc.).
* Überhitzungsgefahr:
Stellen Sie sicher, dass jederzeit eine ausreichende Belüftung gegeben ist, damit sich die Wär-
me, die während des Betriebs entsteht, sich nicht aufstauen kann. Stellen Sie sicher, dass das
Gerät ausreichend weit entfernt von Wänden und anderen Gegenständen ist, damit die Luft zirku-
lieren kann.
* Stellen Sie sicher, dass die Lüftungsschlitze nicht verdeckt sind.
* Füllen Sie den lnnenbehälter nicht mit Eis oder Flüssigkeit.
* Tauchen Sie das Gerät nicht in Wasser.
* Schützen Sie das Gerät und das Kabel vor Hitze und Feuchtigkeit.
Lieferumfang
1. Kühler
2. Anschlusskabel für 12/24 V ---- Verbindung
3. Anschlusskabel für 220 bis 240 V ~ Anschluss
13

Bestimmungsgemäße Verwendung
Die Gefrierbox ist zum Kühlen und Gefrieren von Nahrungsmitteln vorgesehen. Das Gerät ist auch
für die Verwendung auf Schiffen geeignet.
Das Gerät wurde entwickelt, um sowohl von einer 12 V --- oder 24 V --- Anschlussbuchse eines
Fahrzeugs (z.B. Zigarettenanzünder), eines Bootes oder Wohnwagens als auch von einem 220-240 V
Netzanschluss betrieben werden zu können.
Funktionsbeschreibung
Die Gefrierbox kann Produkte kühlen, kühl halten und einfrieren. Ein wartungsarmer Kühlkreislauf
mit Kompressor liefert die Kühlung. Die großzügig dimensionierte Isolierung und der leistungsstar-
ke Kompressor sorgen für eine effiziente und schnelle Kühlung.
Die Gefrierbox ist tragbar.
Die Gefrierbox kann eine Neigung von 30° verkraften, z.B. auf Booten.
Funktionsumfang
* Stromversorgung mit Vorrangschaltung für den Anschluss an das Wechselstromnetz
* Drei-Stufen-Batterie-Überwachung, zum Schutz der Fahrzeugbatterie
* Display mit Temperaturanzeige in °C und °F
* Automatische Abschaltung bei niedriger Batteriespannung
* Temperatureinstellung: Mit zwei Tasten in Schritten von 1° C (2° F)
* Faltbare Tragegriffe
* Notfallschalter (optional)
* Herausnehmbarer Korb
14
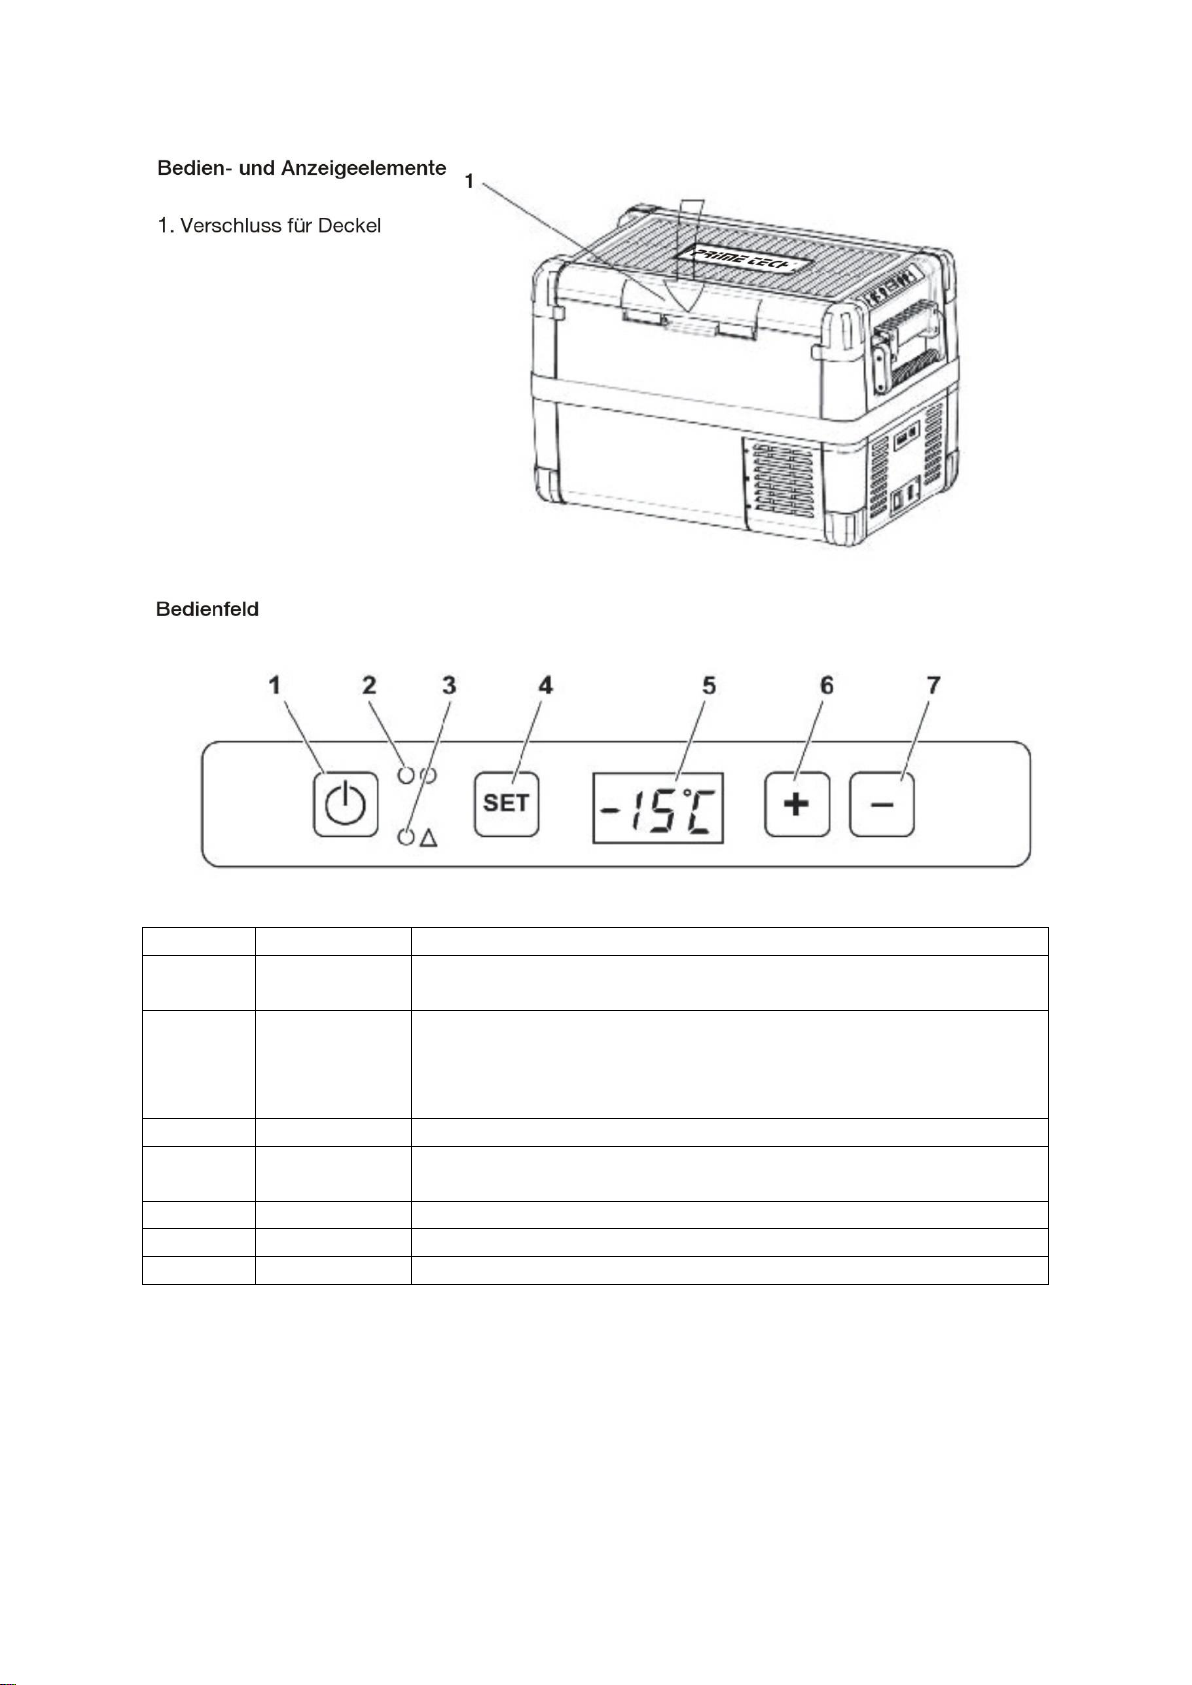
Position
Beschreibung
Erklärung
1
ON
OFF
Schaltet die Gefrierbox ein oder aus, wenn die Taste ein bis zwei
Sekunden lang gedrückt wird
2
POWER
Statusanzeige
LED leuchtet grün: Kompressor ist an. LED leuchtet orange:
Kompressor ist aus. LED blinkt orange: Display schaltet automatisch
ab wegen niedriger Batteriespannung
3
ERRROR
LED blinkt rot: Gerät ist eingeschaltet, aber nicht betriebsbereit
4
SET
Wählt den Eingabemodus- Temperatur-Einstellung- Anzeige in
Celsius oder Fahrenheit- Einstellung der Batterieüberwachung
5
DISPLAY
Anzeige, zeigt Temperaturen oder andere Funktionen an
6
UP +
einmal drücken um Wert zu erhöhen
7
DOWN -
einmal drücken um Wert zu verringern
15

Position
Beschreibung
1
Anschlussbuchse für die Wechselspannungsversorgung
2
Sicherungshalter
3
Anschlussbuchse für die Gleichspannungsversorgung
Notfallschalter
16
Bedienung
Vor dem ersten Gebrauch
Bemerkung: Bevor Sie ihren neuen Kühler zum ersten Mal starten, sollten Sie ihn aus hygienischen
Gründen innen und außen mit einem feuchten Tuch reinigen.
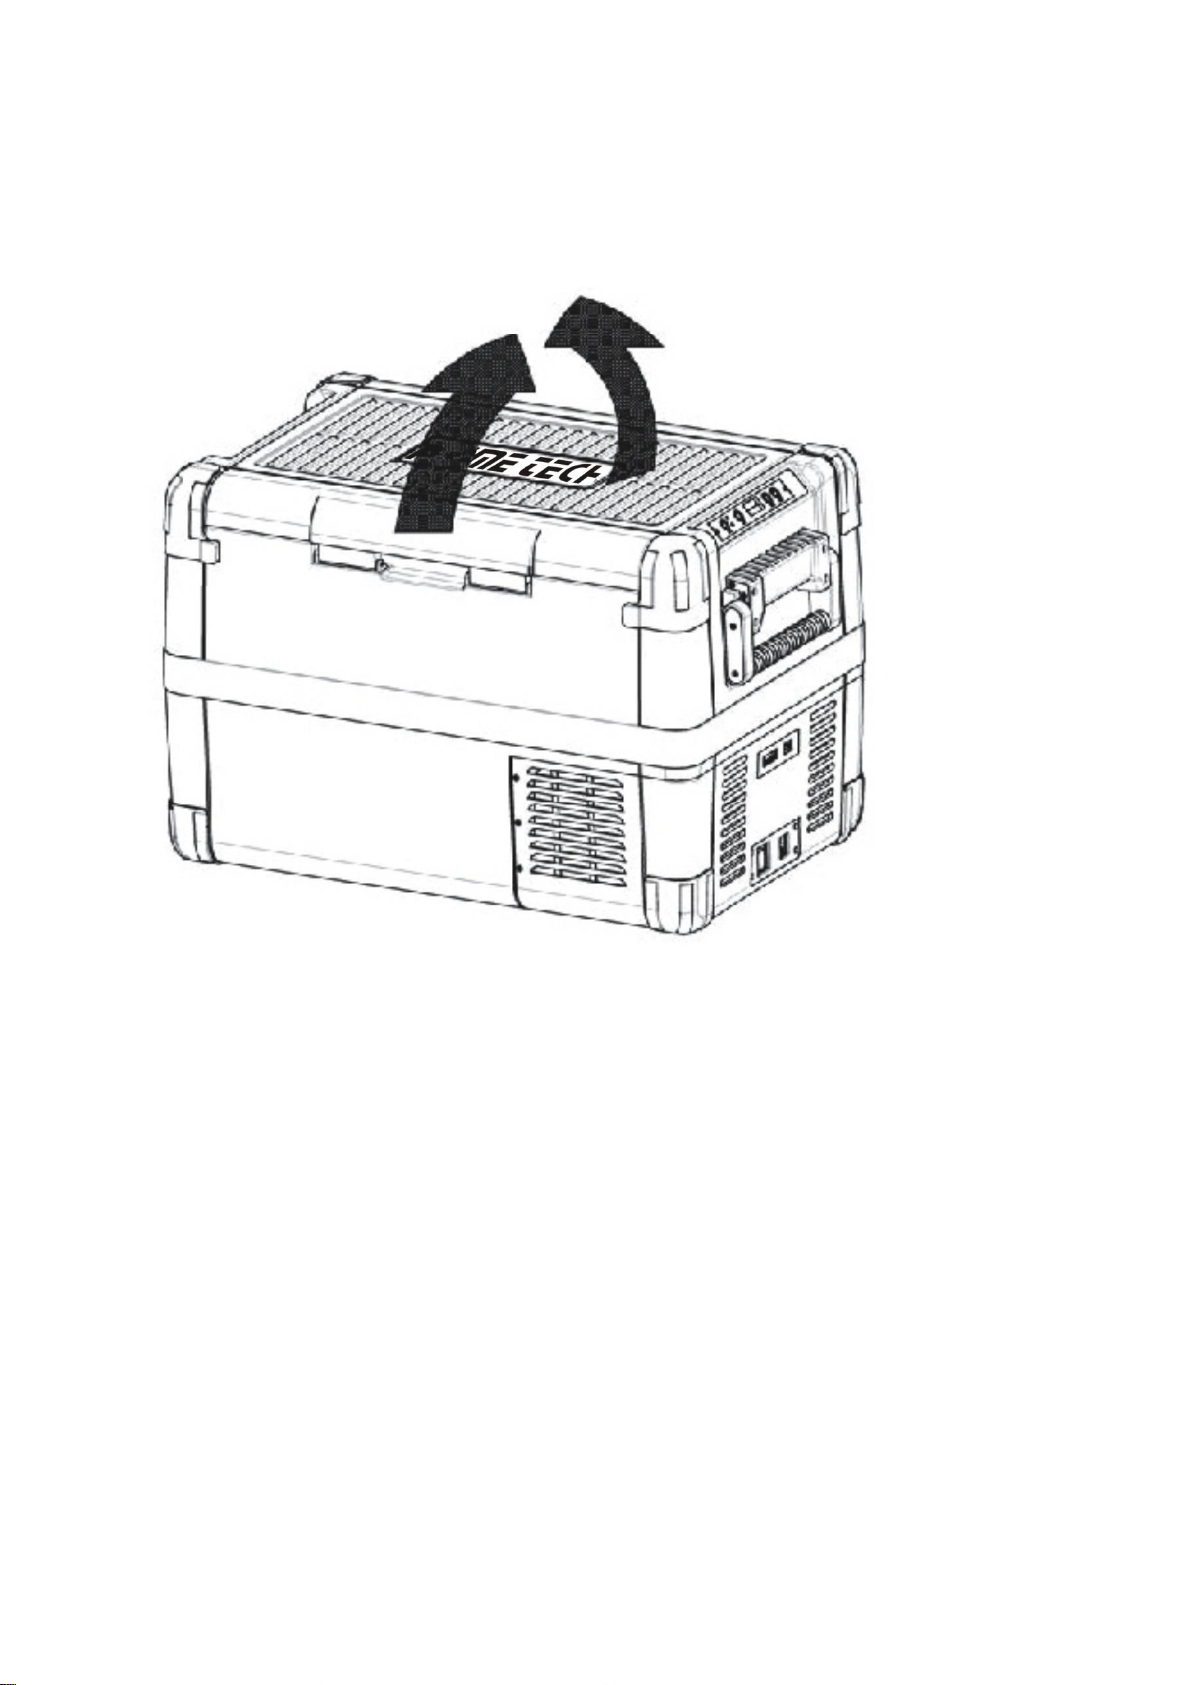
Der Deckel kann ganz entfernt werden, oder er kann von jeder Seite im Nu geöffnet werden, ent-
weder nach links oder rechts.
Auswahl der Temperatureinheit
Die Temperaturanzeige kann zwischen Celsius und Fahrenheit wie folgt umgeschaltet werden:
* Schalten Sie den Kühler ein.
* Drücken Sie die Taste „SET“ zweimal.
* Verwenden Sie die UP + oder DOWN - Tasten, um Celsius oder Fahrenheit auszuwählen.
Die gewählte Temperatureinheit erscheint in der Anzeige für ein paar Sekunden. Die Anzeige blinkt
mehrmals, bevor sie zur aktuellen Temperatur zurückkehrt.
Energiespartipps
* Wählen Sie einen gut belüfteten Aufstellort, der vor direkter Sonneneinstrahlung geschützt ist
* Lassen Sie warme Speisen erst abkühlen, bevor Sie sie in das Gerät geben um sie kühl zu halten.
* Öffnen Sie die Kühlbox nicht öfters als unbedingt nötig.
* Lassen Sie die Kühlbox nicht länger offen stehen als unbedingt nötig.
* Tauen Sie den Kühler ab sobald sich im lnnern eine Eisschicht gebildet hat.
* Vermeiden Sie unnötig niedrige Temperaturen.
17

Anschluss der Gefrierbox
Anschluss an eine Batterie (Fahrzeug oder Schiff)
Der Kühler kann mit 12 V oder 24 V betrieben werden
Hinweis: Beschädigungsgefahr!
* Überspannung kann die Elektronik des Geräts beschädigen.
* Aus Sicherheitsgründen ist der Kühler mit einem elektronischen System ausgestattet, dass eine
falsche Polung verhindert. Dies schützt den Kühler vor einem Kurzschluss beim Anschließen an
eine Batterie.
* Stecken Sie das 12/24 V-Verbindungskabel in die Gleichspannungsbuchse des Geräts und in
den 12 V oder 24 V Zigarettenanzünder.
Anschließen an das 220-240 V Wechselstromnetz (z.B. im Haus oder Büro)
Gefahr: Gefahr durch Stromschlag!
* Handhaben Sie Stecker und Schalter nie mit nassen Händen oder wenn Sie auf einer nassen
Oberfläche stehen.
* Wenn Sie Ihren Kühler an Bord eines Bootes an einem Netzanschluss 220-240 V ~ betreiben
möchten, müssen Sie zwischen dem 220-240 V ~ Wechselstromanschluss und dem Kühler einen
Fehlerstromschutzschalter installieren. Lassen Sie sich von einem Fachmann beraten.
* Der Kühler besitzt ein integriertes Mehrspannungsfähiges-Netzteil mit Vorrangschaltung, welches
automatisch den Kühler auf Netzbetrieb umschaltet, sobald das Gerät an das 220-240 V Wechsel-
stromnetz angeschlossen wird, auch wenn das 12/24 V Anschlusskabel noch angeschlossen ist.
* Stecken Sie das 220-240 V Verbindungskabel in die AC-Spannungsbuchse des Gerätes und
verbinden es mit dem 220-240 V Wechselspannungsnetz
Verwendung der Batterieanzeige
Das Gerät ist mit einer mehrstufigen Batterie-Überwachung ausgestattet, die ihre Fahrzeugbatterie
vor Tiefentladung schützt, wenn das Gerät an die 12/24 V Spannungsversorgung angeschlossen ist.
Wenn der Kühler betrieben wird, während die Zündung ausgeschaltet ist, schaltet sich der Kühler
automatisch ab, sobald die Versorgungsspannung unter einen bestimmten Wert fällt. Der Kühler
wird wieder eingeschaltet, wenn die Batterie wieder auf einen Wiederanlauf-Spannungspegel auf-
geladen worden ist.
Hinweis! Beschädigungsgefahr!
Wenn die Kühlbox durch die Batterie-Überwachung ausgeschaltet wurde, ist die Batterie nicht mehr
ausreichend geladen. Vermeiden Sie deshalb wiederholtes Anlassen des Motors oder das Betreiben
weiterer Verbraucher ohne längere Ladephasen. Stellen Sie sicher, dass die Batterie wieder voll
aufgeladen wird!
lm „HIGH“ Modus reagiert die Batterie-Überwachung schneller als auf den Modi „LOW“ und
„MED“ (siehe folgende Tabelle).
Batterie Überwachungsmodus
LOW
MED
HIGH
Abschaltspannung bei 12 V
10,1 V
11,4 V
11,8 V
Wiederanlaufspannung bei 12 V
11,1 V
12,2 V
12,6 V
Abschaltspannung bei 24 V
21,5 V
24,1 V
24,6 V
Wiederanlaufspannung bei 24 V
23,0 V
25,3 V
26,2 V
18

Der Modus der Batterie-Uberwachung kann wie folgt gewählt werden:
* Drücken Sie die Taste „SET“ dreimal
* Verwenden Sie die „UP + “ oder „DOWN -" Tasten, um den Batterie-Überwachungsmodus zu
wählen.
* Auf der Digitalanzeige steht folgendes:
Lo (LOW), Md (MED), Hi (HIGH)
Der ausgewählte Modus wird dann in der Anzeige für einige Sekunden angezeigt. Die Anzeige
blinkt mehrmals, bevor sie zur aktuellen Temperatur zurückkehrt.
Verwendung der Gefrierbox
Vorsicht! Überhitzungsgefahr!
Stellen Sie sicher, dass jederzeit eine ausreichende Belüftung gegeben ist, so dass die Wärme,
die während des Betriebs erzeugt wird, abgeführt werden kann. Stellen Sie sicher, dass die Lüf-
tungsschlitze nicht verdeckt sind. Stellen Sie sicher, dass das Gerät ausreichend weit entfernt von
Wänden und anderen Gegenständen aufgestellt wird, damit die Luft zirkulieren kann.
Stellen Sie die Gefrierbox auf einen festen Untergrund.
Hinweis: Gefahr durch zu niedrige Temperaturen!
Stellen Sie sicher, dass nur die Objekte in den Kühler gegeben werden, die dazu bestimmt sind, bei
der gewählten Temperatur gekühlt zu werden.
* Drücken Sie die „ON / OFF“ -Taste für ein bis zwei Sekunden.
* Die LED leuchtet auf
* Das Display schaltet sich ein und zeigt die aktuelle Kühltemperatur.
Bemerkung: Die angezeigte Temperatur ist die in der Mitte des großen lnnenraums.
Bemerkung: Beim Batteriebetrieb, schaltet sich das Display automatisch ab, wenn die Batterie-
spannung niedrig ist. Die LED blinkt orange.
Verriegeln des Kühlerdeckels
* Schließen Sie den Deckel.
* Drücken Sie die Verriegelung nach unten, bis sie hörbar einrastet.
Temperatur einstellen
* Drücken Sie die Taste „SET“ einmal.
* Verwenden Sie die „UP + “ und „DOWN - “ Tasten, um die Kühltemperatur zu wählen.
Die Kühltemperatur wird im Display für einige Sekunden angezeigt. Die Anzeige blinkt mehr-
mals, dann wird wieder die aktuelle Temperatur angezeigt.
19
This manual suits for next models
2
Table of contents
Languages:


