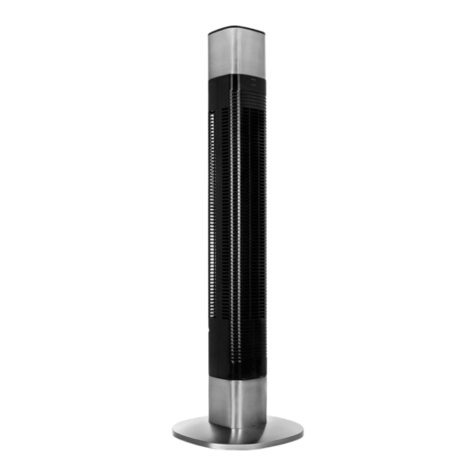
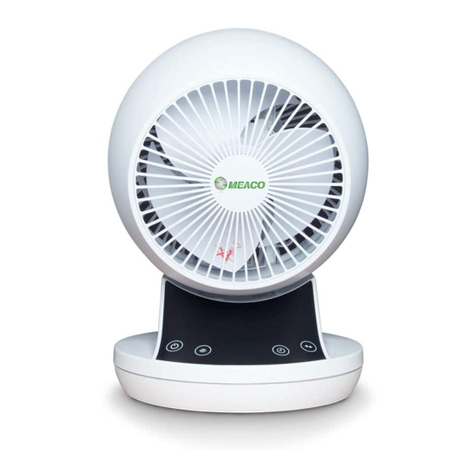
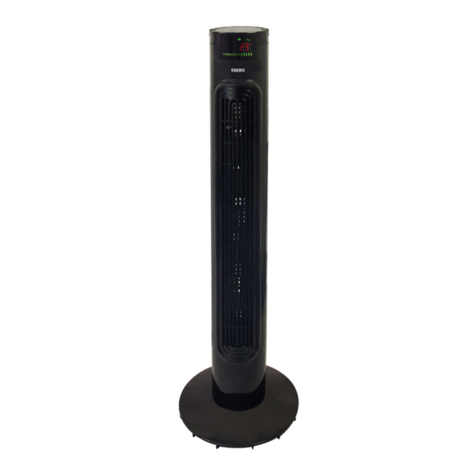
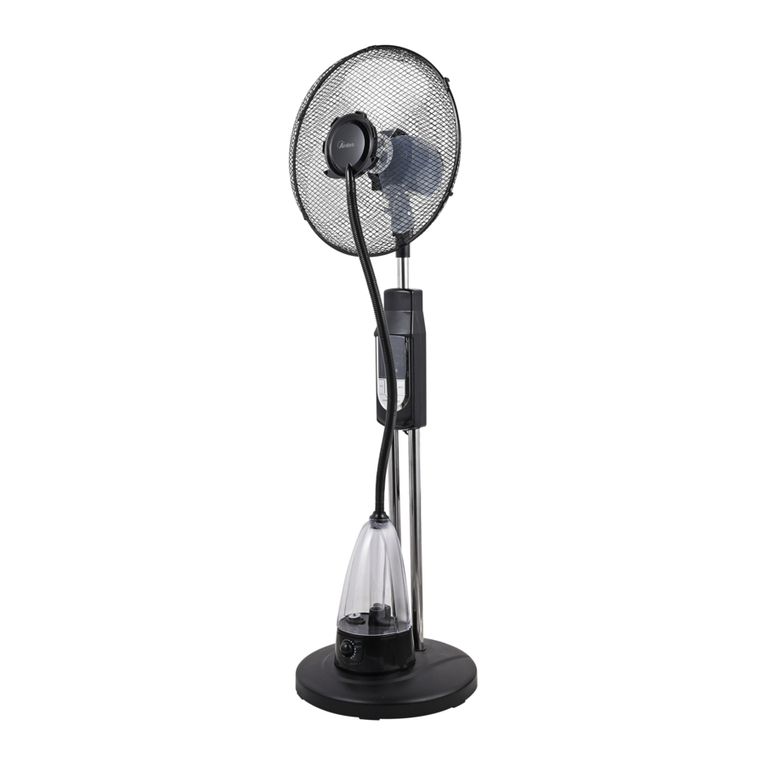
Princess 350000 User manual

EN
Instruction manual
NL
Gebruiksaanwijzing
FR
Mode d’emploi
DE Bedienungsanleitung
ES Manual de usuario
PT Manual de utilizador
IT Manuale utente
SV Bruksanvisning
CS Návod na použití
PL Instrukcja obsługi
SK Návod na použitie
Smart tower fan
01.350000.01.001
RU Руководство по эксплуатации

PARTS DESCRIPTION / ONDERDELENBESCHRIJVING / DESCRIPTION DES PIÈCES /
TEILEBESCHREIBUNG / DESCRIPCIÓN DE LAS PIEZAS / DESCRIÇÃO DOS
COMPONENTES / DESCRIZIONE DELLE PARTI / BESKRIVNING AV DELAR /
OPIS CZĘŚCI / POPIS SOUČÁSTÍ / POPIS SÚČASTÍ / ОПИСАНИЕ ЗАПЧАСТИ
2
3
4
1

Instruction manual
3
SAFETY
• This appliance shall not be used by children
aged less than 8 years. This appliance can
be used by children aged from 8 years and
above and persons with reduced physical,
sensory or mental capabilities or lack of
experience and knowledge if they have been
given supervision or instruction concerning
use of the appliance in a safe way and
understand the hazards involved. Children
shall not play with the appliance. Keep the
appliance and its cord out of reach of
children aged less than 8 years. Cleaning
and user maintenance shall not be made by
children unless older than 8 and supervised.
• By ignoring the safety instructions the
manufacturer cannot be held responsible for
the damage.
• If the supply cord is damaged, it must be
replaced by the manufacturer, its service
agent or similarly qualified persons in order
to avoid a hazard.
• Never move the appliance by pulling the
cord and make sure the cord cannot
become entangled.
• The appliance must be placed on a stable,
level surface.
• The user must not leave the device
unattended while it is connected to the
supply.
• This appliance is only to be used for
household purposes and only for the
purpose it is made for.
• To protect yourself against an electric shock,
do not immerse the cord, plug or appliance
in the water or any other liquid.
PARTS DESCRIPTION
1. Button panel
2. Display
3. Fan body
4. Base
EN

Instruction manual
4
BEFORE THE FIRST USE
• Take the appliance andaccessoriesoutthebox.Removethe
stickers,protective foilorplasticfrom thedevice.
• Before using your appliance for the first time, wipe off all
removable parts with a damp cloth. Never use abrasive products.
• Place the device on a flat stable surface and ensure a minimum
of 10 cm. free space around the device. This device is not
suitable for installation in a cabinet or for outside use.
• Note: The appliance is not compatible with 5GHz WiFi, it will only
work on 2.4GHz WiFi.
• Plug the power cable into a 13A socket.(Note: Make surethe
voltagewhich is indicated on the devicematchesthe localvoltage
beforeconnecting the device.Voltage220V-240V 50Hz).
Assembly instructions
• Remove the 3 screws out of the turnplate (Picture 1).
• Pull the power cord through the hole of the base (Picture 2).
• Align the base with the turnplate and use the 3 screws to secure
them together (Picture 3).
• Press the power cord into the cable slot.(Picture 4).
USE
USING BUTTONS ON FAN
• Press the on/off button to turn the device on or off.
• Press the speed button to choose the desired speed setting.
Press repeatedly to select one of the three different speed
settings.
• Mode button: Choose from 3 different breeze patterns: Normal,
Natural (randomly cycle through different speed settings to
recreate an outdoor natural breeze) and Sleep (slows the fan
speed down so you can still feel the air flow but you don't hear the
fan as much). The natural and sleep function are shown on the
display when they are selected.
• Sleep mode:
Firstly select the fan speed, then select sleep mode. The sleep
mode will begin from the selected fan speed and reduce down to
low speed where it will remain.
Fan speed High when sleep mode selected:
20 minutes high, then 20 minutes medium, then Low.
Fan speed Medium when sleep mode selected:
20 minutes medium, then Low.
Fan speed low when sleep mode selected:
This mode does not give any additional function and the fan will
remain in low speed.

Instruction manual
5
• Press the oscillation button to turn on the swing function, press
again to turn off.
• Press the timer button to activate the timer. Push repeatedly to
increase the timer. The timer can be set to automatically turn off
the fan after 1-8 hours.
USING THE FAN WITH CLIMATE APP
• The fan can be used manually with its built-in controls or you can
use a smart phone to control it. Before you begin, ensure the
Homewizard Climate app is downloaded. The Homewizard
Climate app is available on Android and iOS.
Pair your fan to HomeWizard Climate app
• Make sure your fan is powered.
• Open HomeWizard Climate APP.
• Create an account or if you already have a HomeWizard account,
please log in using those details.
• Click "Add new Climate Device" to add a new device.
• Follow the instructions on the app to connect the fan.
CLEANING AND MAINTENANCE
• Clean the appliance with a damp cloth. Never use harsh and
abrasive cleaners, scouring pad or steel wool, which damages
the device.
• Never immerse the electrical device in water or any other liquid.
The device is not dishwasher proof.
PRODUCT SPECIFICATIONS
Item Detail
Height 41 inches
Timer function range 1-8 h
Number of speed settings 3
Speed 950-1150-1300 rpm
Airflow 1488 m³/h
Wind modes 3 different wind modes: normal,
natural, sleep
Noise level 54,7 dB
Oscillating range 80°
Integrated handle(s) Yes
Overheat protection Yes
Power 50 W
Frequency Only 2.4Ghz, it will not work on
5Ghz WiFi
Button type of main body Touch buttons
DECLARATION OF CONFORMITY
• Hereby, Smartwares Europe declares that the radio equipment
type 350000 is in compliance with Directive 2014/53/EU
• The full text of the EU declaration of conformity is available at the
following internet address: www.princesshome.eu/doc
EN

Instruction manual
6
ENVIRONMENT
This appliance should not be put into the domestic garbage at
the end of its durability, but must be offered at a central point for the
recycling of electric and electronic domestic appliances. This symbol
on the appliance, instruction manual and packaging puts your
attention to this important issue. The materials used in this appliance
can be recycled. By recycling of used domestic appliances you
contribute an important push to the protection of our environment. Ask
your local authorities for information regarding the point of
recollection.
Support
You can find all available information and spare parts at
www.princesshome.eu!

Gebruiksaanwijzing
7
VEILIGHEID
• Dit apparaat mag niet worden gebruikt door
kinderen jonger dan 8 jaar. Dit apparaat kan
worden gebruikt door kinderen vanaf 8 jaar
en door personen met verminderde
lichamelijke, zintuiglijke of geestelijke
vermogens of gebrek aan de benodigde
ervaring en kennis indien ze onder toezicht
staan of instructies krijgen over hoe het
apparaat op een veilige manier kan worden
gebruikt alsook de gevaren begrijpen die
met het gebruik samenhangen. Kinderen
mogen niet met het apparaat spelen. Houd
het apparaat en het netsnoer buiten bereik
van kinderen jonger dan 8 jaar. Laat
reiniging en onderhoud niet door kinderen
uitvoeren, tenzij ze ouder zijn dan 8 jaar en
onder toezicht staan.
• Als u de veiligheidsinstructies negeert, kan
de fabrikant niet verantwoordelijk worden
gehouden voor de mogelijke schade.
• Als het netsnoer beschadigd is, moet het
worden vervangen door de fabrikant, de
onderhoudsmonteur van de fabrikant of door
personen met een soortgelijke kwalificatie
om gevaar te voorkomen.
• Verplaats het apparaat nooit door aan het
snoer te trekken en zorg dat het snoer niet
in de war kan raken.
• Het apparaat moet op een stabiele, vlakke
ondergrond worden geplaatst.
• De gebruiker mag het apparaat niet
onbeheerd achterlaten wanneer de stekker
zich in het stopcontact bevindt.
• Dit apparaat is uitsluitend voor huishoudelijk
gebruik en voor het doel waar het voor
bestemd is.
• Dompel het snoer, de stekker of het
apparaat niet onder in water of andere
vloeistoffen om elektrische schokken te
voorkomen.
BESCHRIJVING VAN DE ONDERDELEN
1. Knoppenpaneel
2. Display
3. Ventilatorstatief
4. Basis
NL

Gebruiksaanwijzing
8
VOORAFGAAND AAN HET EERSTE GEBRUIK
• Haal het apparaat en de accessoires uit de doos.Verwijder de
stickers, de beschermfolie of het plastic van het apparaat.
• Veeg voor het eerste gebruik van het apparaat alle afneembare
onderdelen af met een vochtige doek. Gebruik nooit schurende
producten.
• Plaats het apparaat op een vlakke, stabiele ondergrond. Zorg
voor minimaal 10 cm vrije ruimte rondom het apparaat. Dit
apparaat is niet geschikt voor inbouw of gebruik buitenshuis.
• Opmerking: Het apparaat is niet compatibel met wifi van 5GHz,
alleen met wifi van 2,4GHz.
• Steek de stekker in een stopcontact van 13A.(Opmerking:
controleer of het voltage op het apparaat overeenkomt met de
plaatselijke netspanning voordat u het apparaat aansluit.Voltage
220 - 240V, 50Hz.)
Montage-instructies
• Verwijder de 3 schroeven uit de draaias (afbeelding 1).
• Trek het netsnoer door de opening in de basis (afbeelding 2).
• Lijn de basis uit met de draaias en gebruik de 3 schroeven om de
onderdelen aan elkaar te monteren (afbeelding 3).
• Druk het netsnoer in de kabelsleuf (afbeelding 4).
GEBRUIK
DE VENTILATORKNOPPEN GEBRUIKEN
• Druk op de aan/uit-knop om het apparaat in of uit te schakelen.
• Druk op de snelheidsknop om de gewenste snelheid te kiezen.
Druk herhaaldelijk op deze knop om een van de drie
verschillende snelheden te selecteren.
• Modusknop: Kies uit 3 verschillende ventilatiepatronen: normaal,
natuurlijk (willekeurig verschillende snelheden doorlopen om een
natuurlijke bries te simuleren) en slaap (de ventilator werkt op
lage snelheid, waarbij u nog wel een luchtstroom voelt, maar het
apparaat minder geluid maakt). Als de natuurlijke modus of de
slaapmodus actief is, wordt dit op het display weergegeven.
•Slaapmodus:
Selecteer eerst de ventilatorsnelheid en daarna de slaapmodus.
De slaapmodus begint op de geselecteerde ventilatorsnelheid en
neemt daarna geleidelijk af tot de lage snelheid om in die stand te
blijven draaien.
Ventilatorsnelheid hoog wanneer u de slaapmodus
selecteert:
20 minuten hoog, daarna 20 minuten medium, daarna laag.
Ventilatorsnelheid medium wanneer u de slaapmodus
selecteert:
20 minuten medium, daarna laag.

Gebruiksaanwijzing
9
Ventilatorsnelheid laag wanneer u de slaapmodus selecteert:
Deze stand biedt u geen extra functie en de ventilator blijft
draaien op lage snelheid.
• Druk op de oscillatieknop om de zwenkfunctie in te schakelen.
Druk opnieuw op de knop om deze functie uit te schakelen.
• Druk op de timerknop om de timer te activeren. Druk
herhaaldelijk op de knop om de timer te laten oplopen. Met de
timer kunt u instellen dat de ventilator na 1-8 uur automatisch
wordt uitgeschakeld.
DE VENTILATOR GEBRUIKEN MET DE CLIMATE-APP
• De ventilator kan handmatig worden bediend met de ingebouwde
bedieningselementen, of u kunt een smartphone gebruiken voor
de bediening. Voordat u begint, moet u de HomeWizard Climate-
app downloaden. De HomeWizard Climate-app is beschikbaar
voor Android en iOS.
De ventilator koppelen aan de HomeWizard Climate-app
• Zorg dat de ventilator is ingeschakeld.
• Open de HomeWizard Climate-app.
• Maak een account aan. Als u al een HomeWizard-account hebt,
meldt u zich aan met uw gegevens.
• Klik op 'Add New Climate Device' (Nieuw klimaatapparaat
toevoegen) om een nieuw apparaat toe te voegen.
• Volg de instructies in de app om de ventilator te verbinden.
REINIGING EN ONDERHOUD
• Reinig het apparaat met een vochtige doek. Gebruik nooit
agressieve of schurende reinigingsmiddelen, schuursponzen of
staalwol; dit beschadigt het apparaat.
• Dompel het apparaat nooit onder in water of andere vloeistoffen.
Het apparaat is niet vaatwasserbestendig.
PRODUCTSPECIFICATIES
Item Detail
Hoogte 104 cm
Bereik van timerfunctie 1-8 uur
Aantal snelheden 3
Snelheid 950-1150-1300 rpm
Luchtstroom 1488 m³/u
Windmodi 3 verschillende windmodi:
normaal, natuurlijk, slaap
Geluidsniveau 54,7 dB
Zwenkbereik 80°
Geïntegreerde handgreep Ja
Bescherming tegen oververhitting Ja
Vermogen 50 W
Frequentie Uitsluitend 2,4GHz, het apparaat
werkt niet met wifi van 5GHz
Type knoppen op hoofdbehuizing Druktoetsen
NL

Gebruiksaanwijzing
10
CONFORMITEITSVERKLARING
• Hierbij verklaart Smartwares Europe dat de radioapparatuur van
het type 350000 voldoet aan de richtlijn 2014/53/EU
• De volledige tekst van de EU-conformiteitsverklaring is
beschikbaar op het volgende internetadres:
www.princesshome.eu/doc
MILIEU
Dit apparaat mag aan het einde van de levensduur niet bij het
normale huisafval worden gedeponeerd, maar moet bij een speciaal
inzamelpunt voor hergebruik van elektrische en elektronische
apparaten worden aangeboden. Het symbool op het apparaat, in de
gebruiksaanwijzing en op de verpakking attendeert u hierop. De in het
apparaat gebruikte materialen kunnen worden gerecycled. Met het
recyclen van gebruikte huishoudelijke apparaten levert u een
belangrijke bijdrage aan de bescherming van ons milieu. Informeer bij
uw lokale overheid naar het inzamelpunt.
Support
U kunt alle beschikbare informatie en reserveonderdelen vinden op
www.princesshome.eu!

Manuel d'instructions
11
SÉCURITÉ
• Cet appareil ne doit pas être utilisé par des
enfants de moins de 8 ans. Cet appareil
peut être utilisé par des enfants de 8 ans ou
plus et des personnes présentant un
handicap physique, sensoriel ou mental
voire ne disposant pas des connaissances
et de l'expérience nécessaires en cas de
surveillance ou d'instructions sur l'usage de
cet appareil en toute sécurité et de
compréhension des risques impliqués. Les
enfants ne doivent pas jouer avec l'appareil.
Maintenez l'appareil et son cordon
d'alimentation hors de portée des enfants de
moins de 8 ans. Le nettoyage et la
maintenance utilisateur ne doivent pas être
confiés à des enfants sauf s'ils ont 8 ans ou
plus et sont sous surveillance.
• Si vous ignorez les consignes de sécurité, le
fabricant ne peut être tenu pour responsable
des dommages.
• Si le cordon d'alimentation est endommagé,
il doit être remplacé par le fabricant, son
réparateur ou des personnes qualifiées afin
d'éviter tout risque.
• Ne déplacez jamais l'appareil en tirant sur le
cordon et veillez à ce que celui-ci ne
s'enroule pas.
• L'appareil doit être posé sur une surface
stable et nivelée.
• Ne laissez jamais le dispositif sans
surveillance s'il est connecté à l'alimentation.
• Cet appareil est uniquement destiné à des
utilisations domestiques et seulement dans
le but pour lequel il est fabriqué.
• Afin de vous éviter un choc électrique,
n'immergez pas le cordon, la prise ou
l'appareil dans de l'eau ou autre liquide.
DESCRIPTION DES PIÈCES
1. Panneau de commande
2. Affichage
3. Corps du ventilateur
4. Base
FR

Manuel d'instructions
12
AVANT LA PREMIÈRE UTILISATION
• Sortez l'appareil et les accessoires hors de la boîte.Retirez les
autocollants, le film protecteur ou le plastique de l'appareil.
• Avant la première utilisation de votre appareil, essuyez toutes les
pièces amovibles avec un chiffon humide. N’utilisez jamais de
produits abrasifs.
• Mettez l'appareil sur une surface stable plate et assurez un
dégagement tout autour de l'appareil d'au moins 10 cm. Cet
appareil ne convient pas à une installation dans une armoire ou à
un usage à l'extérieur.
• Remarque: L'appareil n'est pas compatible avec le WiFi 5GHz, il
ne fonctionne qu'avec le WiFi 2,4GHz.
• Branchez le câble d'alimentation dans une prise
13A.(Remarque: Assurez-vous que la tension indiquée sur
l'appareil correspond à la tension locale avant de brancher
l'appareil.Tension 220V-240V 50 Hz).
Instructions de montage
• Retirez les 3 vis du plateau tournant (Photo 1).
• Tirez le cordon d'alimentation à travers le trou de la base (Photo
2).
• Alignez la base au le plateau tournant et utilisez les 3 vis pour les
fixer ensemble (Photo 3).
• Enfoncez le cordon d'alimentation dans la fente pour câble.
(Photo 4).
UTILISATION
UTILISATION DES BOUTONS SUR LE VENTILATEUR
• Appuyez sur le bouton Marche/Arrêt pour allumer ou éteindre
l'appareil.
• Appuyez sur le bouton de vitesse pour choisir le réglage que vous
souhaitez utiliser. Appuyez à plusieurs reprises pour sélectionner
l'un des trois réglages de vitesse différents.
• Bouton Mode: Choisissez parmi 3 modèles de ventilation
différents: Normal, Naturel (faites défiler de façon aléatoire les
différents réglages de vitesse pour recréer une brise naturelle
extérieure) et Veille (ralentit la vitesse du ventilateur pour que
vous puissiez toujours sentir le flux d'air mais que vous ne
l'entendiez pas trop). La fonction naturelle et la fonction veille
s'affichent sur l'écran une fois sélectionnées.
•Mode veille:
Sélectionner d'abord la vitesse du ventilateur, puis le mode veille.
Le mode veille démarre à partir de la vitesse du ventilateur
sélectionnée qui ralentit jusqu'à rester à vitesse lente.
Vitesse du ventilateur rapide lors de la sélection du mode
veille:

Manuel d'instructions
13
20 minutes rapide, puis 20 minutes à vitesse moyenne, puis
lente.
Vitesse du ventilateur moyenne lors de la sélection du mode
veille:
20 minutes à vitesse moyenne, puis lente.
Vitesse du ventilateur lente lors de la sélection du mode
veille:
Ce mode n'ajoute aucune fonction supplémentaire et le
ventilateur continuera à fonctionner à vitesse lente.
• Appuyez sur le bouton de l'oscillation, appuyez à nouveau pour
éteindre l'appareil.
• Appuyez sur le bouton de la minuterie pour activer la minuterie.
Répétez l'opération pour faire avancer la minuterie. Il est possible
de régler la minuterie pour éteindre le ventilateur
automatiquement après 1 à 8 heures.
UTILISATION DU VENTILATEUR AVEC L'APPLI CLIMATE
• Le ventilateur peut être utilisé manuellement avec ses
commandes intégrées ou vous pouvez utiliser votre smartphone
à distance. Avant de commencer, veillez à ce que l'appli
Homewizard Climate soit téléchargée. L’appli Homewizard
Climate existe pour Android et iOS.
Associez votre ventilateur à l'appli HomeWizard Climate
• Veillez à ce que votre ventilateur soit sous tension.
• Ouvrez l'appli HomeWizard Climate.
• Créez un compte, ou si vous avez déjà un compte HomeWizard,
veuillez vous connecter à l'aide de ces détails.
• Cliquez sur «Add new Climate Device» pour ajouter un nouvel
appareil.
• Suivre les instructions sur l'application pour connecter le
ventilateur.
NETTOYAGE ET ENTRETIEN
• Nettoyez l'appareil avec un chiffon humide. N'utilisez pas de
produits nettoyants agressifs ou abrasifs, de tampons à récurer
ou de laine de verre, ceux-ci pourraient endommager l'appareil.
• N'immergez jamais l'appareil dans l'eau ni aucun autre liquide.
L'appareil ne peut pas être nettoyé en lave-vaisselle.
FR

Manuel d'instructions
14
CARACTÉRISTIQUES DU PRODUIT
Élément Détail
Hauteur 41 pouces
Plage de minuterie 1-8 h
Nombre de réglages de vitesse 3
Vitesse 950-1 150-1 300 tr/min
Débit d'air 1 488 m³/h
Modes ventilation 3 modes ventilation: normal,
naturel, veille
Niveau sonore 54,7 dB
Plage d'oscillation 80°
Poignée(s) intégrée(s) Oui
Protection contre la surchauffe Oui
Puissance 50 W
Fréquence Seulement 2,4 Ghz, ne
fonctionne pas sur le WiFi 5 Ghz
Type de bouton sur l'appareil Boutons tactiles
DÉCLARATION DE CONFORMITÉ
• Par la présente, Smartwares Europe déclare que le type
d'équipement radio 350000 est en conformité avec la directive
2014/53/UE
• Le texte intégral de la déclaration de conformité est disponible à
l'adresse internet suivante: www.princesshome.eu/doc
ENVIRONNEMENT
Cet appareil ne doit pas être jeté avec les déchets ménagers
à la fin de sa durée de vie, il doit être remis à un centre de recyclage
pour les appareils électriques et électroniques. Ce symbole sur
l'appareil, le manuel d'utilisation et l'emballage attire votre attention
sur un point important. Les matériaux utilisés dans cet appareil sont
recyclables. En recyclant vos appareils, vous contribuez de manière
significative à la protection de notre environnement. Renseignez-vous
auprès des autorités locales pour connaître les centres de collecte
des déchets.
Support
Vous retrouvez toutes les informations et pièces de rechange sur
www.princesshome.eu!

Bedienungsanleitung
15
SICHERHEIT
• Dieses Gerät darf nicht von Kindern unter 8
Jahren verwendet werden. Dieses Gerät
darf von Kindern ab 8 Jahren und von
Personen mit eingeschränkten körperlichen,
sensorischen oder geistigen Fähigkeiten
oder einem Mangel an Erfahrung und
Kenntnissen verwendet werden, sofern
diese Personen beaufsichtigt oder über den
sicheren Gebrauch des Geräts unterrichtet
wurden und die damit verbundenen
Gefahren verstanden haben. Kinder dürfen
mit dem Gerät nicht spielen. Halten Sie das
Gerät und sein Anschlusskabel außerhalb
der Reichweite von Kindern unter 8 Jahren.
Reinigungs- und Wartungsarbeiten dürfen
nicht von Kindern vorgenommen werden, es
sei denn, sie sind älter als 8 und werden
beaufsichtigt.
• Beim Ignorieren der Sicherheitshinweise
kann der Hersteller nicht für Schäden
haftbar gemacht werden.
• Ist das Netzkabel beschädigt, muss es vom
Hersteller, dem Kundendienst oder ähnlich
qualifizierten Personen ersetzt werden, um
Gefahren zu vermeiden.
• Bewegen Sie das Gerät niemals durch
Ziehen am Kabel, und stellen Sie sicher,
dass sich das Kabel nicht verwickeln kann.
• Das Gerät muss auf einer ebenen, stabilen
Fläche platziert werden.
• Das Gerät darf nicht unbeaufsichtigt bleiben,
während es am Netz angeschlossen ist.
• Dieses Gerät darf nur für den
Haushaltsgebrauch und nur für den Zweck
benutzt werden, für den es hergestellt
wurde.
• Tauchen Sie zum Schutz vor einem
Stromschlag das Kabel, den Stecker oder
das Gerät niemals in Wasser oder sonstige
Flüssigkeiten.
TEILEBESCHREIBUNG
1. Bedienfeld
2. Display
3. Lüftergehäuse
4. Sockel
DE

Bedienungsanleitung
16
VOR DEM ERSTEN GEBRAUCH
• Nehmen Sie das Gerät und das Zubehör aus der
Verpackung.Entfernen Sie die Aufkleber, die Schutzfolie oder
das Plastik vom Gerät.
• Wischen Sie vor der ersten Inbetriebnahme des Geräts alle
abnehmbaren Teile mit einem feuchten Tuch ab. Verwenden Sie
niemals Scheuermittel.
• Stellen Sie das Gerät auf eine ebene und stabile Fläche und
halten Sie einen Abstand von mindestens 10 cm um das Gerät
herum ein. Dieses Gerät ist nicht für den Anschluss oder die
Verwendung in einem Schrank oder im Freien geeignet.
• Hinweis: Das Gerät ist nicht mit 5GHz WiFi kompatibel, sondern
funktioniert nur mit 2,4GHz WiFi.
• Schließen Sie das Netzkabel an einer Steckdose (13A)
an.(Hinweis: Achten Sie darauf, dass die am Gerät angegebene
Spannung mit der vorhandenen Netzspannung übereinstimmt,
bevor Sie das Gerät anschließen.Spannung: 220-240V, 50Hz).
Montageanweisungen
• Entfernen Sie die 3 Schrauben aus dem Drehteller (Abbildung 1).
• Ziehen Sie das Netzkabel durch das Loch im Sockel (Abbildung
2).
• Richten Sie Sockel und Drehteller miteinander aus und benutzen
Sie die 3 Schrauben, um sie miteinander zu verbinden (Abbildung
3).
• Drücken Sie das Netzkabel in die Kabelführung (Abbildung 4).
GEBRAUCH
BEDIENUNG DES LÜFTERS
• Drücken Sie die Ein/Aus-Taste, um das Gerät ein- oder
auszuschalten.
• Wählen Sie mit der Geschwindigkeitstaste die gewünschte
Lüftergeschwindigkeit. Drücken Sie wiederholt die Taste, um eine
der drei Geschwindigkeitsstufen zu wählen.
• Taste Modus: Wählen Sie unter 3 verschiedenen Betriebsarten:
Normal, Natural (zufällig variierende Geschwindigkeitseinstellung,
um eine natürliche Frischluftbrise zu simulieren) und Sleep
(verringert die Lüftergeschwindigkeit, so dass der Lüfter kaum
noch zu hören, aber dennoch ein Luftzug zu spüren ist). Die
Betriebsarten „Natural“ und „Sleep“ werden bei Auswahl auf dem
Display angezeigt.
•Schlafmodus:
Wählen Sie zunächst die Lüftergeschwindigkeit und dann den
Schlafmodus. Der Schlafmodus beginnt mit der gewählten
Lüftergeschwindigkeit und senkt diese dann auf eine dauerhaft
niedrige Drehzahl ab.
Hohe Lüftergeschwindigkeit bei aktiviertem Schlafmodus:
20Minuten hoch, dann 20Minuten mittel, dann niedrig.

Bedienungsanleitung
17
Mittlere Lüftergeschwindigkeit bei aktiviertem Schlafmodus:
20Minuten mittel, dann niedrig.
Niedrige Lüftergeschwindigkeit bei aktiviertem
Schlafmodus:
In diesem Modus gibt es keine zusätzliche Funktion, und der
Lüfter verbleibt bei einer niedrigen Drehzahl.
• Drücken Sie die Oszillationstaste, um die Schwenkfunktion
einzuschalten; drücken Sie sie erneut, um sie wieder
auszuschalten.
• Drücken Sie die Timer-Taste, um den Timer zu aktivieren. Durch
wiederholtes Drücken erhöhen Sie die Timereinstellung. Der
Timer lässt sich so einstellen, dass er den Lüfter nach
1-8Stunden automatisch ausschaltet.
BENUTZUNG DES LÜFTERS MIT DER CLIMATE-APP
• Sie können den Lüfter manuell mit den integrierten
Bedienelementen oder über ein Smartphone steuern. Bevor Sie
anfangen, müssen Sie die HomeWizard Climate-App
heruntergeladen haben. Die HomeWizard Climate-App gibt es für
Android und iOS.
Synchronisieren Sie den Lüfter mit der HomeWizard Climate-
App
• Achten Sie darauf, dass der Lüfter eingeschaltet ist.
• Öffnen Sie die HomeWizard Climate-App.
• Erstellen Sie ein Konto oder melden Sie sich bei einem bereits
eingerichteten HomeWizard-Konto an.
• Klicken Sie auf „Add new Climate Device“ (Neues Klimagerät
hinzufügen), um ein neues Gerät hinzuzufügen.
• Befolgen Sie die Anweisungen in der App, um den Lüfter zu
verbinden.
REINIGUNG UND PFLEGE
• Reinigen Sie das Gerät mit einem feuchten Tuch. Verwenden Sie
niemals scharfe oder scheuernde Reiniger, Topfreiniger oder
Stahlwolle. Dies würde das Gerät beschädigen.
• Tauchen Sie das Gerät niemals in Wasser oder andere
Flüssigkeiten. Das Gerät in nicht spülmaschinenfest.
DE

Bedienungsanleitung
18
PRODUKTSPEZIFIKATIONEN
Merkmal Detail
Höhe 104,1cm
Timer-Funktionsbereich 1-8Std.
Geschwindigkeitsstufen 3
Drehzahl 950-1150-1300U/min
Luftstrom 1488m³/h
Windmodi 3 verschiedene Windmodi:
Normal, Natural, Sleep
Geräuschpegel 54,7dB
Oszillationsbereich 80°
Integrierte(r) Griff(e) Ja
Überhitzungsschutz Ja
Leistung 50W
Frequenz Nur 2,4GHz, funktioniert nicht mit
5GHz WiFi
Tastentyp am Gehäuse Berührungstasten
KONFORMITÄTSERKLÄRUNG
• Hiermit erklärt Smartwares Europe, dass der Funkgerätetyp
350000 der Richtlinie 2014/53/EU entspricht
• Der vollständige Text der EU-Konformitätserklärung ist unter
folgender Internetadresse abrufbar: www.princesshome.eu/doc
UMWELT
Dieses Gerät darf am Ende seiner Lebenszeit nicht im
Hausmüll entsorgt werden, sondern muss an einer Sammelstelle für
das Recyceln von elektrischen und elektronischen Haushaltsgeräten
abgegeben werden. Das Symbol auf dem Gerät, in der
Bedienungsanleitung und auf der Verpackung macht Sie auf dieses
wichtige Thema aufmerksam. Die in diesem Gerät verwendeten
Materialien können recycelt werden. Durch das Recyceln gebrauchter
Haushaltsgeräte leisten Sie einen wichtigen Beitrag zum
Umweltschutz. Fragen Sie Ihre örtliche Behörde nach Informationen
über eine Sammelstelle.
Support
Sämtliche verfügbaren Informationen und Ersatzteile finden Sie unter
www.princesshome.eu!

Manual de instrucciones
19
SEGURIDAD
• Este aparato no debe ser utilizado por niños
menores de 8 años. Este aparato puede ser
utilizado por niños a partir de los 8 años y
por personas con capacidades físicas,
sensoriales o mentales reducidas, o que no
tengan experiencia ni conocimientos, sin
son supervisados o instruidos en el uso del
aparato de forma segura y entienden los
riesgos implicados. Los niños no pueden
jugar con el aparato. Mantenga el aparato y
el cable fuera del alcance de los niños
menores de 8 años. Los niños no podrán
realizar la limpieza ni el mantenimiento
reservado al usuario a menos que tengan
más de 8 años y cuenten con supervisión.
• Si ignora las instrucciones de seguridad,
eximirá al fabricante de toda
responsabilidad por posibles daños.
• Si el cable de alimentación está dañado,
corresponde al fabricante, al representante
o a una persona de cualificación similar su
reemplazo para evitar peligros.
• Nunca mueva el aparato tirando del cable y
asegúrese de que no se pueda enredar con
el cable.
• El aparato debe colocarse sobre una
superficie estable y nivelada.
• El usuario no debe dejar el dispositivo sin
supervisión mientras esté conectado a la
alimentación.
• Este aparato se debe utilizar únicamente
para el uso doméstico y sólo para las
funciones para las que se ha diseñado.
• Para protegerse contra una descarga
eléctrica, no sumerja el cable, el enchufe ni
el aparato en el agua o cualquier otro
líquido.
DESCRIPCIÓN DE LOS COMPONENTES
1. Panel de botones
2. Visor
3. Cuerpo del ventilador
4. Base
ES

Manual de instrucciones
20
ANTES DEL PRIMER USO
• Saque el aparato y los accesorios de la caja.Quite los adhesivos,
la lámina protectora o el plástico del dispositivo.
• Antes de utilizar el aparato por primera vez, pase un paño
húmedo por todas las piezas desmontables. Nunca utilice
productos abrasivos.
• Coloque el dispositivo sobre una superficie plana estable y
asegúrese de tener un mínimo de 10 cm de espacio libre
alrededor del mismo. Este dispositivo no es apropiado para ser
instalado en un armario o para el uso en exteriores.
• Nota: Este aparato no admite la conexión WiFi de 5GHz; solo
funciona con la conexión WiFi de 2,4GHz.
• Enchufe el cable de alimentación en una toma de 13A.(Nota:
Asegúrese de queel voltajeindicado en el
dispositivocoincidecon el voltajelocal antes deconectar el
dispositivo.Tensión:220V-240V50Hz).
Instrucciones de montaje
• Retire los 3 tornillos de la placa de giro (imagen 1).
• Tire del cable de alimentación a través del orificio de la base
(imagen 2).
• Haga coincidir la base con la placa de giro y fíjelas con los tres
tornillos (imagen 3).
• Inserte el cable de alimentación a través de la ranura para cables
(imagen 4).
USO
UTILIZACIÓN DE LOS BOTONES DEL VENTILADOR
• Para encender y apagar el equipo, pulse el botón de encendido/
apagado.
• Pulse el botón de velocidad para seleccionar el ajuste de
velocidad deseado. Púlselo varias veces para seleccionar uno de
los tres ajustes de velocidad distintos.
• Botón de modo: Escoja entre 3 patrones de brisa diferentes:
normal, natural (cambia de forma aleatoria entre diferentes
ajustes de velocidad para recrear una brisa natural exterior) y
sueño (baja la velocidad del ventilador de modo que continúe
sintiendo el flujo de aire, pero no se escuche tanto). Las
funciones natural y sueño se muestran en el visor cuando se
seleccionan.
•Modo reposo:
Primero seleccione la velocidad del ventilador y, a continuación,
seleccione el modo reposo. El modo de reposo comenzará con la
velocidad del ventilador seleccionada e irá reduciendo hasta
llegar a la velocidad baja, que luego se mantendrá constante.
Velocidad del ventilador alta al seleccionar el modo de
reposo:
Other manuals for 350000
1
This manual suits for next models
1
Table of contents
Languages:
Other Princess Fan manuals

Princess
Princess 01.358280.02.001 User manual

Princess
Princess SMART 01.358450.02.001 User manual

Princess
Princess 352600 User manual

Princess
Princess 352526 User manual

Princess
Princess 350000 User manual

Princess
Princess 352520 User manual

Princess
Princess 350001 User manual

Princess
Princess 2518 User manual

Princess
Princess 352500 User manual

Princess
Princess 352610 User manual
