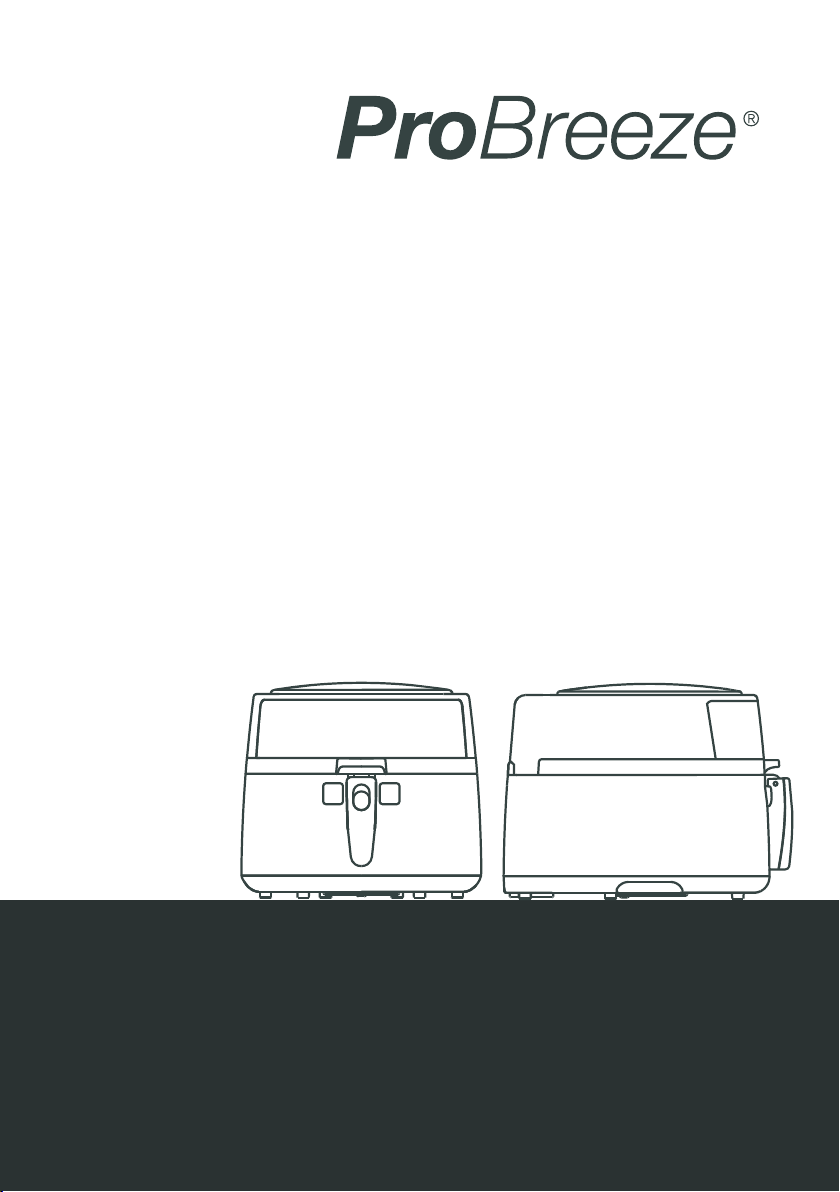
Pro Breeze AF-05 User manual
Instruction manual
Model AF-05
Digital Air Fryer
IMPORTANT INSTRUCTIONS - RETAIN FOR FUTURE USE.

1 | English
Digital Air Fryer
Model AF-05
SAFETY INSTRUCTIONS
Thank you for choosing to purchase a product from Pro Breeze. Please read the entire
manual carefully prior to rst use and keep in a safe place for future reference.
WARNING: Read all safety notices, instructions, illustrations, and technical
data provided with this appliance.
WARNING: To avoid the risk of electrical shock, re or injury to people, always
make sure the appliance is unplugged from the electrical outlet before
relocating, servicing, or cleaning it.
CAUTION: The appliance will become very hot during use and can cause
burns. Do not touch heated parts of the appliance with bare skin during use or
immediately after the appliance has been switched OFF. Allow the appliance
to thoroughly cool down before handling or cleaning. Use oven gloves or oven
mitts when handling hot components and surfaces.
• Use this appliance only as described in this manual. Any other use not recommended by
the manufacturer may cause re, electric shock, or injury to persons.
• The appliance is not to be used by persons (including children) with reduced physical,
sensory or mental capabilities, or lack of experience and knowledge, unless they have
been given supervision or instruction.
• Keep the appliance and its power supply cord out of the reach of children.
• Children must be supervised not to play with the appliance.
• Do not leave children alone or unattended in the area where the appliance is in use.
• Children younger than 8 years of age and animals must be kept away from the appliance
and the connecting cable.
• Cleaning and user maintenance may not be performed by children, unless they are older
than 8 years of age and are supervised.
• The appliance must have a minimum 20cm clearance around all sides of the appliance.
• The ventilation slots on the appliance must never be covered or blocked as this can
cause the appliance to overheat.
• Do not place the appliance against a wall or other appliances.
• Do not operate the appliance under any surfaces, such as a kitchen cabinet.
• Always place the appliance on heat resistant mat or heat pad to prevent any potential
damage to your worktop.

English | 2
• Place the appliance on a dry, at, stable, and heat-resistant surface. Never place the
appliance on a soft surface. Operating the product in any other position could cause a
hazard.
• Ensure the appliance is not located immediately below or next to a socket-outlet.
• Ensure the mains cable is fully extended before use and arrange it so that it is not in
contact with any part of the appliance.
• Use the appliance in a well-ventilated area.
• This appliance is intended for indoor household use and similar applications. Do not use
outdoors or in commercial or retail environments.
• Never leave the appliance unattended while in use. Always turn the appliance o and
unplug from the mains power when not in use.
• Do not operate the appliance with wet hands.
• Do not cover the appliance during use as this can pose a re hazard.
• Do not use the appliance near ammable materials, substances, petrol, paints,
ammable gases, ovens, or other heating sources.
• Do not place anything on top of the appliance.
• Do not use sharp or abrasive items. Use only heat resistant plastic or wooden spatulas
to avoid damaging the surfaces of accessories supplied.
• Do not pour any liquids (e.g. oil or water) directly into the appliance or the drawer or
place a liquid-lled vessel into the appliance. It works exclusively with hot air.
• Do not place any other tools or accessories in the appliance, other than the ones
supplied.
• During use, hot steam can be released through the air outlet vents. Keep your hands and
face at a safe distance from the steam and the air outlet openings. Avoid steam from the
air outlets coming into close contact with other appliances or surfaces during air frying.
• Never insert ngers or metal objects into the vents and openings of the appliance.
• Do not push any objects in the air inlet and outlet grills as this may cause an electric
shock, re or damage the appliance.
• Always plug the appliance directly into a wall socket. Do not use any extension cables.
• To avoid a circuit overload when using this appliance, do not operate another high-
wattage appliance on the same electrical circuit.
• Do not pull on the mains cable. Never move, carry, or hang the appliance by the mains
cable.
• Do not operate this appliance with an external timer or separate remote-control system.
• Do not operate the appliance if there are signs of damage to the appliance, power cord,
or any of the accessories.
• If the supply cord is damaged, it must be replaced by the manufacturer, its service
agent, or a similarly qualied person to avoid a hazard.
• Do not attempt to repair or adjust any electrical or mechanical elements in the appliance.
Doing so may be unsafe and will void your warranty.
3 | English
• Ensure that the mains power supply (including voltage, frequency, and power) complies
with the rating label of the appliance.
• Do not kink or wrap the power cord and plug around the appliance, as this may cause
the insulation to weaken or split, particularly where it enters the appliance.
• Make sure that the connected mains cable does not present a trip hazard. The mains
cable may not hang down from the surface on which the appliance is placed in order to
prevent the appliance from being pulled down.
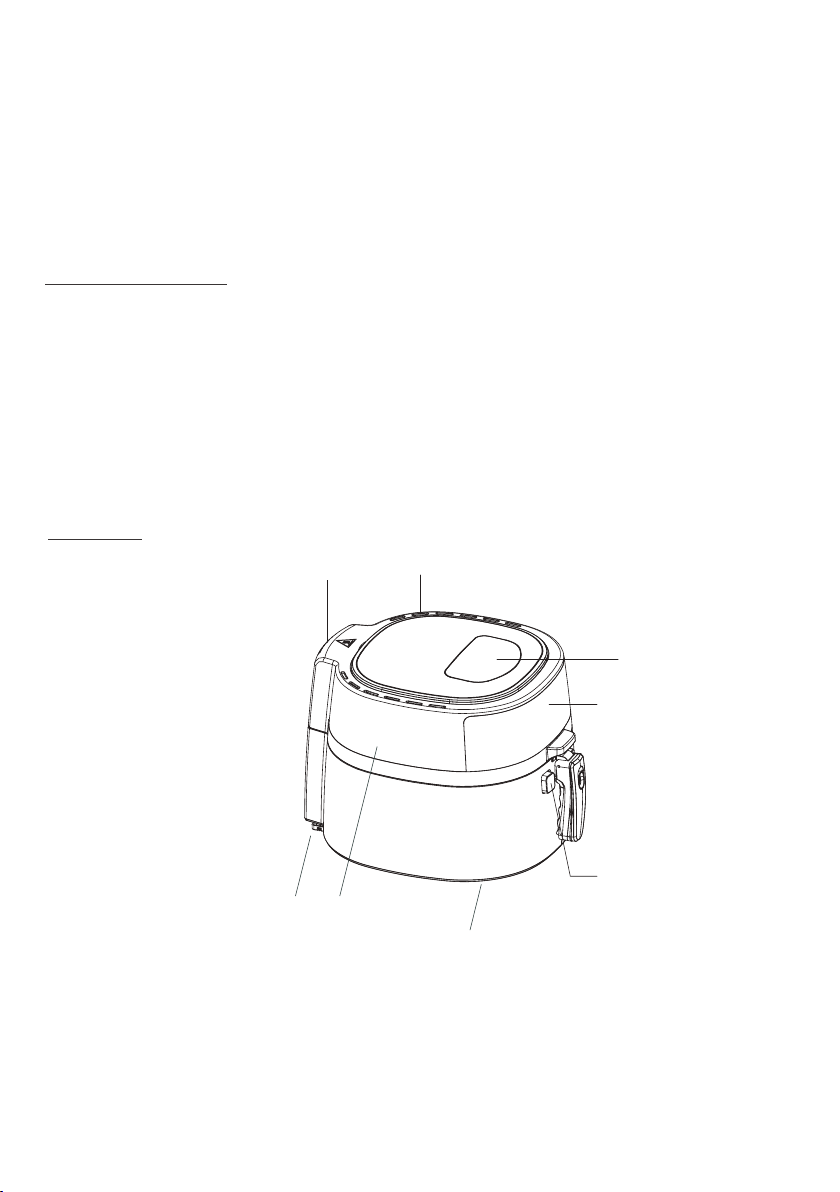
1. Control panel
2. Digital display
3. Air inlet
4. Air outlet
5. Transparent Window
6. Spring lid
7. Spring lid open button
8. Suction cup
9. Spindle
10. Frying pot
11. Foldable pot handle
12. Stirring paddle
13. Food rack
14. Paddle key
15. Power cable
3. 4.
1. & 2.
5.
6.15.
8.
7.
PARTS
Model: AF-05
Voltage: 220-240V~
Frequency: 50-60Hz
Power: 1800W
Product Dimensions: L39.7 x W33 x H29.7cm
Net Weight: 6.5 KG
SPECIFICATION

English | 4
1. On/O button
2. Pre-set mode selection button
3. Temperature decrease button
4. Tempreature increase button
5. Stir mode button
6. Time decrease button
7. Time increase button
8. Cooking pre-sets
9. Fan indicator
10. Temperature indicator
11. Timer indicator
1.
8. 10. 11.
9.
5. 6. 7.2.3.4.
12.
13.
11.
14.
10.
9.
CONTROL PANEL

5 | English
• Read all the ‘Safety Instructions’ listed in this manual prior to rst use.
• Remove the air fryer from the box and put it on at surface.
• Push the spring lid open button to open the lid and remove all packaging materials and
accessories from the air fryer.
• Thoroughly wash the frying pot, food rack and stirring paddle with warm, soapy water,
then rinse and dry thoroughly.
• Do not immerse the air fryer main unit in water or any other liquid.
• Do not use harsh or abrasive cleaning detergents or scouring sponges to clean the air
fryer or its parts as this could cause damage.
• Place the air fryer on a at, stable, heat resistant surface.
• Place the air fryer on a heat resistant mat or heat pad to prevent any potential damage
to your worktop.
• Do not operate the appliance under any surfaces, such as a kitchen cabinet.
• Do not place the appliance against a wall or other appliances.
• The appliance must have a minimum 20cm clearance around all sides. We recommend
a 30cm clearance around the back side of the appliance.
1. Place the air fryer on a at, stable, heat resistant surface.
2. Insert the power plug into a power socket.
3. Push the spring lid open button to open the lid. Put the food rack into the frying pot.
4. Attach the stirring paddle to the paddle key if stirring function is required.
5. Close the spring lid and press the On/O button.
6. Press the temperature increase and decrease buttons to set the desired cooking
temperature.
7. Pre-heat the air fryer by pressing the time decrease button until ve minutes are set. Press
the On/O button to begin the pre-heating.
8. During pre-heating the temperature indicator, and timer indicator will illuminate.
9. When the timer reaches 0, you will hear a beeping sound. Carefully open the spring lid and
remove the frying pot by unfolding the handle and pulling gently. Place it on a at, stable,
heat resistant surface.
BEFORE FIRST USE
OPERATING INSTRUCTIONS
YOUR AIR FRYER IS NOW READY FOR USE!

English | 6
10. Place the ingredients into the non-stick frying pot and then reinsert the frying pot into the
pre-heated air fryer.
11. Fold the frying pot handle and close the lid.
12. Press the On/O button.
13. Select the appropriate temperature and timer settings for the ingredients using the
temperature and timer increase and decrease buttons. See the cooking guide for further
information. Alternatively press the pre-set mode selection button to cycle through and
select one of the seven cooking pre-sets.
14. Press the On/O button to begin cooking. During cooking the heating indicator and fan
indicator will illuminate.
15. For ingredients that needs stirring, press the stir mode button to continuously stir the
ingredients. Press stir mode button again to stop stirring function.
16. When the timer reaches 0 the same beeping will sound and the automatic switch-o will
turn the air fryer o. Carefully open the spring lid and remove the frying pot by unfolding
the handle and pulling gently. Place it on a at, stable, heat resistant surface.
17. If the food is cooked remove from the frying pot and serve.
18. If the food requires further cooking, reinsert the frying pot into the air fryer and set the
timer for a few extra minutes. Keep checking back until you are happy with the result.
NOTE
• If the temperature or time needs to be adjusted during use, simply use the temperature
and time increase and decrease buttons as required and the air fryer will automatically
adjust.
• Once the timer comes to an end, the internal fan will continue to operate for 10 seconds to
cool the air fryer down.

7 | English
COOKING GUIDE
Note: This is a cooking guideline only and cooking should always be monitored.
Potatoes and Chips
Meat and Poultry
Fish
Food Amount (g) Time (Min) Temperature (℃)
Food Amount (g) Time (Min) Temperature (℃)
Food Amount (g) Time (Min) Temperature (℃)
Thin frozen chips
Thick frozen chips
Homemade chips
Homemade potato wedges
Steak
Lamb chops
Pork chops
Hamburger
Chicken breast
Chicken wings
Frozen chicken nuggets
Fish
Frozen sh ngers
300 - 600
300 - 600
300 - 600
300 - 600
100 - 500
100 - 500
100 - 500
100 - 500
100 - 500
100 - 500
100 - 500
100 - 500
100 - 500
8-15
15-20
18-20
18-20
15-25
20-25
10-15
15-25
10-20
160
180
180
180
200
180
200
180
180
16-18
18-20
18-25
18-25
200
200
200
180

English | 8
NOTE: Use baking tin or other baking container when baking.
Baking and Cakes
Food Amount (g) Time (Min) Temperature (℃)
Quiche
Cake
300
300
20-22
20-25
180
160
WARNING: Always turn the appliance OFF, unplug the power cord from the
electrical outlet and allow the appliance to completely cool down before handling,
cleaning or storing.
CAUTION: : Do not immerse the appliance in water or any other liquid. Do not
allow water or other liquids to run into the interior of the appliance, as this could create a
re and/or electrical hazard. Do not use any toxic, corrosive, or abrasive cleaning agents or
scouring sponges to clean the appliance or the accessories supplied. These can damage the
surface. Do not spray cleaning agents directly onto or into the appliance.
1. Clean the air fryer after each use.
2. Remove the frying pot from the air fryer.
3. Ensure the frying pot is empty and take the food rack and the stirring paddle out of the
frying pot.
4. Clean the frying pot, the rack and the paddle with warm water and a mild detergent. Allow
the frying pot, the rack and the paddle to soak in warm water with mild detergent for 15
minutes. Remove any food residue with a soft sponge. Do not use scouring sponges as
this will damage the non-stick coating.
Note: The frying rack is dishwasher safe.
5. Clean the exterior surface of the appliance by wiping it with a soft, damp cloth. Dry the
appliance with a soft clean cloth.
6. Allow all parts to dry completely before reassembling the appliance for use or prior to
storage.
7. Check the mains cable regularly for any damage.
8. To store your product, we recommend using the original or similar size box.
9. Do not kink or wrap the power cord and plug around the appliance, as this may cause the
insulation to weaken or split, particularly where it enters the appliance.
10. Store the appliance and all accessories in a safe, clean, frost free, dry place at
temperatures of between 0 and 40°C, out of reach of children and direct sunlight when not
in use.
CLEANING, MAINTENANCE & STORAGE

9 | English
This marking indicates that this product should not be disposed of with other
household waste throughout the EU. This is to prevent possible harm to the
environment and human wellbeing. Contact your local authority for information
regarding the collection systems available. If possible, recycle it responsibly to
promote the sustainable reuse of resources.
DISPOSAL

English | 10
www.probreeze.com
One Retail Group, Ryland House, 24A Ryland Road,
London, NW5 3EH, United Kingdom
© Copyright 2020
Table of contents
Other Pro Breeze Fryer manuals


Popular Fryer manuals by other brands


Eagle Group
Eagle Group CLGF30-LP Installation, operating, & maintenance instructions

TEFAL
TEFAL ActyFry Series manual

Russell Hobbs
Russell Hobbs 27160AU manual

Orbegozo
Orbegozo FDR 68 instruction manual

AFG
AFG QUEEN9 Instructions for installation

goldstein
goldstein 800 Series Installation and operation manual


