Pro Clear Aquatic Systems
Contact: 904-448-6800
www.Pro-Clear.com
@ProClearAquaticSystems2015
@ProClearAquatics
PRO SERIES 150 ASSEMBLY AND
INSTALLATION INSTRUCTIONS
The Pro 150 Series Wet/Dry is designed with the input water from
the tank being skimmed before going to the Biological area. This has the advantage of higher Biological
activity and increased oxygenation of the aquarium water. Make sure the skimmer section of the filter
maintains a consistent water level that is high enough to mount any heaters or chiller probes vertically.
The sump contains a foam water-polishing block to prevent any smaller debris from being returned to the
aquarium.
ASSEMBLY:
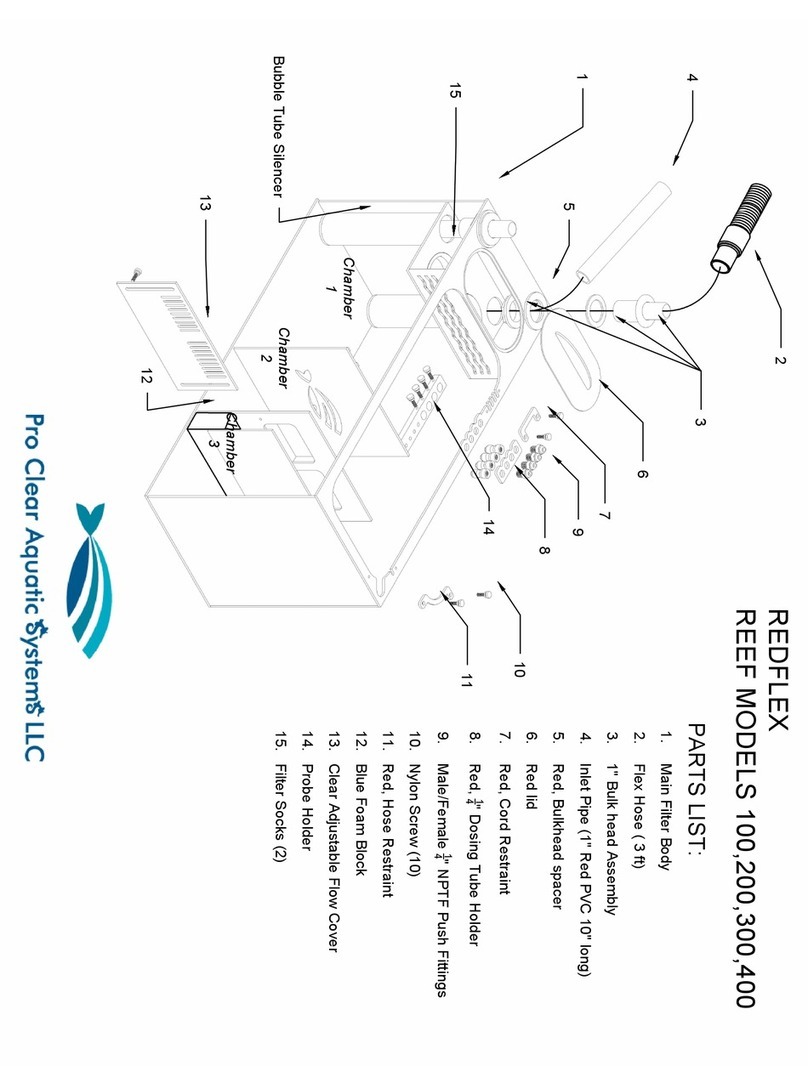
1. Remove the skimmer pump, Item 6, from the box, and connect pump to manifold, Item 5 using a
discharge adapter. Ensure vinyl tube with the black air valve is installed on the elbow on the pump.
Place the pump into the main filter unit, Item 7, behind the back divider. Note: the suction cups are
not used.
2. Remove the bubble trap, Item 12, from the thread slip fitting, Item13, and threaded 90 degree elbow,
Item 15, with rubber seal, Item 14. Install the threaded 90 degree elbow with rubber seal outside to
the 1 1/4" hole in the rear of filter tank unit, tightening threaded slip fitting hand tight from inside
filter tank unit. (Do not over tighten!)
3. Install the protein skimmer body, Item 4, over the manifold, Item 5, on the pump
4. Place the main filter unit with protein skimmer under the aquarium stand at desired location.
5. Hang the pre-filter box Item B —Fig. 1 on the back of the aquarium with the skimmer box, Item A —
Fig. 1, inside the aquarium. Adjust the skimmer box inside the aquarium as required. Tighten nylon
screw, Item E —Fig.1, once adjusted.
6. Place the siphon tube Item C —Fig. 1, in the pre-filter box, Item B- Fig. 1. Note: the siphon tube goes
down the side not inside the pre-filter sponge.
OPERATION:
1. Fill the aquarium with water until the water begins to fill the skimmer box, Item A —Fig. 1.
2. Fill the pre-filter box, Item B —Fig. 1, with water using the siphon hose, Item C —Fig. 1, until half the
box is full.
3. Insert the length of vinyl siphoning hose, Item G —Fig 1, supplied with the pre-filter unit, until it is
approximately half way into the bend of the siphon tube, Item C —Fig. 1.
4. Start siphoning by sucking on the vinyl siphoning hose, Item G, to remove excessive air. By natural
forces, the water should begin draining from the aquarium into the pre-filter box, Item B, - Fig. 1. To
remove the vinyl siphoning hose, Item G, pinch the end of the tube to prevent air from being drawn
back into the siphon tube. With one hand hold the siphon tube, Item C, in the pre-filter box and pull
the vinyl siphoning hose completely out with the other hand. Any remaining air bubbles can be
removed by jiggling the siphon tube once the system is running. Should the siphon process fail,
repeat the above procedure.
