Pro-tec PROFLAT PRTR Series User manual

PRTR PROFLAT
PRTR 100, PRTR 200, PRTR 300, PRTR 500, PRTR 700
Stand 05.2018 (ÄA14/096) 4 12 786 03
Raumtemperaturregler Bimetall / Bimetal room temperature controller
Thermostat électronique pour la régulation de la température ambiante
This bimetal room temperature controller is only to be opened by a qualified electri-
cian and installed in keeping with the wiring diagram on the housing cover / on the
cover / and in the operating instructions. In so doing, the safety regulations are to
be noted. Following installation, the company concerned is to instruct the operator
in the function and operation of the control system.
The operating instructions are to be kept at a place that is easily accessible for
both operating and maintenance staff.
3. Montage/Anschluss 3. Mounting / Installation
Sicherheitshinweis! D Safety information! GB
Dieses Gerät darf nur durch eine Elektrofachkraft geöffnet und gemäß dem ent-
sprechenden Schaltbild im Gehäusedeckel / auf dem Gehäuse / in der Bedie-
nungsanleitung installiert werden. Dabei sind die bestehenden Sicherheitsvorschrif-
ten zu beachten. Nach der Installation ist der Betreiber, durch die ausführende In-
stallationsfirma, in die Funktion und Bedienung der Regelung einzuweisen.
Die Bedienungsanleitung muss für Bedien- und Wartungspersonal an frei zugäng-
licher Stelle aufbewahrt werden.
1. Anwendung
Dieser Raumtemperaturregler wurde speziell für die Regelung oder Überwachung
von Temperaturen in Büros, Wohnräumen und Hotels entwickelt. Elektrische Fußbo-
denheizungen müssen über ein zusätzliches Leistungsschütz angesteuert werden.
Hierbei ist darauf zu achten, dass die Leistung der Heizung auch bei Dauerbetrieb
den Estrich nicht überhitzen kann. Bei Warmwasserheizungen sind maximal 10, bei
Kühlung maximal 5 stromlos geschlossene Ventile zu verwenden. Gegebenenfalls
benötigte Temperaturbegrenzungen müssen zusätzlich installiert werden. Für andere,
vom Hersteller nicht vorherzusehende Einsatzgebiete, sind die dort gültigen Sicher-
heitsvorschriften zu beachten. Eignung hierfür siehe Punkt 8. Gewährleistung.
This bimetal room temperature controller has been specially devised for the control and
supervision of temperatures in offices, living spaces and hotels. Electric floor heating
systems need to be controlled by an additional power contactor. Care must be taken the-
reby to ensure that the performance of the controlled system cannot, even if the system
is operated continuously, result in an overheating of the pavement. With hot water heating
systems, no more than 10 normally closed valves must be used and no more than 5 wi-
th water cooling systems. Where applicable, temperature limiters need to be installed in
addition. Notice is to be taken of those safety regulations applying to other fields of use
not anticipated by the manufacturer. For suitability in this respect see Item 8 Warranty.
1. Application
4. Technische Daten
Fühlerelement / Kontakt: Bimetall, Öffner oder Wechsler Typ 1C
Versorgungsspannung und Schaltvermögen:
250 V~, 2(1)A
Regelbereich: 5 … 30°C
Schaltdifferenz: ca. 0,5 K
Skala: °C Skala
max. zulässige Temperaturänderungs-
geschwindigkeit der Regelstrecke: 4 K/h
Schutzart: IP30 nach entsprechender Montage
Schutzklasse: II nach entsprechender Montage
Max. Luftfeuchtigkeit: 95%rH, nicht kondensierend
Gehäusematerial und -Farbe:
Kunststoff ABS, reinweiß (ähnlich RAL 9010)
Bemessungsstoßspannung: 4000 V
Verschmutzungsgrad: 2
Energieeffizienzklasse: I (Beitrag zur jahreszeitbedingten
Raumheizungs - Energieeffizienz 1 %)
4. Technical data
Sensing element / contact bimetal sensor, type 1C / break contact
Supply voltage and switching capacity: 250 V~, 2(1) A
Control range: 5° … 30°C
Switching difference: approx. 0.5 K
Imprinting: °C scale
Max. admissible temperature changing
speed of the controlled system: 4 K/h
Degree of protection: IP30 (after according installation)
Protection class: II (after according installation)
Max. admissible air moisture: 95%rh, non-condensing
Housing material and colour: plastic (ABS), pure white (similar to RAL 9010)
Rated impulse voltage: 4000 V
Degree of pollution: 2
Energy efficiency class: I (contribution to seasonal space heating
energy efficiency 1 %)
2. Funktionen
Der Raumtemperaturregler erfasst mit einem innenliegenden Bimetallfühler die
Raumtemperatur und regelt entsprechend dem eingestellten Sollwert. Der Regler-
typ PRTR 500 PROFLAT verfügt über einen „EIN/AUS“-Schalter und eine rote Lam-
pe „Heizen“. Durch eine thermische Rückführung wird eine sehr genaue Schaltdif-
ferenz erreicht. Bereichseinengung siehe Bild 2. Bei Beschalten der Klemme
mit 230 V~ wird auf eine um ca. 3K geringere Temperatur geregelt (Nachtabsen-
kung).
5. Verwendete Symbole
Symbol Erklärung
L Phase Versorgungs- und Schaltspannung
N Neutralleiter Versorgung und Verbraucher
Ausgang Heizen
Ausgang Kühlen oder Kühlbetrieb oder Frostschutz (5°C)
Temperatur-Absenkbetrieb (ECO-Betrieb)
Temperatur-Absenkeingang (ECO-Eingang)
I Ein
0 Aus
5. Explanation of symbols
Symbol Explanation
L Supply and switching voltage (phase)
N Supply and consumers (neutral conductor)
Heating output
Cooling or cooling mode or frost protection (5°C) mode output
Temperature decrease mode (ECO mode)
Temperature decrease mode (ECO input)
I ON
0 OFF
Bild 2 /
picture 2
/
illustration 2
Einstellfahne
für minimalen
Temperaturwert
Pin for the
setting of the
minimum
temperature value
Broche pour
l’ajustage de la
valeur de tempé-
rature
minimale
Einstellfahne
für maximalen
Temperaturwert
Pin for the
setting of the
maximum
temperature
value
Broche pour
l’ajustage de la
valeur de tem-
pérature
maximale
Bild 1 /
picture 1
/
illustration 1
1. Knopf abnehmen /
Remove the knob / Enlever
le bouton
2. Schraube entfernen /
Unscrew the screw / Dé
visser la vis
3. Drücken /
Press / Presser
4. Ziehen /
Pull / Tirer
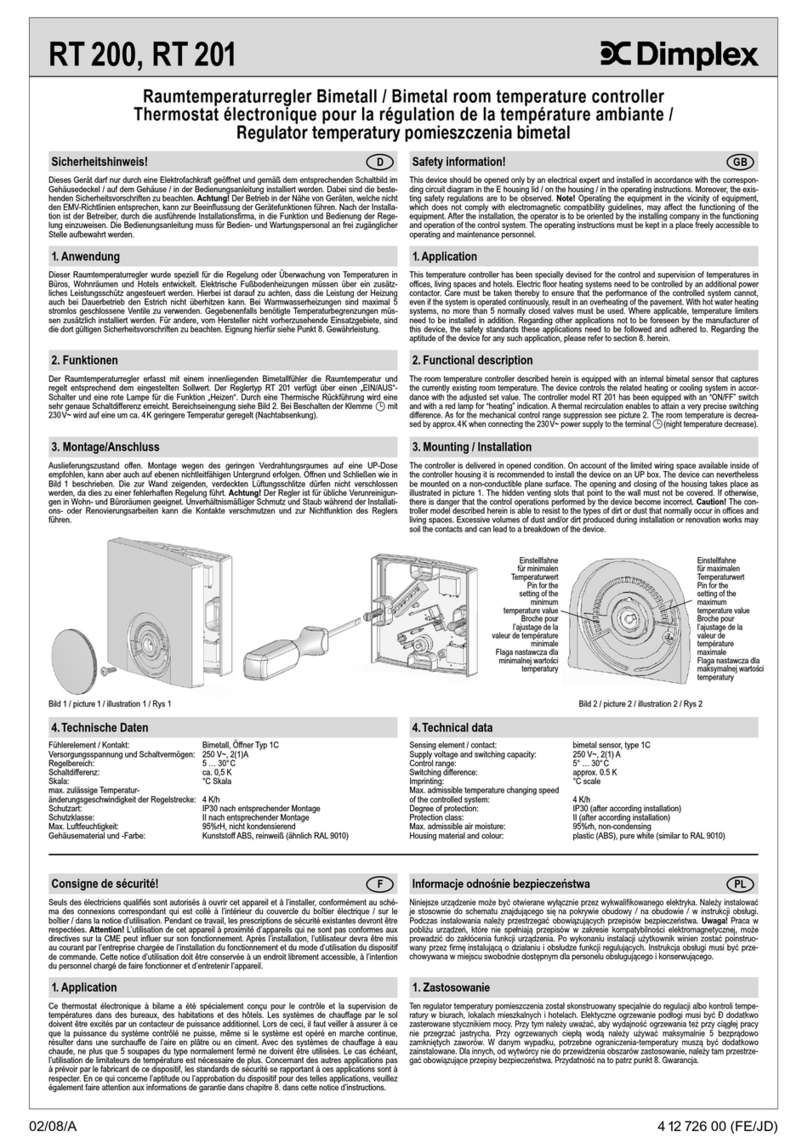
The room temperature controller described herein has been equipped with an internal bi-
metal sensor that captures the currently existing room temperature. The controller model
PRTR 500 PROFLAT is equipped with an ON/OFF switch and a red lamp for “heating”
mode indication. The thermal recirculation realised with the devices of this series enables
to attain a highly precise switching difference. Regarding the suppression of the setting
range, please see picture 2. The room temperature is decreased by approx. 3K when
connecting the 230V~ power supply to the terminal (night temperature decrease).
2. Functional description
The controller is delivered in opened condition. As there is only little space available for its
wiring, it is recommended to install the device on an UP box. The controller can neverthe-
less be mounted on a non-conductible surface. The opening and closing of the housing
takes place as described in picture 1. The venting slots that point to the wall must not be
covered. If otherwise, there is danger that the control operations performed by the device
become incorrect.
Caution: Excessive volumes of dust and/or dirt produced during the installation or during
renovation works may do soil the contacts and can lead to a breakdown of the device. In
any such case, the contacts need to be cleaned by an expert electrician. This may, for
example, be effected by blowing the device down or by cleaning it with a dry brush.
Caution: Always make sure to pull off the knob only prior to removing the housing cover!
The adjusting knob must neither be put on, nor be pulled off without having put on the
housing cover beforehand!
Auslieferungszustand offen. Montage wegen des geringen Verdrahtungsraumes auf
eine UP-Dose empfohlen, kann aber auch auf ebenen nichtleitfähigen Untergrund
erfolgen. Öffnen und Schließen wie in Bild 1 beschrieben. Die zur Wand zeigenden,
verdeckten Lüftungsschlitze dürfen nicht verschlossen werden, da dies zu einer
fehlerhaften Regelung führt.
Achtung! Unverhältnismäßiger Schmutz und Staub während der Installations- oder
Renovierungsarbeiten kann die Kontakte verschmutzen und zur Nichtfunktion des
Reglers führen. In diesem Fall sind die Kontakte von einer Elektrofachkraft zu rei-
nigen. Dies kann zum Beispiel durch Ausblasen oder durch reinigen mittels eines
trockenen Pinsels geschehen.
Achtung! Den Einstellknopf immer erst vor dem Abnehmen des Gehäusedeckels
abziehen! Der Einstellknopf darf nicht ohne vorheriges Aufsetzen des Gehäusede-
ckels aufgesteckt und wieder abgezogen werden!

6.
Maßbild und Anschluss-Schaltbilder
Dimensional drawing and connection diagram
Dessin coté et schéma de branchement
7. Montagehinweis
Mounting information
Précision d’installation
Die von uns genannten technischen Daten wurden unter Laborbedingungen nach allgemein gültigen Prüfvorschriften, insbesondere DIN-Vorschriften, ermittelt. Nur inso-
weit werden Eigenschaften zugesichert. Die Prüfung der Eignung für den vom Auftraggeber vorgesehenen Verwendungszweck bzw. den Einsatz unter Gebrauchsbedin-
gungen obliegt dem Auftraggeber; hierfür übernehmen wir keine Gewährleistung. Änderungen vorbehalten.
The technical data specified herein have been determined under laboratory conditions and in compliance with generally approved test regulations, in particular DIN stan-
dards. Technical characteristics can only be warranted to this extent. The testing with regard to the qualification and suitability for the client’s intended application or the
use under service conditions shall be the client’s own duty. We refuse to grant any warranty with regard thereto. Subject to change without notice.
Les données techniques indiquées dans cette notice d’instructions ont été déterminées sous conditions laboratoires en conformité avec des prescriptions d’essai géné-
ralement approuvées, notamment les normes DIN. Les caractéristiques techniques ne peuvent être garanties que dans cette mesure. La vérification du dispositif en rapport
à sa qualification et appropriation pour l’application prévue ou son utilisation sous conditions de service incombe au client. Nous n’assumons aucune garantie à cet égard.
PROTEC.class Produktmanagement · Ludwig-Erhard-Straße 21-39 · D-65760 Eschborn
3. Installation / raccordement
8. Gewährleistung / Warranty / Garantie
Le régulateur est livré en condition ouverte. En raison de l’espace de branchement
limité à l’intérieur du boîtier du régulateur, il est conseillé de l’installer sur une boîte
de branchement encastrée. Le dispositif sert néanmoins pour l’installation sur des
sous-sols non conductrice. L’ouverture et la fermeture du dispositif se font comme
représenté dans l’illustration 1 ci-dessous. Les fentes de ventilation cachées qui
montrent vers le mur ne doivent pas être fermées, car sinon ceci résultera dans un
fonctionnement incorrect du régulateur.
1. Application
Ce thermostat électronique à bilame a été spécialement conçu pour le contrôle et la
supervision de températures dans des bureaux, des habitations et des hôtels. Les
systèmes de chauffage par le sol doivent être excités par un contacteur de puissance
additionnel. Lors de ceci, il faut veiller à assurer à ce que la puissance du système
contrôlé ne puisse, même si le système est opéré en marche continue, résulter dans
une surchauffe de l’aire en plâtre ou en ciment. Avec de systèmes de chauffage à
eau chaude, ne plus que 10 soupapes du type normalement fermé ne doivent être
utilisés et ne plus de 5 avec des systèmes de refroidissement à l’eau. Le cas échéant,
l’utilisation de limitateurs de température est nécessaire de plus. Dans le cas d’autres
champs d’application non prévus par le fabricant, il faut respecter les consignes de
sécurité respectives. Voir l’aptitude à l’emploi au paragraphe 8. Garantie.
4. Caractéristiques techniques
Capteur à bilame / contact type 1C (contact de rupture)
Tension d’alimentation et pouvoir
de coupure: 250 V~, 2(1) A
Plage de réglage: 5° … 30° C
Différentiel: env. 0,5 K
Impression: échelle en °C
Vitesse max. de variation de
température du système contrôlé: 4 K/h
Type de protection: IP30 (après installation correspondante)
Indice de protection: II (après installation correspondante)
Limite d’humidité de l’air:
95% d’humidité relative de l’air, non condensant
Matériau du boîtier et couleur:
en plastique (ABS), blanc pur (pareil à RAL 9010)
Tension nominale d’impulsion: 4000 V
Degré de pollution: 2
Classe d’efficacité énergétique: I (contributtion à l’efficacité énergétique du chauf
fage saisonnier 1 %)
Consigne de sécurité! F
Cet appareil doit uniquement être ouvert par un électricien qualifié et doit être in-
stallé conformément au plan de raccordement respectif représenté sur le couver-
cle du boîtier/le boîtier/le mode d’emploi. Il convient de respecter les consignes de
sécurité applicables. Après l’installation, l’exploitant doit être instruit par la société
exécutant l’installation du fonctionnement et de l’utilisation de la régulation.
Conserver la notice d’utilisation à un endroit accessible pour le personnel de ser-
vice et de maintenance.
5. Symboles
Symbole Explication
L Tension d’alimentation et de commutation (phase)
N Alimentation et consommateurs (conducteur neutre)
Sortie «chauffage»
Sortie «refroidissement» ou sortie «mode de service refroidissement» ou «protection antigel» (5°C)
Mode de service «abaissement de la température» (mode de service ECO)
Entrée «abaissement de la température» (entrée ECO)
I MARCHE
0 ARRET
2. Fonctionnement
Le régulateur de la température ambiante décrit dans cette notice d’instructions est
doté d’un capteur à bilame interne pour la saisie de la température ambiante ac-
tuelle. Le dispositif règle les systèmes de chauffage ou de refroidissement en con-
formité avec la valeur de consigne effectivement ajustée. Le régulateur type PRTR
500 PROFLAT est doté d’un commutateur MARCHE/ARRET et d’une lampe-té-
moin rouge pour la signalisation de l’état actif du mode de service «chauffage». La
recirculation thermique permet d’obtenir un différentiel très précis. Relatif au resser-
rage mécanique de la plage de réglage, cf. illustration 2. La température existant
dans un local s’abaisse par env. 3K lorsqu’une tension de 230V~ est filée sur la
borne (abaissement de la température nocturne).
Attention! Des encrassages ou des volumes de poussière plus importants se pro-
duisant durant des travaux d’installation et/ou de la mise en neuf peuvent salir les
contacts et provoquer une panne du régulateur. Dans un tel cas, il faut que les
contacts soient nettoyés par un électricien spécialiste. Le nettoyage peut, par ex-
emple, être effectué en soufflant ou par moyen d’une brosse sèche.
Attention! Toujours faire attention à ne retirer le bouton de réglage qu’avant
d’avoir démonté le couvercle du boîtier! Le bouton de réglage ne doit ni être mon-
té, ni retiré sans avoir préalablement monté le couvercle du boîtier!
This manual suits for next models
5
Popular Temperature Controllers manuals by other brands
SMC Networks
SMC Networks HRS400 Series manual
aci
aci BACnet Series Installation & operation instructions
EMKO
EMKO ESM-3712-HCN instruction manual
S+S Regeltechnik
S+S Regeltechnik THERMASGARD RGTF1 Series Operating Instructions, Mounting & Installation

Monkey Vision
Monkey Vision MOMETER PRO quick start guide
Dimplex
Dimplex RT 200 manual

