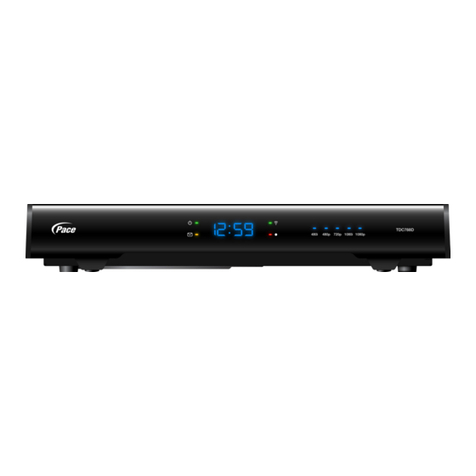
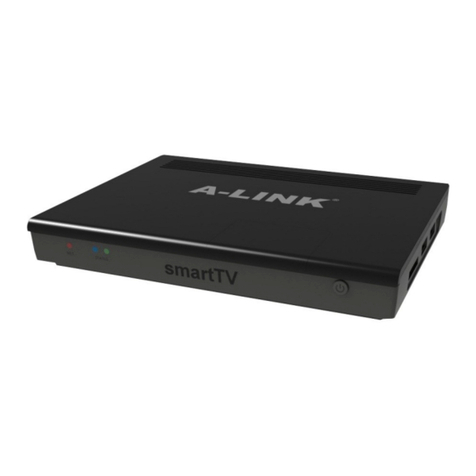
Pro2 Hi-Vision TV Box User manual

Hi-Vision TV Box
High Resolution TV BOX
OWNERS MANUAL

1
TABLE OF CONTENTS
zPackage Content …………………………………………………….……..…………. 1
zAbout The TV BOX……………………………………………………………………...… 2
zFront & Rear Panels…….……………………………………………………………….…3
zIllustration of Basic Connection.…………………………………………………..………4
zProcedure of Set Up.……………………………………..……………………………… 5-7
zRemote Controller Description………………….…………………………….…………...8
zOperation……………………………………………………………….…………….……9-12
zSpecification ……………………………………………………..…………………………13
zTrouble Shooting …………………………………………………………………..………14
zUser Information ………………………………………………………………..………….14
PACKAGE CONTENT
Before the installation, please check the package of content.
●TV BOX main unit X 1
●Plastic Stand X 1
●Remote Control X 1
●HD-15 VGA Cable X 1
●3.5mm Stereo Audio Cable X 1
●AC-DC Adaptor X 1 (Please check the AC Voltage)
Main Unit Plastic Stand Remote Control
VGA Cable Audio Cable AC/DC Adaptor

2
ABOUT THE TV BOX
*For the best performance of this product, we strongly recommend you to
read this operation manual thoroughly and keep this manual properly for
further reference
Preface:
The imaging method of the CRT or LCD monitor is quite different from the traditional TV
Set. CRT or LCD uses the non-interlace method to form a full screen. But the TV set uses
interlacing method. So it is apparently that the LCD or CRT Monitor is better for long time
viewing. And CRT or LCD has higher resolution than TV Set. Traditional TV Set has limited
resolution (Horizontal Line), CRT or LCD can have more than twice or triple resolutions.
Now here comes a super TV Box, can let your CRT or LCD become a second TV set with
higher picture quality and stable operation.
Features:
•Plug ‘n’ Play: no software required
•Stand alone external TV tuner box for those TV's, HDTV's or video monitor
without TV tuners built in.
•Great demodulator for converting coaxial cable TV signals into RCA video
and stereo audio outputs for TV, video recorders, A/V receivers, wireless
transmitter kit, etc.
•Excellent video to VGA converter for converting video signals into
progressive scan type for high definition video quality.
•Full Channel, PAL system.
•7 different resolutions: 800x600 , 1024x768 , 1280x1024 , 1366x768 ,
1440x900 , 1600x1200 , 1920x1080 , 1920x1200 , 1680x1050 , 2048x1152
•Stylish Design, with Stand, can place upright or horizontal.
•Full-function remote control
•1 AV and S-Video connectors on the front panel, meet the daily operation
•Adjustable TV function: brightness, hue, color ..etc
•Auto-Scan function: never miss the channel
•Audio in and out
•VGA In and Out
Application:
•With LCD, your LCD will become a LCD TV
•With CRT Monitor, you will have an Excellent TV Set
•You can play TV Game on your monitor or LCD
•You can make your monitor become a home entertainment center
•You can make your monitor to become a security monitor

3
FRONT & REAR PANELS
Front Panels:
Rear Panels:
Powe
r
Input
CH+/-
Volume+/-
Semi-transparent
cover
Audio Input
VIDEO Input
S-VIDEO Input
SPEAKER
3.5mm Stereo connector for
connecting to Speaker
VGA IN
HD-15 VGA Female connector
for connection to VGA Output
Port of VGA Card of PC
TO MONITOR
HD-15 VGA Female connector
for connection to CRT or LCD
CABLE IN
F (or IEC) connector for
ANTENNA or CATV signal input
VIDEO OUT
Video output (only for TV)
AUDIO IN
3.5mm Stereo connector for
connecting to output of PC
Sound Card
DC 5V
Power input connector for
AC/DC Adaptor supplied,
Please note using different
rated power supply will cause
serious injury or fire.

4
ILLUSTRATION OF BASIC CONNECTION
*All brand names and trademarks stated or illustrated are related to their respect owners.
Front View
DVD/VCD
HiFi-VC
Camcorder
GAMECUBETM
PS2TM
X-BoxTM
Back View
Antenna or CATV
Audio Cable
Speaker
Monitor or LCD
VGA Cable
VGA Cable
Power Adaptor
VGA Card
Sound Card
Back Panel
of a PC
Audio Cable

5
SET UP PROCEDURE
(1.) Connection to LCD or CRT ( In This section, after finishing the
installation you will have a TV function only)
a. Take the TV BOX main unit, let it upright or horizontally placed beside your CRT or
LCD
b. Connect the Antenna or CATV cable to the “CABLE IN” of the back panel of TV
BOX
b. Take the VGA Cable of CRT or LCD, connect the HD-15 VGA connector to “TO
MONITOR” on the back panel of TV BOX. Fasten the screws, Please note: It is
very important to fasten the screws. Loose connection will cause the
distortion of Picture.
d. Take the connector of your Multimedia speaker (please note the connector should
be 3.5mm male stereo type), connect to “SPEAKER” on the back panel of TV BOX
e. Take out the AC/DC adaptor (included), please check the Voltage of your outlet of
AC Power is the same rating with the adaptor. Hook the AC/DC Adaptor to the Outlet,
connect the output of DC to “DC 5V” on the back panel of TV BOX
f. Turn on the Power of CRT or LCD, then push “POWER” button to “TV Mode”, if
there are TV screen on your CRT or LCD. Congratulation!
you have finished the Installation.
*All brand names and trademarks stated or illustrated are related to their respect owners.
b
c.
e.
d.
CRT or LCD
Speaker
Rear
AC/DC
Adaptor

6
(2) Connection to Computer ( In this section, after finishing all the
installation, you will have a TV function and you can also use your
PC)
a. Take the TV BOX main unit, let it upright or horizontal placed beside your CRT or
LCD
b. Connect the Antenna or CATV cable to the “CABLE IN” of the back panel of
TV BOX
c. Take the VGA Cable of CRT or LCD, connecting the HD-15 VGA connector to
“TO MONITOR” on the back panel of TV BOX. And take the VGA cable
(supplied) , connect one end to “VGA IN” on TV BOX, another end to VGA Card .
Fasten the screws. Please note it is very important to fasten the screws.
Loose connection will cause the distortion of Picture.
d. Take the connector of your Multimedia speaker (please note the connector
should be 3.5mm male stereotype), connect to “SPAEKER” on the back panel of
TV BOX
e. Take the supplied 3.5mm Audio cable, connect one end to Speaker out of Sound
Card of Computer, another end to “AUDIO IN” of TV BOX
f. Take the AC/DC adaptor, please check the Voltage of your outlet of AC Power is
the same rating with the adaptor. Hook the AC/DC Adaptor to the Outlet, connect
the output of DC to “DC 5V” on the back panel of TV BOX
g. Turn on the Power of CRT or LCD, then push “POWER” button to “TV Mode”, if
there are TV screen on your CRT or LCD. Congratulation! You have finished the
installation
*All brand names and trademarks stated or illustrated are related to their respect owners.
Rear
b.
d.
e.
f.
c.
Sound Card
VGA Card

7
(3) Connection to TV Game Console, V8 or another Video
Appliances, Please follow the previous procedure first
( If your Video Source is only RCA Output, please follow the steps)
a. Connect the RCA connector to the output of your TV Game, DVD or VCR
(Please note the connection cable should be color coded, yellow for Video,
White for Audio R, Red for Audio L)
b. Connect the other end of RCA to the “Video/Audio Input” on the front panel of TV
BOX ( Please note the connection cable should be color coded, yellow for
Video, White for Audio L, Red for Audio R)
c. Turn on the Power of TV BOX and your Video Appliance
Select the” POWER” mode to “TV mode”. Change the Source to “CVBS”
d. Push the “PLAY” key on your Video device, If you see the picture, your installation is
completed.
( If Your Video Source has S-Video, please follow the steps below)
a. Connect the S connector and 2 Audio RCA Connectors to the output of your TV
Game, DVD or VCR (please note the Audio connection cable should be color
coded, White for Audio R, Red for Audio L, S-Video Connector has special
connector, please find the right orientation, never push too heavily otherwise
the S-connector will be broken. )
b. Connect the S connector to the “S “on the TV BOX and 2 Audio RCA Connectors to
“AUDIO” on the front panel of TV BOX (please note the Audio connection cable
should be color coded, White for Audio L, Red for Audio R, S-Video
Connector has special connector, please find the right orientation, never
push too heavily otherwise the S-connector will be broken)
c. Turn on the Power of TV BOX and your Video Appliance.
d. Select the” POWER” mode to “TV mode”. Change the Source to “S-VIDEO”
e. Push the “PLAY” key on your appliance, If you see the picture your installation is
completed
All brand names and trademarks stated or illustrated are related to their respect owners.
Camcorde
DVD VCR
X-BoxTM GCTM
PS2TM

8
REMOTE CONTROLLER DESCRIPTION
Illustration of remote controller
MUTE:
Mute key for audio
muting
PIP: Start the PIP
function, please be
noticed this key only
valid when the TV
box is in the PC
mode
INPUT: selection of
the signal sources
CH+/-:channel
up/down (only valid
in TV/CATV mode)
VOL+/-: change the
volume of the TV
BOX
MENU:Setting of TV
function
PICTURE: hot key for
the setting(TV
function)
Powe
r
: TV/PC mode
selection
Numeric Key:0~9
1--: when the
channel number
upto 100, you need
to press this key first
RETURN: Last
Channel Recall (only
valid in TV/CATV
mode)
RES:Change the
resolution of the TV
box
PREVIEW: 9
channel preview
function

9
First time use(Watch TV on your monitor)
There is no channel plan inside this box, when you finished all the connections and
power on the TV box, at this time, TV box is under TV mode. Please use channel
scan to scan all the channels available in your area.
Step 1: press the “MENU” key
Step 2: use arrow key CH+ CH- to select “Search” tab and press VOL+ to setting
Step 3: use arrow key CH+ CH- to select “Fast scan” item。
Step 4: press arrow key VOL+- to activate quick scan, it will scan all the channels
Step 5: when finish, you can watch the TV program now.
If the Fast scan can not get all the channels, please use “NORMAL SCAN” to
acquired all the channels, but it will take longer time.
Watch DVD on your monitor
Step 1: make the connection like previous section --(3)Connection to TV Game Console,
V8 or another Video Appliances
Step 2: press “input” key on your remote controller to choose Composite Video or S-Video
Step 3: enjoy your program
ADVANCE SOFTWARE APPLICATION
There are many features presented in this TV box, in general, user seldom to use those
functions. In some case, wrong setting will cause annoying viewing experience.
Please be careful for the setting
MENU OPERATION
When you press the “MENU” key on your remote control there will be a POP-UP MENU
(with 6 ICON) as Follow (Only valid under TV mode) All the operation are using CH+/CH-
keys. VOL+ /VOL- keys are using for selecting sub-item and setting. “MENU” key for going
to previous menu or exiting the menu.
1. Picture: Picture adjust
1.Picture 1.Bright
2.Seach 2.Contrast
3.Audio 3.Saturation
4.Setup 4.Hue
5.Time 5.Colour temp. Normal /warm /cold
6.Access.
6.Picture mode Normal/user/bright/soft
Description of sub item
Bright: change the brightness of the TV box
Contract: change the contrast of the TV box
Saturation: change the color saturation of the TV box

10
Hue: change the color tone of the TV box
Color Temperature: change the color temperature of the TV
Picture mode: There are 4 selections, normal/user/bright/soft , to Change the picture mode.
2. Search : Auto scan
1. Picture
2. Search 1.Auto Scan Fast Scan
3. Audio Normal Scan
5. Time 2.Manual Scan Channel 1
6. Access.
Band VHFL/VHFH/UHF
Search ÅÆ
Fine >>>
Skip ON/OFF
3.Audio Sys BG/DK/I
4.CH Exchange1 1
5.CH Exchange2 1
6.Confirm Yes
OK
Description of sub item
Auto Scan : There are 2 methods for scanning the TV Channel.
Fast Scan: Scan the TV channel via Channel mapping.
Normal Scan: Scan the TV channel via Frequency step by step. It will take longer time for
scanning all the channels
Manual Scan: In order to get more channels, sometimes you need to scan the channel via MANUAL
scan method. There are 5 items that you will need to do the scan.
Channel: You can use VOL+/- to choose the desired channel
Band: VHFL/VHFH/UHF 3 bands for your choice
Search: do the search
Fine: fine tune the frequency, add or decrease 0.1MHz /step
Skip: skip the channel
CH Exchange1, CH Exchange2: When you scan the channel, you can set the channel 2 as CH
Exchange 1, Channel 7 is CH Exchange 2, then press confirm, than when you press CH2, the content
is CH7, press CH2, the content is channel 7.
Audio Sys: Select audio system that match your TV system.
Confirm Yes: When press this key, Channel swapping will activate.
3 .Audio : audio setup
1. Picture
2. Search
3.Audio 1.volume
4. Setup 2.equalize
5.Time
6.Access
Description of sub item
Volume: change the level of audio output
Equalize: change the balance of the audio output of the TV Box

11
4. Setup: System settings
1. Picture 1.OSD setting Language English
2. Search Bright Normal/Bright/Gloom
3. Audio Mix Normal/Heavy/Light
4.Setup
Background Gradual/Normal/Mix
5. Time 2.Display mode Signal source TV / AV /SV
6. Access. Colour system AUTO/PAL
Monitor type 4:3 / 16:9 / 16:10
Display ratio
800*600 60/75Hz
1024*768 60/75Hz
1280*1024 60/75Hz
1600*1200 60Hz
1366*768 60Hz
1920x1080 60Hz
2048x1152 60Hz
1440*900 60Hz
1680*1050 60Hz
1920*1200
POP mode Center/Bottom R
/Top R/Bottom L/Top L
Browse mode 4 / 9/ 16 pic.
3.Advance
setting De-noise off/high/middle/low
PEAKING on/off
BLE ON/off
Screen Mode Normal/4:3/16:9
4.Blue
background
5.Factory mode
Description of main item
OSD setting : Change parameter setting of the OSD, there are 4 items for selection.
Display mode: Change parameter of the display mode, there are 6 items for setting
Advance setting: Setting of the picture parameter
BLUE Background: Activating screen to be blue when signal loss. There are 2 selections “ON”,”OFF”
Factory mode: Reset this TV Box to Factory setting.
Description of sub item
Language: Choose the OSD language, English Only
Bright: change the OSD brightness
Mix: mixture of OSD and background
Background: Change the background type of OSD block.
Signal Source : Change the input source of the TV box now. There are 3 selections
TV : CATV or Air TV
AV: Composite Video
SV: S- Video
Color System: Setting of the color system. The default is AUTO.

12
NOTE: wrong setting will cause serious distortion on image.
Monitor Type: Change the monitor aspect ratio, there are 3 selections, 4:3/16:9/16:10
Display ratio: Change the resolutions of the VGA output, there are 13 selections,
800*600 60/75Hz 1024*768 60/75Hz
1280*1024 60/75Hz 1600*1200 60Hz
1366*768 60Hz 1920x1080 60Hz
2048x1152 60Hz 1440*900 60Hz
1680*1050 60Hz 1920*1200 60Hz
Please be noticed: You need to make sure the maximum resolution and frequency of you
monitor can support. Wrong setting will cause no picture on your screen.
POP-Mode: change the POP sub window position. There are 5 selections, Center/Bottom R/Top
R/Bottom L/Top L
Browse Mode: Selection of the quick view windows number from 4, 9 to 16.
De-noise : There are 4 selections, High, Middle, Low and off, you can choose the proper noise
reduction level to meet your prefer image. Please be noticed, if the level set to “HIGH”, there will
be lagging of video on some action movie.
PEAKING: Change the sharpness of image.
BLE: Change the output performance to enhance video on LCD monitor. Selection is ON/OFF
Screen Mode: Change the output monitor type, there are 2 selections, Normal/4:3
5 Time : Time setting
1. Picture 1.Sys off 00:00 no use/always/once
2. Search 2.Sys on 00:00 no use/always/once
3. Audio 3.Remind 00:00 no use/always/once
4. Setup 4. Reserve 00:00
5. Time 5.Time 00:00
6. Access.
This items are used for the automation of shutting down or waking up of this TV
Box, you can do the adjustment to met what you need.6 .Access : Some useful
software
1. Picture
2. Search
3. Audio
4.Setup
5. Time calendar
6. Access.
Software ID

13
SPECIFICATION
Item Specification
CATV/TV Input 75 Ohm F female or IEC female
Frequency range 48~862MHz
Video Input Video, S-Video
Audio Input (Signal Source) Stereo RCA Left, Right
Audio Input (PC) 3.5mm Stereo
VGA In HD-15 Female
Power- AC/DC adaptor 5 VDC 1A
UL-listed for USA, CE certified for Europe
VGA Output HD-15 Female
resolution 800*600 60/75Hz
1024*768 60/75Hz
1280*1024 60/75Hz
1366*768 60Hz
1440*900 60Hz
1600*1200 60Hz
1680*1050 60Hz
1920x1080 60Hz
1920*1200 60Hz
2048x1152 60Hz
Audio Output 3.5 mm Stereo
Video Output RCA jacket
Regulatory specification:
Complies with requirements of:
FCC 15.225
FCC Part 15-Class B
ICES-003
CE, RoHS
*Specification subject to change without further notice

14
TROUBLE SHOOTING
1.No picture
a. The connection could be not correct, please contrast the connection with illustration.
b. Check the power plug whether it is firmly connected and the supplied voltage
meets the adapter rating.
c. Make sure that the selected mode is the same as input signal, and then perform
AUTO SCAN again.
( For example : under “AIR TV “ mode, the F connector has to be connected with
UHF/ VHF antenna. Under “CATV“ mode, the F connector has to be connected
to CATV system.)
2. No sound
The connection could be not correct, please contrast the connection with illustration.
3. TV BOX has no response while using remote controller
a. Make sure that you are pointing to the IR sensor window of TV BOX within 6 M,
and +/- 15 degrees.
b. Please check the batteries and replace with new one if necessary.
*****************************************************************************************************
The standard of VGA signal output from this unit TV BOX is identical to
general PC VGA display card, so the use of this unit will not violate the
warranty of LCD or CRT monitor.
*****************************************************************************************************
USER INFORMATION
This equipment has been tested and found to comply with the limits for a Class B Digital
Device, pursuant to Part 15 of the FCC Rules. These limits are designed to provide
reasonable protection against harmful interference in a residential installation
This equipment generates, uses and can radiate radio frequency energy and, if not
installed and used in accordance with the instruction may cause harmful interference to
radio communication,. However, there is no guarantee that interference will not occur in a
particular installation.
If this equipment does cause harmful interference to radio or television reception, which
can be determined by turning the equipment off and on, the user is encouraged to try to
correct the interference by one or more of the following measures:
--Connect the equipment into an outlet on a circuit different from that to which the receiver
is connected
--Consult the dealer or an experienced radio/TV technician for help
Table of contents
Popular Set-top Box manuals by other brands
Motorola
Motorola DCT6412 DUAL-TUNER DVR AND HD SET-TOP - MICROSOFT... Technical specifications

Billow Technology
Billow Technology MD09L user manual

Goodmans
Goodmans gdb 400 dvd user guide
FORMULER
FORMULER Z8 Using Guide

Seg
Seg SB 1200 instruction manual

ZyXEL Communications
ZyXEL Communications STB2101-HD quick start guide
