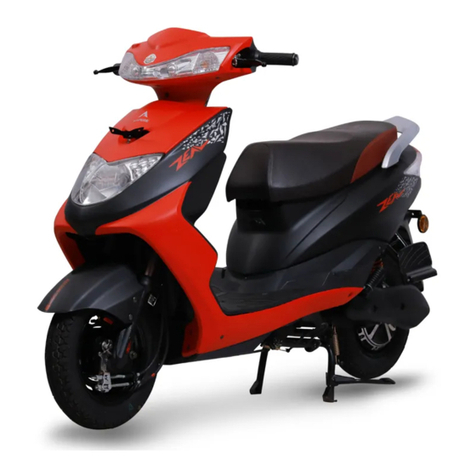
ProGo 3000 User manual

OPERATOR’S MANUAL
CONTAINS IMPORTANT AND VITAL USER INFORMATION
READ ENTIRE OPERATORS MANUAL BEFORE OPERATION
OF YOUR PROPANE POWERED PROGO SCOOTER
MUST ADD CRANKCASE OIL BEFORE INITIAL OPERATION
(SECTION 5.2)

2
SECTION 1: BEFORE YOU START
1.1 PACKAGING CONTENTS
1.2 TABLE OF CONTENTS
Your PROGO® comes packaged with the following items:
•Scooterbase+handlebar
•Allenkeyforinstallingthehandlebar(seeinstructionsinsection4.1)
•T-shapedkeyforreplacingthesparkplug
•1.7oz(50ml)engineoilbottle
•Tire-inflatingadapter
•Thismanual
Section Content Page
1 BeforeYouStart 2
2ImportantInformation 3
3Safety 4
4 Assembly 8
5 Engine 9
6UnderstandingPropane 10
7 Installing/RemovingPropaneCylinder 11
8Starting&StoppingTheEngine 12
9EngineMaintenance 13
10 GeneralMaintenance 16
11 Adjustments 18
12 Long-TermEngineMaintenance 21

3
SECTION 2: IMPORTANT INFORMATION
2.1 ABOUT THIS MANUAL
2.2 A SPECIAL NOTE FOR PARENTS
Attention:
•ThestatusofthePROGO®asa“motorvehicle”variesfromstatetostateandissubjectto
driverslicensing,insurancerequirementsandregistration.
•YoushouldcheckwithareliableauthorityinyourstatetoseeifthePROGO®mustbe
registeredasamotorvehicle.Yourpolicedepartmentorlocaldepartmentofmotorvehicles
maybeabletoansweryourquestionsordirectyoutoareliableauthority.
•Yourinsurancepoliciesmaynotprovidecoverageforaccidentsinvolvingtheuseofthis
vehicle.Todetermineifcoverageisprovidedyoushouldcontactyourinsurancecompanyor
agent.
•Therecommended ageandminimum weightforthePROGO®is16 years of age or older
and 100 pounds,butthisissubjecttothephysicalcoordinationoftherider,theabilityofthe
ridertowearprotectivegear,usegooddecisionmakingability,andtakeresponsibilityfor
theiractions.
Why you should read this manual:
Thismanualwaswrittentohelpyouunderstandtheoperationandmaintenanceofyourvehicle.
It’simportantforyoutounderstandyournewscooter,itsfeaturesandoperationssothat
fromyourfirstrideyouwillgetthemostfromyournewscooterandformproperhabitsto
keepitmaintainedforoptimumperformanceandsafetyformanyyearstocome.
Keepthismanual.Refertoitoftenanduseittoinstructotherusers.IfyouloanoutyourPROGO®
scootertoothers,alsoloanthemthismanual.
Itisalsoimportantthatyourfirstrideonanewscooteristakeninacontrolledenvironment,
awayfromvehicles,obstaclesandotherhazards.
Evenifyouhavepreviousexperiencewithmotorizedscooters,vehicles,bikesandthelike,you
probablyneedanupdateofyourscootinghabits,knowledgeandassumptions.Therearemany
changesintechnologiesandconstructionwhichcanaffectthefunction,handling,performance
andsafetyofyourscooter.
It’satragicfactthatmostchildrenaremorelikelytohaveanaccidentthanadults.Asaparentor
guardian,youbeartheresponsibilityfortheactivitiesandsafetyofyourminorchild.Amongthese
responsibilitiesaretomakesurethatthescooterwhichyourchildisridingisproperlyfittedto
thechild;thatitisingoodrepairandinsafeoperatingcondition;thatyouandyourchildhave
learned,understandandobeynotonlytheapplicablelocalmotorvehicleandtrafficlaws,but
alsothecommonsenserulesofsafeandresponsiblescooting.Asaparent,youshouldreadthis
manualandgooverallkeypointswithyourchildbeforelettingyourchildridethescooter.
GENERAL WARNING: Scooting can be a hazardous activity even under the best
of circumstances. Proper maintenance of your scooter is your responsibility
as it helps reduce the risk of injury. This manual contains many “Warnings”
and “Cautions” concerning the possible consequences of failure to follow
instructions, perform maintenance, or inspect your scooter. Falls can result
in serious injury or even death, and operating within the guidelines outlined
in this manual will help reduce those risks.

4
SECTION 3: SAFETY
3.1 EQUIPMENT SAFETY
WARNING: Many States or regions require specific safety devices or
equipment. It is your responsibility to familiarize yourself with laws of the
state or region in which you ride and to comply with all applicable laws,
including properly equipping yourself and your scooter.
A. Helmets: WhilenotallStatesorregionsrequireriderstowearapproved
protectiveheadgear,commonsensedictatesthatyoushouldwearaDOT,
Snell,BSIorCPSCapprovedhelmet.Mostseriousincidencesinvolvehead
injurieswhichmighthavebeenavoidediftheriderhadwornahelmet.
YourauthorizedPROGO®dealermayhaveavarietyofapproved
helmets,andcanrecommendonetosuityourneeds.Makesurethatitfiscorrectly,isworn
correctlyandisproperlysecured.Askyourdealertohelpwiththefitandadjustmentofyour
helmet,orrefertotheowner’smanualprovidedwiththehelmet.BuckleUp!
B. Protective pads: Elbowpads,kneepads,andwristguardsarenotrequired
bymoststatesorregions.Again,commonsensedictatesthatyoushouldwear
protectivepadstohelpprotectagainstinjury.YourauthorizedPROGO®dealer
mayhaveavarietyofprotectivepads,andcanrecommendonetosuityour
needs.Agoodsetofpadsshouldficomfortably,stayinpositionatalltimes
andnothaveanyexcessstrapping,Velcro®,orotherprotrusionstocatchon
anythingthatcancauseyoutolosecontrolofyourscooter.
C. Shoes: Yourshoesshouldhavegoodgrip,protection,andsupport.Yourshoesshouldhave
adequatestrappingorlacessothattheystayonyourfeet.Makesurethatlacesorotherstrap-
pingcannotcatchorhanguponanypartofthescooterorotherobjects.Neverridebarefootor
wearsandalswhenoperatingthescooter.
D. Clothing:Beingseenisveryimportant.Brightlycolored,reflectivehelmetsandclothingwill
makeyoumorenoticeable.Clothingshouldnotbeloosesothatitdoesnotcatchonmoving
partsorsnagsonotherobjects.
F. Reflectors:Reflectorsareimportantsafetydevicesdesignedtoreflectlightinawaythat
makesyoumorevisible.Thereflectorsareintendedtoenhancethevisibilityofthescooterbut
maynotmeetrefelctorrequirementsforyourarea.
E. Eye protection: Anykindofridingcaninvolveairbornedebris,dust,andbugs,socommon
sensedictatesthatyoushouldwearprotectiveeyewearwithprotectivelenses.
WARNING: Do not remove the reflectors from your scooter. Removing
reflectors may reduce visibility to others. Reflectors are not suitable for use
as lights. Riding at dawn, dusk, or night is not recommended and presents a
serious risk to the rider, regardless of any measures taken.

5
3.2 MECHANICAL SAFETY CHECK
Hereisasimpleprocedureyoushouldgetinthehabitofbeforeyougetonyourscooter:
A. Nuts, bolts and structural: Pickyourscooteroffthegroundafewinchesandbounceit.Doa
quick,visual,andtactileinspectionofthewholescooter.Makesureyoulookatallvisible
fastenersandstructuralweldstoseeiftheyareinplaceandsecure.Ifanythingsounds,feelsor
lookslooseorshowssignsofstressthenreplaceorsecurethepartasnecessary.Replaceparts
thatarecracked,chipped,ordamagedinanyway.Checkforfuelleaks.Propanehasaharmless
odorantaddedsothatitspresenceisdetectablebysmell.Ifatanytimethesmellofpropane
isidentified,checkallfuellineconnectionsandmakenecessaryrepairsbeforeoperatingthe
unit.Donotoperatetheunitwithlooseordamagedparts.Ifyou’renotsure,asksomeonewith
experienceoranauthorizeddealertoshowyouwhattolookforinamechanicalsafetycheck.
B. Tires and Wheels:Checkthatpneumatictiresareproperlyinflated.Refertothesidewallof
thetireforrecommendedPSI.CheckingPSIusingatirepressuregaugeisrecommendedbutyou
canalsobounceyourweightonthescooterandcomparetiredeflationtohowitlookswhen
youknowthetiresareproperlyinflated.Spinthewheels,checkthatthetireshavenotyet
reachedthewearmarksonthetires,ripped,torn,orshowanysignsofdistress,andreplace
asnecessary.Makesurethewheelsspinfreelyandtrue.Ifwheelswobbleorrubthebrakesthen
takeittoaqualifiedauthorizedPROGO®dealerforadjustments.
C. Brakes:Squeezethebrakeleversandcheckthattheyaregettingpropercontactwiththe
disc.Fullbrakingforceisappliedwhenyousqueezetheleverandthelevercannottouchthe
handlebarorgrip.Thebrakesshouldnotinterferewiththerotationofthewheelwhennot
applied.Makesurethatthebrakecalipergetsfullcontactwiththedisc.Makesurethatall
brakesurfacesarecleanandfreeofdebris.Donotridethescooteruntilthebrakesareproperly
adjusted.
D. Control levers and cables:Familiarizeyourselfwiththeleversandcontrols.Squeezeand/or
twistalllevers/controlsandmakesuretheyarefunctioningproperly.Iftheystick,moveatthe
base,ordonotgetfullrangeofmotion,makeadjustmentsasnecessaryortaketoanauthorized
PROGO®dealerforservice.Donotridethescooteruntilthecontrolleversandcablesare
properlyadjusted.Controlleversareoriginallypositionedwheretheyworkbestformostpeople.
Theangleofthecontrolscanbechangedtobettersuityou.Askyourdealertoshowyouhow,or
learnhowtomaketheadjustmentsyourself.
E. Engine: Checktheidlespeed.Makesurethattheairfiteriscleanandcleanifnecessary.
Duetoenginevibration,nutsandboltscanbecomeloose.Makesurethatcarburetor,muffler,
motormountsandotherfastenersaresecurelyfastenedandtightenifnecessary.
WARNING: Never attempt to ride your vehicle without properly adjusted
brakes.
WARNING: Never attempt to ride your vehicle without properly adjusted
controls and cables.

6
3.3 SCOOTING SAFETY
CAUTION: Like most sports, scooting involves risk of injury and damage. By
choosing to ride a scooter you assume the responsibility for that risk. This
makes it extremely important that you know, understand, and practice the
rules of safe and responsible riding.
CAUTION: Modifications to the exhaust or intake will change the noise level
of your scooter which will disturb others. Making changes or modifications
to your scooter can make your scooter act or perform in a manner that is
unsafe.
Scootingcanbeanenvironmentallyuseful,safeandfunwayofreducingtrafficcongestion.
WARNING: Scooters are designed for recreational use only! They should
never be used on main streets or in traffic.
A. Know Your Scooter: Familiarizeyourselfwiththescooterbeforeyouride.Checkthecontrols.
Rideverycautiouslyuntilyoubecomefamiliarwiththewaythescooterhandles.Taketurns
slowlyandgiveyourselfextrastoppingdistance.
B. Ride Within Your Abilities:Tocontrolyourscooter,youneedtokeepituprightandmakeitgo
whereyouwantittogo.Thissectioncannotteachyouhowtocontroldirection,speedorbalance.
Onlyalotofpracticewilldothat.Belowareafewthingstohelpyou.
C. Turning:Newriderstendtohavemoretroubleturningthanexperiencedriders.Theonly
waytomakegood,safeturnsistopractice.Alwaysapproachturnsverycarefully.
D. Braking:Frontbrakesprovidemostofyourstoppingpower,butyouwillneedtolearnto
adjustyourcenterofgravitytomaintainstability.Practicethisatasafespeeduntilyouare
comfortablewiththisaction.
E. Areas to Ride:Rideinasafeplacefreeofcars,inanareawhichwillnotdisturbotherpeople
oranimalsandhasacleandrysurface.
3.4 RULES TO SCOOT BY
•Alwayswearyoursafetygear.
•Neverrideundertheinfluenceofalcoholordrugs.
•Learnthelocallawsandregulations.
•Ridedefensively.
•Wearbrightcoloredand/orreflctiveclothing.
•Neverrideyourscooteratnightorinconditionsofpoorvisibility.
•Observeandyieldtherightofway.
•Donotdartoutofdrivewaysorfrombetweenparkedcars.
•Stopatallstopsigns/lights.
•Becarefulwhencheckingtraffianddon’tswervewhenlookingoveryourshoulder.
•Alwaysgowithtrafficfolwandkeeptothefarsideoftheroad.
•Neverrideonsidewalks.
•Avoidridinginbadweatherorwhenvisibilityisobscured.
•Donotdostunts,wheeliesorjumps.Thosewillincreaseyourchancesofinjuryanddamage
toyourscooter.
•Youaresharingroads,trailsandridingareaswithothers.Respecttheirrights,andbe
tolerantiftheyinconvenienceyou.
•Alwaysyieldrightofwaytopedestriansandanimals.Rideinawaythatdoesnotfrightenor
endangerthem,andavoidridingnearthemwheneverpossible.

7
•Keepyourspeedconsistentwiththeconditions,andkeepinmindthatspeedhasadirect
relationtocontrolaswellascomponentstress.
•Nevercarrypassengers.
•Nevercarryanythingthatcanobstructvision,orcontrolofyourscooter
3.5 WET WEATHER RIDING
3.6 NIGHT RIDING
Ridinginwetconditionsisnotrecommended.
WARNING: Wet weather impairs traction, braking and visibility, for riders
and others. The risk of accident dramatically increases in wet conditions and
should be avoided.
WARNING: Riding at dawn, dusk, or at times of poor visibility is illegal and
dangerous.
CAUTION: STUNTS, WHEELIES or JUMPS are dangerous should not be
performed at any time. Although such stunts can be fun, they put incredible
stress on all parts of the scooter. Riders who insist on jumping risk serious
damage to their scooter and to themselves.

8
SECTION 4: ASSEMBLY
4.1 INSTALLING THE HANDLEBAR
4.2 FOLDING FEATURE
YourPROGO®scooterispackagedseparatelyfromthehandlebar.
BeforeusingyourPROGO® scooter,you
mustproperlyinstallthehandlebar:
1.Unlessitisalreadyscrewedintothe
stemcore,passtheboltthroughthe
latchandscrewafewthreadsclockwise
intothestemcore(fig.1).
2.Positionthehandlebarwiththelatch
abovethefrontwheelandinsertthe
stemcoreintothestembase(fig.1).
3.Screwtheboltclockwiseallthewayinto
securethehandlebarinitsplace.
YourPROGO®isequippedwithafoldingfeatureforeasycarryingandstowage.
Beforeoperatingthescooter:
1.Pullthehandlebaruptoanuprightposition.
2.Screwthelatchknobclockwiseallthewayintosecurethehandlebarinitsposition.
3.TofoldyourPROGO®scooter,reversetheprocess.
WARNING: The “Lower Hinge” of the latching mechanism is also a
“Mechanical Fuse” designed to break if there is high shock loads, stress,
and/or fatigue exerted on the handlebar assembly. If the handlebar feels
abnormally loose or sloppy, you must immediately stop riding and have the
scooter serviced. Failure to ignore this safety feature could result in a
catastrophic failure causing a sudden loss of control.
Fig. 1

9
SECTION 5: ENGINE
5.1 RECOMMENDED OIL TYPES
5.2 ADDING OIL TO CRANKCASE BEFORE INITIAL USE
Usingthepropertypeandweightofoilinthecrankcaseisextremelyimportant.Oilismajor
factoraffectingengineoverallperformanceandlongevity.Checktheoilbeforeeachuseand
changetheoilregularly.Failuretousethecorrectoil,orusingdirtyoil,cancausepremature
enginewearandfailure.
Useahigh-quality4-strokemotoroilthatmeetsorexceedsthe
requirementsofAPI (American Petroleum Institute) service
class SF, SG, or SH.SAE 10w-30 is recommended for general
use. Otherviscositiesshowninthechartmaybeusedwhenthe
averagetemperatureinyourareaiswithintheindicatedrange
(fig.2).
The oil capacity of the engine is 80cc (2.7 US fl. oz)
NOTE: Thisunitisshippedwithoutoil.Inordertoavoiddamage
totheunit,putoilinthecrankcasebeforeyouattempttostartthe
unit.Yourunitissuppliedwithone1.7fluidoz.(50mL)bottleof
SAE10W-30SF,SGorSHoil.
NOTE:Savethebottleofoil.Itcanbeusedtomeasurethe
correctamountduringfutureoilchanges.(SeeSection9.2)
1.Placeunitonalevelsurface.
2.Removetheoilplug/dipstickfromthecrankshaft.(fig.3)
3.Pourtheoilintotheoilfillholesothatitfillsthetankas
illustratedinfig.4.
4.Wipeupanyoilthatmayhavespilledandreinstalltheoilplug/
dipstick.
CAUTION: This unit is shipped without oil in the engine. Add oil (Section
5.2) befor attempting to start or severe damage to the engine can result.
WARNING: Overfilling crankcase may cause hot oil to drip from the air fiter,
and smoke to come out from the exhaust. Check and maintain the proper oil
level in the crank case. It Is important and cannot be overemphasized. Check
the oil before each use and change as needed. See Section 9.2
Fig. 2
Fig. 3
Fig. 4

10
SECTION 6: UNDERSTANDING PROPANE
SAFETY WARNINGS FOR PROPANE UNITS
NOTE: Usepropaneonlyincontainersspecifiallydesignedandapprovedforthisunit.Propane
isacombustiblegas.Itiscolorlessandthusinvisibletothenakedeye.Propanehasaharmless
odorantaddedsothatitispossibletosmellit.Theusershouldbefamiliarwiththesmellof
propane(smellslikesulfurorrotteneggs).Ifatanytimeyouidentifythesmellofpropane,turn
offtheengine.Iftheleakpersists,removethepropanecylinder.Neverattempttooperateaunit
thathasasuspectedleak.Alwaysremovethepropanecylinderifyourunithasasuspectedleak.
CARBON MONOXIDE HAZARD
BurningpropaneproducesCarbonMonoxide(CO).COisinvisible,hasnosmellandcanbelethal.
Operatingyourunitinanenclosedareacanbedangerous.
1.Useonlyoutdoorsorinwellventilatedareas.Ifyouexperienceheadache,drowsiness,or
nausea,turnunitoffandgetfreshairquickly.
2.Neverusewherepeoplearesleeping.
3.Followunitinstructionsforproperuse.
6.1 UNDERSTANDING PROPANE
6.2 BEFORE USE
6.3 DURING USE
6.4 AFTER USE
1.Keepoutofreachofchildren.
2.Neverexposecylindertoheat,sparks,oropenfire.Neverleaveindirectsunlight.Neverstore
attemperaturesabove120degreesF°(49°C).
3.Neverstoreinlivingspaces.
4.Alwaysusecylinderuntilitiscompletelyempty.
5.Neverrefilladisposablecylinder.Refillingmaycauseanexplosion.Federallawforbids
transportationifrefilled,apenaltyupto$500,000,and5yearsimprisonment(49U.S.C.5124).
6.Neverputinluggageortakeontrainsoraircraft.
7.Todiscard,contactyourlocalrefusehaulerorrecyclecenter.Neverputinfireorincinerator.
Donotpuncture.
1.Checkcylinderandapplianceseals.Neverusewithdamagedormissingseals.Discard
cylinderifyoufinddirtorrustparticlesinvalvearea.
2.Makesureengineisturnedoff.
3.Attachcylinderoutdoorsawayfrompilotlights,flames,sparksorotherignitionsources.
4.Handtightenonly.Neverusetoolstotightenpropanecylinder.Over-tighteningcandamage
seals.
5.Checkforleaks:putsoapywateronconnectionsandlookforbubbles.Listenforhissof
escapinggas.Feelforextremecoldandsmellforrotteneggodor.Donotuseifleaking.
6.Readandfollowallinstructionsthatcamewithyourpropanegascylinder.
Neverusenearpilotlights,flames,sparks,orotherheatsources,thesecanigniteleakinggas.
1.Turnengineoffandletitcool.
2.Alwaysdetachcylinderwhennotinuse.
3.Keepthecylinderawayfrompilotlights,flames,sparks,orotherheatsources.
4.Replacecylindercaptokeepvalveclean.
CAUTION: IN CASE OF FIRE - 1. Leave area quickly and call for help.
2. Let cylinder burn out.

11
SECTION 7: INSTALLING/REMOVING PROPANE CYLINDER
7.1 USING THE CORRECT PROPANE CYLINDER
7.2 ATTACHING THE PROPANE CYLINDER
7.3 REMOVING THE PROPANE CYLINDER
Alwaysusepropanecylindersor“bottles”thatarethecorrectsize.16.4oz/465gcylindersthat
areapproximately3⅞inches(9.5cm)indiameterarethecorrectcylinders.Donotusecylinders
withasmallerdiameter,astheywillnotlatchsecurelytotheunit,becomeloose,maycause
damageandpotentiallyresultinadangerousleak.
1.Makesuretheengineisoff.
2.Makesurethecylindercageclampisintheunlatched
position.
3.Insertthethreadedendofthepropanecylinderinto
thecageasfarasitcango(fig.5).Insertthepropane
connectorontothethreadedendofthecylinderandscrewitontothreadsclockwise(↻)until
snug.Donotovertighten.Itmaybenormaltohearorsmellamomentaryleakofpropaneas
theconnectorisbeingscrewedin.Makesurethattheconnectorisinstalledtightlyenoughso
thatanyleaksstop.
4.Manualtighteningissufficient.Latchthecylinderclamptosecurethecylinderinitsplace.
1.Makesuretheengineisoff.
2.Unlatchtheclampandremovethepropaneconnectorbyturningitcounterclockwise(fig5).
3.Pullouttheemptycylinder.
4.DisposeofemptypropanecylindersinaccordancetoFederal,StateandlocalRegulations.
WARNING: Never attempt to force a connector onto a propane cylinder that
has improper or damaged threads.
WARNING: Propane is highly flammable and its vapors can explode if
ignited.
Fig. 5

12
SECTION 8: STARTING & STOPPING THE ENGINE
8.1 ENGINE STARTING INSTRUCTIONS
8.2 ENGINE STOPPING INSTRUCTIONS
1.Checktheoillevelinthecrankcase(seesection9.1)
2.Placeunitfirmlyontheground.Donotattempttostartnearpilotlightsoranyopenflame.Do
notsmoke.Graspthestarterropehandlewithonehandandthethrottlewiththeother.
3.Withtheunitinthestartingposition,pulltheropesmoothlyandbriskly.Theengineshould
startwithin3-5pulls.Oncewarm,theengineshouldstartonthefistpull.
NOTE:Onthefirstuse,itmaytakeextrapullstofillthefuelsystemwithpropane.
4.Squeezethethrottlecontrolslightlytowarmuptheenginefor15to30seconds.Incold
weather,movethethrottleslowlyuntiltheenginewarmsupfor30to60seconds.
NOTE:Whenstartingtheengineinveryhotorcoldconditionsitmaybenecessarytosqueeze
thethrottleopenwhilepullingthestarterrope.
1.Releaseyourhandfromthethrottlecontrollever.Allowtheenginetocooldownbyidling30to
60seconds.
2.Pressandholdtheenginekillbuttonuntilenginestops.
3.Whendoneusingtheunitfortheday,disconnectthepropanecylinderandproperlystoreit
awayfrompilotlights,flames,sparks,orotherheatsources.Keepoutofreachofchildren.
WARNING: The exhaust contains chemicals known to the state of California
to cause cancer, birth defects or other reproductive harm.

13
SECTION 9: ENGINE MAINTENANCE
FREQUENCY MAINTENANCEREQUIRED REFERTO
BeforeStarting CheckEngineOil Section9.1
Every10Hours CleanandOilAirFilter Section9.3
FirstChangeat10Hours ChangeOil Section9.2
Every25HoursThereafter ChangeOil Section9.2
Every25Hours CheckSparkPlugandGap Section9.5
Every25Hours RockerArmClearanceAdjustment Section9.6
Performtheserequiredmaintenanceproceduresatthefrequencystatedinthetable.These
proceduresshouldalsobeapartofanyseasonaltuneup.
NOTE:Failuretomaintainyourunitattherecommendedschedulemayresultinpoor
performanceand/orcausepermanentdamagetoyourengine.
NOTE:Somemaintenanceproceduresmayrequirespecialtoolsorskills.Ifyouareunsureabout
theseprocedurescall1-877-840-8410forthelocationofyournearestauthorizedPROGO®
servicedealer.
NOTE:Maintenance,replacement,orrepairoftheemissioncontroldevicesandsystemmaybe
performedbyanynonroadenginerepairestablishment,individualorauthorizedservicedealer.
9.1 CHECKING OIL LEVEL
9.2 CHANGING THE OIL
Theimportanceofcheckingandmaintainingtheproperoillevelinthecrankcasecannotbe
overemphasized.
Check oil level before each use:
1.Makesuretheengineisturnedoffandcooleddown.
2.Placetheunitonaflat,levelsurfacetogetaproperoillevel
reading.
3.Keepdirtandotherdebrisoutoftheengine.Cleanthearea
aroundtheoilfillplug/dipstickbeforeremovingit.
4.Removetheoilfillplug/dipstickandwipeoffoil.Reinsertitallthewaybackin.
5.Removetheoilfillplug/dipstickagainandchecktheoillevel.Oilshouldbebetweentheadd
andfilmarks.(fig.4)
6.Ifthelevelislow,addasmallamountofoiltotheoilfillholeandcheckagain.Repeatthis
procedureuntiltheoillevelreachesthefullmarkofthedipstick.
NOTE: Donotoverfilltheunit.
NOTE: MakesuretheO-ringisinplaceontheoilfillplug/dipstickwhencheckingandchanging
theoil.Throttleslowlyuntiltheenginewarmsupfor30to60seconds.
Foranewengine,changetheoilafterthefirst10hoursofoperation.Changetheoilwhilethe
engineisstillwarmbutnothot.Theoilwillflowfreelyandcarryawaymoreimpuritieswhen
warm.
1.Unplugsparkplugboottopreventaccidentalstarting.
2.Removetheoilfilplug/dipstick.
3.Pourtheoiloutoftheoilfillholeandintoacontainerbytippingtheunittoitsside.Allow
ampletimeforcompletedrainage.
Note:Wearglovestopreventinjurywhenhandlingtheunit.
4.Wipeupanyoilresidueontheunitandcleanupanyoilthatmayhavespilled.Disposeoftheoil
accordingtoFederal,Stateandlocalregulations.
5.Fillthecrankcasewith1.7fluidoz.(50ml)ofSAE10W30SF,SG,orSHoil.
Note:Youcanusethesuppliedoilbottletomeasure1.7fluidoz/50ml.Carefullycheckthe
levelwiththedipstick.Ifthelevelislow,addasmallamountofoilandcheck.Donotoverfill.
Fig. 4

14
6.Replacetheoilfillplug/dipstick.
7.Reconnectthesparkplugboot.
9.3 CLEANING THE AIR FILTER
9.4 CARBURETOR AND IDLE SPEED ADJUSTMENT
Cleanandre-oiltheairfilterevery10hoursofoperation.Itisanimportantitemtomaintain.
Failuretomaintainyourairfilterproperlycanresultinpoorperformanceorcausepermanent
damagetoyourengine.
1.Removetheknobintheairfiltercover.
2.Removetheairfilterbypullingtheairfiltercoverout(fig.6).
3.Washthefilterindetergentandwater.Rinsethefilter
thoroughly.
4.Allowthefiltertodry,orblowdry.
5.Replacethefilter.
6.Reinstalltheairfiltercoverandreplacetheknob.
Theidlespeedoftheengineisadjustable.Theidleadjustmentscrewislocatedonthesideofthe
carburetor,nexttothecarburetor’sconnectiontothepropaneregulator(fig.7).
Note:Carelessadjustmentscanseriously damage your
unit.Anauthorizedservicedealershouldmakecarburetor
adjustments.
Note:Theconditionoftheairfiterisimportanttotheoperation
oftheunit.Adirtyoroil-saturatedairfiterwillrestrictair
flow.Issuescausedbyancloggedairfilterareoftenmistaken
forcarburetorproblems.Check the condition of the air fiter
before adjusting the idle speed screw.RefertoCleaningthe
AirFilter(Section9.3).
Note: Weatherconditionsandaltitudemayaffecttheengineperformance.
Adjusting the Idle Speed
If,aftercheckingthefuelandcleaningtheairfiter,theenginestillwillnotidle,use a T-15
screwdriver toadjusttheidlespeedscrewasfollows:
1.Starttheengineandletitrunatahighidleforaminutetowarmup.RefertoStarting/
Stoppinginstructions(Section7).
2.Releasethethrottletriggerandlettheengineidle.Iftheenginestops,usetheT-15scredriver
toturntheidlespeedscrewin,clockwise(↻)1/8ofaturnatatimeuntiltheengineidles
smoothly.
Note:Therearwheelshouldnotrotatewhentheengineidles.
3.Iftherearwheelrotateswhentheengineidles,turntheidlespeedscrewcounterclockwise
1/8ofaturnatatimetoreduceidlespeed.
Checkingthefuel,cleaningtheairfilter,andadjustingtheidlespeedshouldsolvemostengine
problems.Ifafterchecklingallabovecomponents,youstillexperiencetheseissues:
•Theenginewillnotidle
•Theenginehesitatesorstallsonacceleration
•Thereisalossofenginepower
Checkthesparkplugforpropergapandcondition.Ifproblemstilloccurs,havethecarburetor
adjustedbyanauthorizedservicedealer.
WARNING: Do not operate the unit without the air filter. Operating without the
air filter will VOID the warranty.
Fig. 6
Fig. 7

15
9.5 MAINTAINING THE SPARK PLUG
Toensureproperengineoperation,thesparkplugmustbeproperlygappedandfreeofdeposits.
Thegapshouldbe0.6~0.7mm(0.023~0.027inch).Regularinspectionandadjustmentisneededto
ensurethecorrectgap(fig.8).
Removetheplugafterevery 25 hours of operation andcheckits
condition.
Fig. 8

16
SECTION 10: GENERAL MAINTENANCE
10.1 SERVICE AND MAINTENANCE SCHEDULE
Someserviceandmaintenancecanandshouldbeperformedbytheowner,andrequireno
specialtoolsorknowledgebeyondwhatisinthismanual.Itisalwaysagoodideatogooverkey
pointswithanauthorizedPROGO®dealerwhocanfurtherassistyouwithquestionsyoumight
haveandisanexcellentsourceforyourOEMreplacementparts.Inaddition,youwillalsofind
helpfulinformationonserviceandmaintenanceatwww.PROGOSCOOTERS.com.
1. Break In Period:Propaneenginesrequirepropercareandmaintenance.Properenginebreak-
iniscriticaltoimprovingenginelifeandreliabilityinabrandnewengine.Duringthebreak-in
periodenginecomponentssettletomatchoneanotherandallowengineoilintothesystem
toproperlycoatinteriorcomponents.Onceyouhavestartedtheengine,runitatvarying
speedsfor3to10minutesatatimebutavoidusingfullthrottle.Allowtheenginetorunatidle
for30secondstoaminutesoitcanslowlycoolbeforeshuttingoff.Allowenginetocooloff
completelyforatleast10minutesbeforerepeatingtheprocess.Yourengineshouldgothrough
3to4heatcycles,allowingtheenginetocooleachtimebeforeyoustartusingfullthrottleand
operatingtheunitnormally.
Note:Remembertoperforma“MechanicalSafetyCheck”(Section3.2)beforeeachuseduring
thebreak-inperiod,asthisiswhenchainsandcableswillstrechthemost,andwhenfasteners
slightlyloosenascomponentssettle.
2.Before Each Ride:Performa“MechanicalSafetyCheck”(Section3.2).Lube/adjustchainor
drivewheel.Liftthefrontwheeloffthegroundandturnfromsidetosideandwigglebackand
forth.
Note: If steering feels loose or sloppy, do not ride and inspect the lower handlebar hinge or
have an authorized PROGO® dealer check it for you.
Inspect the brakes: Makesureyouhavesufficientbrakepads(thickerthanadime).Models
withsolidrubbertiresshouldhavesidewallgrovesonthetiredeeperthanthethicknessof
adime.Ensurethatbrakecaliperbrakingsurfacesareincompletecontactwiththebraking
servicesofthewheelordisc.
Note: Failuretomaintainyourunitattherecommendedschedulemayresultinpoor
performanceand/orcausepermanentdamagetoyourengine.Propermaintenanceandcareof
yourequipmentarekeyfactorsinreliabilityandsafety.Onlyyoucanensurethepropercarefor
andmaintenanceofyourequipment.Makesureallusersunderstandtheimportanceofproperly
maintainedequipment,allsafetywarnings/cautions,andrecommendeduserpracticescontained
inthismanualforthesafetyofyourequipmentandallthosethatuseit.
WARNING: Do not begin any adjustments, service, or repair on your PROGO®
if you have the slightest doubt about your ability to properly complete them.
Improper adjustments, service, or repair may result in permanent damage to
the PROGO®, and/or injury.
WARNING: Any modification to this unit VOIDS the warranty, including but
not limited to: disconnecting the muffler exhaust tube, using either wheels
or tires not recommended by PROGO®, changes to the emissions control
systems, attempting to enhance the speed or performance of the engine,
and/or equipping the unit with any non PROGO® OEM components. Such
modifiations can create HAZARDOUS AND/OR DANGEROUS conditions for the
rider, and can result in serious damage and personal injury.
CAUTION: In order to help keep your unit functioning normally, have any
repair or maintenance which is not specifially described in this manual
performed by an authorized PROGO® dealer.

17
CAUTION: PROGO® scooters are equipped with a mechanical “fuse”
incorporated into the lower hinge of the handlebar latch assembly which
is designed to fail before a catastrophic failure. If your handlebar feels
abnormally loose or sloppy you must immediately stop riding and have
the scooter serviced. Failure to ignore this safety feature could result in a
catastrophic failure causing a sudden loss of control.
3.During and After Any Long Ride: Cleantheairfilter,adjustandoilthechainandmakeany
adjustmentsasneeded.PerformaMechanicalSafetyCheckandwipeawayanydirtordebris.
4.Every 25 to 50 Hours of Operation:YourPROGO®shouldundergoacompletecheckupbyan
authorizedPROGO®dealersothatallcomponentscanbetightened,adjusted,replaced,or
repairedasnecessary.

18
SECTION 11: ADJUSTMENTS
11.1 BRAKE ADJUSTMENTS
11.2 WHEELS
11.3 TIRES
Disc brake caliper:Thebrakecalipermustbereplacedwhenthebreakpadsareworndownto
lessthanthethicknessofadime.
Adjustment:
1.Adjustthegapbetweenrotorandoutsidepadwith3mmAllendriverviathecenterholeof
caliper,turnclockwisetomovepadforwardandcounterclockwisetomovepadback.
2.Adjustgapbetweenrotorandinsidepadwith5mmAllendriverviacenterboltonbackcover.
Turnclockwisetomovepadforwardandcounterclockwisetomovepadback.
Replacing worn pads:
1.Removethecaliperfromforkusing5mmAllendriver(bothbrakeleveradjustmentsbarrels
needtobescrewedallthewayin).
2.Usepointednosepliersorscrewdrivertoremovesafetyclipfrompadguide.
3.Loosenpadguildscrewwith3mmAllendriver.
4.Removecompletepadassemblywithinnerplatespring(carefulnottobendortwistspring).
5.Fitreplacementpadontospringplate.
6.Insertpad/springcombinationintopadslotandrelocateguidescrew.
7.Fastenguidescrewandpushsafetyclipbackintoclipgaponguidescrew.
8.Adjustbrakesasdescribedinthemechanicalsafetychecksection.
Maintenance of disk brake caliper: Keepallsurfacescleanandfreeofoilanddebris.More
detailedinformationavailableatwww.progoscooters.com
Brake lever and cable:Makesurethecableisnotfrayedorkinkedinanywayandcheckthat
thecablehousingendsaresecurelyseated.Anadjustmentisavailableatthebrakes;youcan
increaseortakeupslackbyscrewingorunscrewingtheadjustmentbarrel.
Front wheel removal:
1.Makeanoteofthelocationforthewashersusedonthefrontaxle.Usepointednosepliersor
screwdrivertoremovesafetyclipfrompadguide.
2.Removetheaxlenut.
3.Slidetheaxleboltoutandremovewheel.
Rear Wheel Removal:
1.Makeanoteofthelocationforthewashersusedonthefrontaxle.
2.Removetheaxlenut.
3.Slidetheaxleboltoutandremovewheel.
NeverusetiresortubesthatarenotrecommendedbyPROGO®orthatexceedthemaximum
P.S.I.limitsofthetireassemblyinuse.
Incaseyoucannotreachthetirevalvewithyourpump,usetheinflationextensionadapter
(includedinthepackaging)toinflatethetires.
CAUTION: In order to help keep your unit functioning normally, have any
repair or maintenance which is not specifially described in this manual
performed by an authorized PROGO® dealer.

19
WARNING: Tire wear, punctures, or ruptures can cause immediate loss of
control, which may affect operator and precipitate serious bodily injury.
Helmets, goggles, gloves, elbow and knee pads and appropriate shoes with
ankle support must be worn at all times.
WARNING: Completely deflate wheel before disassembly or any work on the
wheel. Failing to do so can result in serious injury.
WARNING: Patching a tube is an emergency repair. Patches can severely
weaken the integrity of a tube, resulting in possible tube failure and cause a
loss of control. Replace a patched tube as soon as possible. Never replace the
tube with anything other then the stock OEM tube. Using an aftermarket tube
or tire not intended for PROGO® specifiation could result in a sudden loss of
pressure that could cause damage to your scooter and sudden loss of control.
Never use a tube or tire that is not recommended by PROGO®.
CAUTION: Replace front or rear tires when tread is worn within 1/16” tread
depth, or if obvious tire damage has occurred.
Replacing pneumatic tires and tubes:Tiresandtubesarecriticalcomponentsthatrequire
precisereassemblytoinsureproperalignment.Thisoperationshouldbedonebyanauthorized
PROGO®dealerusingOEMparts.
11.4 ADJUSTING CHAIN TENSION
Fig. 9
Properchaincareandmaintenanceisessentialtolongevityandwearofthedrivecomponentson
yourchaindrivescooter.
• Makesurethatthesprocketsareperfectlyalignedto
eachother.Usealongstraightedgeorcheckvisually
bylininguptherearsprocketwiththefronttoseethat
thechainisstraight.
• Your PROGO® is equipped with a pivoting motor mount
for chain tension adjustment:
Themotormountonunitswithapivotingmotormount
allowschaintensionadjustmenttoaccommodatefor
chainstretchand/orsprocketwear.Toadjustthemotor
mount,loosenthetighteningscrewandtwonylocknutslocatedonthe
motormountandpivotthemotormountforwarduntilthespecifiedchain
tensionisachieved(fig.9).Oncethedesiredtensionisachieved,retighten
thetighteningscrewtolocktheengineinplaceandtightenthenylock
nuts.Failuretokeepthechainproperlyadjustedwillresultinpremature
sprocketandchainwear.Thesprocketsmaybealignedbyaddingor
removingwashersbetweentherearwheelandtheframe.Tightenchainso
thatthereisapproximately3/4”ofchainplaybetweenthetwosprockets
(fig.10).
Fig. 10
WARNING: Never exceed the P.S.I. rating specified on the side wall of your
tire or serious injury can result. Never use nonstandard equipment as it may
not be suitable for use in this application and can result in immediate loss of
control, unstable conditions, and failure.

20
• Thechainshouldbelubricatedbeforeeachride.
• Yourchainshouldbeclean.Asafecleaningsolventcanbeusedbutthechainmustbeoiled
oncedry.
• Toreducedirtandgrimebuildupandoversprayonrearbrakecomponents,neverover-
lubricatethechain.
• Sprocketsshouldbeperiodicallycheckedfordamageandwear.Ifyounoticeanydamageto
thesprocketsoratoothmissing,replacesprocketimmediately.
CAUTION: Never lubricate chain while motor is running. Always Keep
fingers, clothing, and other objects clear of any rotating chain or wheel.
CAUTION: Tightening the chain more than necessary will cause your drive
components to wear prematurely and add performance reducing drive
system friction.
Table of contents

