Progression Fitness PRO Club 24 User manual
PRO Club 24 Spin Bike
2
3
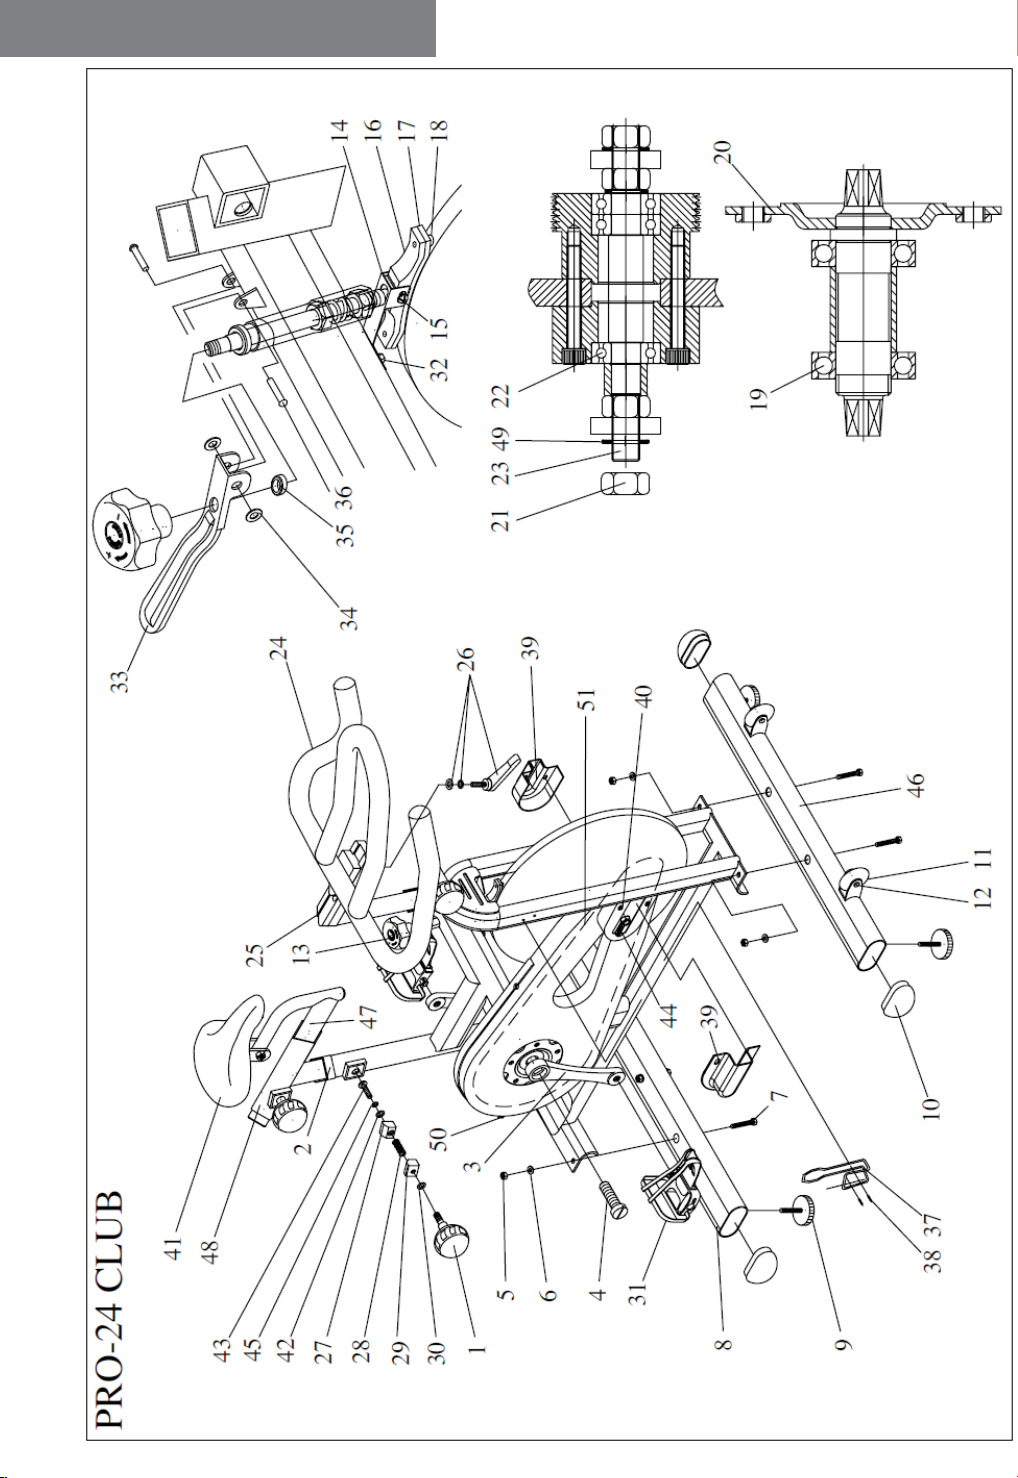
Assembly Drawing

4
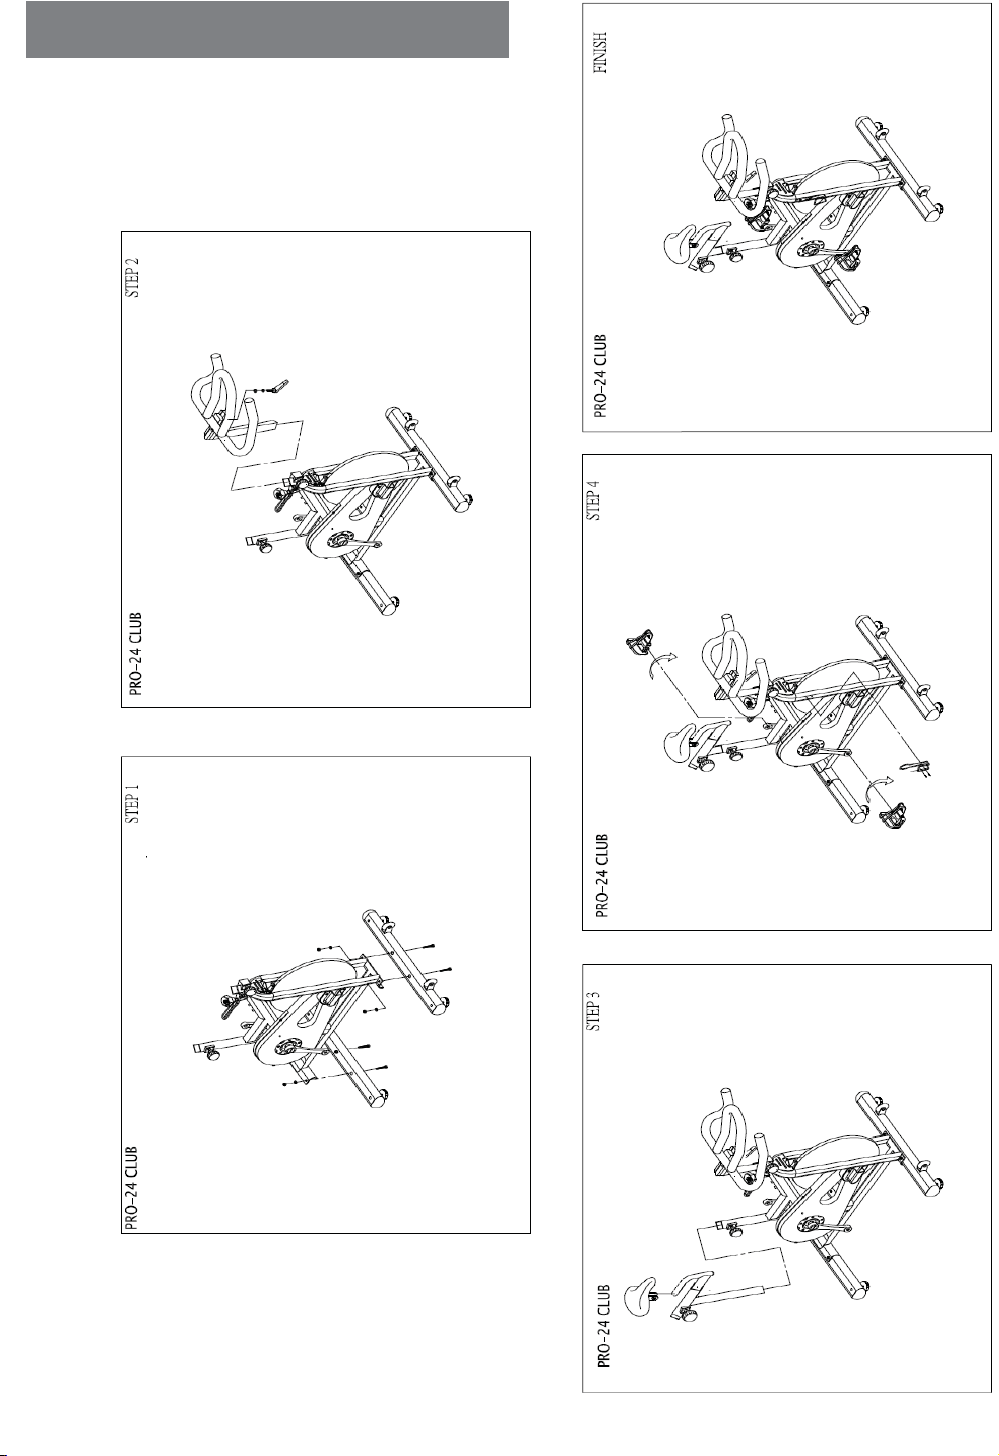
PRO-24 CLUB Assembly
Step one
Attach the front (46) and rear foot (8) to the frame using the bolts (7), washer (6)
and nuts (5).
Step two
Attach the handlebar post (25) inserting into the head tube on the frame.
Use the knob to adjust and tighten the height in proper position. Then use the release
lever (26) to adjust and tighten the handlebar (24) in proper position
Step three
Insert the seat post (48) into the frame’s seat tube. Attach the saddle (41) into
seat slider (47). Insert the seat slider into the seat post. Using knob (1)
adjust and tighten the height in proper position.
Step four
Attach the pedals (31) into the crank arms (3), each pedal is marked with the left
(L) or right (R) to denote the side of the spin bike they are on. Note- the right
hand crank is on the same side as the chain guard. Be careful to align the
threads correctly to avoid any damage. A little grease on the threads should
help the pedals
To screw in easily and correctly, tighten using a 15mm spanner, both pedals
threads should tighten towards the front of the spin bike.
Adjusting the resistance
To adjust the exercising resistance on the spin bike, use the brake
knob (13) of brake system, and then simply loosen (-) or tighten (+).
The flywheel should rotate freely without resistance when you loosen (-) the brake
system totally.
More experienced riders may wish to increase the overall resistance by
Tighten (+) the brake system totally.
5
Exploded Drawing
Table of contents
Other Progression Fitness Exercise Bike manuals


Popular Exercise Bike manuals by other brands


Sunny Health & Fitness
Sunny Health & Fitness SF-B121021 user manual

Monark
Monark 827E instruction manual

Stamina
Stamina 1310 owner's manual

American Fitness
American Fitness SPR-BK1072A owner's manual
 Service manual")
Cateye
Cateye CS-1000 (CYCLO SIMULATOR) Service manual

BH FITNESS
BH FITNESS H9158H Instructions for assembly and use