PROIETTA THOROK 700L User manual

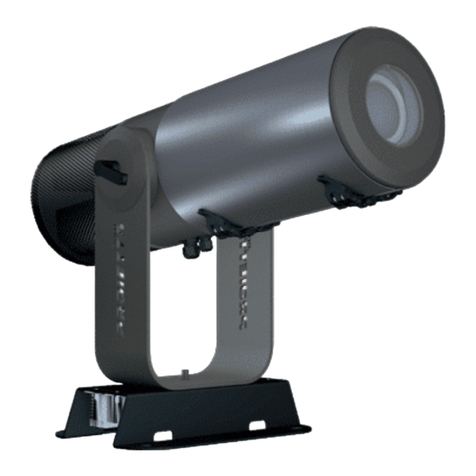
THOROK 700L
Rotating gobo projector and dynamic effect.

COLOR TEMPERATURE
TECHNICAL SPECIFICATIONS
65
LED
ELECTRICAL FREQUENCY
IP (PROTECTION RATING)
Consult the drawing below (dimensions in mm)
220/240 V
700 W
THOROK 700L
DIMENSIONS
5,300 K (can be changed with color conversion filters)
MODEL
PROJECTOR’S BRIGHTNESS
50/60 Hz
35,000 lm
50,000 h
NOMINAL POWER
SUPPLY VOLTAGE
LIFETIME
20kg
POWER SUPPLY
From 5° (projection ratio: 10:1) to 69° (projection ratio: 0,7:1)
OPTICS AVAILABLE
1
329
437
307
120
379 308
687
346
1722996
346132
478
WEIGHT

INSTRUCTION MANUAL INDEX
Please read this instruction manual carefully before using the
projector
Thank you for choosing a PROIETTA product
WARNING:
4
4) CARE AND MAINTENANCE
8
3) USE OF THE PROJECTOR
7
6) WARRANTY
9
5) CAUSES AND SOLUTIONS OF POSSIBLE PROBLEMS
9
3
1
7) DECLARATION OF CONFORMITY
8) DISPOSAL
2) TECHNICAL SPECIFICATIONS
6
1) SECURITY INFORMATION

SECURITY INFORMATION
Do not place objects on the power cord and in the event of damage to it, contact the
manufacturer for replacement in order to avoid the danger of electrocution.
Always unplug the projector from the power outlet before any maintenance operation. Risk of
electric shock if you disassemble the projector or any of its parts.
Do not look into the beam of light to avoid damaging your eyes.
Warning: The surface temperature of some projector components can reach values high
enough to burn you if touched directly, during and after turning off.
Be sure to provide adequate ventilation for the projector to protect it from overheating. The
projector should not be placed in a closed installation or in a room that is too small and without
sufficient ventilation.
The projector must be positioned so that the objects struck by the light beam are at least 5
meters away from the lens of the projector itself.
3
For reliable operation of the appliance, the ambient temperature must be between -25°C and
45°C.
Never touch the projector and all of its components with wet hands.
Read the following safety information carefully before performing any operation. The product
described in this manual is a lighting fixture for projecting a light beam in indoor and outdoor
environments.
Use an M12 bolt with self-locking nut and in case of suspended installation use a safety chain.
Never place the projector on flammable and/or combustible surfaces.
Make sure to firmly fix the projector to an architectural element that ensures its stability and
reliability. All elements used for installation (screws, bolts, brackets, etc…) must always be
suitable for the load they must support.
Any repair that requires the removal of the projector assembly screws must only be carried out
by the manufacturer, who declines all responsibility for unauthorized interventions.
The vents should never be covered or blocked with any material.
Any other use is not foreseen by the manufacturer and therefore releases him from any liability
for damages deriving from improper use.

USE OF THE PROJECTOR
The installation must be performed by preparing the space in which the appliance must be
MULTIPLE CONNECTION It is
possible to connect several projectors using an IP 65 watertight connector, as in Fig. 1, using a
single power cable (with a maximum of 4 projectors for each line).
For special requirements, the appliance can be fixed with a suitable anchor to the
- Open the cover with the special hooks positioned on the side of the projector, see
4
It is necessary that the supply voltage is: 220-240 V, 50-60 Hz and that the supply line is
protected by an efficient earthing connection and has a bipolar switch with differential
magnetothermic 0.03 safety (life ).
desired angle using the side handles.
Fig.2
the parts identified for fixing the projector are in conditions suitable for the support
surface material to which it is to be clamped. It is necessary to make sure that all
surface.
1) CONNECTION TO THE ELECTRIC NETWORK
2) POSITIONING THE PROJECTOR
of the same. Finally, make sure that the projector has been securely anchored to the
Fig.1
3) IGNITION
valid for any device that operates at low voltage.
used in such a way that it is free from any obstructions. You can tilt the projector
Fig.2.
Connect the device to the mains following the normal safety procedures
Blind panel for
DMX connectors to
be removed if the
control unit is installed
PRO DMX4 (optional)
Waterproof
connector to
power the
projector.

direction
of insertion
b
- Insert the selected lens into the projector making sure that knob B is
- To take advantage of the maximum extension of the lens, position the knobs at the ends,
loosening them and fixing them once the position has been found, as in Fig. 3.
Fig.4
Fig.3
centered with respect to the sagittal axis of the projector, see Fig. 3. Then fix it to the
Then the image (Gobo or dynamic effect) is positioned centrally and flat on the plate,
following the guides present. By moving it back and forth, the ideal focus is sought, as in
Fig. 4.
5
machine body by rotating the element A on the outside, see Fig. 2.

CARE AND MAINTENANCE
dCF
AND
- Orient it towards the surface onto which you want to project making sure of
- Turn on the projector by pressing the power button (item C). Other items
brightness (D), connectors for motorized effects and PRODMX4 board (E), 4A fuse (F).
case we will have only one. Here too once the knob is loosened it is sufficient
6
almost similar way, the only difference is given by the number of knobs present; in this
move the inner lens until the image looks sharp.
Check that the air intake openings are clean and the fans are working. Depending on the
usage environment, the projector will need regular cleaning.
present on the control panel, see Fig. 5, are: potentiometer for the control of
The focusing of the image must be done by acting simultaneously on the knobs
be at least 5 meters away from the projector lens.
Before starting any maintenance or cleaning operation on the projector, disconnect the voltage
from the power supply.
The product must never be washed, but should only be cleaned on the outside with a slightly
damp cloth.
4) SIZE AND FOCUS OF THE IMAGE
Fig. 5
For versions without a zoom lens, focus adjustment takes place in
of the zoom lens installed on the projector.

-Reduced brightness
Any repair requiring the disassembly of the headlamp assembly screws must only be carried out by the
manufacturer.
TIPS: to obtain the best results from projections, project images on poorly lit or dark surfaces, avoiding
reflective surfaces (e.g. mirrors).
Check that the power supply is present
Whenever possible, always prefer light colored surfaces.
- Faulty projection The
gobo may be broken or dust or dirt has settled on the gobo. Clean the gobo with an antistatic cloth, if
the problem persists contact PROIETTA customer service.
-The projector does not turn on
- The line circuit breaker blows out at the projector connection. The
line circuit breaker is undersized compared to the projector's characteristics. Bypass or replace the line
circuit breaker.
Fig.6
7
It is important to periodically check the gaskets (G) to ensure maximum watertight performance. See Fig. 6.
it can be caused by the LED dying out or by the presence of dirt in the optical elements. Thoroughly
clean the optical elements, if the problem persists contact PROIETTA customer service.
The replacement of defective parts with non-original spare parts voids the guarantee.
CAUSES AND SOLUTIONS OF POSSIBLE PROBLEMS
g

WARRANTY
8
- Detailed description of the problem.
Consumable parts are not covered by the warranty.
For the use of the guarantee, the following information is essential: -
Date of purchase (the date of the invoice applies)
Any repair that requires the removal of the projector assembly screws must only be carried out
by the manufacturer, who declines all responsibility for unauthorized interventions. The
disassembly (even partial) of the projector not carried out by the manufacturer will invalidate
the guarantee.
The product is covered by a guarantee according to the terms of the law (24 months). In the
event of a malfunction during the warranty period the product will be repaired or replaced at the
discretion of the manufacturer.
Any damage caused by non-compliance with the manual will invalidate the guarantee. The
manufacturer assumes no responsibility for damage or problems caused by not following the
manual.
It is essential to follow the safety instructions and warnings contained in this manual.

DECLARATION OF CONFORMITY
The product to which this manual refers is in accordance with the Directives of
the European Community. The examination is made clear by the application of
the CE mark on the product and the declaration of compliance.
The device meets the requirements of the 2002/95/CE (RoHS) Directive; the
General Safety Information Regulations: EN60598-1, EN60598-2-17 and the
European Parliament's Directive 2004/108/EC on Electromagnetic Compatibility.
DISPOSAL OF UNUSED PRODUCT
The device must be disposed of in accordance with the applicable laws relating
to lighting products. In any case, it should not be thrown between normal waste
or dispersed in the environment, the latter action, although legally pursued, is a
serious danger to animals and people and a source of long-term pollution. The
product cannot be treated as a simple urban waste and must be disposed of
appropriately in accordance with existing waste disposal regulations.
Avigliana, 10/05/2021
PROIETTA srl
Viale Dei Mareschi 4/d - 10051 - Avigliana - TO (Italy) - VAT number: IT09964950019
Table of contents
Other PROIETTA Projector manuals
