Proku Coolfog Maxi User manual

Store these directions for use along with the Coolfog Maxi. For the most recent version, visit
www.proku.nl

Directions Coolfog Maxi
September 2016
Pagina 2 van 18
Contents
1. Introduction..................................................................................................................................... 3
1.1 Ultrasonic air humidification................................................................................................... 3
1.2 Applications............................................................................................................................. 3
1.3 Packaging................................................................................................................................. 3
1.4 Warranty period...................................................................................................................... 3
2. Safety guidelines.............................................................................................................................. 3
3. Connections and functions.............................................................................................................. 4
4. Assembly and installation instructions............................................................................................ 5
4.1 Coolfog Maxi schematic diagrams........................................................................................... 6
4.2 Placement instructions............................................................................................................ 6
4.3 Electrical connection (supply voltage 230 VAC)...................................................................... 7
4.4 Water connections .................................................................................................................. 7
4.5 Air connections........................................................................................................................ 7
4.6 Step-by-step assembly and installation................................................................................... 8
5. Operating instructions................................................................................................................... 12
5.1 Operational testing................................................................................................................ 12
5.2 General instructions for use .................................................................................................. 12
6. Maintenance and repair instructions............................................................................................ 13
6.1 Prior to maintenance............................................................................................................. 13
6.2 Maintenance.......................................................................................................................... 13
6.3 Malfunctions.......................................................................................................................... 14
6.4 Replacement.......................................................................................................................... 15
6.5 Disassembly........................................................................................................................... 15
7. Technical specifications................................................................................................................. 16
8. Contact details............................................................................................................................... 17
Important!
In order to guarantee the safe, correct and economical use of the Coolfog Maxi, you should pay
particular attention to and observe all directives and safety instructions contained in these directions
for use. If, after reading these directions for use, you still have questions, please contact your
distributor. You will find the contact details at the end of these directions for use.

Directions Coolfog Maxi
September 2016
Pagina 3 van 18
1. Introduction
These directions for use provide technical information about the Coolfog Maxi, as well as assembly
and installation instructions, operating instructions and maintenance and repair directives applicable
to the Coolfog Maxi.
1.1 Ultrasonic air humidification
During ultrasonic air humidification, vibrating plates are used to convert water into extremely fine
cool water vapour. These vibrating plates are located just below the water’s surface and agitate the
water by means of high-frequency vibrations (1.7 MHz), hurling tiny water particles, 1 to 3 microns in
size, from the water’s surface. This creates a very fine mist, also called cold steam. This visible mist is
blown into the humidification area using a fan (and possibly a mist distribution pipe). The mist is
quickly absorbed by the surrounding air and distributed throughout the area.
1.2 Applications
The Coolfog Maxi is suitable for direct and indirect humidification. For the purpose of indirect
humidification, the Coolfog Maxi is placed outside the humidification area. A piping system
transports the extracted air and mist into the area.
The Coolfog Maxi has been designed for the following applications, on condition that the items inside
the humidification area can withstand increased humidity:
•CA (Controlled Atmosphere) / ULO (Ultra Low Oxygen) storage
•Areas in which high relative humidity is desired
•Cold stores
The Coolfog Maxi is intended for commercial use, thus excluding domestic use.
1.3 Packaging
The Coolfog Maxi is supplied in recyclable packaging that does
not need to be kept. The packaging contains the following
components (see image):
A. Coolfog Maxi (cylinder with lid, extractor, level tube, cable
gland, connections, electrical connection cable and mains
electrical plug)
B. Float (packaged separately)
C. Coolfog Basic including transformer with mains electrical
plug (with 2 metre cable for connection to transformer)
(packaged separately)
D. These directions for use
1.4 Warranty period
The Coolfog Maxi is covered by a six-month warranty period. This warranty becomes void if the
Coolfog Maxi is not assembled and installed according to instructions or is handled without the
necessary expertise.
Details related to the client, distributor, installer and the Coolfog Maxi must be entered in chapter 8.
Incomplete or omitted details will result in warranty cover on the Coolfog Maxi being forfeited.
2. Safety guidelines
A
C
B

Directions Coolfog Maxi
September 2016
Pagina 4 van 18
The Coolfog Maxi may only be assembled and installed by authorised and competent persons. The
client is responsible for checking the relevant qualifications.
Operation, maintenance and possible repairs may only be carried out by persons with knowledge
about the product and who have the qualifications necessary to carry out the work in question. The
client is responsible for checking the relevant qualifications.
Before the Coolfog Maxi is moved or maintenance work is carried out on it, always shut off its 230 V
electrical supply.
If it is noted that risk-free use of the Coolfog Maxi is no longer possible, it must immediately be
disabled and be secured to prevent unintentional activation. This may be the case under the
following circumstances:
•The Coolfog Maxi is damaged.
•The Coolfog Maxi no longer functions correctly.
•Connections or pipes are leaking.
Below is a complete overview of the safety guidelines contained in these directions for use:
•In order to prevent electrocution, the humidifier must be connected to its electricity supply only
after all installation work is complete.
•The Coolfog Maxi contains a number of sharp components (screws).
•The Coolfog Maxi will contain air from the humidification area if air is extracted from this area.
This must be taken into account when maintenance work is carried out.
•If used for the purpose of humidifying low-oxygen areas, work must always be carried out
according to safety guidelines that apply to application in low-oxygen areas!
•Once opened, the Coolfog Maxi must never be left unattended!
3. Connections and functions
Side view Front view
A
B
C
D
E
F
A
D
E
F
C
H
G

Directions Coolfog Maxi
September 2016
Pagina 5 van 18
Switch unit front view Rear view
A. Lid
B. Extractor
C. Air outlet connection
D. Water intake connection
E. Level meter tube
F. Water outlet connection
G. Air intake connection
H. Cable gland
I. -
J. -
K. Mains electrical plug
L. Electrical connection cable
M. Switch unit
N. Power switch (on/off)
O. Fuse
4. Assembly and installation instructions
The Coolfog Maxi may only be assembled and installed by authorised and competent persons. The
client is responsible for checking the relevant qualifications.
Attention must be paid to all details related to assembly and installation included in these directions
for use.
All local guidelines that have a bearing on assembly and installation tasks must be taken into account.
Important!
If the Coolfog Maxi is not assembled and installed according to instructions, or if it is not handled
with the necessary expertise, the warranty will become void.
A
B
G
M
L
N
O
K

Directions Coolfog Maxi
September 2016
Pagina 6 van 18
4.1 Coolfog Maxi schematic diagrams
Side view Front view
Side view interior Rear view
A. Lid
B. Extractor
C. Air outlet connection
D. Water intake connection
E. Level meter tube
F. Water outlet connection
G. Air intake connection
H. Cable gland
I. Coolfog Basic with float
J. Transformer
K. Mains electrical plug
L. Electrical connection cable
M. Switch unit
N. -
O. -
4.2 Placement instructions
•The Coolfog Maxi and its water connections must be installed in a frost-free area in order to
guarantee effective operation.
•The Coolfog Maxi must be installed level (upright) on a stable base with a load capacity of at least
150 kg.
•The water temperature must be at least +5°C and must not exceed +34°C. Higher temperatures
will cause permanent damage to the Coolfog Basic’s vibrating plates.
A
A
B
A
H
C
D
E
F
H
C
D
E
F
I
B
G
J
K
B
G
M
K
L
G
C
A
D
E
F

Directions Coolfog Maxi
September 2016
Pagina 7 van 18
4.3 Electrical connection (supply voltage 230 VAC)
The Coolfog Maxi must be connected to an earthed wall socket that forms part of an earthed
electrical system.
If desired, the wall socket can be fitted with a timer switch for setting activation times.
Electrical cables must not be rolled up due to the risk of overheating.
4.4 Water connections
Water intake
•The water level inside the Coolfog Maxi is regulated by a float valve. This is located inside the
Coolfog Maxi. The water supply connection is on the exterior of the Coolfog Maxi. This is a 3/8”
threaded connection.
•The Coolfog Maxi and its water connections must be installed in a frost-free area in order to
guarantee effective operation.
•If there are major temperature fluctuations between the Coolfog Maxi and its surroundings,
condensation can form on the exterior of the Coolfog Maxi and on the air outlet pipes. This can
be prevented by insulating the Coolfog Maxi and the air outlet pipes.
•The Coolfog Maxi must be included in company-specific risk management related to legionnaire’s
disease and in the corresponding Legionnaire’s Disease containment plan, set up within the
context of legionnaire’s disease prevention.
•Distilled water cannot be used, as it will damage the water sensor on the Coolfog Basic.
Important!
Legislation and regulation with respect to Legionnaire’s Disease can differ per country. The client is
responsible for observing applicable legislation and regulations.
Water outlet
•A water outlet connection with a ½” ball valve is fixed to the exterior of the Coolfog Maxi. Its
purpose is to allow drainage of the Coolfog Maxi during maintenance or if the equipment is not
used for a long period of time.
•A level meter tube is fixed to the exterior of the Coolfog Maxi. The water level inside the Coolfog
Maxi can be determined with this level meter tube, while it has a safety function that guards
against water levels exceeding the maximum. The top of this level meter tube must not be closed
off.
4.5 Air connections
Air intake
The Coolfog Maxi is suitable for direct and indirect humidification.
Direct humidification requires a clean air supply free of water particles. Any possible air ducts must
not be obstructed.
If indirect humidification is applied, the Coolfog Maxi is placed outside the humidification area. A
sealed air system is used to extract the air from the area in question. This is then fed back into the
area, along with the added mist. This involves the recirculation of the humidified air. With the
exception of the humidity being brought to the desired level, the atmosphere inside the area does
not change. When installing an extraction pipe in the humidification area, care must be taken to
ensure that the mist from the Coolfog Maxi is not immediately drawn in by the extraction pipe. The
system requires an unobstructed air supply free of water particles. The manufacturer recommends
the use of a mist distribution pipe.

Directions Coolfog Maxi
September 2016
Pagina 8 van 18
Important!
If used for the purpose of humidifying low-oxygen areas, work must always be carried out according
to safety guidelines that apply to application in low-oxygen areas!
When cutting 90 mm conduits into a wall for the purpose of
indirect humidification, the manufacturer recommends the
use of black synthetic sleeves (see image).
Air outlet
During the production of mist, water droplets will always form. When assembling, it is important that
the first air outlet pipe is installed with a fall towards the Coolfog Maxi. This pipe must be at least
75cm long. If this is not possible, the mist distribution pipe must be installed with a fall that runs into
a drainage system.
When installing the air outlet pipe, the following must be taken into account:
The air outlet pipe must have the least number of bends possible to prevent mist loss due to
condensation.
The air outlet pipe must not sag. If this is the case, condensation will accumulate.
The maximum length of the air outlet pipe should be 12 metres.
The manufacturer recommends the use of a mist distribution pipe.
If the area is fitted with a ventilation fan, the air outlet pipe should be situated in the air flow to
ensure effective distribution of the mist.
Warning!
To prevent electrocution, the humidifier must be connected to the electrical supply only when all
installation tasks are complete.
4.6 Step-by-step assembly and installation
Below is a step-by-step plan according to which to assemble and install the Coolfog Maxi.
1. Remove the Coolfog Maxi from its packaging.
2. Place the Coolfog Maxi level (upright) in position. It
must be placed on a stable base with a load
capacity of at least 150 kg.
3. Install the required intake pipes (90 mm)
4. Install the required outlet pipes (90 mm)

Directions Coolfog Maxi
September 2016
Pagina 9 van 18
5. If required, install a mist distribution pipe inside the
humidification area.
6. Connect the water supply pipe to the water intake
connection
7. If applicable, connect the water outlet to a waste
system
8. Remove the lid
9. Remove the float from its packaging
10. Fit the two float components together to form a
shallow tray
11. Remove the Coolfog Basic and transformer from its
packaging
12. Place the Coolfog Basic inside the float

Directions Coolfog Maxi
September 2016
Pagina 10 van 18
13. Carefully place the float on the bottom of the
Coolfog Maxi
14. Unscrew the compression nut from the cable gland
15. Remove the rubber seal from the cable gland
16. Thread the Coolfog Basic cable (2 m) through the
cable gland from the inside of the Coolfog Maxi
towards the outside
17. Make sure that as much extra cable as possible is
outside the Coolfog Maxi

Directions Coolfog Maxi
September 2016
Pagina 11 van 18
18. Place the rubber seal around the cable and insert it
back into the cable gland
19. Replace the cable gland compression nut and
tighten until airtight
20. Connect the cable from the Coolfog Basic to the
transformer
21. Connect the transformer mains plug to the Coolfog
Maxi’s electrical connection cable
22. Connect the Coolfog Maxi mains plug to an earthed
wall socket forming part of an earth leakage
protected electrical system
23. Carry out the operational test as described in
paragraph 5.1.
Directions Coolfog Maxi
September 2016
Pagina 12 van 18
24. Use the lock ring to seal the lid
25. Check whether the mist distribution pipe
effectively distributes the mist throughout the
humidification area
5. Operating instructions
This section describes the operational test and contains general instructions for use.
5.1 Operational testing
Before the Coolfog Maxi is activated for the first time, the following must be checked:
That the Coolfog Maxi is level (upright on a stable base with sufficient load capacity).
That the air intake and outlet pipes (including mist distribution pipe) are correctly installed.
That the shut-off valves on the air intake and air outlet pipes are open.
That there is sufficient water pressure.
That the water intake and water outlet are connected according to the instructions.
Operational test
1. Open the water intake. The Coolfog Maxi will start filling up.
When the Coolfog Maxi is about half full, make sure that the
float valve automatically shuts off the water supply.
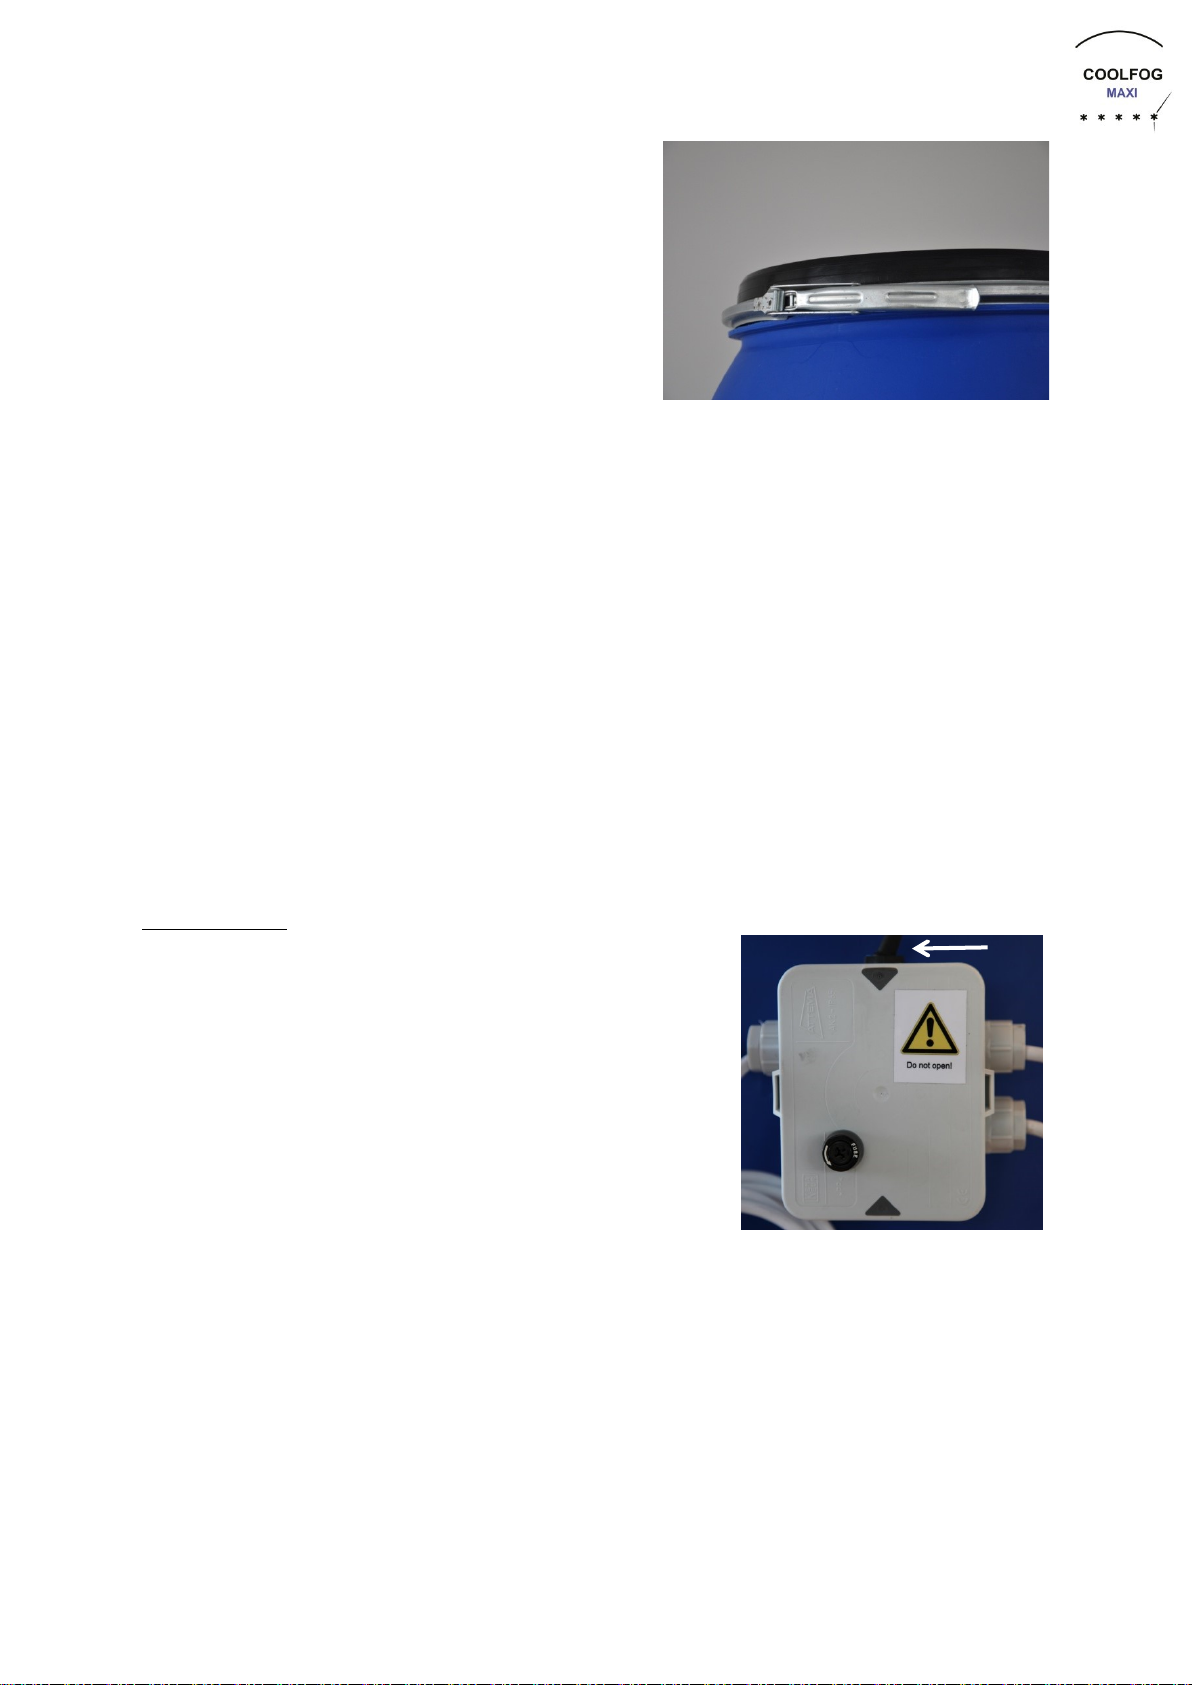
2. Use the black switch to turn on the Coolfog Maxi (see
image).
3. Check whether the extractor blows air.
4. Check whether mist forms inside the Coolfog Maxi; mist
production should start within a few seconds.
5. Turn off the power and check that the extractor and the mist
production stop.
6. Seal the lid with the lock ring.
7. Turn the power back on.
5.2 General instructions for use
The transformer must not be covered because it heats up during humidification.
Do not touch the Coolfog Basic’s vibrating plates or the transformer when the system is
electrically active.
Fingers or other body parts must not be placed within 10 cm of the Coolfog Basic’s vibrating
plates when these are active.
After turning off the Coolfog Maxi, wait at least 3 seconds before opening the lid.

Directions Coolfog Maxi
September 2016
Pagina 13 van 18
The Coolfog Maxi must be included in company-specific risk management related to
Legionnaire’s Disease and in the corresponding Legionnaire’s Disease containment plan, set up
within the context of Legionnaire’s Disease prevention.
•Distilled water cannot be used, as it will damage the water sensor on the Coolfog Basic.
The Coolfog Basic must be cleaned using nothing other than a soft cloth.
•The water temperature must be at least +5°C and must not exceed +34°C. Higher temperatures
will cause permanent damage to the Coolfog Basic vibrating plates.
When the Coolfog Maxi is in use, its lid must never be removed.
If it overheats, the Coolfog Maxi will automatically shut off. Overheating can be caused by:
-Air intake or air outlet blockages
-Excessive air intake temperature
-Excessive water temperature
-Excessive surrounding temperature
-Defective extractor
6. Maintenance and repair instructions
The operation of the Coolfog Maxi must be checked on a daily basis. Regular maintenance is essential
in order to ensure hygiene and the effective operation of the Coolfog Maxi.
Attention! If the Coolfog Maxi is to be inactive for a long period of time, the water must be drained
from the Coolfog Maxi. After draining, let the Coolfog Maxi open; do not put the lid back on.
6.1 Prior to maintenance
Prior to carrying out maintenance, the following must be done:
1. Use the black switch to turn off the Coolfog Maxi.
2. Remove the mains plug from the wall socket.
3. Close the air intake and air outlet shutoff valves.
4. Close the water intake shutoff valve.
5. Use the water outlet valve to drain the Coolfog Maxi.
6. Open the Coolfog Maxi by removing the lid.
7. Leave the Coolfog Maxi open for a few minutes to air before continuing with maintenance tasks.
6.2 Maintenance
How often the Coolfog Maxi should be cleaned depends on water quality and on the cleanliness of
the extracted air. Cleaning of the Coolfog Maxi and the Coolfog Basic should take place at least once
every three months. Use nothing other than a soft cloth to clean the Coolfog Basic. Do not use soap
or other detergents.
Warning!
The Coolfog Maxi contains a number of sharp components (screws).
For the purpose of indirect humidification, the Coolfog Maxi is placed outside the humidification
area. The Coolfog Maxi is fitted with shut-off valves. This makes it possible to carry out maintenance
on the system without affecting the atmosphere within the humidification area. However, when
opening the Coolfog Maxi, be aware that it will contain air from the humidification area if air is
extracted from this area. This can be dangerous. For this reason, we recommend that the Coolfog
Maxi is left open for a few minutes to allow it to air before maintenance tasks are started.

Directions Coolfog Maxi
September 2016
Pagina 14 van 18
Warning!
The Coolfog Maxi will contain air from the humidification area if air is extracted from it. This must be
taken into account when maintenance work is carried out.
If used for the purpose of humidifying low-oxygen areas, work must always be carried out according
to safety guidelines that apply to application in low-oxygen areas!
Once opened, the Coolfog Maxi must never be left unattended, especially if children are present. The
Coolfog Maxi is large enough to hold a child. Children could become trapped in the Coolfog Maxi and
could drown or suffocate when it is activated.
Warning!
Once opened, the Coolfog Maxi must never be left unattended!
6.3 Malfunctions
Malfunction
Possible cause
Action to take
The Coolfog Basic has shut
down automatically; the
extractor still runs.
Water level too low
Blocked water intake
Low water pressure
Water outlet open
Defective float valve
Other
Coolfog Basic not working
or defective
Unblock water intake
Restore water pressure
Close water outlet
Check float valve and
replace if necessary
Check Coolfog Basic and
replace if necessary; see §
6.4
Water seeping from the level
meter tube.
Water level too high
Float valve not working or
defective
Surplus water runback
(condensation build-up)
Check float valve and
replace if necessary
Adjust air outlet pipe (see
‘air outlet’ under § 4.5)
The Coolfog Basic has shut
down automatically; the
extractor is not running.
No electricity supply
Coolfog Maxi fuse burnout
due to short circuit.
Thermostat automatically
shutting down system
because of high water
temperature due to:
blocked air intake
blocked air outlet
defective extractor
Restore electricity supply
Determine cause of short
circuit and repair as
necessary
Unblock air intake
Unblock air outlet
Replace extractor
The water in the Coolfog Maxi
is frozen.
Surrounding temperature
and/or water temperature
too low and/or not frost-
free
See § 4.2

Directions Coolfog Maxi
September 2016
Pagina 15 van 18
6.4 Replacement
The ‘Coolfog Basic’ must be replaced after 8,500 active hours or within 1 year, depending on what
comes first. Its lifespan also depends on the surrounding temperature and the maintenance. Higher
surrounding temperatures will result in a shorter lifespan.
6.5 Disassembly
For transportation purposes, the Coolfog Maxi must be disassembled to prevent damage to its
components.
1. Use the black switch to turn off the Coolfog Maxi.
2. Remove the mains plug from the wall socket.
3. Close the air intake and air outlet shut-off valves.
4. Close the water intake valve.
5. Release the water pressure.
6. Open the Coolfog Maxi by removing the lid.
7. Leave the Coolfog Maxi to air for a few minutes.
8. Use the water outlet valve to drain the Coolfog Maxi.
9. Disconnect the water outlet connection (if applicable).
10. Disconnect the water intake connection.
11. Remove the Coolfog Maxi cable from the transformer socket.
12. Disconnect the Coolfog Basic cable from the transformer.
13. Undo the compression nut on the cable gland.
14. Remove the rubber seal from the cable gland.
15. Thread the Coolfog Basic cable (2 m) through the cable gland towards the inside of the Coolfog
Maxi.
16. Carefully remove the Coolfog Basic and float from the Coolfog Maxi and disassemble.
17. Disassemble the 90 mm air intake and air outlet pipes.
18. Use the lock ring to seal the lid.
19. The Coolfog Maxi is now disassembled and ready for transport.

Directions Coolfog Maxi
September 2016
Pagina 16 van 18
7. Technical specifications
Mains voltage
230 VAC/50Hz
Total power consumption
450 VA - 450 W - 2,3 ampère
Fuse
3 ampère
Transformer voltage
input - 230VAC/50 Hz
output - VAC36V –450 W
Transformer power consumption
2 ampère
Extractor voltage
230VAC/50Hz
Extractor power
60 W
Extractor capacity
80 m³ per hour
Coolfog Basic maximum capacity
6 litres per hour
Coolfog Basic lifespan
8,500 operating hours
(app. 1 year if constantly active)
Water particle size
1 to 3 microns
Diameter air outlet connection (PVC)
90 mm
Diameter air intake connection (PVC)
90 mm
Air outlet pipe length
12 metres maximum
Water supply pressure
0.1 bar minimum to 6 bar maximum
Water intake connection
⅜” threaded connection
Maximum water hardness
8°dH (German degrees)
Water outlet connection
½” threaded connection
Coolfog Maxi volume
120 litres
Coolfog Maxi auto-filled
53 litres
Surrounding temperature
frost-free
Coolfog Maxi water temperature
+5°C minimum to +34°C maximum
Temperature shutoff module
automatic shut-off at +40°C
automatic reactivation at +25°C
Coolfog Maxi dimensions
110 x 51 x 90 (l x b x h)
Weight Coolfog Maxi half-filled
65 kilo
Weight Coolfog Maxi empty
17 kilo
Weight Coolfog Basic (packaged)
8 kg

Directions Coolfog Maxi
September 2016
Pagina 17 van 18
8. Contact details
Once you have assembled and installed the Coolfog Maxi, enter the following details. Incomplete or
omitted details will result in forfeiture of warranty cover on the Coolfog Maxi.
Please contact your distributor or installer if you experience any problems.
Client details
Name
:
Address
:
City
:
Telephone no.
:
E-mail address
:
Distributor details
Name
:
Proku
Address
:
P.O. Box 1
City
:
Dreumel
Telephone no.
:
+31 (0)487-745014
E-mail address
:
Website
:
www.proku.nl
Installer details
Name
:
Address
:
City
:
Telephone no.
:
E-mail address
:
Engineer
:
Installation date
:
Coolfog Maxi details
Serial number
(on side of lid)
:
Website
:
www.proku.nl
Store these directions for use along with the Coolfog Maxi. For the most recent version, visit
www.proku.nl

Directions Coolfog Maxi
September 2016
Pagina 18 van 18
Baliac, Provincialeweg 40, 5334 JH Velddriel,
the Netherlands, declares –with full cognisance
–that the Coolfog Maxi, manufactured by
Baliac and supplied by Proku conforms to the
following CE directives
-Machine directive (2006/42/EC)
-EMC directive (2004/108/EC)
-Low voltage directive (2006/95/EC)
Baliac and Proku shall in no case whatsoever be held liable for any losses resulting from the use of
the Coolfog Maxi (see our supply and payment terms and conditions, number 2011/6, held by the
Arnhem District Court. A copy can be found on our website: www.proku.nl or can be sent to you free
of charge upon request.)
Table of contents


