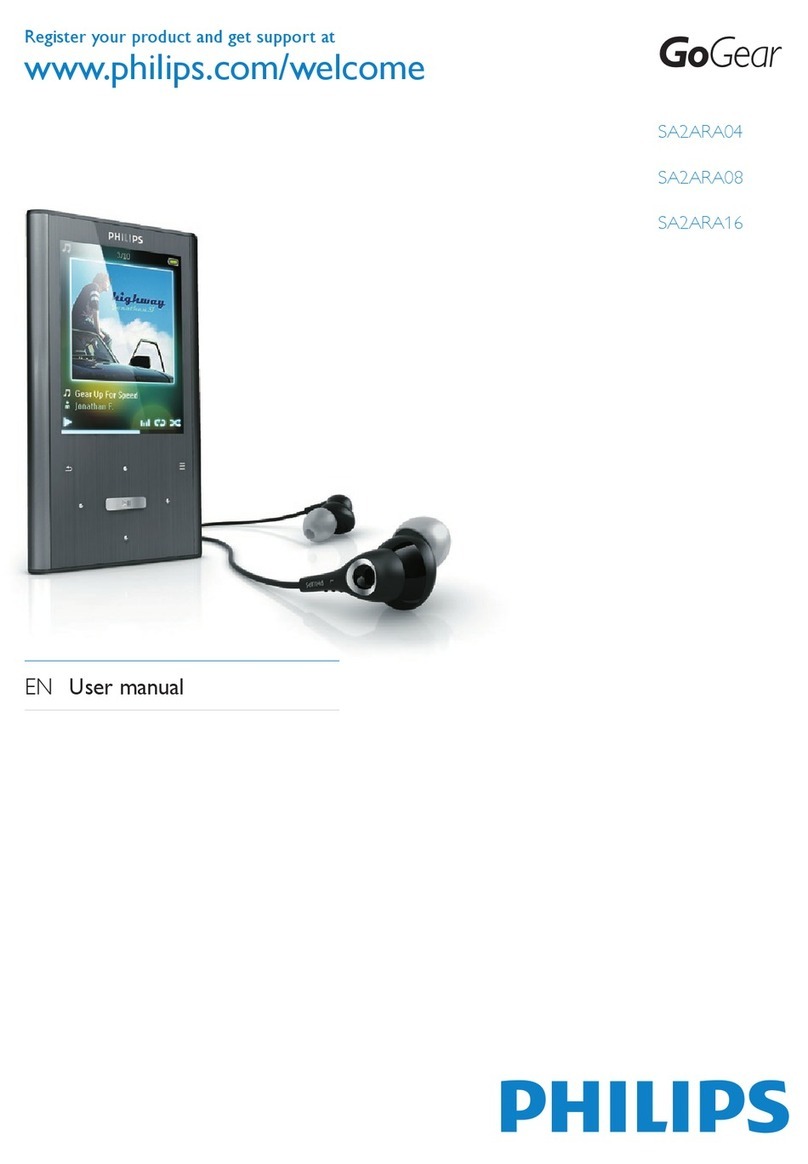
Proline MP351 User manual

Portable Media Player
MP351
User Manual

i
TABLE OF CONTENTS
Introduction.............................................................................................................................................................................................1
Regulatory Information: FCC Part 15 ...................................................................................................................................................2
Important Safety Precautions AND MAINTENANCE ..........................................................................................................................3
MAIN PRODUCT FEATURES .................................................................................................................................................................5
Overview..................................................................................................................................................................................................6
Getting Started........................................................................................................................................................................................7
System requirements ...........................................................................................................................................................................7
Copy Files from computer ....................................................................................................................................................................7
Connect to the power ...........................................................................................................................................................................8
Charging the battery.............................................................................................................................................................................8
Insert Media..........................................................................................................................................................................................9
Basic operation.....................................................................................................................................................................................10
Turn on/off the Player .........................................................................................................................................................................10
Adjust the volume...............................................................................................................................................................................10
Reset the Player.................................................................................................................................................................................10
Unlock All Buttons ..............................................................................................................................................................................10
Entering the main menu ..................................................................................................................................................................... 11
Enjoying Music .....................................................................................................................................................................................12
Playing Songs ....................................................................................................................................................................................12
Using Music Menu..............................................................................................................................................................................12
Lyric Displaying ..................................................................................................................................................................................14
Enjoying a Video...................................................................................................................................................................................15

ii
Playing a Video ..................................................................................................................................................................................15
Viewing Pictures...................................................................................................................................................................................16
Viewing a Photo .................................................................................................................................................................................16
Using picture menu ............................................................................................................................................................................17
FM Radio ...............................................................................................................................................................................................18
Listening to FM radio..........................................................................................................................................................................18
Using FM radio menu .........................................................................................................................................................................19
Display Calendar ..................................................................................................................................................................................19
Voice Recording and Playing ..............................................................................................................................................................20
Recording a Voice ..............................................................................................................................................................................20
Playing recordings..............................................................................................................................................................................21
Text Reading .........................................................................................................................................................................................22
Reading a text ....................................................................................................................................................................................22
Using Text reader menu .....................................................................................................................................................................23
Folder View ...........................................................................................................................................................................................24
Browsing all files and deleting a file ...................................................................................................................................................24
Changing Player Settings....................................................................................................................................................................24
Setting items.......................................................................................................................................................................................25
Troubleshooting ...................................................................................................................................................................................26
Specification .........................................................................................................................................................................................27

1
Introduction
Thank you for purchasing this Portable Media Player.
This manual contains important safety information and operation instructions, so please read all the instructions carefully before using the
player and keeps it for future reference.
This manual will help you use all of the exiting features to make your player view more enjoyable.
We have done our best to produce a complete and accurate manual; however, we cannot ensure there are no errors
or omissions. We also have no responsibility for damages or loss of data caused by improper operation.
The instruction manual is subject to change for improvement without notice.
Trademarks and trade names used in this user’s manual are owned by their respective companies or organisations.

2
Regulatory Information: FCC Part 15
This device complies with part 15 of the FCC rules. Operation is subject to the following two conditions:
(1) This device may not cause harmful interference, and
(2) this device must accept any interference received, including interference that may cause undesired operation.
Note:
This equipment has been tested and found to comply with the limits for a Class B digital device, pursuant to part 15 of the FCC Rules. These
limits are designed to provide reasonable protection against harmful interference in a residential installation.
This equipment generates, uses and can radiate radio frequency energy and, if not installed and used in accordance with the instructions, may
cause harmful interference to radio communications. However, there is no guarantee that interference will not occur in a particular installation. If
this equipment does cause harmful interference to radio or television reception, which can be determined by turning the equipment off and on,
the user is encouraged to try to correct the interference by one or more of the following measures:
yReorient or relocate the receiving antenna.
yIncrease the separation between the equipment and receiver.
yConnect the equipment into an outlet on a circuit different from that to which the receiver is connected.
yConsult the dealer or an experienced radio/TV technician for help.
NOTE: THE MANUFACTURER IS NOT RESPONSIBLE FOR ANY RADIO OR TV INTERFERENCE CAUSED BY UNAUTHORISED
MODIFICATIONS TO THE DEVICE.
ANY SUCH MODIFICATIONS COULD VOID THE USER'S AUTHORITY TO OPERATE THE EQUIPMENT.
Contact:
Chuck zhu
Nextar, Inc., 1661 Fairplex Dr., La Verne, CA 91750
Tel: (909) 392-8282
Fax: (909) 392-8283
www.nextar.com
E-mail: chuck.zhu@nextar.com

3
Important Safety Precautions AND MAINTENANCE
Always follow these basic safety precautions when using your player. This will reduce the risk of product damage and personal injury.
yDo not disassemble, attempt to repair or modify the player by yourself. Refer servicing to qualified personnel.
yDo not dispose of the player in fire to avoid explosion because the player has built-in battery.
yDo not touch the player with bare hands if the built-in battery is leaking. In this case, contact service center for help since the liquid may
remain in the player. If your body or clothes has contacted with the battery liquid, wash it off thoroughly with water. Also, if some of liquid
gets into your eyes, do not rub your eyes but immediately wash them with clean water, and consult a doctor.
yKeep the player away from direct sunlight and heat source.
yDo not expose the unit to rain or moisture to avoid any malfunction.
yDo not use the player in very dry or damp environments to avoid static.
yNever apply heavy impact on the player like dropping it or placing it on the magnet.
yRoute USB cable so that people are not likely to trip over or accidentally pull on them as they move around or walk through the area.
yDisconnect the USB cable from the computer when you do not use the player for a long time.
yClean only with dry cloth. Make sure the player is turned off before cleaning. Do not use liquid or abrasive cleansers.
yBe sure to back up your files. We will not be liable for the loss of data due to improper operation, repair or other causes.
yThis product is intended for domestic use only any other use may invalidate the warranty and might be dangerous.

4
WARNING
yDo not expose this product to dripping or splashing or place objects filled with liquid such as vases on or near the product.
yDo not place a naked flame source such as lighted candles on or near the product.
Precautions in using the headphone
Do not use the headphone while driving an automobile or riding a bicycle. It is not only dangerous, but also against the law.
HEADPHONE VOLUME WARNING
Connect headphones with the volume set low and increase it if required. Prolonged listening through some headphones at high volume
settings can result in hearing damage.
Earphones or Headphones must comply with EN 50332-2 to ensure continued protection from excessive sound pressure levels.
- Continuous use of earphones at high volume can damage the user’s hearing.
- Connect earphones with the volume set low and increase it if required.

5
MAIN PRODUCT FEATURES
y3.5” TFT display 320*240
yHigh-Fi stereo output
ySupports MP3, WMA, FLAC, APE, OGG, and WAVE music formats
ySupports WMV, RMVB, MPEG-1, MPEG-4, FLV, DIVX and XIVD video formats
yPhoto viewing (JPG/BMP)
yFM radio
yVoice and radio recording
yText reading (txt format)
yCalendar display
ySupports Micro SD(MAX 8GB) memory card
yUSB 2.0 high speed

6
Overview
1. [ ] Down button; Volume down
2. [ ] Up button; Volume up
3. [ ] Play/Pause/Confirm
4. Microphone
5. [ ] Exit button
6. [ ] Left/Previous button, press and hold to fast rewind
7. [ ] Right/Next button, press and hold to fast forward
8. Screen display
9. Headphones jack
10. Mini-USB connector; DC Input socket
11. Micro SD card slot
12. [MENU] enter function menu for each mode
13. [POWER] Press and hold to power on/off the player
14. Reset hole

7
Getting Started
System requirements
Your computer system must meet the following requirements:
yPentium 200MHz or above
yMicrosoft Windows 2000/ME/XP/Vista
yUSB 2.0 port supported
Copy Files from computer
Files can be transferred directly into the player by using the USB data cable.
1. Make sure that your computer has been started before you start.
2. Connect the mini plug of the USB cable to the mini USB port on the player, and push the other end into a free USB port on your
computer.
3. The computer system detects “New hardware” and starts to install the driver automatically. Wait for the system to finish the installation.
When it has finished, a new “Removable Disk” will be created in “My Computer”.
4. Drag and drop the files on your computer to the “Removable Disk”.
5. To disconnect the USB cable from the computer, double click the Safely Remove Hardware icon on the task bar. Click the USB Mass
Storage Device, and then click OK. Then you can unplug the player safely.
Note: Do not disconnect the USB cable during loading. It may cause malfunction of the player and the files.

8
Connect to the power
Plug one end of the power adaptor into the DC socket in the player, and the other
into a USB 2.0 port on your PC.
Note:
yTo turn On/Off the player, press and hold [POWER] button.
Charging the battery
yThe battery will charge automatically when the player is connected to a USB 2.0 port on your computer. Make sure the computer has
been booted.
yThe battery will be 80% charged in about three hours and fully charged in about five hours. If you charge the player while loading files to
the player, it will take longer.
yReading the battery level indication of your player:
Full Two-thirds full Half full Low Empty
PC

9
Important:
yRecommended temperature for battery charging is 0
℃
to 35
℃
.
yFully charge it before you use the player for the first time or when you haven’t used it for a long time.
yCharge the player immediately when the “Low battery” icon displays.
yDo not overcharge or discharge the player. Over charging or discharging will shorten the battery life.
yThe battery will be over discharged if the player is not used for a long time (over three months). To avoid over discharge, fully charge the
player every three months, always keep the voltage of the battery above 50%.
yIf the player is not used for a long time, keep it in the temperature range 23ºC
±
5
℃
and the moisture of 65
±
20% RH to maintain
the performance of the battery
.
Insert Media
The player includes a Micro SD card slot that enables you add up to 8GB of additional
memory to your player.
yInsert the Micro SD card into the card slot with the metallic contacts facing the back
of the player.
Note:
yDo not use force while inserting a memory card.
yTo remove the card, pull it out gently.
yDo not remove the card while data is transferring.

10
Basic operation
Turn on/off the Player
Make sure the battery is sufficiently charged and the headphones are connected.
yTo turn the player on, press and hold the [POWER] button for about 2 seconds.
yTo turn off the player, press and hold the [POWER] button.
Adjust the volume
yTo increase the volume, press the [ ] button while music playing.
yTo decrease the volume, press the [ ] button while music playing.
Reset the Player
If a malfunction of the player occurs, take a metal pin, e.g. the end of a paper clip, and press it into the RESET hole located just below the power
button to re-initialise the software of your player.
Unlock All Buttons
All buttons of the player will be locked after you do not use it for a certain time (you can set the time in setup menu). This prevents you from
accidentally pressing the buttons while using the player on the move. Press and hold the [ ] button to unlock all buttons.

11
Entering the main menu
Once you turn on the player, the main menu appears. Or use the [ ] button to return to the main
menu from other modes.
1. Press the [ ] or [ ] button to select: Music, Video, Pictures, Radio, Calendar, Recordings,
Text reader, Folder View, Settings, SD card, and Now Playing/Last Played.
2. Press the [ ] button to enter the desired setting.
Icon Main menu items Description Icon Main menu items Description
Music Play songs.
Text reader Reading text.
Video Play videos.
Folder View View files and folders of the player.
Pictures View pictures.
Settings Customize the settings of your
player.
Radio Listen to FM radio SD card Play songs, videos, pictures, or
texts saved in the Micro SD card.
Calendar Display calendar.
Now Playing/Last
Played
Resume Now playing or Last
Played song/video.
Recordings Voice recording.

12
Enjoying Music
Playing Songs
Make sure that the battery is charged sufficiently and the headphones are connected.
1. Use [ ] or [ ] to select Music on the main menu, and then press [ ].
2. Press [ ] or [ ] to select All Songs, Artists, Albums, Genres and Playlists, and then press [ ].
3. Use [ ] or [ ] to select a song, and then press [ ]. The music playback interface appears on the
screen.
While music playing, you can:
yPause/Resume Playing: Press [ ] button to pause playing. To resume playing, press [ ] button again.
ySkipping Tracks: Press [ ] or [ ] button to skip to previous/Next track.
yFast Searching: Press and hold [ ] button to fast rewind within a track, press and hold [ ] button to fast forward within a track.
yAdjust Volume: Press [ ] or [ ] button to increase/decrease the volume.
yExit: Press [ ] button to back to previous screen.
yMusic menu: Press [MENU] button to enter music menu.
yPower Off: Press and hold the [POWER] button to turn off the player.
Using Music Menu
While music playing, press the [MENU] button, the music menu appears for you to set play modes, add the song to playlist, EQ settings, display
lyrics or delete the file.
1. Press [MENU] button to enter music menu.
2. Press [ ] or [ ] button to select among Play modes, Add to Playlist, EQ Settings, Lyrics display, and Delete.
3. Press [ ] button to enter.
4. Press [ ] button to exit.

13
Item Sub-menu Sub-sub-menu Description
Use [ ] or [ ]
then [ ]
Use [ ] or [ ]
then [ ]
Use [ ] or [ ] then
[ ]
Off Play all songs in order.Shuffle All
On Shuffle all songs.
Off Play all songs in order once.
Repeat One Repeat the current or selected song.
Play modes
Repeat
Repeat All Repeat all songs.
Playlist 1 Add current or selected song to Playlist 1.
Playlist 2 Add current or selected song to Playlist 2.
Playlist 3 Add current or selected song to Playlist 3.
Playlist 4 Add current or selected song to Playlist 4.
Playlist
Playlist 5 Add current or selected song to Playlist 5.
3D 3D sound effect.
Bass Bass sound effect.
MS Play FX
Balance Balance sound effect.
Off No sound effect.
MS Play FX MS Play FX sound effect.
Rock Rock sound effect.
Pop Pop sound effect.
Jazz Jazz sound effect.
Classical Classical sound effect.
Hip Hop Hip Hop sound effect.
EQ Settings
EQ
Custom Custom sound effect.
Off Display lyrics.Lyric display
On Do not Display lyrics.
Cancel Cancel delete.Delete
Delete Delete current or selected song.

14
To customize EQ:
1. Select EQ Settings>EQ>Custom, and then press [ ] button.
2. Press [ ] or [ ] button to navigate among value bars.
3. Press [ ] or [ ] button to adjust the value.
4. Press [ ] button to confirm and exit.
Create new Playlist:
1. Enter Music>Playlists.
2. Press [MENU] button to “Delete a playlist” or “Create new playlist”.
3. Use [ ] or [ ] button to select “Create new playlist”, and then press [ ] button to confirm.
Lyric Displaying
This player supports lyrics display while music playing. Only the lyrics in LRC format can be displayed.
To add lyrics to the music, take “love music. Mp3” for example:
1. Download the corresponding lyrics with extension “.lrc” from the Internet.
2. Rename the lyrics file as “love music.lrc”. Make sure the lyrics filename is the same as the music file name.
3. Copy both files into the same folder on the player.
4. The lyrics will be displayed on the screen while the music is playing.

15
Enjoying a Video
Playing a Video
1. Use [ ] or [ ] to select Video on the main menu, and then press [ ]. The video file list
appears on the screen.
2. Press [ ] or [ ] to select a video, and then press [ ]. The video playback interface appears
on the screen.
3. Press [ ] button to exit and return to video file list.
While video playing, you can:
yPause/Resume Playing: Press [ ] button to pause playing. To resume playing, press [ ] button again.
ySkipping videos: Press [ ] or [ ] button to skip to previous/next video.
ySearching: Press and hold [ ] button to fast rewind within a video, Press and hold [ ] button to fast forward within a video.
yAdjust Volume: Press [ ] or [ ] button to increase/decrease the volume.
yVideo menu: Press [MENU] button to enter video menu.
yExit: Press [ ] button to return to video file list.
yPower Off: Press and hold the [POWER] button to turn off the player.

16
Viewing Pictures
Viewing a Photo
1. Use [ ] or [ ] to select Pictures on the main menu, and then press [ ]. The picture file list
appears on the screen.
2. Use [ ] or [ ] to “All Pictures”, and then press [ ]. All pictures stored on the player display
on the screen as thumbnails.
3. Press [ ], [ ], [ ] or [ ] button to select a picture, and then press [ ]. The picture displays
on the screen.
4. Press [ ] button to exit.
While viewing pictures, you can:
ySkipping pictures: Press [ ] or [ ] button to skip to previous/next photo.
yRotate picture: Press [ ] or [ ] button repeatedly to rotate the picture counterclockwise or clockwise.
yPicture menu: Press [MENU] button to enter Picture menu.
yPower Off: Press and hold the [POWER] button to turn off the player.

17
Using picture menu
While viewing pictures, press [MENU] button to enter Picture menu.
1. Press [ ] or [ ] button to select among Start Slideshow, Slideshow Settings, Add to ‘Favorites’ and Delete Picture.
2. Press [ ] button to enter.
3. Press [ ] button to exit.
yStart Slideshow: start a slideshow from the current picture.
ySlideshow Settings:
a) Slideshow music: use [ ] or [ ] then [ ] to select a background music from playlists.
b) Time per slide: use [ ] or [ ] then [ ] to set interval time while playing a slideshow.
c) Shuffle: play pictures in a random order.
d) Repeat: repeat playing the slideshow.
yAdd to ‘Favorites’: save the current picture or selected picture to “Favorite Pictures”.
yDelete Picture: use [ ] or [ ] to select “Delete” then [ ], to delete current picture or selected picture.
Table of contents
Languages:

