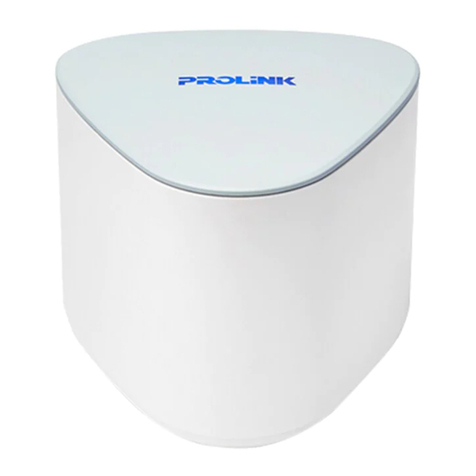
PROLiNK Xtend PRO Instruction Manual

FREQUENTLY ASKED QUESTIONS
PROLiNK® PRC2402M
Xtend Pro Whole Home Mesh Wi-Fi System
v1.0_150920

Copyright
The contents of this publication may not be reproduced in any part or as a whole, stored,
transcribed in an information retrieval system, translated into any language, or transmitted in
any form or by any means, mechanical, magnetic, electronic, optical, photocopying, manual,
or otherwise, without the prior written permission.
Trademark
All products, company, brand names are trademarks or registered trademarks of their
respective companies. They use for identification purpose only. Specifications are subject to
be changed without prior notice.
CE Declaration of Conformity
This equipment complies with the requirements relating to electromagnetic compatibility, EN
55022/A1 Class B.
Please read this entire manual before using this device, paying extra attention to
these safetywarningsandguidelines.Pleasekeepthismanualinasafeplaceforfuture
reference.
•This device is intended for indoor use only.
•Do not expose this device to water or moisture of any kind. If moisture does get in or
on the device, immediately unplug it from the power source, then allow it to fully dry
before reapplyingpower.
•Do not touch the device or any connected cables with wet hands.
•Unplug the device from its power source if it will go unused for a long period of
time.
•Cleanusingasoft,dryclothonly.Donotusechemicalcleaners,solvents,or
detergents. For stubborn deposits, moisten the cloth with warm water.
•Thisdevicehasno userserviceable parts. Donot attempttoopen,service,or
modify thisdevice.

Frequently Asked Questions
Which unit from Twin Pack is recommended to be used as the main router?.........1
What if the LED shows Blue Solid, but not able to surf internet when connected
through its Wi-Fi or LAN cable?..............................................................................1
How to recover Internet access after ISP downtime and recovered........................1
How to pair new PRC2402M single pack unit into existing running PRC2402M
mesh?.....................................................................................................................2
How to set the PRC2402M to support Wired-Backhaul? ........................................2
Where should I place my node unit after pairing successful? .................................2
How do I access the PRC2402M WebGUI after finished setting up?......................3
Why is the Client List page not showing up after clicking onto the page link? ........3
Can the PRC2402M support AP mode? .................................................................3
How do I set PRC2402M as AP mode instead of default Router mode? ................3
How to set the PRC2402M to support VLAN Internet setting?................................3
Does PRC2402M support IPTV Set Top Box / VOIP phone connection at Node? .4
How do I know what VLAN values to set for my subscribed ISP for
Internet/IPTV/VOIP service?...................................................................................4
What do the LED different colour/behaviour mean? ...............................................5
What should I do and Who to contact for suspected security breach?....................5
How to allow my Smart-Home devices discoverable when connected to the mesh?
................................................................................................................................6
How to enable / disable UPnP feature in PRC2402M?...........................................6
How to reserve IP Address to a specific device?....................................................7
How to recover Internet after connecting ISP ONT to PRC2402M WAN port?.......7

PRC2402M FAQ
v1.0_150920
Page 1 / 7
Which unit from Twin Pack is recommended to be used as the main router?
Ans. It is recommended to use Blue-Top casing as the main router
What if the LED shows Blue Solid, but not able to surf internet when
connected through its Wi-Fi or LAN cable?
Ans. Follow below steps;
Step 1. Disconnect and manually reconnect (through Wired LAN / WiFi) to the PRC2402M
router
Step 2. Set Fix DNS Server IP Address
a. Go to http://prc2402m.setup/ or http://192.168.123.254/ and login
b. Click Setup > Internet > change DNS drop down menu to Use the following
DNS
c. Fill in as 8.8.8.8 and 8.8.4.4 respectively for DNS 1 and DNS 2
d. Click Apply
Step 3. Disconnect and Reconnect WiFi and Wired clients.
How to recover Internet access after ISP downtime and recovered
Ans. By default, the PRC2402M will recover itself. Follow below steps if it did not manage to
recover itself;
Step 1. Power-Off all PRC2402M units (router and node units)

PRC2402M FAQ
v1.0_150920
Page 2 / 7
Step 2. Power-On PRC2402M Router unit (blue-top-casing or the immediate unit
connected to the main internet source).
Step 3. Wait for the Router unit to fully bootup and LED becomes Solid Blue.
Step 4. Power-On the node units
How to pair new PRC2402M single pack unit into existing running PRC2402M
mesh?
Ans. Follow below steps;
Step 1. Power-On the new PRC2402M unit near the existing PRC2402M router unit
Step 2. Wait for the new unit to finish booting up (indicating by blinking red)
Step 3. On PRC2402M Router unit > Press & Hold Pair button for 2 secs then release,
the LED will become Blue Blinking
Step 4. On new PRC2402M unit > Press & Hold Pair button for 2 secs then release, the
LED will become Blue Blinking
Step 5. Wait until the pairing process completed (indicated by all unit showing Blue Solid
LED); pairing takes approximately 2 min 30 secs.
Step 6. Power-Off the newly paired PRC2402M unit and move to a location in-between
existing PRC2402M unit and Wi-Fi dead spot location
Step 7. Power-On the newly paired PRC2402M
How to set the PRC2402M to support Wired-Backhaul?
Ans. Follow below steps;
Step 1. Ensure all node units are paired.
a. For Twin pack, node unit is already pre-paired to the router unit
b. For Single pack or any new unit, Pairing can only be done via Pair button between
the node unit and the router unit.
Step 2. Ensure that LAN cable is connected between from PRC2402M Router LAN port
to Node unit’s WAN port.
Step 3. Power-On the Node unit
Where should I place my node unit after pairing successful?
Ans. General guideline is maximum of 2 room distance between the main router and the node.
Or maximum of 2 room distance between existing node and the new node. It is highly
recommended to place the unit on an open space or unobstructed space. Please do take note
of below placement examples to avoid:

PRC2402M FAQ
v1.0_150920
Page 3 / 7
-corner of the room on the floor,
-hidden in fully enclosed wooden/glass cupboard,
-behind-beside-below fish-tank,
-near microwave oven,
-on top of fridge,
-etc
How do I access the PRC2402M WebGUI after finished setting up?
Ans. Follow below steps;
Step 1. Ensure that the Wi-Fi Client / Wired Client is connected to PRC2402M
Step 2. Choose either one of below 2 options:
Option1. Laptop / Desktop - Go to http://prc2402m.setup or https://prc2402m.setup >
login
Option2. Mobile phone - Launch mXtend App > Existing Setup > login
Why is the Client List page not showing up after clicking onto the page link?
Ans. Client list page loading may take an approximately 12 seconds, please wait a little
while more as the request is being processed. Note that every time it is clicked, the request
to pull client list is being reprocessed.
Can the PRC2402M support AP mode?
Ans. Yes. PRC2402M can support AP mode. Note that in AP mode, all NAT or Firewall
related features (example DDNS, Port forwarding) will not be available.
How do I set PRC2402M as AP mode instead of default Router mode?
Ans. From Factory default mode, Select AP Mode during Setup Wizard
How to set the PRC2402M to support VLAN Internet setting?
Ans. Follow below steps;
Step 1. Connect a PC / Laptop / Mobile to PRC2402M and Login (http://prc2402m.setup
or through mXtend App)
Step 2. Click Setup > click Internet Settings > click VLAN > Fill in the correct VLAN
values and click Apply to proceed.
Step 3. Connect the Set Top Box to PRC2402M main router’s LAN 3

PRC2402M FAQ
v1.0_150920
Page 4 / 7
Example:
Does PRC2402M support IPTV Set Top Box / VOIP phone connection at Node?
Ans. Currently, IPTV Set Top Box and VOIP phone connection has to be connected to the
PRC240M main router unit. Support for connection at node side is currently not available.
How do I know what VLAN values to set for my subscribed ISP for
Internet/IPTV/VOIP service?
Ans. For best accurate information, please do check with your ISP. Below table information
may serve as setting guideline.
a. For Singapore
Operators Singtel Starhub M1
Connection Type DHCP DHCP DHCP
VLAN ID
Internet 10 0 0
IPTV 20
Starhub IPTV connection is
through its ONT/ONR. No
settings required onRouter
0
VOIP
Digital phone is directly
connected to the ONT/ONR
Digital phone is directly
connected to the ONT/ONR.No
settings required onRouter
Digital phone is directly
connected to the ONT/ONR.No
settings required onRouter
VLAN Priority ID
Internet 0 0 0
IPTV 4
Starhub IPTV connection is
through its ONT/ONR. No
settings required onRouter.
0
VOIP
Digital phone is directly
connected to the ONT/ONR
Digital phone is directly
connected to the ONT/ONR.No
setings required on Router.
Digital phone is directly
connected to the ONT/ONR.No
setings required on Router.

PRC2402M FAQ
v1.0_150920
Page 5 / 7
b. For Malaysia
What do the LED different colour/behaviour mean?
Ans. Refer to below table;
LED Behaviour
Mesh Router
Mesh Node
Solid Purple
Starting-Up / Booting-Up
Solid Blue
The internet connection is up
The connection between the Mesh
Node and the Mesh Router or another
Mesh Node in the system is good
Blinking Blue
The Mesh Pairing or TouchLink
process initiated and ongoing
The Mesh Pairing or TouchLink
process initiated and ongoing
Solid Red
-
The connection between the Mesh
Node and the Mesh Router or another
Mesh Node is weak
Blinking Red
The Router has no internet
connection
1) The Node is unable to connect to
the Mesh Router or another Node
2) The Node has no internet
connection
What should I do and Who to contact for suspected security breach?
Ans. Should you suspect that your Wi-Fi or WebLogin or App Login password has been
breached, please do the following steps immediately. For further assistance, we are reachable
at support@prolink2u.com.
Step 1. Go to http://prc2402m.setup > login > click Setup > click Login Password >
change the password and click Apply
Operators TM Fiber Unifi MaxisONE Fiber TIME Fiber Broadband
Connection Type PPPoE PPPoE PPPoE
VLAN ID
Internet 500 621 0
IPTV 600 823 0
VOIP 400 822 0
VLAN Priority ID
Internet 0 0 0
IPTV 0 0 0
VOIP 0 0 0

PRC2402M FAQ
v1.0_150920
Page 6 / 7
Step 2. Login with the new password > click Wi-Fi > click Wi-Fi Configuration >
change both Wi-Fi SSID and Wi-Fi Password > click Apply
How to allow my Smart-Home devices discoverable when connected to the
mesh?
Ans.
A. If it is operating in Router Mode - Please ensure the UPNP is enabled by default.
B. If it is operating in AP mode, please ensure that your main router’s UPnP feature is enabled.
How to enable / disable UPnP feature in PRC2402M?
Ans. Follow below steps;
Step 1. Go to http://prc2402m.setup > login > click Setup > click Network Tools > click UPNP
Step 2. Click either Enable or Disable > click Save

PRC2402M FAQ
v1.0_150920
Page 7 / 7
How to reserve IP Address to a specific device?
Ans. Follow below steps;
Step 1. Go to http://prc2402m.setup > login > click Setup > click Client List > click
Static IP
Step 2. Fill in the fields > click [+]
Notes:
a. Ensure the Assigned IP Address is not clashing with any of existing connected
client.
b. Ensure that the MAC Address tallies the actual device to be assigned.
c. IF the device is currentlyconnected to the mesh, power off / on the device again
so that it is able do get the newly assigned IP Address.
d. Currently it supports up to 10 DHCP IP reservation list.
How to recover Internet after connecting ISP ONT to PRC2402M WAN port?
Ans. Follow below steps;
Step 1. Ensure/double check if there is a need to have VLAN settings configured on
the subscribed ISP. Please proceed to set accordingly if there is a need to set VLAN.
Step 2. Power-Off both ONT and PRC2402M router unit for 30 minutes
Step 3. After 30 minutes, Power-On the ONT and wait until Internet LED turns Green.
Step 4. Ensure that the physical connection from ONT to PRC2402M is correct (ONT
LAN port to PRC2402M WAN port).
Step 5. Power-On the PRC2402M unit.
Other manuals for Xtend PRO
1
This manual suits for next models
1
Table of contents
Other PROLiNK Network Hardware manuals
Popular Network Hardware manuals by other brands

netsys
netsys NVF-2400S user manual

Intel
Intel SS4200-E - Entry Storage System NAS Server Guía de usuario de inicio rápido

Advantech
Advantech PCLD-8751 user manual

Juniper
Juniper Junos Space JA2500 quick start

Landis+Gyr
Landis+Gyr Gridstream IV Series User and installation guide

One Identity
One Identity Safeguard for Privileged Sessions T1 installation guide