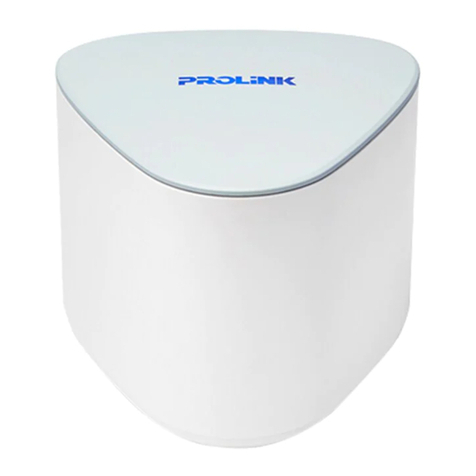
PROLiNK Xtend PRO User manual

User Manual
PROLiNK®Xtend PRO
Whole Home Mesh Wi-Fi System
PRC2402M
v. 1.1

ii
Copyright
The contents of this publication may not be reproduced in any part or as a whole, stored,
transcribed in an information retrieval system, translated into any language, or transmitted in
any form or by any means, mechanical, magnetic, electronic, optical, photocopying, manual, or
otherwise, without the prior written permission.
Trademark
All products, company, brand names are trademarks or registered trademarks of their
respective companies. They use for identification purpose only. Specifications are subject to be
changed without prior notice.
CE Declaration of Conformity
This equipment complies with the requirements relating to electromagnetic compatibility, EN
55022/A1 Class B.
Please read this entire manual before using this device, paying extra attention to these safety
warningsandguidelines.Pleasekeepthismanualinasafeplaceforfuturereference.
•This device is intended for indoor use only.
•Do not expose this device to wateror moistureof any kind. Ifmoisturedoes get in or on
the device, immediately unplug it from the power source, then allow it to fully dry before
reapplyingpower.
•Do not touch the device or any connected cables with wet hands.
•Unplugthedevicefromitspowersourceifitwill gounusedforalongperiod of time.
•Clean using a soft, dry cloth only. Do not use chemical cleaners, solvents, or
detergents. For stubborn deposits, moisten the cloth with warm water.
•This device has no user serviceable parts. Do not attempt to open, service, or
modify this device.

iii
Preface
Revision
Date
Descriptions
1.0
7/2/2020
Initial release
1.1
1/9/2020
Content Update

iv
TABLE OF CONTENTS
Introduction...............................................................................................................................................................1
Features...............................................................................................................................................................1
Hardware Overview.............................................................................................................................................2
Xtend Pro LED Indicator......................................................................................................................................3
Getting Started..........................................................................................................................................................4
Wi-Fi Mesh Placement Guide..............................................................................................................................4
Physical Connectivity Setup - PRC2402M as Router or Access Point (AP) Mode.............................................5
Setting up the PRC2402M as a Mesh Node .......................................................................................................7
Option 1: Via Physical Pairing Button.............................................................................................................7
Option 2: Via Web Browser............................................................................................................................8
Accessing the GUI (Graphical User Interface) .......................................................................................................10
Web User Interface Configuration.....................................................................................................................10
Home Page...................................................................................................................................................16
Status ...........................................................................................................................................................16
Current Mode and the Internet Connectivity............................................................................................. 16
Client List Information............................................................................................................................... 17
Mesh Network Status................................................................................................................................ 17
Device Information.................................................................................................................................... 18

v
Wizard ..........................................................................................................................................................18
Router Wizard........................................................................................................................................... 19
AP Wizard................................................................................................................................................. 20
Wi-Fi .............................................................................................................................................................21
Wi-Fi Configuration................................................................................................................................... 21
Mesh Network........................................................................................................................................... 22
TouchLinkTM.............................................................................................................................................. 22
Region Settings ........................................................................................................................................ 23
2.4GHz and 5GHz Wireless Settings ....................................................................................................... 24
Setup ............................................................................................................................................................25
Internet Setting ......................................................................................................................................... 26
DHCP Settings.......................................................................................................................................... 28
Client List.................................................................................................................................................. 30
QoS Settings............................................................................................................................................. 32
USB Storage............................................................................................................................................. 33
DDNS........................................................................................................................................................ 34
Network Tools........................................................................................................................................... 35
Security Management............................................................................................................................... 36
Time Settings............................................................................................................................................ 36
LED Control .............................................................................................................................................. 37

vi
Login Password........................................................................................................................................ 37
Backup/Restore Settings.......................................................................................................................... 38
Firmware Upgrade.................................................................................................................................... 39
Device Status............................................................................................................................................ 41
Device Reboot .......................................................................................................................................... 42
App User Interface Configuration......................................................................................................................43
Wi-Fi Configuration.......................................................................................................................................45
Adding New Mesh Node Using mXtend App ...............................................................................................46
Technical Specification...........................................................................................................................................48

PRC2402M User Manual v1.1
1
Introduction
Xtend Pro is a Whole Home Mesh Networking System featuring a seamless wireless
experience for users to enjoy high-speed live-streaming, faster downloads and minimal video-
buffering. Using the newest mesh technology, the scalable mesh system can easily support
strong and stable Wi-Fi connection in home sizes of up to 6,000ft with an aggregated wireless
speed of up to 2100Mbps.
Features
•Easy Setup - Xtend Pro units comepre-paired out ofthe box, just plug inand get started.
•Seamless Roaming - Enjoy seamless roaming without experiencing disconnection.
•TouchLinkTM - Tap and connect to Wi-Fi without having to create password for guests.
•Extensive Coverage - Provide full Wi-Fi coverage throughout the whole home/office.
•Band Steering - Prioritize dual-band capable clients to a less crowded Wi-Fi network.
•MU-MIMO - Create highly efficient Wi-Fi network that can handle a greater number of
connected devices.
•Security - Safeguard your home network with a firewall and wireless encryption.
•Extend Existing Coverage - Connect Xtend Pro to the existing router to expand your
wireless coverage.
•Scalable Network - Add extra Xtend Pro unit(s) up to total 8 nodes to provide more
coverage.
•Gigabit Ethernet Ports - Three Ethernet ports support 10/100/1000Mbps speed

PRC2402M User Manual v1.1
2
Hardware Overview

PRC2402M User Manual v1.1
Page 3 / 49
Xtend Pro LED Indicator
LED Behaviour
Mesh Router
Mesh Node
Solid Purple
Starting-Up / Booting-Up
Solid Blue
The internet connection is up
The connection between the Mesh
Node and the Mesh Router or
another Mesh Node in the system
is good
Blinking Blue
The Mesh Pairing or TouchLink
process initiated and ongoing
The Mesh Pairing or TouchLink
process initiated and ongoing
Solid Red
-
The connection between the Mesh
Node and the Mesh Router or
another Mesh Node is weak
Blinking Red
The Router has no internet
connection
1) The Node is unable to connect
to the Mesh Router or another
Node
2) The Node has no internet
connection

PRC2402M User Manual v1.1
Page 4 / 49
Getting Started
To setup PRC2402M you need to ensure the following item in the list is available.
•Internet Access (DSL, Modem or existing Wireless Router).
•Ethernet Cable with RJ45 connector at both ends.
•Computer equips with Ethernet Network adapter (10Base-T or 100Base-TX or
1000Base-TX) with capability IEEE802.11a/b/g/n/ac.
•Web Browser such as (Microsoft Edge, Chrome, Firefox, or Safari)
Wi-Fi Mesh Placement Guide
•A solid Blue LED lighting indicates that the Mesh is performing at its optimal strength
•Avoid placement of Mesh Node units with high potential of signal obstruction
(e.g. walls, doors, aquariums) or any of Bluetooth/Devices with high wireless
transmission (e.g microwave) within a 30cm radius.
•Ensure that each mesh unit is spread out evenly
•For multi-storey homes, position mesh router units in open space or elevated positions
such as shelfs or table tops.

PRC2402M User Manual v1.1
Page 5 / 49
Physical Connectivity Setup - PRC2402M as Router or Access
Point (AP) Mode
Step 1. Identify the master Mesh Router (Blue Unit) to be connected to the existing Internet
Service
Step 2. Power off all existing Internet source from your equipment / modem / router provided
by your ISP (Internet Service Provider)
Step 3. Use the provided LAN cable to connect your Internet source equipment/modem’s LAN
port to the Mesh Router’s WAN port (WAN/LAN port)
Step 4. Power on the existing Internet source equipment/modem/router provided by the ISP
Step 5. Connect a LAN cable from PC/laptop to the Mesh Router’s LAN port
Step 6. Finally, power on your Mesh router with the provided power adapter (DC 5V 3A)

PRC2402M User Manual v1.1
Page 6 / 49
Example diagram for AP mode physical setup:
Step 1. Turn OFF Main Router/Existing Router
Step 2. Connect Ethernet cable between Main/Existing Router LAN ports to PRC2402M
WAN/LAN Port.
Step 3. Connect Ethernet cable between Computer LAN ports to PRC2402M LAN port.
Step 4. Turn ON power Main/Existing Router and PRC2402M Mesh Router. Please ensure
the power LED indicator is light up once turn-on. When the PRC2402M is ready to
set up, the LED indicator will Solid Blue

PRC2402M User Manual v1.1
Page 7 / 49
Setting up the PRC2402M as a Mesh Node
PRC2402M is a Mesh-Ready device. To set up your mesh system, you will need at least two
units of PRC2402M. First unit is to be connected to main Internet source (known as Mesh
Router) and the second PRC2402M as the Mesh Node unit.
You may add additional PRC2402M to your existing PRC2402M Mesh System as Mesh Node.
This will help increase the coverage of your wireless coverage.
For Starter Kit (3-Unit or 2-Unit), all the node(s) has been pre-paired with the Mesh Router Unit
from the box. Please follow Option 1 or Option 2 as described below to add a 1-Unit to existing
mesh system.
Option 1: Via Physical Pairing Button
Step 1. Place the new Mesh Node unit near the existing Mesh Router Unit
Step 2. Plug the Mesh Node unit with the provided power adapter and power on.
Step 3. Wait for the unit to fully boot up, indicated by LED Blinking Red
Step 4. Press and Hold the Pair Button for Two Seconds on Mesh Router Unit.
When the pairing is activated, the LED will be Blinking Blue
Step 5. Press and Hold the Pair Button for Two Seconds on the Mesh Node Unit. When
the pairing is activated, the LED will be Blinking Blue

PRC2402M User Manual v1.1
Page 8 / 49
Step 6. Wait for the Pairing sequence to complete, once successful, both the Mesh
Router LED and the Mesh Node LED will be solid blue
Option 2: Via Web Browser
Step 1. Connect your computer to the existing Mesh System, launch a web browser and
access via any one of below options:
http
https
http://prc2402m.setup
https://prc2402m.setup
http://192.168.123.254
https://192.168.123.254
http://the_mesh_router_IP_Address
https://the_mesh_router_IP_Address
Note for https, when you are prompted with ‘Your Connection is not private’ page,
click on (i) Advanced, followed by (ii) Proceed to 192.168.123.254 (unsafe), as per
below screenshot example:
Step 2. Login and navigate to Wi-Fi > Mesh Network
Step 3. Give a name for the new Mesh Node where it is intended to be places and enter
the 5GHz MAC Address respectively. The 5GHz Mac Address information can be found
from the Product Label located beneath the Mesh Node unit. Enter the MAC Address
Information in All Capital letters.

PRC2402M User Manual v1.1
Page 9 / 49
Step 4. Press the Plus Button [+]
Step 5. Wait until the Mesh Node’s LED turns Solid Blue indicating that the pairing is
successful.
Step 6. Move the node unit to the desired location. For placement guide, refer to Wi-Fi
Mesh Placement Guide covered in earlier section.

PRC2402M User Manual v1.1
Page 10 / 49
Accessing the GUI (Graphical User Interface)
PRC2402M equipped with Web-based and mXtend App Utility configuration specially design
for Desktop and Mobile Phone. All the setting interface is simple and easy to configure. For
Desktop, Web Utility is not restricted to Microsoft Edge only, but the user can enter through
Mozilla Firefox, Chrome, Internet Explorer or Apple Safari. With the mXtend App for Mobile
phone, it provides convenience and hassle-free management to your PROLiNK Whole Home
Mesh System PRC2402M.
Web User Interface Configuration
1. Run any web browser that available in your computer. On the address bar enter the
default URL for PRC2402M.
http
https
http://prc2402m.setup
https://prc2402m.setup
http://192.168.123.254
https://192.168.123.254
http://the_mesh_router_IP_Address
https://the_mesh_router_IP_Address
Note for https, when you are prompted with ‘Your Connection is not private’ page,
click on (i) Advanced, followed by (ii) Proceed to 192.168.123.254 (unsafe), as per
below screenshot example:

PRC2402M User Manual v1.1
Page 11 / 49
2. Enter the Web GUI Password. Default password can be found at the product label. Do
note that password is Case-Sensitive.
3. Upon login, set Time Zone and New Login Password. Click Save to proceed. Note that
the New Login Password is the password that you will require for subsequent login to
through Web GUI and App.

PRC2402M User Manual v1.1
Page 12 / 49
For better security, it is highly recommended to set complex password.
4. To set PRC2402M as Router, select Router Wizard and complete the following steps:
a. Select Respective WAN Connection Type as determined by the ISP (Internet
Service Provider), otherwise, leave it as DHCP (Dynamic IP)
b. Set the new SSID (Default: PROLiNK_Mesh_XXXX), and new Wi-Fi password
(Default: refer to product label)
c. Click Apply

PRC2402M User Manual v1.1
Page 13 / 49
5. To set PRC2402M as AP, select AP Wizard and complete the following steps:
a. Set the new SSID (Default: PROLiNK_Mesh_XXXX), and new Wi-Fi password
(Default: refer to product label)
b. Click Apply
c. NOTE: to re-access the PRC2402M GUI after the setting above, go to
http://prc2402m.setup or https://prc2402m.setup.

PRC2402M User Manual v1.1
Page 14 / 49
Other manuals for Xtend PRO
1
This manual suits for next models
1
Table of contents
Other PROLiNK Network Hardware manuals
Popular Network Hardware manuals by other brands

General DataComm
General DataComm SpectraComm SDT Installation and operation manual

Raritan
Raritan DOMINION SX - user guide

Perle
Perle IOLAN SCG Series Hardware installation guide

Wavion
Wavion WCPEn-2400-I quick start guide

TelcoBridges
TelcoBridges TMP6402 DC Quick installation guide

Worldcast Systems
Worldcast Systems AUDEMAT FM PROBE Quick Start Notice