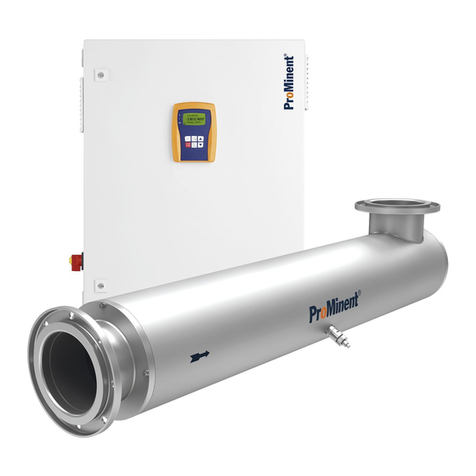
ProMinent DULCODOS DSPb Pool Professional User manual

DULCODOS DSPb
Pool Professional
Assembly and operating instructions
A3693
Target group: at least instructed personnel
EN
Original operating instructions (2006/42/EC)Part no. 990279 Version: BA DD 036 05/23 EN
Please carefully read these operating instructions before use. · Do not discard.
The operator shall be liable for any damage caused by installation or operating errors.
The latest version of the operating instructions are available on our homepage.

In order to make it easier to read, this document uses the male
form in grammatical structures but with an implied neutral sense.
The document is always aimed equally at women, men and
gender-neutral persons. We kindly ask readers for their under‐
standing in this simplification of the text.
Please read the supplementary information in its entirety.
Information
This provides important information relating to the
correct operation of the unit or is intended to make
your work easier.
Warning information
Warning information includes detailed descriptions of the haz‐
ardous situation, see
Ä Chapter 2.2 ‘Labelling of Warning Informa‐
tion’ on page 10
.
The following symbols are used to highlight instructions, links, lists,
results and other elements in this document:
Tab. 1: More symbols
Symbol Description
Action, step by step.
⇨Outcome of an action.
Links to elements or sections of these instructions or other applicable documents.
nList without set order.
[Button]
Display element (e.g. indicators).
Operating element (e.g. button, switch).
‘Display/GUI’
Screen elements (e.g. buttons, assignment of function keys).
CODE Presentation of software elements and/or texts.
General non-discriminatory approach
Supplementary information
Supplemental directives
2

Table of contents
1 About this product................................................................. 5
1.1 Overview of equipment................................................. 6
1.2 Control elements........................................................... 8
2 Safety and responsibility....................................................... 9
2.1 User qualification.......................................................... 9
2.2 Labelling of Warning Information................................ 10
2.3 General safety information.......................................... 11
2.4 Intended use............................................................... 12
3 Storage and transport......................................................... 13
4 Operating concept............................................................... 14
4.1 Video tutorials in the video library............................... 14
4.2 Operating elements.................................................... 15
4.2.1 Pictograms used as operating elements.................. 17
4.3 Navigation levels......................................................... 18
4.3.1 Entering a PIN/PUK................................................. 19
4.3.2 Interactions.............................................................. 20
4.3.3 Navigation levels...................................................... 21
5 Access to the setting menus............................................... 26
6 Assembly............................................................................ 27
6.1 Wall-mounted.............................................................. 27
6.2 Fit the antikink device for the bleed line...................... 28
6.3 Hydraulic installation................................................... 29
6.3.1 Metering system...................................................... 30
6.3.2 Sensors.................................................................... 33
6.4 Electrical installation................................................... 33
6.4.1 Connect power supply............................................. 34
6.4.2 Cable Cross-Sections and Cable End Sleeves....... 34
7 Start up............................................................................... 35
7.1 Preparation................................................................. 35
7.2 Adjusting the flow sensor switching point................... 36
7.3 Priming and venting (with an alpha or Beta pump)..... 37
7.4 Calibration................................................................... 37
7.4.1 General information on calibration........................... 38
7.4.2 Operation and calibration......................................... 39
7.4.3 Calibrate: measured variable, pH............................ 42
7.4.4 Calibrate: measured variable, ORP......................... 44
7.4.5 Calibrate: measured variable, free chlorine............. 45
7.4.6 Calibrate: measured variable, total available
chlorine.................................................................... 46
7.4.7 Calibrate: measured variable, total chlorine............ 46
8 Operational pause (e.g. over-wintering).............................. 47
9 Troubleshooting, maintenance and repair of the bypass fit‐
ting...................................................................................... 48
9.1 Diagnostics and troubleshooting................................. 48
9.2 Maintenance/repair..................................................... 48
9.2.1 Maintenance intervals.............................................. 49
9.2.2 Cleaning dismantled sensor modules...................... 50
9.2.3 Replacing or retrofitting sensor modules................. 51
Table of contents
3

9.2.4 Replacing or retrofitting the module holder.............. 51
9.3 Retrofit kits, spare parts and accessories................... 53
9.3.1 Retrofit kits............................................................... 53
9.3.2 Spare parts.............................................................. 54
9.3.3 Accessories............................................................. 58
10 Replacing the chemical storage tanks................................ 59
11 Disposal of used parts........................................................ 60
12 Drawings, drilling and external dimensions of the DUL‐
CODOS............................................................................... 61
13 Technical data..................................................................... 63
14 Spare parts and accessories.............................................. 64
14.1 Spare parts............................................................... 64
14.2 Maintenance kits for metering pumps....................... 64
14.3 Maintenance kits for measured variables................. 65
14.4 Accessories.............................................................. 65
15 EC Declaration of Conformity............................................. 66
16 Index................................................................................... 68
Table of contents
4

1 About this product
Metering systems are designed for the treatment of swimming pool
water. Pre-assembled and fully-wired ready for use, the metering
systems take on the job of pH value adjustment and disinfection
with chlorine.
A3694
Fig. 1: The metering system
The metering systems include all the necessary components
mounted on a plate:
nSensors
nController
nMetering pumps
About this product
5

1.1 Overview of equipment
1
2
3
45
67 8 910
11
A3695
Fig. 2: Overview of equipment for the metering system DUL‐
CODOS Pool Professional, with all options and metering pumps
Beta.
1. Controller
2. Flow sensor
3. Ball valve, inlet side
4. Dirt filter
5. Flow module with flow sensor
6. pH sensor*
7. ORP sensor*
8. Sensor for total chlorine*
9. Sensor for free chlorine*
10 Sample valve
11 Ball valve, outlet side
* To be assembled by the customer. These components are
ready for subsequent installation, but are supplied separately
to avoid damage in transit.
Components
About this product
6

12a
13a
14a
15a
12b
13b
14b
15b
A0990
Fig. 3: Overview of equipment: DULCODOS Pool Professional,
with all options and metering pumps Beta.
12a Injection valve for acid
13a Metering pump, acid
14a Cable for acid level switch (only with metering pump
“Beta”)
15a Suction assembly, acid
12b Injection valve, disinfection
13b Metering pump, disinfection
14b Cable for disinfection level switch (only with metering
pump “Beta”)
15b Suction assembly, disinfection
not shown Multifunctional valve, acid
not shown Multifunctional valve, disinfection
About this product
7

1.2 Control elements
1
2
3a
3b
4
A3696
Fig. 4: Control elements: DULCODOS Pool Professional, with all
options and metering pumps Beta
1 Controller display
2 Flow meter
3a/3b Metering pump stroke adjustment dial
4 Ball valve, outlet side
- Multifunctional valve (not shown)
About this product
8

2 Safety and responsibility
2.1 User qualification
WARNING!
Danger of injury with inadequately qualified per‐
sonnel
The operator of the system / equipment is respon‐
sible for ensuring that the qualifications are ful‐
filled.
If inadequately qualified personnel work on the unit
or loiter in the hazard zone of the unit, this could
result in dangers that could cause serious injuries
and material damage.
– All work on the unit should therefore only be
conducted by qualified personnel.
– Unqualified personnel should be kept away
from the hazard zone.
The pertinent accident prevention regulations, as
well as all other generally acknowledged safety
regulations, must be adhered to.
Training Definition
Instructed personnel An instructed person is deemed to be a person who has been instructed and,
if required, trained in the tasks assigned to him and possible dangers that
could result from improper behaviour, as well as having been instructed in the
required protective equipment and protective measures.
Trained user A trained user is a person who fulfils the requirements made of an instructed
person and who has also received additional training specific to the system
from the manufacturer or another authorised distribution partner.
Trained, qualified per‐
sonnel
A trained, qualified employee is deemed to be a person who is able to assess
the tasks assigned to him and recognize possible hazards based on his
training, knowledge and experience, as well as knowledge of pertinent regula‐
tions. A trained, qualified employee must be able to perform the tasks
assigned to him independently with the assistance of drawing documentation
and parts lists. The assessment of a person's technical training can also be
based on several years of work in the relevant field.
Electrical technician An electrical technician is able to complete work on electrical systems and rec‐
ognise and avoid possible dangers independently based on his technical
training and experience as well as knowledge of pertinent standards and regu‐
lations. An electrical technician must be able to perform the tasks assigned to
him independently with the assistance of drawing documentation, parts lists,
terminal and circuit diagrams. The electrical technician must be specifically
trained for the working environment in which the electrical technician is
employed and be conversant with the relevant standards and regulations.
Service The Service department refers to service technicians, who have received
proven training and have been authorised by the manufacturer to work on the
system.
Safety and responsibility
9

2.2 Labelling of Warning Information
These operating instructions provide information on the technical
data and functions of the product. These operating instructions pro‐
vide detailed warning information and are provided as clear step-
by-step instructions.
The warning information and notes are categorised according to
the following scheme. A number of different symbols are used to
denote different situations. The symbols shown here serve only as
examples.
DANGER!
Nature and source of the danger
Consequence: Fatal or very serious injuries.
Measure to be taken to avoid this danger.
Description of hazard
– Denotes an immediate threatening danger. If
the situation is disregarded, it will result in fatal
or very serious injuries.
WARNING!
Nature and source of the danger
Possible consequence: Fatal or very serious inju‐
ries.
Measure to be taken to avoid this danger.
– Denotes a possibly hazardous situation. If the
situation is disregarded, it could result in fatal
or very serious injuries.
CAUTION!
Nature and source of the danger
Possible consequence: Slight or minor injuries.
Material damage.
Measure to be taken to avoid this danger.
– Denotes a possibly hazardous situation. If the
situation is disregarded, it could result in slight
or minor injuries. May also be used as a
warning about material damage.
NOTICE!
Nature and source of the danger
Damage to the product or its surroundings.
Measure to be taken to avoid this danger.
– Denotes a possibly damaging situation. If the
situation is disregarded, the product or an
object in its vicinity could be damaged.
Introduction
Safety and responsibility
10

Type of information
Hints on use and additional information.
Source of the information. Additional measures.
–
Denotes hints on use and other useful informa‐
tion. It does not indicate a hazardous or dam‐
aging situation.
2.3 General safety information
WARNING!
Danger from hazardous substances!
Possible consequence: Fatal or very serious inju‐
ries.
Please ensure when handling hazardous sub‐
stances that you have read the latest safety data
sheets provided by the manufacture of the haz‐
ardous substance. The actions required are
described in the safety data sheet. Check the
safety data sheet regularly and replace, if neces‐
sary, as the hazard potential of a substance can be
re-evaluated at any time based on new findings.
The system operator is responsible for ensuring
that these safety data sheets are available and that
they are kept up to date, as well as for producing
an associated hazard assessment for the worksta‐
tions affected.
Live parts
nMeasure: Disconnect the mains plug prior to opening the
housing.
nDe-energise damaged or faulty units, or units that have been
tampered with, by disconnecting the mains plug.
Schuko standard European socket with protective earth conductor
nIt is essential to guarantee with units with plugs (CEE 7/7) and
sockets that the Schuko standard European socket is con‐
nected to the protective earth connector on site.
Electronic faults
nDo not route the mains connection cable and data cable
together with cables that are prone to interference.
nMeasure: Take appropriate interference suppression meas‐
ures.
Unauthorised access
nMeasure: Ensure that there can be no unauthorised access to
the equipment.
Operating errors
nEnsure that the equipment is only operated by adequately
qualified and technically expert personnel.
nAlso observe the operating instructions for the controllers and
fittings and any other assemblies, such as sensors, sample
water pump ...
nThe operator is responsible for ensuring that personnel are
qualified.
Safety and responsibility
11

Warning of feed chemical spraying around.
nSpraying feed chemical caused by a leak.
nRegularly check the system for leaks.
nEnsure that the system with all components can be de-ener‐
gised from outside the danger zone by appropriate measures
(e.g. Emergency Stop switch etc.).
Correct sensor operation / run-in period.
nDamage to the product or its surroundings.
nCorrect measurement and metering is only possible if the
sensor is working perfectly.
nIt is imperative that the sensors’ run-in periods are adhered to.
nFactor in run-in periods when planning commissioning.
nIt may take an entire working day to run in the sensor.
nPlease refer to the operating instructions for the sensor.
Correct sensor operation
nCorrect measurement and metering is only possible if the
sensor is working perfectly.
nCheck and calibrate the sensor regularly.
Compensation for control deviations
nThis controller cannot be used in control circuits which require
rapid compensation (< 30 seconds).
2.4 Intended use
The unit is designed to measure and control the pH value and dis‐
infectant content in swimming pools. Usually the integrated
metering pumps are intended for metering the necessary chemi‐
cals. Only connect other feeder assemblies, such as electrolysis
systems or calcium hypochlorite systems, if these systems are
intended for use in swimming pools.
Only use the unit in accordance with the technical details and
specifications provided in these operating instructions and in the
operating instructions for the individual components (such as sen‐
sors, fittings, calibration instruments, metering pumps etc.).
All other uses or modifications are prohibited.
Safety and responsibility
12

3 Storage and transport
nUser qualification, storage and transport: instructed personnel,
Ä Chapter 2.1 ‘User qualification’ on page 9
Basic rules.
nPrior to storage or transport, make sure that the metering sys‐
tems are free from feed chemicals and water.
nFlush out the wetted parts including the hoses with clean pure
water.
nStore and transport the metering systems in their original pack‐
aging.
nAlso protect the packaged metering systems from damp, expo‐
sure to chemicals and mechanical effects.
nPlease also observe the operating instructions for the control‐
lers and fittings and other assemblies, such as sensors, filter,
metering pump ...
Storage temperature: 0 ... 50 °C
Air humidity: < 95% relative humidity, non-condensing
If the metering systems are stored as an assembly with the sen‐
sors, then the storage and transport conditions must be appro‐
priate for the component with the least resistance to external influ‐
ences.
Ambient conditions for storage and
transport without sensors
Storage and transport
13

4 Operating concept
4.1 Video tutorials in the video library
Home display > Hamburger menu > System settings > Video
library.
System settings 2022-06-22
14:21:28
START 1
Login
Not assigned
Language
EN
Display
Display, colour scheme, screen lock,
maintenance interval, date, time
System
Network
User administration
Video library
Unit settings, Software update,
Device restart
LAN, Wi-Fi, IP, DHCP client, DHCP server
Add/delete user, change passwords
Tutorials
Web services
Intranet, Web server, FTP server, VNC server, SSL
A2520
CAN
Fig. 5: ‘System settings’
Important explanations about processes, such as calibration, can
be viewed as video tutorials in the video library.
Operating concept
14

4.2 Operating elements
The device is operated by a touchscreen as a combined input and
output interface between man and machine (HMI).
The capacitative touchscreen display provides an overview of all
functions. It reacts like a smartphone.
System overview System designation
System 1... 3
Pool overview
2018-06-22
14:21:28
Pool name 1
1ECO 2ECO
Pool name 3
3
CAL
Input screen locked!
Swipe to unlock.
A2495
Fig. 6: Locked screen
To unlock: use the tip of your finger to move the left icon and
swipe the icon to the right towards the lock . Move the icon
until it covers the lock . Tap your finger briefly on the lock
and the lock opens
ðThe lock opens.
Operating elements
Operating concept
15

Operating elements
Help topics
System overview
2018-11-06
14:21:28
CAL
Pool name
System 1... 3
STOPSTOP
Pool measured value Pool name
Off
System overview
pH Target
0.00
pH
Dosing
ON
Dosing
-100.0 %
ON
Target 0
ORP
mV
Dosing
Target 0.0
Temperature
Dosing
Target 0.00
Free chlorine
ppm
Dosing
Target 0.00
Total chlorine
m
3
/h
Dosing
Cl combined Target 0.00
OFF
START 1
System information
Start/Stop
Pool
Home
Start screen
Settings
Recorder
System overview
Status display of
pools and link to
start screen
back
Alarms
Errors & warnings
Calibrate
active pool
Page index
Menu
Pool name 1
OFF
START 1
06/11/2017
System overview
CAL
active pool
14:21:28
A2519
ON
Fig. 7: The individual operating elements
Alternate
‘ON/ OFF’
to
‘START/STOP’
status:
n
‘ON’
status ➨
‘STOP’
pool display (at pool level),
n
‘OFF’
status ➨
‘START’
pool display (at pool level).
If the status display for a pool indicates
[ON]
status, then the
[STOP]
key can be used to stop the control and outputs of this
pool.
If the status display for a pool indicates
[OFF]
status, then the
[START]
key can be used to start the control and outputs of this
pool.
All pools can be stopped at system level using the
[STOP]
key
[system 1 ... n]
. Each pool can then only be started individually.
Operating concept
16

4.2.1 Pictograms used as operating elements
Tab. 2: Pictograms used as operating elements.
Picto. Name Meaning and function
Active pictograms are highlighted, while inactive pictograms remain dimmed. Only the active pictograms
can be actuated.
System alarms This key immediately opens the global list with all system alarms.
Calibration
menu
This key immediately opens the calibration menu. You then need to select the
parameters to be calibrated.
System set‐
tings
This key immediately opens the list with all system settings.
Quick access
menu
This key immediately opens the quick access menu (
‘hamburger’
menu) . You
can then select from the various sub-menus in the
‘hamburger’
menu .
[Home]
This key takes you straight back to the screen defined as
[Home]
.
Locked lock This icon indicates that the display is locked.
Screen
recorder
This key immediately opens the view with the recorder. The screen recorder logs
all the device’s activities and measured values.
Becken 1...3
Pool status Alternate
‘ON/ OFF’
to
‘START/STOP’
status
n
‘ON’
status➨
‘STOP’
display
n
‘OFF’
status ➨
‘START’
display
2018-06-22
14:21:28
General infor‐
mation
You will find all information about the date, time, device type and links between
the various interfaces etc. displayed here.
Back This key takes you one level back in the menu.
Page index These points at the top of the display indicate that there are more pages. You can
access these pages by swiping to the left or right. The dark point marks the posi‐
tion of the visible page in the entire system.
Operating concept
17

4.3 Navigation levels
Login System designation 2018-06-22
14:21:28
Select user
A2532
Fig. 8: Login interface
Login System designation 2018-06-22
14:21:28
Select user
Name User2
User
alias User1
Service
A2533
Fig. 9: User selection interface
Login
Selecting the user
Operating concept
18

4.3.1 Entering a PIN/PUK
Login System designation 2018-06-22
14:21:28
alias User1
Service
1 2 3
4 5 6
987
0
A2534
Fig. 10: PIN entry interface
1. You can enter the PIN you have assigned here.
2. If you cannot remember your PIN, you can enter the PUK.
The PUK is supplied with the device and can be found in a
sealed envelope. It is the responsibility of the operator to
ensure that the PUK is kept safe and is available when
needed.
Call up the
‘System settings’
to enter the PUK.
System settings 2022-06-22
14:21:28
START 1
Login
Not assigned
Language
EN
Display
Display, colour scheme, screen lock,
maintenance interval, date, time
System
Network
User administration
Video library
Unit settings, Software update,
Device restart
LAN, Wi-Fi, IP, DHCP client, DHCP server
Add/delete user, change passwords
Tutorials
Web services
Intranet, Web server, FTP server, VNC server, SSL
A2520
CAN
Fig. 11: ‘System settings’
3. Tap on
‘User administration’
.
Entering a PIN/PUK
Entering a PIN
Entering a PUK
Operating concept
19

User settings 2021-06-22
14:21:28
START 1
User accounts
cNet
ChangeUser Supervisor
Service
Please change default user! PIN: 1234
+ New
u s e r acc ount
A3392
Fig. 12: You will be asked for your PUK in this menu.
4. You can only use the PUK in this menu when the PIN is
requested.
The PUK can only be used in the
‘User settings’
menu when
the user cannot remember their PIN. The PUK allows you to
view or change a new or old PIN.
4.3.2 Interactions
Help topics
System overview
2018-06-22
14:21:28
System designation
System 1... 3
Navigation principle, interaction
Swipe
Navigate to
next screen on the same
level.
Scroll
Display further content on the
same screen
.
Tap
Navigate to
following screen on
the next level.
A2518
Fig. 13: Swiping, scrolling and tapping
Operating concept
20
Table of contents
Other ProMinent Water System manuals
Popular Water System manuals by other brands

Waterboy
Waterboy VPM-T-G2 Assembly instructions

Kärcher
Kärcher WATERCLEAN A 2011201 operating instructions

Reliable
Reliable DDX Instructions for installation, operation and maintenance

Culligan
Culligan GOLD SERIES owner's guide

RIDGID
RIDGID RSWS Series Operating instructions and parts manual

Aquaporin
Aquaporin A2O Pure manual

Vetus
Vetus 1320 installation manual

Graf
Graf EcoBloc Inspect flex manual

Kelvinator
Kelvinator KGC20BNA user manual

HeadHunter
HeadHunter X-CALIBER XR-124 Installation and operation manual

Water Right
Water Right Sanitizer Plus Master Programming Manual

Zip Water
Zip Water Zip HydroTap G4 BCS100/75 Installation and operating instructions