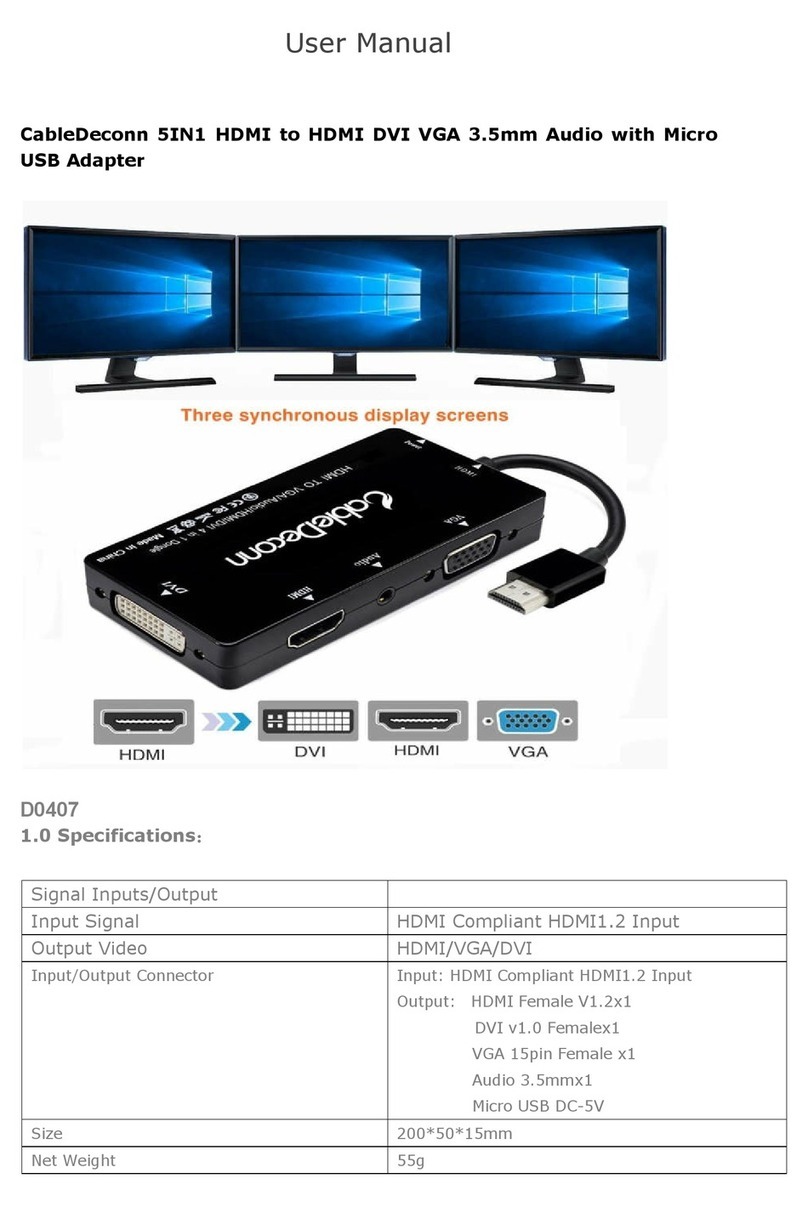
Promise SANLink 3N1 User manual

N1
Thunderbolt™ 3 to NBASE-T Ethernet Adapter
QUICK START GUIDE
© 2018 PROMISE Technology, Inc. All Rights Reserved.

About this guide
Follow the instructions in this Quick Start Guide to
connect the Thunderbolt™ 3 port and Ethernet port.
Use the SANKlink3 N1 to provide a connection from
a SAN or Ethernet network of up to 10Gbps to a host
system equipped with a Thunderbolt™ 3 port. The
SANKlink3 N1 is bus powered, so there is no need for
a power supply.
Step 1: Download and install the device driver
NOTE: Mac users might not need to install the driver
To download the Windows driver:
1. Go to www.promise.com and click on Support
at the top of the web page.
2. Find the SANLink 3 logo in the Current
Products carousel menu and click on it.
3. Click the link for SANlink3 N1. In the new
page, nd the link to the correct Driver for your
operating system.
4. Download the device driver installation
package.
To install the driver, launch the driver installation
package and follow the on-screen instructions.
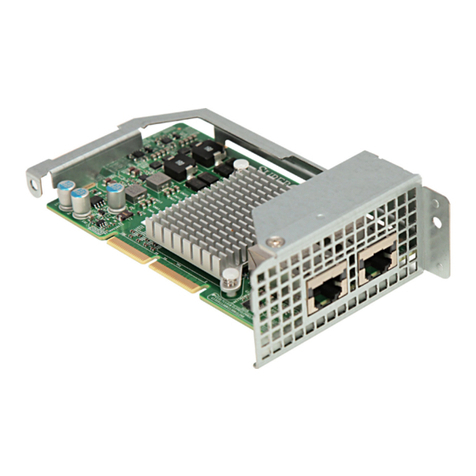
NBASE-T port LED indicators
NBASE-T port
Orange/Green
Link Speed LED
Green Link
Status LED

Step 2: Connect a Thunderbolt cable to the
workstation
Connect a Thunderbolt™ 3 cable between the
Thunderbolt™ 3 port on your SANLink3 and a
Thunderbolt™ 3 port on your computer.
See the illustration in next column for an example.
Thunderbolt™ 3 port and fan status LED indicator
Thunderbolt™ 3 port
Fan LED
Step 3: Connect to network
Connect an Ethernet cable (Cat 5e or better)
to the NBASE-T Ethernet port on the other end
of the SANLink3. Connect the other end of the
Ethernet cable to an Ethernet switch to complete
the link to the SAN or Ethernet network. The
NBASE-T connection automatically negotiates
link speed, or you can manually specify link
speed.
The NBASE-T port supports connection
speeds of 100 Mbps, and 1.0, 2.5*, 5.0* and 10
Gbps.
To manually specify a link speed, you must
change the settings of your workstation
Ethernet network connection.
Instructions are available for download at:
www.promise.com.
* These speeds require a NBASE-T enabled
switch.

Table 1: Ethernet cable requirements
Link Speed Cable Type
Maximum
Cable Length
10Gb CAT-6A 100 meters
10Gb CAT-6 55 meters
100Mb / 1Gb /
2.5Gb / 5Gb
CAT-5e
( or better ) 100 meters
Table 2: SANLink3 LED behavior
Link
Status
The upper right LED indicator for
the NBASE-T port lights GREEN
when the port is connected, blinks
GREEN for I/O activity on the port,
and is unlit when not connected.
Link
Speed
The link speed LED indicator
on the upper left of the port is lit
GREEN for 10 Gbps;
ORANGE for 100 Mbps, 5, 2.5,
and 1 Gbps.
Fan The Fan LED is located on the
same panel as the Thunderbolt™ 3
port. GREEN indicates normal and
RED indicates fan fault.

N1
Adaptador Thunderbolt™ 3 a NBASE-T Ethernet
GUÍA DE INICIO RÁPIDO
© 2018 PROMISE Technology, Inc. Todos los derechos reservados.

Sobre esta guía
Siga las instrucciones en esta Guía de Inicio Rápido para
conectar el puerto Thunderbolt™ 3 y el puerto Ethernet.
Utilice el SANLink3 N1 para proporcionar una conexión
desde una SAN o red Ethernet de hasta 10Gbps a un
sistema antrión equipado con un puerto Thunderbolt™ 3.
El SANLink3 N1 está alimentado a través del bus, por lo
tanto no hay necesidad de una fuente de alimentación.
Paso 1: Descargar e instalar el controlador del
dispositivo.
NOTA: Los usuarios Mac pueden no necesitar instalar el
controlador.
Para descargar el controlador de Windows:
1. Vaya a www.promise.com y haga clic en Support en
la parte superior de la página web.
2. Busque el logotipo SANLink 3 en el menú carrusel
Current Products y haga clic sobre él.
3. Haga clic en el enlace para SANLink3 N1. En la
página nueva, busque el enlace para el controlador
correspondiente a su sistema operativo.
4. Descargue el paquete de instalación del controlador
de dispositivo.
Para instalar el controlador, ejecute el paquete de instalación
de controlador y siga las instrucciones que aparecen en
pantalla.
Indicadores LED del puerto NBASE-T
Puerto
NBASE-T LED de estado
de enlace VERDE
Naranja/Verde
LED de velocidad
de enlace

Paso 2: Conecte un cable Thunderbolt
a la estación de trabajo
Conecte un cable Thunderbolt™ 3 entre el
puerto Thunderbolt™ 3 del SANLink3 y un puerto
Thunderbolt™ 3 de su PC.
Consulte la ilustración en la siguiente columna
para un ejemplo.
Indicador LED de estado del puerto
Thunderbolt™ 3 y el ventilador
Puerto Thunderbolt™ 3
LED de
ventilador
Paso 3: Conecte a la red
Conecte un cable Ethernet (Cat 5e o superior) al
puerto NBASE-T Ethernet en el otro extremo del
SANLink3. Conecte el otro extremo del cable Ethernet
a un conmutador Ethernet para establecer el enlace
a la SAN o red Ethernet. La conexión NBASE-T
negociará automáticamente la velocidad de enlace
o puede especicar la velocidad de enlace de forma
manual.
El puerto NBASE-T admite velocidades de
conexión de 100 Mbps, y 1,0, 2,5*, 5,0* y 10 Gbps.
Para especicar una velocidad de enlace de
forma manual, debe cambiar la conguración de la
conexión de red Ethernet de su estación de trabajo.
Se pueden descargar instrucciones en:
www.promise.com.
* Estas velocidades requieren un conmutador
habilitado por NBASE-T.

Tabla 1: Requisitos de cable Ethernet
Velocidad de
enlace Tipo de cable
Longitud
máxima de
cable
10Gb CAT-6A 100 metros
10Gb CAT-6 55 metros
100Mb / 1Gb /
2,5Gb / 5Gb
CAT-5e
( o superior) 100 metros
Tabla 2: Comportamiento del LED en el
SANLink3
Estado de
enlace
El indicador LED superior derecho
del puerto NBASE-T se ilumina
en VERDE cuando el puerto está
conectado, parpadea en VERDE
para actividad de E/S en el puerto
y está apadado cuando no está
conectado.
Velocidad de
enlace
El indicador LED de velocidad de
enlace de la parte superior izquierda
del puerto se ilumina en VERDE
para indicar 10 Gbps;
NARANJA para 100 Mbps, 1,0, 2,5,
y 5,0 Gbps.
Ventilador El LED del ventilador se encuentra
en el mismo panel que el puerto
Thunderbolt™ 3. VERDE indica el
comportamiento normal y ROJO
indica un fallo de ventilador.

N1
Thunderbolt™ 3 至NBASE-T 乙太網路轉接器
快速入門指南
© 2018 PROMISE Technology, Inc. 版權所有。

關於本指南
依本快速入門指南說明連接 Thunderbolt™ 3 連
接埠和乙太網路連接埠。 使用 SANLink3 N1 提供
SAN 連線或速度高達 10Gbps 的乙太網路至配備
Thunderbolt™ 3 連接埠的主機系統。 SANLink3 N1 為
匯流排供電,因此不需要電源供應器。
步驟 1:下載並安裝裝置驅動程式
附註: Mac 使用者可能不需要安裝驅動程式
若要下載 Windows 驅動程式:
1. 前往www.promise.com/tw/並點選網頁
頂端的
技術支援
。
2. 找到現行產品浮動切換選單中的
SANLink 3
標誌並點選。
3. 點選
SANLink3 N1
的連結。 在新頁面
中,找到適用您作業系統的正確驅動
程式連結。
4. 下載裝置驅動程式安裝套件。
若要安裝驅動程式,請啟動驅動程式安裝套件並依
照畫面上的指示進行。
NBASE-T 連接埠 LED 指示燈
NBASE-T 連接埠 綠色連結
狀態 LED
橘色/綠色
連結速度 LED

步驟 2:連接一條 Thunderbolt 纜線至工作站
使用 Thunderbolt™ 3 纜線連接您 SANLink3 上的
Thunderbolt™ 3 連接埠和電腦上的 Thunderbolt™ 3
連接埠。
如需範例請參見下欄旁的圖。
Thunderbolt™ 3 連接埠及風扇狀態 LED 指示燈
Thunderbolt™ 3 連接埠
風扇 LED
步驟 3:連接網路
連接乙太網路纜線 (Cat 5e 或以上) 至SANLink3 另
一端上的 NBASE-T 乙太網路連接埠。 將乙太網路
纜線的另一端連接至乙太網路交換器,以完成 SAN
或乙太網路的連結。 NBASE-T 連線自動交涉連結
速度,或者您可手動指定連結速度。
NBASE-T 連接
埠支援 100 Mbps 與1.0、2.5*、5.0* 及10 Gbps 的
連線速度。
若要手動指定連結速度,您必須變更工作站乙太
網路連線的設定。
操作說明可至以下網址下載:
www.promise.com。
* 這些速度皆需要 NBASE-T 交換器。

表1:乙太網路纜線要求
連結速度 纜線類型 最大纜線長度
10Gb CAT-6A 100 公尺
10Gb CAT-6 55 公尺
100Mb / 1Gb /
2.5Gb / 5Gb CAT-5e (或以上) 100 公尺
表2:SANLink3 LED 表現方式
連結狀態 連接 NBASE-T 連接埠時右上方 LED 指
示燈亮綠色,連接埠上有 I/O 活動時會
閃爍綠色,未連接時則不會亮起。
連結速度 連接埠左上方連結速度 LED 指示燈亮
綠色代表速度為 10 Gbps;亮橘色代表
100 Mbps、1.0、2.5 和5.0Gbps。
風扇 風扇 LED 位在與 Thunderbolt™ 3 連接
埠相同面板上。 綠色代表正常,而紅
色代表風扇故障。

N1
Thunderbolt™ 3到NBASE-T以太网适配器
快速入门指南
© 2018 PROMISE Technology, Inc. 保留所有权利。

关于本指南
按照本快速入门指南中的说明,连接Thunderbolt™
3端口和以太网端口。 使用SANLink3 N1提供从SAN
或以太网网络(最高10Gbps)到主机系统(配备
Thunderbolt™ 3端口)的连接。 SANLink3 N1由总线
供电,不需要电源。
步骤1:下载并安装设备驱动程序
附注: Mac用户可能不需要安装驱动程序
下载Windows驱动程序:
1. 访问hps://www.promise.com/cn/,单
击网页顶部的
技术支持
。
2. 在当现行产品轮播菜单中找到
SANLink 3
标识,单击它。
3. 单击
SANLink3 N1
的链接。 在新页面
中,找到适合您操作系统的正确驱动程
序的链接。
4. 下载设备驱动程序安装包。
安装驱动程序时,请启动驱动程序安装包,然后按照
屏幕上的说明进行操作。
NBASE-T端口LED指示灯
NBASE-T端口 绿色链接
状态LED
橙色/绿色
链接速度LED

步骤2:将Thunderbolt线连接到工作站
使用Thunderbolt™ 3线连接SANLink3的Thunderbolt™ 3
端口和电脑的Thunderbolt™ 3端口。
有关示例,请参见下一栏中的插图。
Thunderbolt™ 3端口和风扇状态LED指示灯
Thunderbolt™ 3端口
风扇LED
步骤3:连接到网络
将以太网线(Cat 5e或以上)连接到SANLink3另一
端的NBASE-T以太网端口。 将以太网线的另一端
连接到以太网交换机,以完成到SAN或以太网的链
接。 NBASE-T连接自动协商链接速度,或者您可以
手动指定链接速度。
NBASE-T端口支持100 Mbps以
及1.0、2.5*、5.0*和10 Gbps的连接速度。
如要手动指定链接速度,您必须更改工作站以太
网络连接的设置。
相关说明可从以下网址下载:
www.promise.com。
* 这些速度需要启用了NBASE-T的交换机。

表1:以太网线要求
链接速度 网线类型 网线最大长度
10Gb CAT-6A 100 m
10Gb CAT-6 55 m
100Mb / 1Gb /
2.5Gb / 5Gb
CAT-5e
(或以上) 100 m
表2:SANLink3 LED行为
链接状态 NBASE-T端口右上角的LED指示灯在
端口连接时显示绿色,端口存在I/O
活动时绿色闪烁,未连接时不亮。
链接速度 端口左上角的链接速度LED指示灯显
示绿色时表示10 Gbps;橙色时表示
100 Mbps、1.0、2.5和5.0 Gbps。
风扇 风扇LED与Thunderbolt™ 3端口位于
同一个面板上。 绿色表示正常,红
色表示风扇故障。

N1
Adaptateur Ethernet Thunderbolt™ 3 vers NBASE-T
Guide de prise en main
© 2018 PROMISE Technology, Inc. Tous droits réservés.

À propos de ce guide
Suivez les instructions de ce Guide de démarrage
rapide pour connecter le port Thunderbolt™ 3 et le
port Ethernet. Utilisez le SANLink3 N1 pour fournir
une connexion depuis un réseau SAN ou Ethernet
jusqu'à 10 Gb/s vers un système hôte équipé d'un port
Thunderbolt™ 3. Le SANLink3 N1 est alimenté par bus,
il n'y a donc pas besoin d'une alimentation électrique.
Étape 1 : Télécharger et installer le pilote
de l'appareil
REMARQUE : Les utilisateurs de Mac n'ont peut-être pas
besoin d'installer le pilote
Pour télécharger le pilote Windows :
1. Rendez-vous sur www.promise.com et cliquez sur
Support dans la partie supérieure de la page Web.
2. Trouvez le logo SANLink 3 dans le menu carrousel
Current Products et cliquez dessus.
3. Cliquez sur le lien SANLink3 N1. Dans la nouvelle
page, trouvez le lien vers le pilote correct pour votre
système d'exploitation.
4. Téléchargez le package d'installation du pilote de
l'appareil.
Pour installer le pilote, lancez le package d'installation du
pilote et suivez les instructions à l'écran.
Indicateurs DEL du port NBASE-T
Port NBASE-T DEL de statut de
liaison verte
DEL de vitesse de liaison
orange/verte

Étape 2 : Raccordement d'un câble
Thunderbolt au poste de travail
Raccordez un câble Thunderbolt™ 3 entre le port
Thunderbolt™ 3 de votre SANLink3 et un port
Thunderbolt™ 3 de votre ordinateur.
Voir l'illustration dans la colonne suivante à titre
d'exemple.
Indicateur DEL de statut du ventila-
teur et port Thunderbolt™ 3
Port Thunderbolt™ 3
DEL
ventilateur
Étape 3 : Connexion au réseau
Raccordez un câble Ethernet (Cat 5e ou supérieur)
au port Ethernet NBASE-T sur l'autre extrémité
du SANLink3. Raccordez l'autre extrémité du
câble Ethernet sur un commutateur Ethernet pour
terminer la liaison vers le réseau SAN ou Ethernet.
La connexion NBASE-T négocie automatiquement
la vitesse de la liaison, vous pouvez également
spécier manuellement la vitesse de la liaison.
Le
port NBASE-T prend en charge des vitesses de
connexion de
100 Mb/s et de 1,0, 2,5*, 5,0* et 10 Gb/s.
Pour spécier manuellement une vitesse de
liaison, vous devez modier les paramètres de
la connexion réseau Ethernet de votre poste de
travail.
Les instructions sont disponibles en
téléchargement à l'adresse suivante :
www.promise.com.
* Ces vitesses nécessitent un commutateur
compatible NBASE-T.

Tableau 1 : Exigences du câble Ethernet
Vitesse liaison Type de câble
Longueur
maximum du
câble
10 Go CAT-6A 100 mètres
10 Go CAT-6 55 mètres
100 Mo / 1 Go /
2,5 Go / 5 Go
CAT-5e
( ou supérieur ) 100 mètres
Tableau 2 : Comportement LED SANLink3
État liaison L'indicateur DEL supérieur droit
pour le port NBASE-T s'éclaire
en VERT lorsque le port est
connecté,clignote en VERT pour
l'activité d'E/S sur le port et est
éteint lorsqu'aucune connexion
n'est établie.
Vitesse
liaison
L'indicateur DEL de vitesse de
liaison sur le côté supérieur
gauche du port s'éclaire en VERT
pour 10 Gb/s ;
ORANGE pour 100 Mb/s, 1,0, 2,5
et 5,0 Gb/s.
Ventilateur La DEL du ventilateur se situe
sur le même panneau que le port
Thunderbolt™ 3. Le VERT indique
un état normal et le ROUGE
indique un dysfonctionnement du
ventilateur.
Table of contents
Languages:
