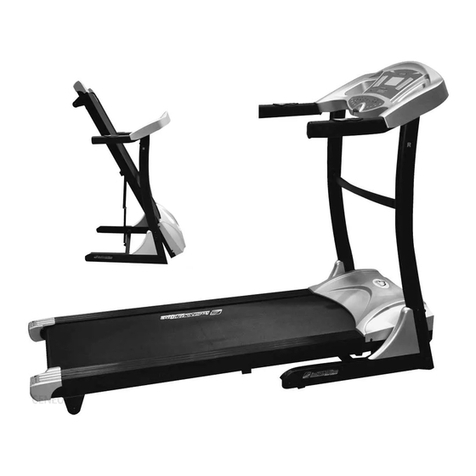
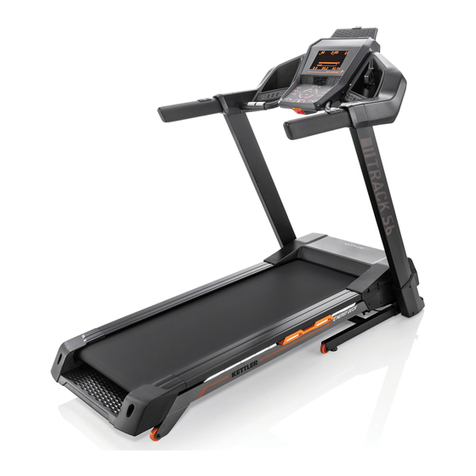
ProRunner QRS7-10 User manual

ELITE TREADMILL QRS7-10
SKU: JV03TNNABXXXXX
OWNER MANUAL

TABLE OF CONTENTS
Quality Guarantee Commitment 3
Safety Instrucons 4
Special Safety Instrucons 5
Assembly Descripon 5
Explosion Diagram 7
Explosion Details 8
Assembly Steps 10
Operang Instrucons 12
Panel Instrucons 15
Refueling Oil Process 39
Running Belt Adjustment 40
Consideraons 43
CAUTION Read this manual before using your equipment.

QUALITY GUARANTEE COMMITMENT
3
Thank you for purchasing this product. It will improve your health.
We ensure that this product is made from high-quality materials. In the event of a problem with the
product during regular use, we will repair it.
Warranty period is one year (from the date of purchase). If the product you purchase has quality problems,
please contact our customer service personnel in 12 months. Please, do not aempt to resolve the issue
without our permission. We are responsible for repairing the following accessories: frames, wires, armrest
foam, motors, moving wheels, etc. The following cases are not covered by our warranty:
• Damage for external reasons.
• Use of non-original accessories.
• Handle incorrectly by yourself.
• Fail to operate as instructed.
Quick-wear parts will not be repaired or replaced if typically worn, such as running belts.
This quality guarantee commitment is only valid for private use by family, and it does not apply to the gym
and other professional training situaons.
To purchase accessories beyond the scope of the warranty, please contact our customer service
department. Please provide the following informaon when ordering:
• Address
• Treadmill’s model
•The serial number of accessories.
• Proof of purchase where the date can be idened.
Please don’t send the product to our company before our customer service personnel conrm.
We will not bear any costs if the product is returned without our permission.

4
SAFETY INSTRUCTIONS
The design and manufacture of the product take many safety problems into account, but it is always
advisable to follow these operang instrucons. We are not responsible for any consequences caused by
irregular operaons.
1. Please carefully read the operang instrucons manual before use to ensure your safety and prevent
accidents. When training with the product, please consider your physical condion and train appropriately
and regularly to ensure that you have enough physical strength. Exercise performed incorrectly, or excess
training will be harmful to your health.
2. This product is unsuitable for children. People who are unwell, mentally decient, or lack common sense
shall not use this product unless under the guardianship of someone responsible for their safety. Children
shall not be allowed to manipulate the equipment in any way.
3. This product is suitable for home use only.
4. This product’s heart rate display does not provide data for clinical medicine.
5. The manufacturer or professional maintenance personnel must replace a damaged power line to prevent
danger.
6. Please inspect all components and ensure that screws and nuts are ghtened before use.
7. Please wear comfortable ght clothes when using the product to prevent the clothes from being hooked
by the machine. Do not let kids or pets play nearby while using the product to avoid accidents.
8. Please place the product on a smooth, clean and at surface. Ensure that there is nothing sharp nearby
and keep it away from water and heat sources.
9. Do not touch any moving parts with your hands or place your hands or feet in a gap beneath the running
belt.
10. This product can only be used by one person at a me.
11. Ensure that screws and bolts are ghtened aer the assembly of the product.
12. This product is an HC product. The weight of the user should not be more than 150kgs.
13. “WARNING! Heart rate monitoring systems may be inaccurate. Over exercising may result in serious
injury or death. If you feel faint, stop exercising immediately”.
14. Maximum allowed running surface lateral posions
15. If applicable, the value of the A-weighted emission sound pressure level at the trainer’s ear;
16. The following statement: “Noise emissions under load are higher than without load.”
17. The running belt has a maximum lateral movement distance of 12mm. If the yellow mark on one side of
the front running board is completely exposed, it means that there is a deviaon in the belt. As a result, it is
necessary to adjust the running belt’s center.

5
SPECIAL SAFETY INSTRUCTIONS
POWER SOURCE
• Place the treadmill where the power line can reach the socket.
• Directly insert the power line into the socket and keep it rm.
• Please use qualied sockets to avoid signicant danger. If the plug and socket are incompable, ask the
electrician to deal with it instead of moving the plug.
• 220V—240VAC power source should be used.
• Please keep the power line away from the roller, do not place the power source on the running belt or
use a damaged plug.
• Please pull the plug out from the socket before cleaning and maintenance.
Warning: failing to pull out the plug may cause personal injury and damage to equipment.
•Please inspect each component before use.
•Please do not use this product outdoors, at high humidity, or in the sun.
• Please turn o the machine and pull out the plug when you have nished the workout.
ASSEMBLY DESCRIPTION
• Please carefully read the assembly steps before installing the equipment.
• Remove all packages from wrappings and place them where is most convenient for you so that you can
check and install
• Carefully check that all components are complete according to the packing list.
• Please pay aenon to safety when using tools or handling. During assembly, don’t force the installaon.
• Please conrm whether the tools and packing materials le are dangerous
• Be aware that plascs and foam can harm children.
Assemble the product according to the instrucon. Please carefully read the steps and descripon of
assembly. The product must be carefully installed by adults or by professionals if necessary.
Warning: Ensure that the product is installed correctly without causing damage.

6
ACCESSORIES MULTI
FUNCTION
SINGLE
FUNCTION
Treadmill Machine
Manual
Package
Mp3 Connecon Line
Security Lock
Silicone Oil
Instrucon Manual
Screw Package
Mulfunconal
Accessories
Massage Bracket
Sit-up Bracket
Massage Head
Sponge Jacket
Body Twister
Dumbbell
Le and Right Side Covers
ACCESSORIES LIST

7
06
Accessories
Details
Exploded diagram
EXPLOSION DIAGRAM

EXPLOSION DETAILS
NO. NAME QTY
1 Base 1
2 Le Column 1
3 Right Column 1
4Incline Frame 1
5 Main Frame 1
6Motor Base 1
7Small Armrest (Le) 1
8 Small Armrest (Right) 1
9 Package Stator 1
10 Running Deck 1
11 Running Belt 1
12 Front Roller 1
13 Rear Roller 1
14 Motor Belt 1
15 Gas Spring 1
16 DC Motor 1
17 Incline Motor 1
18 Compressed Spring 1
19 Electronic PCB 1
20 Controller 1
21 Holding Heartbeat 2
22 Incline 2
23 Mp3 Connecng Line 1
24 Safety Key 1
25 Upper Line Of Electronic Meter 1
26 Lower Line Of Electronic Meter 1
27 150mm Single Branch Line 2
28 300mm Single Branch Line 2
29 300mm Grounding Wire 1
30 Overload Protector 1
8
NO. NAME QTY
31 Power Switch 1
32 Socket 1
33 Power Line 1
34 Magnec Ring 1
35 Electronic Meter Top Cover 1
36 Electronic Meter Lower Cover 1
37 Electronic Board 1
38 Panel Back Cover 1
39 Bole Cage 1
40 Le Armrest Foaming 1
41 Right Armrest Foaming 1
42 Le PU Outer Cover 1
43 Right PU Outer Cover 1
44 Plasc Hole Cover 8
45 Le Small Armrest Cover 1
46 Right Small Armrest Cover 1
47 Le Small Armrest Back Cover 1
48 Right Small Armrest Back Cover 1
49 Le Side Cover 1
50 Right Side Cover 1
51 Motor Cover 1
52 Motor Lower Cover 1
53 Motor Front Cover 1
54 Plasc Edge Strip 2
55 Side Rail 2
56 Silicone Oil Tank 1
57 Fuel Pip 2
58 Tubing Bushing 1
59 R Type Line Buckle 4
60 End Cap 1

EXPLOSION DETAILS
NO. NAME QTY
61 End Cap Inner Cover 1
62 End Cap Side Cover (L/R) 2
63 Adjustment Foot Pad 4
64 Rubber Gasket 2
65 Moving Roller Sleeve 2
66 Moving Roller 2
67 Adjustment Foot Pad 2
68 Round Cushion 8
69 Square Tube Plug 5
70 Round Inner Tube Plug 2
71 Plasc Spacer 6
72 Side Buckle 8
73 Thickened Side Buckle 8
74 M4 Flat Pad 7
75 M8 Flat Pad 38
76 M10 Flat Pad 6
77 M8 Spring Pad 6
78 M8 Locknut 14
79 M5 L-Shaped Hex Wrench 1
80 M6 L-Shaped Hex Wrench 1
81 Cross Open End Wrench 1
82 Half-Round Head Hexagon Screws
M10* 40
1
83 Half-Round Head Hexagon Screws
M10* 25
4
84 Half-Round Head Hexagon Screws
M10* 55
1
85 Hexagon Socket Head Cap
Screws M8* 20
10
86 Half-Round Head Hexagon
Screws M8* 25
1
87 M10 Locknut 6
88 Half-Round Head Hexagon
Screws M8* 40
2
9
NO. NAME QTY
91 Half-Round Head Hexagon Screws
M8* 65
6
92 Half-Round Head Hexagon Screws
M8* 70
1
93 Half-Round Head Hexagon Screws
M8* 60
3
94 Half-Round Head Hexagon
Screws M8* 12
2
95 Half-Round Head Hexagon
Screws M8* 25
8
96 Cross Flat Head Screw M5* 30 4
97 Cross Washer Head Self Tapping
Screw ST3.0* 10
14
98 Phillips Head Self-Tapping Screws
ST4.0* 16
6
99 Cross Semicircular Head Self
Tapping Screw ST4.0* 16
59
100 Phillips Head Self-Tapping Screws
ST4.0* 25
8
101 Phillips Head Self-Tapping Screws
ST4.0* 30
6
102 Phillips Pan Head Self-Drilling
Self-Drilling Screw ST4.0* 16
39
103 Phillips Pan Head Self-Drilling
Self-Drilling Screw ST4.0* 25
6
104 Hexagon Socket Head Cap
Screws M8* 30
2
105 Oil Cap 1
106 Fuel Tank 1
107 Instrucon Manual 1
108 Silicone Oil 1
109 Massage Machine Bracket 2
110 Supine Support 1
111 Massage Head 1
112 Sponge 4
113 Twister 1
114 Dumbbell 2

ASSEMBLY STEPS
10
ASSEMBLING OF ELECTRONIC METER
1. Hold the column and slowly put it into the xing screw hole.
2. Secure the column to the base with M8x20 screws,M8x65 screws and M8 at washers.
3. Fix the electronic meter on the column with M8x20 screws and M8 at washers.
COLUMN AND LEFT AND RIGHT SIDE COVER ASSEMBLY
1. Remove the package stator between the xed frame and base, taking care not to hurt yourself when the
frame is bounced.
2. Use the 4.2*16 screws to x the le and right side covers to the sides of the base.
1
2
3

11
ASSEMBLING OF MULTI-FUNCTION
1. Remove the massage machine bracket, pay aenon to the (L) and ( R )® marks, and x the massage
machine bracket to the le and right columns with the M8*20 screw and M8 at washer.
2. Remove the supine support and x the supine support on the massage support bracket with M8*30
screws and an M8 at washer.
3. Use a hexagonal screw, at washer, and spring pad, and x the massager on the xed piece on the upper
end of the supine support.
ASSEMBLING OF OTHER COMPONENTS
1. Place the dumbbell on the card slot on the seat in picture.
2. The twister can be placed in a stable posion.
3. The security lock is placed on the electronic meter dot.
4. The massage belt can be hung in the card slot on both sides of the massage machine head.
Aer all the accessories have been assembled, make sure all the screws
are ghtened before they can be used.

OPERATING INSTRUCTIONS
12
TREADMILL INSTRUCTIONS (operang instrucons in manual mode)
1. Insert the power plug into the socket, turn on the power switch (the light will turn red), and a Sound
“BI” will be produced. Then the screen on the panel will display.
2. Place the safety lock in the panel’s yellow posion, and the treadmill will be ready for use. Please clip
the safety lock on the clothes to avoid accidents while running. You can pull out the safety lock at any me,
and the motor will stop immediately to prevent you from falling. Every me the equipment is used, please
place the safety lock back to the Yellow dot on the screen.
When using a treadmill, you must use a power outlet with a grounding wire for your safety.

13
MASSAGE MACHINE AND OTHER FEATURES
When using a massage machine, you must use a power socket with grounding wires for your safety.
1. When using the massage machine, please do not fold up the main frame A of the plaorm,
avoid pping forward as a whole when you massage.
2. If required ,you can lie down on the main frame A and do sit-ups.
MOVEMENT INSTRUCTIONS OF TREADMILL
1. When you fold the treadmill, use your feet to x the side of the base, and pull the armrests back with
your hands to lt the machine backwards.
2. Aer folding the equipment, place it in a safe zone where children do not play around in order to prevent
the children from hing the equipment,causing the running plaorm to fall and bruise, resulng in damage
to the machine.
FOLDING INSTRUCTIONS OF TREADMILL
1. Folding treadmill: before folding, turn o the power switch, unplug the power line, and slowly li the
running plaorm by hand unl the running plaorm is caught by the gas spring casing
2. Put down the running plaorm: as shown in the gure, use the foot to lightly press the gas spring casing,
and the running plaorm will slowly land on the ground.

14
LIFT THE RUNNING PLATFORM
PUT DOWN THE RUNNING PLATFORM
12
3
12
3

PANEL INSTRUCTIONS
15
1. USB Interface: aer the operaon, the system plays songs or videos in the USB storage.
2. MP3 Interface: insert MP3 audio, the speaker can play MP3 music.
3. “3%, 6%, 9%, 12%” Incline Shortcuts: set the slope quickly.
4. “4, 8, 12, 16” Speed Shortcuts: set the speed quickly.
5. Volume Plus Minus: increase or decrease the volume.
6. Incline/Decline Buon: incline and decline shortcuts: incline range:0-15%.The adjustment range is one
segment/me, and when connuously pressed for more than 0.5 seconds, the machine automacally and
connuously inclines/declines.
7. Home Buon: return directly to the main interface from any sub-interface
8. Start Buon: the treadmill can be started at any me by pressing this buon with the power on and the
safety lock engaged. The treadmill starts at the lowest speed and the lowest slope if it is started in manual
mode.
9. Stop Buon: this buon can be used to stop the treadmill and reset it to zero during exercise.
10. Return Buon: can return to the previous interface.
11. Speed Range Shortcuts: speed range: 1.0-18.8km/h adjustment range is 0.1km/me, and when
connuously pressed for more than 0.5 seconds, the machine automacally and connuously increases/
decreases.
WARNING: To reduce risk of serious injury stand on foot rails before starting treadmill. Read and understand the user’s manual, all instructions and the warnings before use.
Keep children away. Remove the safety key when the unit is not in use. IMPORTANT: Incline must be set at zero before folding treadmill into storage position.

16
PRECAUTIONS
• To ensure the proper performance of the device, please do not download any APP to the system.
• Please clean up the operaon on the device periodically.
• Please try not to use third-party apps. When exing a third-party app, please use the return key rst.
• WIFI restricons, this product can not link WIFI, which requires vericaon of WIFI web page.
OPERATION DURING EXERCISE
• Treadmill will decelerate to stop running aer pressing the “stop” buon during exercise.
• Treadmill will display heart pulse data in about 5 seconds aer the athlete holds the handle pulse with
both hands.
• The key exercise for athletes is to warm up before running and slow down before totally stopping.
• Usually, the athlete walks slowly for 5 minutes and then fast walks or runs, and nally runs slowly for 5
minutes before stopping.
Explanaon: When starng to run, set the speed slowly and walk for 5 minutes. This is roughly equivalent
to the state of walking, and then gradually increasing the speed of the treadmill. When the speed
increases to “5” or “6”, you are walking or jogging. Based on this state, the body has been basically
adapted, you can maintain or increase the speed and slope according to your own needs, then ocially
run for about 20 minutes, and nally set to a slower speed, slow down for 5 minutes as a relaxaon, let the
body gradually adapt during exercise. This takes about 30 minutes at a me.
Usually, about 30 minutes of exercise has a beer exercise eect, for ordinary exercisers, each run me
should not exceed 60 minutes, too long exercise me may cause excessive fague.
INCLINE OPERATION DURING RUNNING
If you need to set the incline, set it to “0” when you start running. Aer 5 minutes of slow walking, when
the body warms up, gradually increase the slope as needed, which can consume more calories, but the
maximum slope is not suitable for long-running.
HEART RATE MONITORING WHILE RUNNING
Please do not get down from the treadmill immediately aer running. When running, the body’s blood
is mainly concentrated in the lower limbs. The rhythmic contracon of the muscles can help the blood of
the lower limbs to return to the heart. However, if you stop immediately aer running, the eect of this
squeeze suddenly disappears, and the speed of blood returning to the heart slows down, which may cause
insucient blood supply to the brain. In serious scenarios, it may also cause shock symptoms.

17
THE TREADMILL HAS A HEART RATE MONITORING FUNCTION
You can assess whether to stop running by measuring the heart rate. Hold the hand pulse with both hands
and display the heart pulse data in about 5 seconds. The treadmill will automacally calculate the heart
pulse of your exercise. Generally, the heart pulse rate drops below 120, and it is basically OK.
BOOT SCREEN
QUICK START
1. Turn on the power switch and place the safety lock on the safety lock posion on the panel.
2. Aer starng, the screen displays the main interface.
3. Press the “start” buon on the panel, the treadmill will start running at the lowest speed and the lowest
slope, and then you will need to press the incline buon or speed buon to change the slope and speed.
OPERATION DURING EXERCISE
• When the treadmill is running, press the stop buon and the treadmill will decelerate to stop running.
• When the athlete holds the heartbeat handle with both hands, the heartbeat data is displayed in
about 5 seconds.
• The key to the movement of the treadmill is the relaxaon in the early stage and the slow stop aer
the exercise.
• Usually, walk slowly for 5 minutes and then go fast or run, and nally walk 5 minutes to nish running.
Explanaon: When running, set a slower speed and walk for 5 minutes. This is roughly equivalent to the
state of walking, and then gradually increasing the speed of the treadmill. When the speed increases to
“5” or “6”, you are fast walking or The state of jogging, the body has basically adapted at this me, you can
maintain or increase the speed and slope according to your own needs, then ocially run for about 20
minutes, and nally set to a slower speed, slow down for 5 minutes as a release Loosen the body and let
the body gradually adapt to the movement. This takes about 30 minutes at a me.
• Usually, 30 minutes of exercise has a good exercise eect, for every runner who runs.
The me should not exceed 60 minutes. Excessive exercise me may cause excessive fague.
• During the exercise, the li seng (Some models do not have a li funcon, this funcon is for reference
only, subject to the actual product)
• If you need to set the li (slope), set it to “0” when you start running. Aer 5 minutes of slow walking,
aer the body adapts, gradually increase the slope as needed, which can also consume more calories, but
the maximum slope level is not suitable for long-running.
• Heart rate monitoring during running.

18
• Please don’t get down from the treadmill immediately aer running. The blood of the body is mainly
concentrated in the lower limbs when running. The rhythmic contracon of the muscles can help the blood
of the lower limbs to return to the heart. However, if you stop immediately aer running, the eect of this
squeeze suddenly disappears, and the speed of blood returning to the heart slows down, which may cause
insucient blood supply to the brain. In severe cases, there may be shock symptoms.
• The treadmill comes with heart rate monitoring, which allows you to assess your heart rate by measuring
your heart rate at the end of your run. Hold the heartbeat handle with both hands and display the
heartbeat data for about 5 seconds. The treadmill will automacally calculate the number of real-me
heartbeats for your exercise. Generally, the heart rate drops below 120, which is basically enough.
START UP SCREEN
QUICK START
1. Turn on the power switch and properly aach the magnec safety lock to the safety lock posion below
the panel.
2. Press the “Start” buon on the panel to start the system;
3. Aer startup, the screen displays the main interface;
4. Press the “Start” buon on the panel at this me, the treadmill will start at the lowest speed and the
lowest slope; press the “incline + -” or “speed + -” buon to change the slope and speed as needed.
Main Interface
The main interface is divided into eight funconal modules: local audio and video, interenet, program mo-
on, real life moon, speed shiing moon, user center and system sengs.
GESTURE OPERATION
Swipe le and right Single nger press and hold and slide le and right on the screen. This opera-
on can switch between the eight funcon modules on the main interface.
Slide up and down Single nger press and hold, and slide up and down on the screen. When the inter-
face has a list menu, this acon can be swiped up and down to view the content.
Click A single nger on the screen, a quick single click on the screen.
When you click an icon, it will enter the funcon interface.

ICON FUNCTION DESCRIPTION ICON FUNCTION DESCRIPTION
User avatar and name:
user can modify user name
and avatar
Volume buon: adjustable
volume mainly suitable for
music and video playback
interfaces.
Back buon: can return to
the previous interface.
(except main interface)
Home buon: return the main
screen from any interface.
(except main interface)
WIFI icon: used to check if
the system is connected to
the WIFI network.
Time display: convenient for
sports people to view me.
Start buon: click this icon
at any me, the system will
enter “3,2,1, GO” and
treadmill will start running.
You can hold this icon and
let go, move the icon to
another place.
System sengs: built in
brightness adjustment, WIFI
management, factory mode,
clean cache, machine
management and other ve
funcons.
local audio and video: Used
to manage system memory
and audio and video les in
an external USB ash drive.
The Internet: built in third
party music app, third party
video app, internet,
social, news
19
0:03

ICON FUNCTION DESCRIPTION ICON FUNCTION DESCRIPTION
Program movement: there
are 8 kinds of sports modes
built in and divided into 2
categories. Time countdown
mode, Distance countdown
mode, Calorie countdown
mode, Body shaping running,
fat burning running,
Mountain running , Road
running, Heart rate control
speed running.
Real life movement: there are
three kinds of real life sports
in the Gobi, grassland and
seashore. (Dierent models
may be added or deleted)
Speed matching movement:
built in full horse running,
half horse running, 3km,
5km, 10km, 15km, a total of
6 speed modes.
User center:
personal informaon,
sports data management
20
FUNCTION DETAILS
LOCAL AUDIO AND VIDEO
Used to manage and play back the audio and video les in the system memory and external U disk.
• Supports playback of common audio and video format les such as MP3, APE, MP4 and MOV.
• The audio and video les in the local audio and video are connected to the network without being
connected to the network.
• During the exercise you should try to use music with fast rhythm. It is best to adapt to the rhythm of the
running. Suddenly the music with large rhythm changes easily has an adverse aect on the rhythm of
running.
• Please try not to watch the video while running, which is easy to distract and may cause the speed to run
too fast or too slow.
Table of contents
Other ProRunner Treadmill manuals
