ProRunner 300 User manual

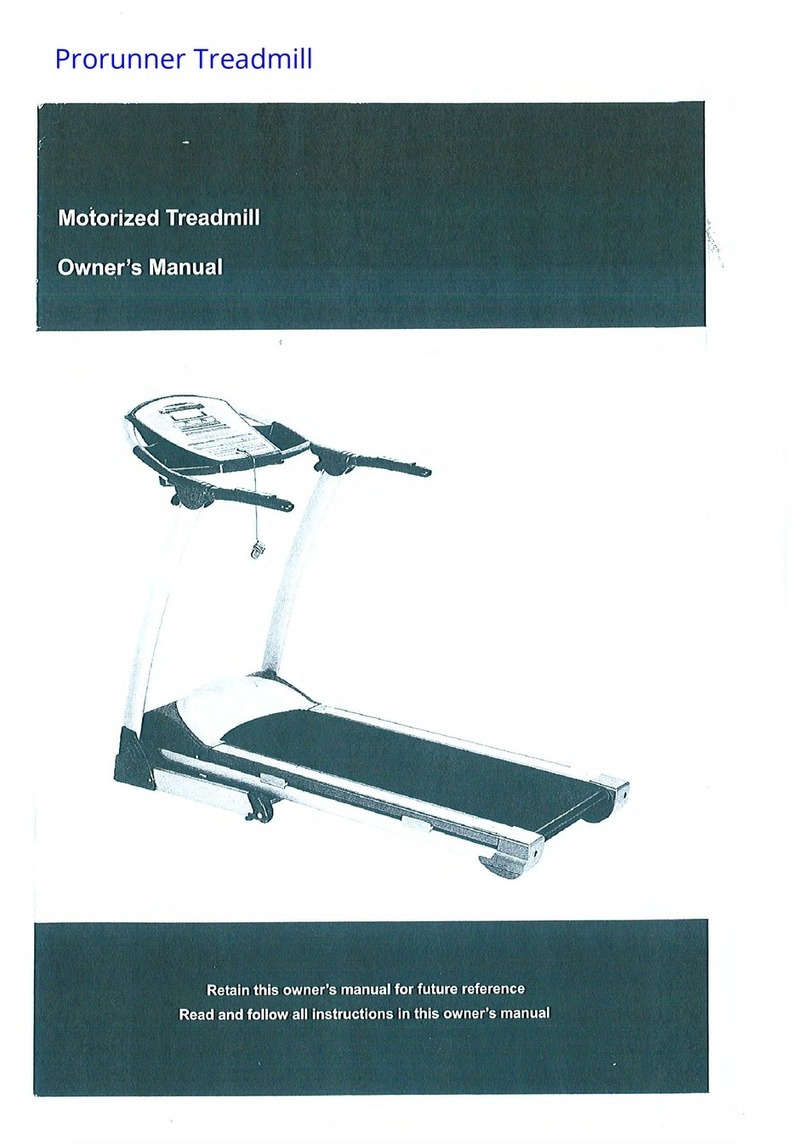
USER’S MANUAL
MOTORIZED TREADMILL
USER WEIGHT LIMITATION: 120kgs. (265lbs.)

PRO RUN 300 MOTORIZED TREADMILL
2
PRECAUTIONS
Precautions:
WARNING: To reduce the risk of burns, fire, electric shock, or injury to persons, read the following important precautions
and information before operating the treadmill. It is the responsibility of the owner to ensure that all users of this treadmill
are adequately informed of all warnings and precautions.
•Use the treadmill only as described in this manual.
•Place on a level surface, with 2 meters (6 feet) of clearance behind it. Do not place the treadmill on any surface
that blocks air openings. To protect the floor or carpet from damage, place a mat under the treadmill.
•When choosing a location for the treadmill make sure that the location and position permit access to a plug.
•Keep the treadmill indoors, away from moisture and dust. Do not put the treadmill in a garage or covered patio,
or near water.
•Do not operate the treadmill where aerosol products are used or where oxygen is being administered.
•Keep children under the age of 12 and pets away from the treadmill at all times.
•The treadmill should not be used by persons weighing more than 120kgs. (265lbs.)
•Never allow more than one person on the treadmill at a time. Wear appropriate exercise clothing when using
the treadmill. Do not wear loose clothing that could become caught in the treadmill. Athletic support clothes are
recommended for both men and women. Always wear athletic shoes. Never use the treadmill with bare feet,
wearing only stockings, or in sandals.
•When connecting the power cord, plug the power cord into a grounded circuit. No other appliance should be on
the same circuit.
•Always straddle the belt and allow it to start moving before stepping onto the belt.
•Always examine your treadmill before using to ensure all parts are in working order.
•Allow the belt to fully stop before dismounting.
•Never insert any object or body parts into any opening.
•Follow the safety information in regards to plugging in your treadmill.
•Keep the power cord away from the incline wheels and do not run the power cord underneath your treadmill. Do
not operate the treadmill with a damaged or frayed power cord.
•Always unplug the treadmill before cleaning and/or servicing. Service to your treadmill should only be performed
by an authorized service representative, unless authorized and/or instructed by the manufacturer. Failure to
follow these instructions will void the treadmill warranty.
•Never leave the treadmill unattended while it is running.

PRO RUN 300 MOTORIZED TREADMILL
3
PREASSEMBLY
Open the boxes:
You are now ready to open the boxes of your new equipment. Make sure to inventory all of the parts that are included in
the boxes. Check the Hardware Comparison Chart for a full count of the number of parts included for this product to be
assembled properly. If you are missing any parts or have any assembly questions call the manufacturer.
Gather your tools:
Before starting the assembly of your unit, make sure that you have gathered all the necessary tools you may require to
assemble the unit properly. Having all of the necessary equipment at hand will save time and make the assembly quick
and hassle-free.
Clear your work area:
Make sure that you have cleared away a large enough space to properly assemble the unit. Make sure the space is free
from anything that may cause injury during assembly. After the unit is fully assembled, make sure there is a comfortable
amount of free area around the unit for unobstructed operation.
Invite a friend:
Some of the assembly steps may require heavy lifting. It is recommended that you obtain the assistance of another
person when assembling this product.
User Weight Limitation:
Please note that there is a weight limitation for this product. If you weigh more than 120kgs (265lbs.) it is not
recommended that you use this product. Serious injury may occur if the user’s weight exceeds the limit shown
here. This product is not intended to support users whose weight exceeds this limit.

PRO RUN 300 MOTORIZED TREADMILL
4
HARDWARE COMPARISON CHART
Hardware chart:
For your convenience, we have identified the hardware used in the assembly of this product. This chart is provided to
help you identify those items that may be unfamiliar to you.
NO. DESCRIPTION QTY.
63 8mm Washer 4
86 10mm Washer 4
87 M10 x 52mm Bolt 2
88 M10 x 20mm Bolt 2
89 M8 x 18mm Bolt 4
105 M5 x 8mm Bolt 2
106 Plastic Cover 2
108 M5 x 14mm Bolt 2
MILIMETERS

PRO RUN 300 MOTORIZED TREADMILL
5
PARTS LIST
NO. DESCRIPTION QTY. ORDER NO. NO. DESCRIPTION QTY. ORDER NO.
1 Motor Hood 1 PR300-01 35 Cushion 4 PR300-35
2 Cushion 1 PR300-02 36 4.5 x 12mm Washer 8 PR300-36
3 Side Rail 2 PR300-03 37 M8 x 15 Screw 14 PR300-37
4 Deck End Cap-Left 1 PR300-04 38 M14 x 90mm Bolt 2 PR300-38
5 Deck End Cap-Right 1 PR300-05 39 Control Board 1 PR300-39
6 Running Belt 1 PR300-06 40 Elevation Motor 1 PR300-40
7 Running Deck 1 PR300-07 41 Motor 1 PR300-41
8 Rear Roller Shaft 1 PR300-08 42 Deck Frame 1 PR300-42
9 Front Roller Shaft 1 PR300-09 43 Motor Bracket 1 PR300-43
10 Rear Roller 1 PR300-10 44 Elevation Support 1 PR300-44
11 Front Roller 1 PR300-11 45
Elevation Support Cover-Right 1 PR300-45
12 Drive Belt 1 PR300-12 46
Elevation Support Cover-Left 1 PR300-46
13
Rubber Cushion
Bolt 8 PR300-13 47 Support 1 PR300-47
14 Rail Guide 6 PR300-14 48 Shock 1 PR300-48
15 Rail Guide Screw 12 PR300-15 49 Motor Belly Pan 1 PR300-49
16 Rear End Cap Bolt 4 PR300-16 50 Frame Cover-Right 1 PR300-50
17 Computer 1 PR300-17 51 Frame Cover -Left 1 PR300-51
18 Console Top 1 PR300-18 52 Bracket 2 PR300-52
19 Console Bottom 1 PR300-19 53 Plastic Clamp-Top 2 PR300-53
20 Safety Key 1 PR300-20 54 Plastic Clamp-Bottom 2 PR300-54
21 Handlebar Grip 2 PR300-21 55
M8 x 19mm Allen Head Bolt 4 PR300-55
22 Handlebar 2 PR300-22 56 Deck Cushion 8 PR300-56
23 Hand Pulse Sensor 2 PR300-23 57 M8 Nylon Nut 1 PR300-57
58 Washer 2 PR300-58
25 Handlebar End Cap 4 PR300-25 59 Rubber Cushion 1 PR300-59
26 Left Upright 1 PR300-26 60 M8 x 50mm Screw 2 PR300-60
27 Right Upright 1 PR300-27 61 M8 x 15mm Bolt 2 PR300-61
28 Base Frame 1 PR300-28 62 Spring Washer 2 PR300-62
29 Base Frame End Cap 2 PR300-29 63 8mm Washer 12 PR300-63
30 Fold Up Lock 1 PR300-30 64 M10 x 136mm Her Bolt 1 PR300-64
31 Spring 1 PR300-31 65 M10 Nylon Nut 3 PR300-65
32 Power Switch 1 PR300-32 66 M5 x 12mm Screw 2 PR300-66
33 Front Moving Wheel 2 PR300-33 67 Clip 2 PR300-67
68 Gear Sleeve 1 PR300-68

PRO RUN 300 MOTORIZED TREADMILL
6
PARTS LIST
NO. DESCRIPTION QTY. ORDER NO. NO. DESCRIPTION QTY. ORDER NO.
69 Bumper 2 PR300-69
70 U Bracket 1 PR300-70 104 Upright Cross Brace 1 PR300-104
71 M8 x 89mm Bolt 1 PR300-71 105 M5 x 8mm Bolt 2 PR300-105
72 M8 Nut 1 PR300-72 106 Plastic Cover 2 PR300-106
73 M16 x 54mm Screw 1 PR300-73 107 M6 x 10mm Bolt 1 PR300-107
74 35 x 18mm Washer 1 PR300-74 108 M5 x 14mm Bolt 2 PR300-108
75 M16 Nut 1 PR300-75
76 Roller 2 PR300-76
77 M6 x 15mm Bolt 2 PR300-77
78 M16 Washer 2 PR300-78
79 Rear Roller Washer 2 PR300-79
80 Rear Roller Bolt 2 PR300-80
81 M10 x 63mm Bolt 1 PR300-81
82 M4 x 12mm Screw 6 PR300-82
83 Plastic Bushing 2 PR300-83
84 Front Roller Washer 1 PR300-84
85 Front Roller Bolt 1 PR300-85
86 10mm Washer 9 PR300-86
87 M10 x 52mm Bolt 4 PR300-87
88 M10 x 20mm Bolt 2 PR300-88
89 M8 x 18mm Bolt 6 PR300-89
90 M8 x 32mm Bolt 1 PR300-90
91 M10 x 25mm Bolt 1 PR300-91
92 M10 x 48mm Bolt 1 PR300-92
93 3.5 x 16mm Screw 9 PR300-93
94 3 x 14mm Screw 6 PR300-94
95 Transportation Wheel 2 PR300-95
96
Transportation Wheel
Bracket 2 PR300-96
97 Bushing 2 PR300-97
98 Metal Plate 1 PR300-98
99 Power Socket 1 PR300-99
100 Fuseless Break 1 PR300-100
101 Power Switch 1 PR300-101
102 Metal Cap 2 PR300-102

PRO RUN 300 MOTORIZED TREADMILL
7
PARTS DIAGRAM
A MAJORITY OF THE PARTS SHOWN HERE HAVE BEEN PREASSEMBLED AT THE FACTORY.

PRO RUN 300 MOTORIZED TREADMILL
8
PARTS DIAGRAM
A MAJORITY OF THE PARTS SHOWN HERE HAVE BEEN PREASSEMBLED AT THE FACTORY.

PRO RUN 300 MOTORIZED TREADMILL
9
PARTS DIAGRAM
A MAJORITY OF THE PARTS SHOWN HERE HAVE BEEN PREASSEMBLED AT THE FACTORY.

PRO RUN 300 MOTORIZED TREADMILL
10
ASSEMBLY
STEP 1:
First remove your treadmill from the carton as shown in FIG1.
Next rotate up the Left and Right Uprights (26 and 27) and secure with two 10mm Washers (86), two M10 x 53mm Bolts
(87) and two M10 x 20mm Bolts (88) as shown.

PRO RUN 300 MOTORIZED TREADMILL
11
ASSEMBLY
STEP 2:
Attach one Plastic Cover (106) to the Left Upright (26) and secure using one Plastic Cover Screw (105). Repeat on Right
Upright (27).

PRO RUN 300 MOTORIZED TREADMILL
12
ASSEMBLY
STEP 3:
First connect the Sensor Wires as shown in FIG2.
Next attach the two Handlebars (22) to the Left and Right Uprights (26 and 27) and secure using four 8mm Washers (63)
and four 8M x 18mm Bolts (89),

PRO RUN 300 MOTORIZED TREADMILL
13
ASSEMBLY
STEP 4:
Rotate up the Console (18) and secure by tightening both M8 x 18mm Bolts (89), located on the Left and Right Uprights
(26 and 27), two M5 x 14mm Bolts (108).

PRO RUN 300 MOTORIZED TREADMILL
14
LEVELING THE TREADMILL
How to level the treadmill:
An uneven floor can cause the treadmill to wobble during use as well as the incline adjustment to function incorrectly.
Please follow the procedure described below to make sure the treadmill cushions are adjusted correctly prior to use. You
may need the assistance of another person to perform this adjustment.
1. To perform the leveling procedure you first need to bring
the treadmill to the highest incline level as shown in
drawing 1. After you’ve completed the assembly
procedure plug in the power cord and switch on the
POWER SWITCH. Insert the Safety Key and press the
START button to quick start the treadmill. Press the
INCLINE UP button until the deck reaches its highest
incline level. Now press the STOP button and pull out the
Safety Key. Switch off the POWER SWITCH and unplug
the power cord.
1. Raise deck to highest incline level.
2. The treadmill should sit on the floor with all four cushions
resting firmly on the floor as shown in drawing 2. Shake
the handlebars back and forth to check if they are resting
firmly on the floor. If they are not, pull the handlebar
backward to adjust the treadmill as shown in drawing 3.
Simply adjust the cushions. Repeat this until the treadmill
sits firmly on the floor.
2. Check position of cushions.
3. Tilt treadmill to access cushions.

PRO RUN 300 MOTORIZED TREADMILL
15
FOLDING INSTRUCTIONS
How to fold up the treadmill:
Your treadmill can be folded up for space saving storage. To do this follow the instructions here:
1. To fold the deck you first
need to bring the treadmill
to the lowest incline level.
1. Lower deck to lowest incline level.
2. Lift the deck up from the
rear of the treadmill and
fold up until it locks in
place. TO PREVENT
INJURY BE SURE YOU
HAVE A FIRM HOLD
WHEN RAISING THE
DECK.
2. Lift the deck up from the rear.
3. You will hear a “click”
sound as the lock
engages.
3. You will hear a “click” sound as the lock engages.

PRO RUN 300 MOTORIZED TREADMILL
16
UNFOLDING INSTRUCTIONS
How to unfold the treadmill:
To unfold the treadmill for use follow the instructions here:
1. Begin by standing behind and
supporting the deck with your hands.
Next release the lock with your foot by
stepping on the release lever. TO
PREVENT INJURY BE SURE YOU
HAVE A FIRM HOLD ON THE DECK
BEFORE RELEASING THE LOCK.
1. Release the lock with your foot by stepping on the release
l
e
v
er
.
2. Slowly lower the deck until it rests
securely on the ground.
2. Lower the deck until it rests securely on the ground.

PRO RUN 300 MOTORIZED TREADMILL
17
TRANSPORT INSTRUCTIONS
How to transport the treadmill:
1. After folding the treadmill tilt it to one side (you
may need the help of a friend), reach under the
Base Frame and rotate down the
Transportation Wheel Bracket (96). Repeat this
procedure on the other side.
2. To roll away for storage simply grab the
handlebars and push as shown.
3. After moving the treadmill to the desired
location, make sure to put the Transportation
Wheel Brackets (96) back into their upright
position in order to stabilize the treadmill for
use.

PRO RUN 300 MOTORIZED TREADMILL
18
COMPUTER OPERATION
Safety Key A B SPEED SLOW Button
START Button C D LCD Window
INCLINE UP/DOWN Switch E F STOP/ENTER Button
SPEED FAST Button G
BUTTONS:
START –
Press to start exercise. The initial belt speed is 0.8 KPH (0.5 MPH).
STOP/ENTER –
a. Press to confirm the program and preset function values under the setting mode.
b. Press to quit a preset program or function value after completing the single program setting procedure,
then return to the beginning of the setting mode before pressing the START key.
c. Press to stop exercising during your workout.
SPEED FAST –
a. Press to increase the belt speed by 0.1 KPH (0.1 MPH)
b. Hold the button to increase the belt speed by 0.5 KPH (0.5 MPH) each second and release the button to stop the
function.
Press to select programs and preset related function values.
ELEVATION UP / DOWN
Press up or down to change incline level.

PRO RUN 300 MOTORIZED TREADMILL
19
COMPUTER OPERATION
SPEED SLOW –
a. Press to decrease the belt speed by 0.1 KPH (0.1 MPH).
b. Hold the button to decrease the belt speed by 0.5 KPH (0.5 MPH) each second and release the
button to stop the function.
c. Press to select programs and preset related function values.
NOTE:
1. The console display will turn itself off automatically five minutes after the belt stops moving.
2. The pulse function is for reference only, and not to be used for medial purposes.
SAFETY KEY –
The safety key must be inserted into the slot on the console in order to operate the treadmill. Always insert
the safety key and attach the clip to your clothing at your waist before beginning your workout. If you should
encounter problems and need to stop the motor quickly, simply pull on the cord to disengage the safety key
from the console. To continue operation first turn the power switch to off and set the speed controller to stop.
Next turn the power switch to on and reinsert the safety key into the console.
COMPUTER OPERATION:
After turning on the power the computer will show a full display for 2 seconds. The “P1” (manual program)
will then begin blinking in the upper right corner of the LCD window. Press the SPEED FAST/SLOW buttons
to select the desired program. Press the STOP/ENTER button to confirm the selected program or press the
START button to start exercising without a selecting a program. Please refer to the following instructions for
the different program options.
PROGRAM 1 – MANUAL
Press the STOP/ENTER button to select the program, then press the START key to start exercising.
While the “P1” is blinking press the STOP/ENTER button to run the preset procedure, before starting to
exercise.
TIME: Accumulates and displays the workout time from the start of the exercise.
DISTANCE: Accumulates and displays the workout distance from the start of the exercise.
CALORIES: Accumulates and displays (approximate) calories burned during the exercise.
SPEED: Displays the current speed in KPH or MPH (which ever your computer is set to).
PROGRAM 2 – DISTANCE
Press the STOP/ENTER button to confirm the program.
DISTANCE (Under the setting mode): Press the SPEED SLOW/FAST buttons to preset the target distance
values and then press the START button to start exercising.
While the “P2” is blinking press the STOP/ENTER button to run the preset procedure, before starting to
exercise.
DISTANCE (Out of the setting mode): Counts down from the preset target value when the exercise starts.
While the distance counts down to zero the speed will go down to zero by 0.5 KPH or MPH each second.
TIME: Accumulates and displays the workout time from the start of the exercise.
CALORIES: Accumulates and displays (approximate) calories burned during the exercise.
SPEED: Displays the current speed in KPH or MPH (which ever your computer is set to).
PROGRAM 3 – TIME
Press the STOP/ENTER button to confirm the program.
TIME (Under the setting mode): Press the SPEED SLOW/FAST buttons to preset the time value and then
press the START button to start exercising.
While the “P3” is blinking press the STOP/ENTER button to run the preset procedure, before starting to
exercise.
TIME (Out of setting mode): Counts down from the preset target value when the exercise starts. While the
time counts down to zero the speed will go down to zero by 0.5 KPH or MPH each second.
DISTANCE: Accumulates and displays the workout distance from the start of the exercise.
CALORIES: Accumulates and displays (approximate) calories burned during the exercise.

PRO RUN 300 MOTORIZED TREADMILL
20
COMPUTER OPERATION
SPEED: Displays the current speed in KPH or MPH (which ever your computer is set to).
PROGRAM 4 – CALORIES
Press the STOP/ENTER button to confirm the program.
CALORIES (Under the setting mode): Press the SPEED SLOW/FAST buttons to preset the target calories
value and then press the START button to start exercising.
While the “P4” is blinking press the STOP/ENTER button to run the preset procedure, before starting to
exercise.
CALORIES (Out of setting mode): Counts down from the preset target value when the exercise starts. While
the distance counts down to zero the speed will go down to zero by 0.5 KPH or MPH each second.
TIME: Accumulates and displays the workout time from the start of the exercise.
DISTANCE: Accumulates and displays the workout distance from the start of the exercise.
SPEED: Displays the current speed in KPH or MPH (which ever your computer is set to).
PROGRAM 5 – 15 MINUTE PRESET SPEED
Press the STOP/ENTER button to confirm the program.
Press the START button to start the exercise, or while the “P5” is blinking press the STOP/ENTER button to
run the preset procedure.
TIME: Accumulates and displays the workout time from the start of the exercise.
DISTANCE: Accumulates and displays the workout distance from the start of the exercise.
PULSE: Detects and displays the current heart rate when out of setting procedure.
CALORIES: Accumulates and displays (approximate) calories burned during the exercise.
SPEED: Displays the current speed in KPH or MPH (which ever your computer is set to).
PROGRAM 6 – 30 MINUTE PRESET SPEED
Press the STOP/ENTER button to confirm the program.
Press the START button to start the exercise, or while the “P6” is blinking press the STOP/ENTER button to
run the preset procedure.
TIME: Accumulates and displays the workout time from the start of the exercise.
DISTANCE: Accumulates and displays the workout distance from the start of the exercise.
PULSE: Detects and displays the current heart rate when out of setting procedure.
CALORIES: Accumulates and displays (approximate) calories burned during the exercise.
SPEED: Displays the current speed in KPH or MPH (which ever your computer is set to).
PROGRAM 7 – 45 MINUTE PRESET SPEED
Press the STOP/ENTER button to confirm the program.
Press the START button to start the exercise, or while the “P7” is blinking press the STOP/ENTER button to
run the preset procedure.
TIME: Accumulates and displays the workout time from the start of the exercise.
DISTANCE: Accumulates and displays the workout distance from the start of the exercise.
PULSE: Detects and displays the current heart rate when out of setting procedure.
CALORIES: Accumulates and displays (approximate) calories burned during the exercise.
SPEED: Displays the current speed in KPH or MPH (which ever your computer is set to).
Table of contents
Other ProRunner Treadmill manuals
