ProSpot Fitness AT210 User manual

AT21
ffi%n
0 rnenDMtLL
Owner'sManual

Table Of Gontents
Assemblylnstruction-------- *---*-----7
PowerRequ
irements--------------
ConsolePanelFunctions---- -----**14
Mainten
anceln
structions- -------------19
l3

Warning
6l Betbreusing
thisheadn1ill
ol sla ingany
exercise
program
'[t is inrpcrflani
to
reviewthismanual
alrd
lhe
tbllowingPrccautions
belore
operation'
Precautions:
l.Always unplugtl'le
treadmill
after
using
to keep
lhethe
lite oftreadmill and
avoidany
riskofinjuries.
2.Surgc
Protector
nust beover l5A intothe
grounded
outlet
of 230Vto avoidelectrical
snocK.
3.Nowatetontreadmill
to keep
the
treadmill
in goodcondition'
4t
Power
Switch

lmportant Safety Information
WARNING! It isthe
owner'srcsponsibility
toensure
that
allusersofthis
treadmillhave
readthe
Owner's
Manual
andarefamiliar
with
warningand
safety
prccautions.
l.Thelreadmill
hasauser
rnaximumcapacityof l80kgsforone
personatatime
2.Thetrcadmillshould
onlybeused
onalevelsurface
andis
with1x 2meters
space
aioundthetreadmill.
3.For
indooronly.
4.Donotoperatcthctreadmill
wilhadamaged
ol frayed
powcr
cordlt must
be
with
qualificdgroundedoutleltoavoid
clectrical
problem.Kecptreadmillaway
ftomwater,
humid,heatedandfirc.
5.Donot
put
anyobjects
aroundthc
treadmill10
avoidany
possible
of
injuries.
6.Keepthetreadnill
stablilyand
carcfully
whilechanging
position
andmoving
7.Do
not
pullthe
powercordornrovc
treadmillby
powercordashandrail.
8.Keep
theobjectsaway
tionlthetreadmillto
avoidanys(uft's
dropinginto
machtne.
g.Never
insertanyobjectofbody
parts
jnto
any
opeDingfor
picking
.Switch
offt'irstly
l0.Donotuscacccssoryattchements
thal
arenotrecommended
toavoidany
injurlcsand
damagctotreadnill.
l l.Toavoid
possiblc
daoragc
tothctreadmill
andthepossibility
ofinjury ,do
notopcrato
thc
treadmilluntilthc
problcnr
isconcctcd.
Callservice.
l2.Unplug
thetrcadnrill
afterswitcholf.
lJ.Ncverleavelhe
lrcadmill
whilc
it
isrunning.
WARNING:Grounded
Plugmustbe
grounded
,no
waterinrunningtokeepthetreadmill
workingordcr.
Donotopen
motorcover
lbrrepairingtoavoidanyinjuries
.Callscrvicc
Before You Start
Remembertotakethctimetoreviewowner'sm{nualsbelbrovoustafi
.
l.Befbreusingthis
trcadmillorstartinganyexcrciseprogram
.consult
yourphysrctan
andacconrpaniedby specializedpcrson.Adjus(
the
specd
notover8KM/Fl.
2.Takethetimeto pcrfbfln tbe
stretching
exercise
proYidcd
to avoidinjury.
3.lf
you
havchcartproblems
.0nd
/ortheotherdiscrscs
,do
nolusethetfcadotill
programs
\rilhout
rcccivingapprolalfrorn
your
physician.
,{.Stop
exercising
orcall
physician
il youftelunr:onrfbrtablc.
5.Donotleave
chilchenunsupervisedanddisableclperson
neaforonthetiladlrill .
Shouldbeacco prnied
bysupcrvisors.
6.Runningis
oxygenexercise,recdnmcnded30minutcs
per timeisroasonable.
7.Wcar
comlbrtable
,good-quality
walkingorrunllingshocs
anclappropriatcclothing.
I)o
notwithtibrcclotingloavoidclcctrical
shock
anddanagethetrcadrnill.
13.l)o
noteus
the
treadmillrvitlr
lraret'eet,sandals.socksol'st()ckiligs
toa\()idanyriskol-
injuries.Wearconlfortable
shoes
or
cotlonsocks.
9.1''ailure
totirllowtheseinstructionswill void
lhelreadn'tillwarranty.
l().
ll thcsupplycordis
danagcd.itntustbc
rcpluced
bythcmanuficlurer
oritssclriucugcnl
orasinrilarly
qualified
person
inordertoavoidahuzurd.
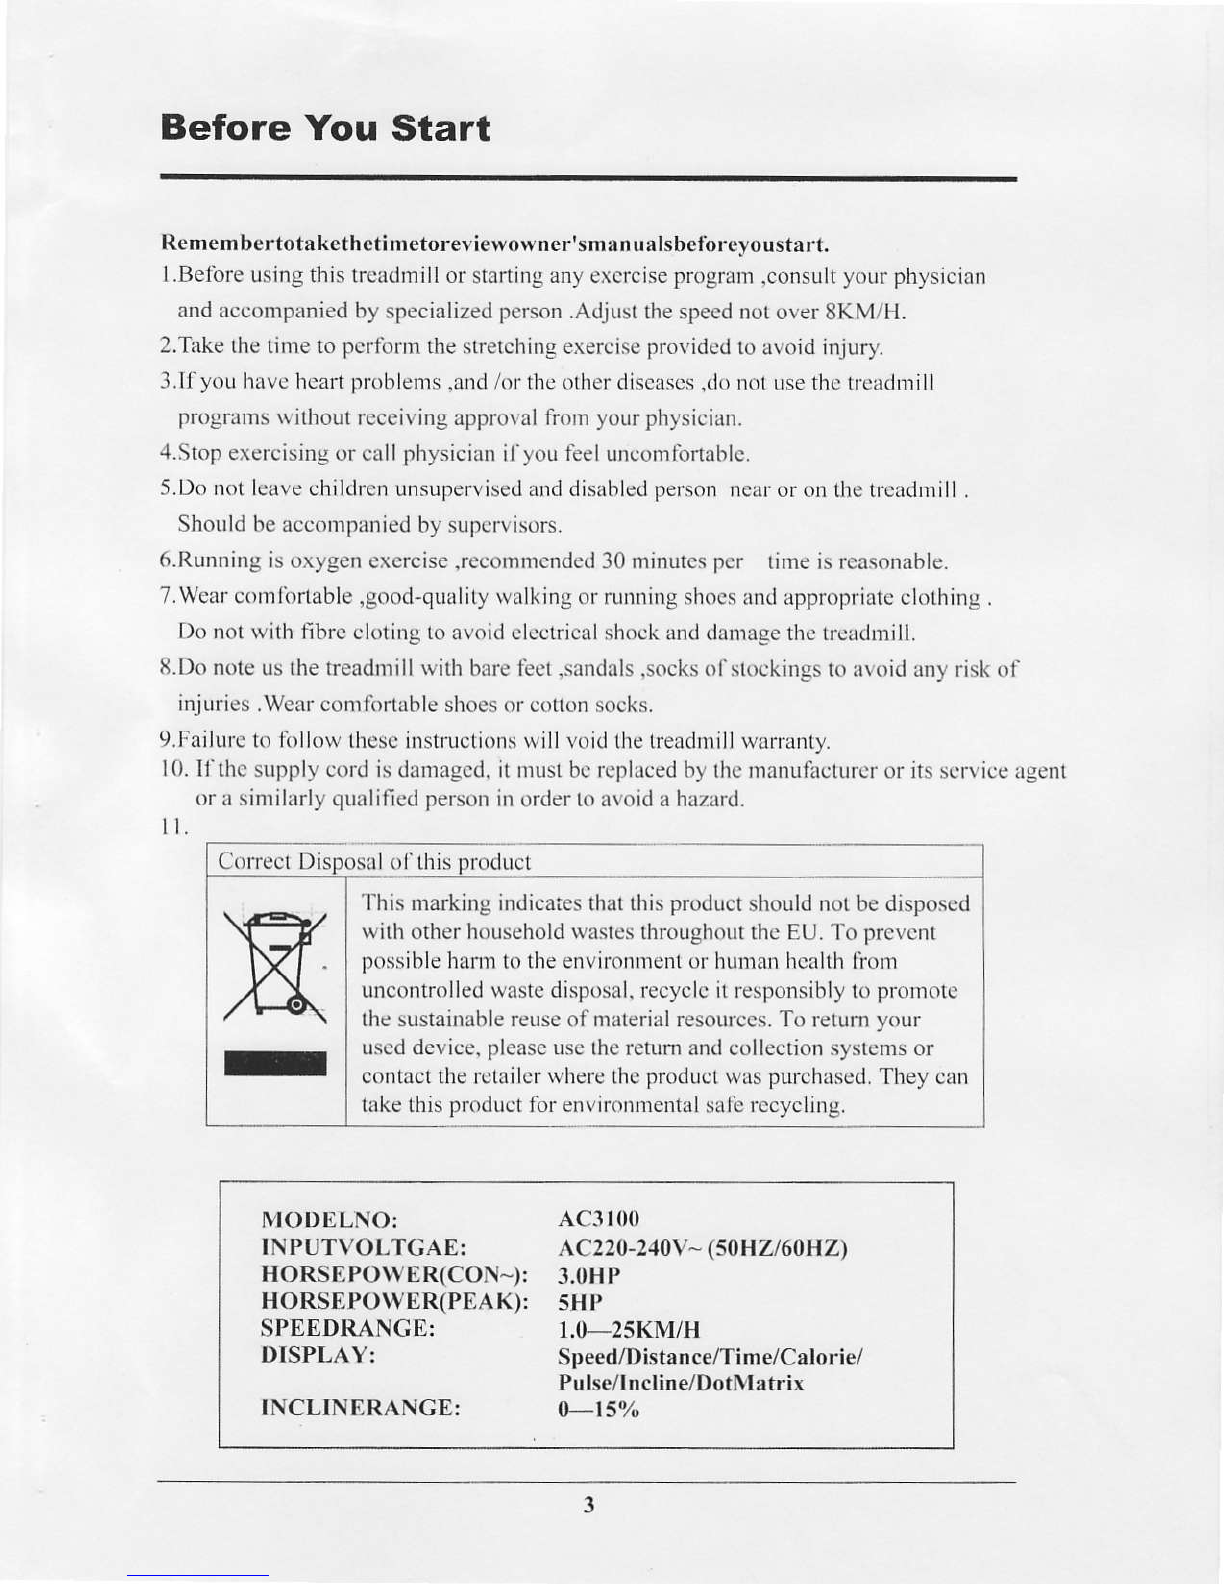
ll. Correct l this
producl
]-hisnarkingindicaies
thalthis
product
shouldnotbedisposcd
withotherhouseholdwnslesthroughout
ihcEU.l'o prevcnl
possible
harn totheenvironnlentorhLrmanhcalthtiorr
uncontrolledwastedisposal.recyclcitresponsiblylclpromotc
thcsustailablereuseofnraterialresourccs.To relum your
uscd
dcvice,
pleasc
usctheretumandcolleclionsyslemsor
contact
thefctailcrwhere
thc
product
was
purchascd.
Tlreycan
takcthis
product
lorenvironmentaLsalerccycling.
]VIODELNO:
INPUTVOLTGAET
HORSEPOWER(CON-):
HORSEPOWER(PEAK):
SPEEDRANGEI
DISPLAY:
INCLINERANCE:
AC3r00
AC220-240V
- (50H:Zt
60HZ\
3.OHP
5HP
1.0-25KMiH
Speed/Distance/Time/Calorie/
Pulse/lncline/DotMatrix
0-t50h

Main Diagram
Left
Upright
KillSwitch
Magnet
Right
Handle
LeftHandle
Right
Upright
Motor
Cover
WalkBelt
LeftEnd
Caps
Transporl
Wheel
SideRail Right
EndCaps
oooooo
Console
Leveler
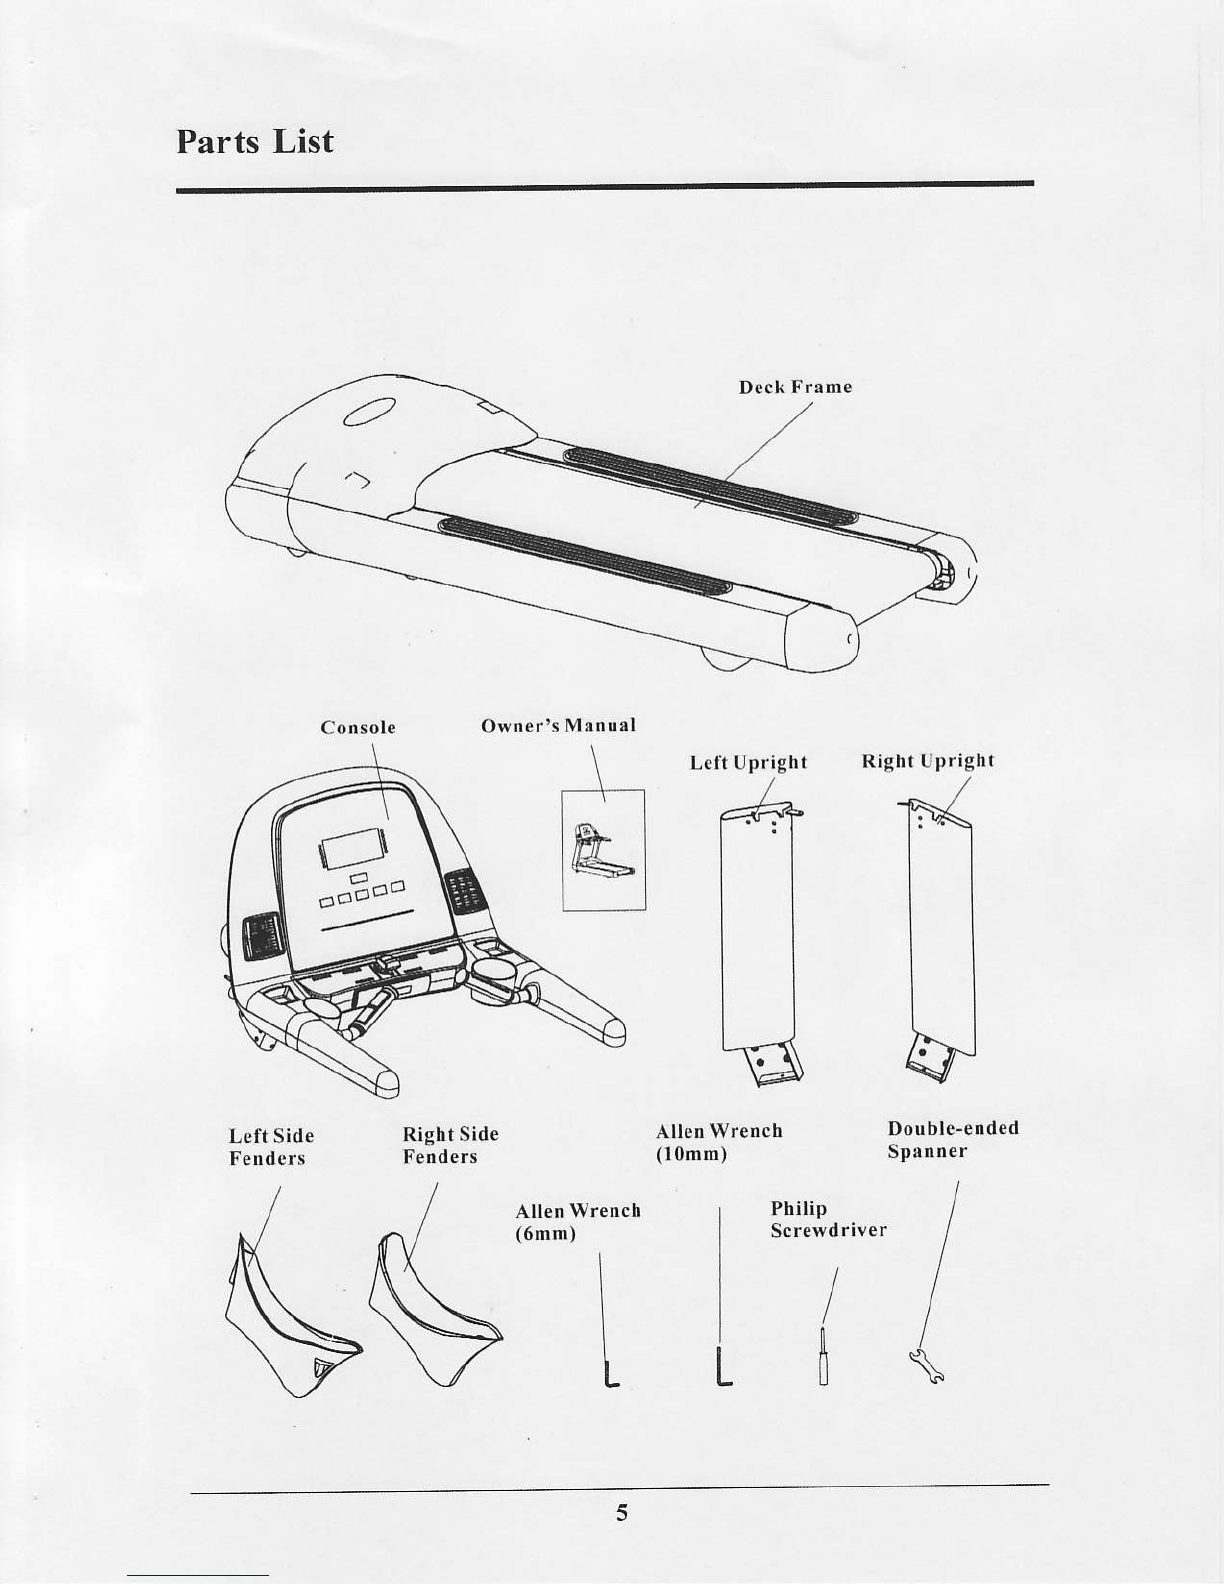
PartsList
Deck
Frrme
Console Owner's
Manull
LeftUpright
LeftSide
Fenders RightSide (r0mn) Double-ended
Spsnner
Philip
Scr€wdriver
il
(6mm) I
I
t
o#oo
Parts List
I
{
I
{
I
{
I
I
{
{
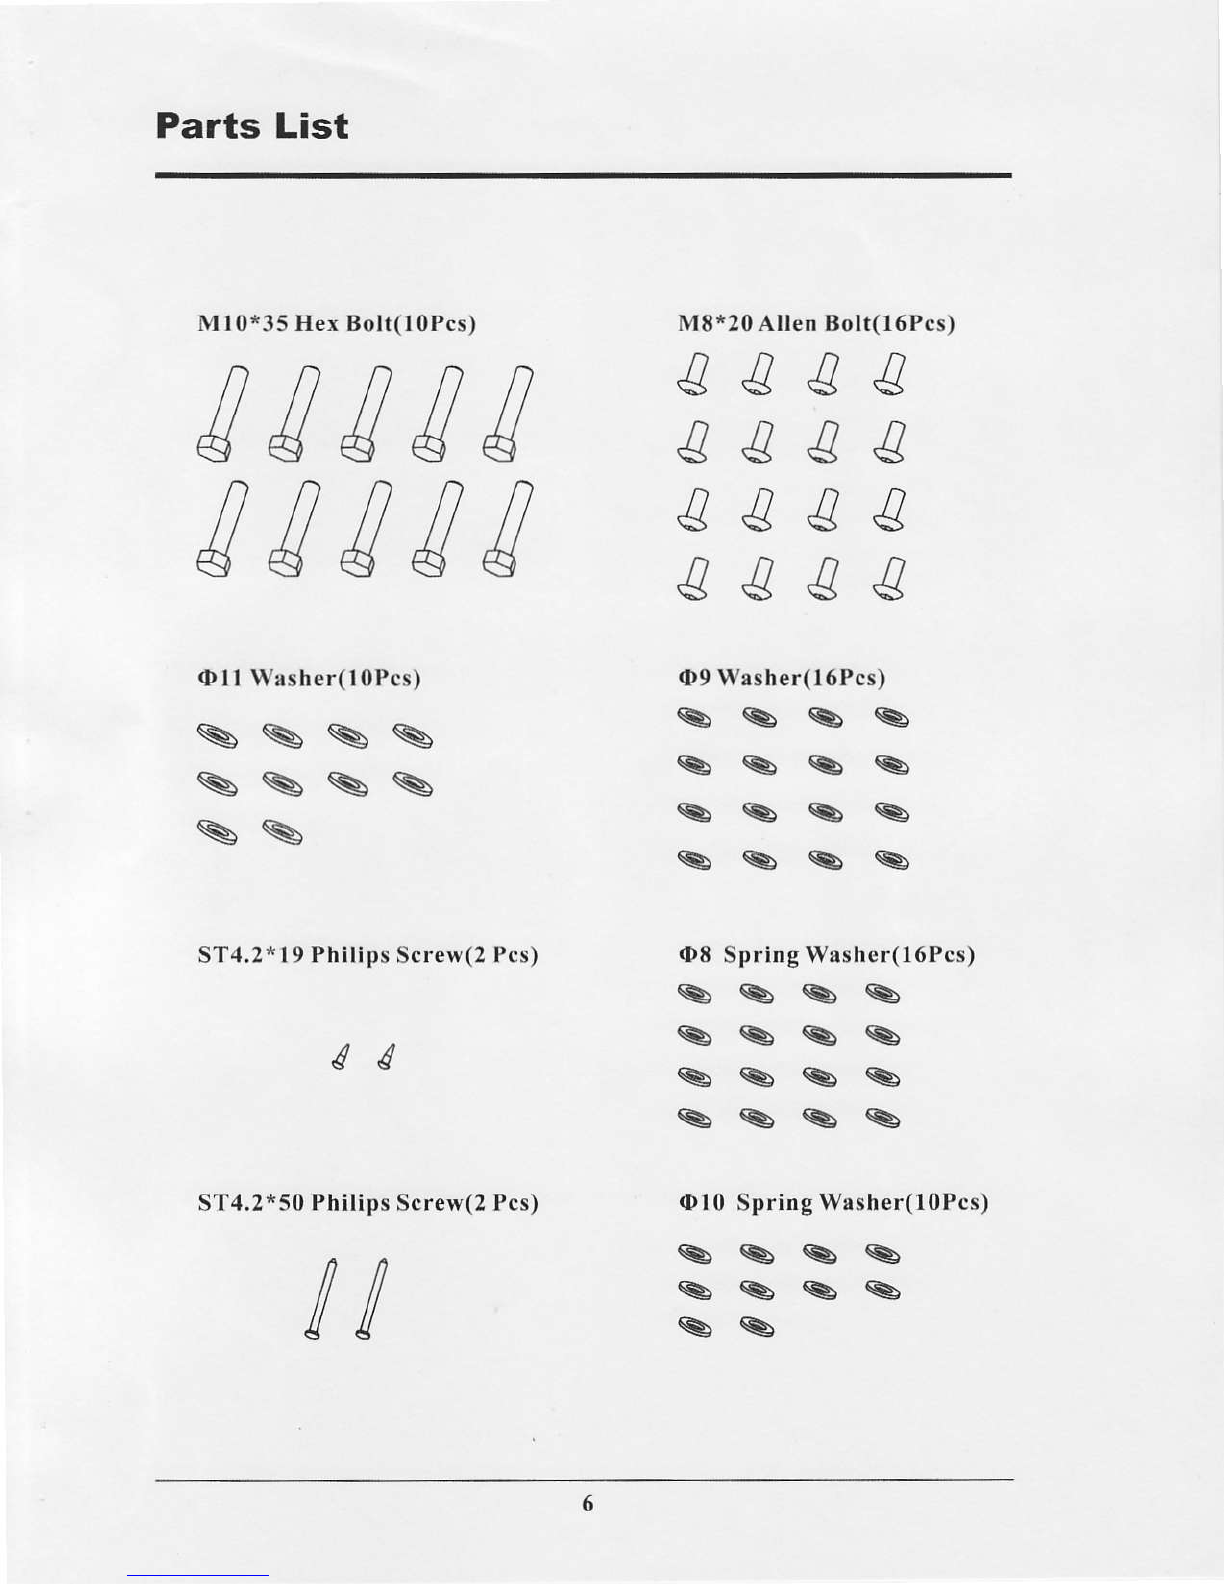
Ml0*35 HexBolt(10Pcs)
Oll Washer(loPcs)
ssss
ssss
\s
ST4.2*l9PhilipsScrew(2Pcs)
AA
M8*20AllenBolt(l6Pcs)
4s4g
{444
{449
4494
o9
wrsher(l6Pcs)
bbSb
555b
bbSs
bb$b
(D8
SpringWasher(16Pcs)
b%b5
bSbb
s%s5
Sbbb
Ol0 SpringWasher(l0Pcs)
bbbs
sqsg
s%
ST4,2*50PhilipsScrew(2Pcs)
!t

Assembly lnstruction
Alteropeningthebox,
rernoveany
packing
material
liomthefoadmill.
Donot
throwawayany
packing
materialsuntiltheunitisworking
properly.
Placethebaseonaclcan,level
surface
.Make
sure
the
power
cord
will easily
reach
in
grounded
outlet.
Stepl: Left Uprights
l.Take
offthemotorcover
.Place
thel€ftandright
fenders
throughthe tubeofthe lefr
andrightuprights
shown
asbelow.
2.Attach
theleffuprightstothebaseusingMl0135Bolt
(Qty.3)
,Spring
Washerrl0
(Qty.3)
andWasherOl l(Qty.3).
Next,securetheleftupdghtstothebaseshownasbelow.
B€fore
Assembly,
Plesseremove
thGMotorCoverflrst.Thcr€sre
liveScrervonit.
Oll Wa3h€r
Ol0 SpringWrsher
Ml0135HexBolt

Assembly Instruction
Step
2:Left Uprights
Attachleftuprightstothe
baseusing
Bolt
Ml0*35
(Qty.3)
,Spring
Washer
08 (Qty/3)
andWasherO1l(Qty.3)
shownas
below.
Lcfi upright
M10*35HcxBoll
OII Washer
o8 Springw!3h€r
DeckFremc
Step
3:LeltUprights
Attach
leftuprightstothebascusingBolt
Ml0*358Qty.2)
,Spring
Washcr
O
l0 (Qty.2)
andWashcrOl I (Qty.2)
shownasbelow.
Lefl Uprighl
Oll WNsh€r
O10Spring
Ml0*35|i€rBolt

Assembly Instruction
Stcp4: Right Uprights
l{epeat
assemblystcpslbr right sideuplightsaslelt uprights.
Step
5i Console
LAttach theconsole
hamcssshoNnas
belowlogctherfrom insidc
theuprightsandbase
nssembly.
2.Attach
theleftconsolcto llreuplightsusirrg
Sclew
(Qty.8)
,Spring
Wdshcr
(Qty.lt)
und
Washer
(Qty.lt).
3.Atlach
thelcli console
to
thcuprightsusing
Screw
(Qty.8)
.Spring
Washer
(Qty.li)
ond
Washcr
(Qty.8).
Console
Lelt
tJ
prig
ht

Assembly Instruction
Step6: Console
Aftachright fcnders
intothcbackof consolc
show
ndsbeloBusing
ScrcwST4.2
* l9 and
Scrcw
ST4.2*50.
ST.l.2*50
Philips
Sc
I
_[
,/\ s-|
4.2*19
PhilipsScrew
Step
7:Motor Covcr
Attitch
n'rotor
covcr
todrel)ase
shorvnas
belorvusing
screNST4.2*
l6 (ety.2)
.Washcr
(l)6
(Qty.2)
and
Spring
Washer
(D6
(Qry.2).
l,cftUpright
Motor Co!e''
SidcRail
ST4.2*16
Philips
Scrow
(D6
Washcr
(I'6
Spr.irgWashet Deckl'rtmo
$rr/
\\
,ll
./Z
10
Assembly lnstruction
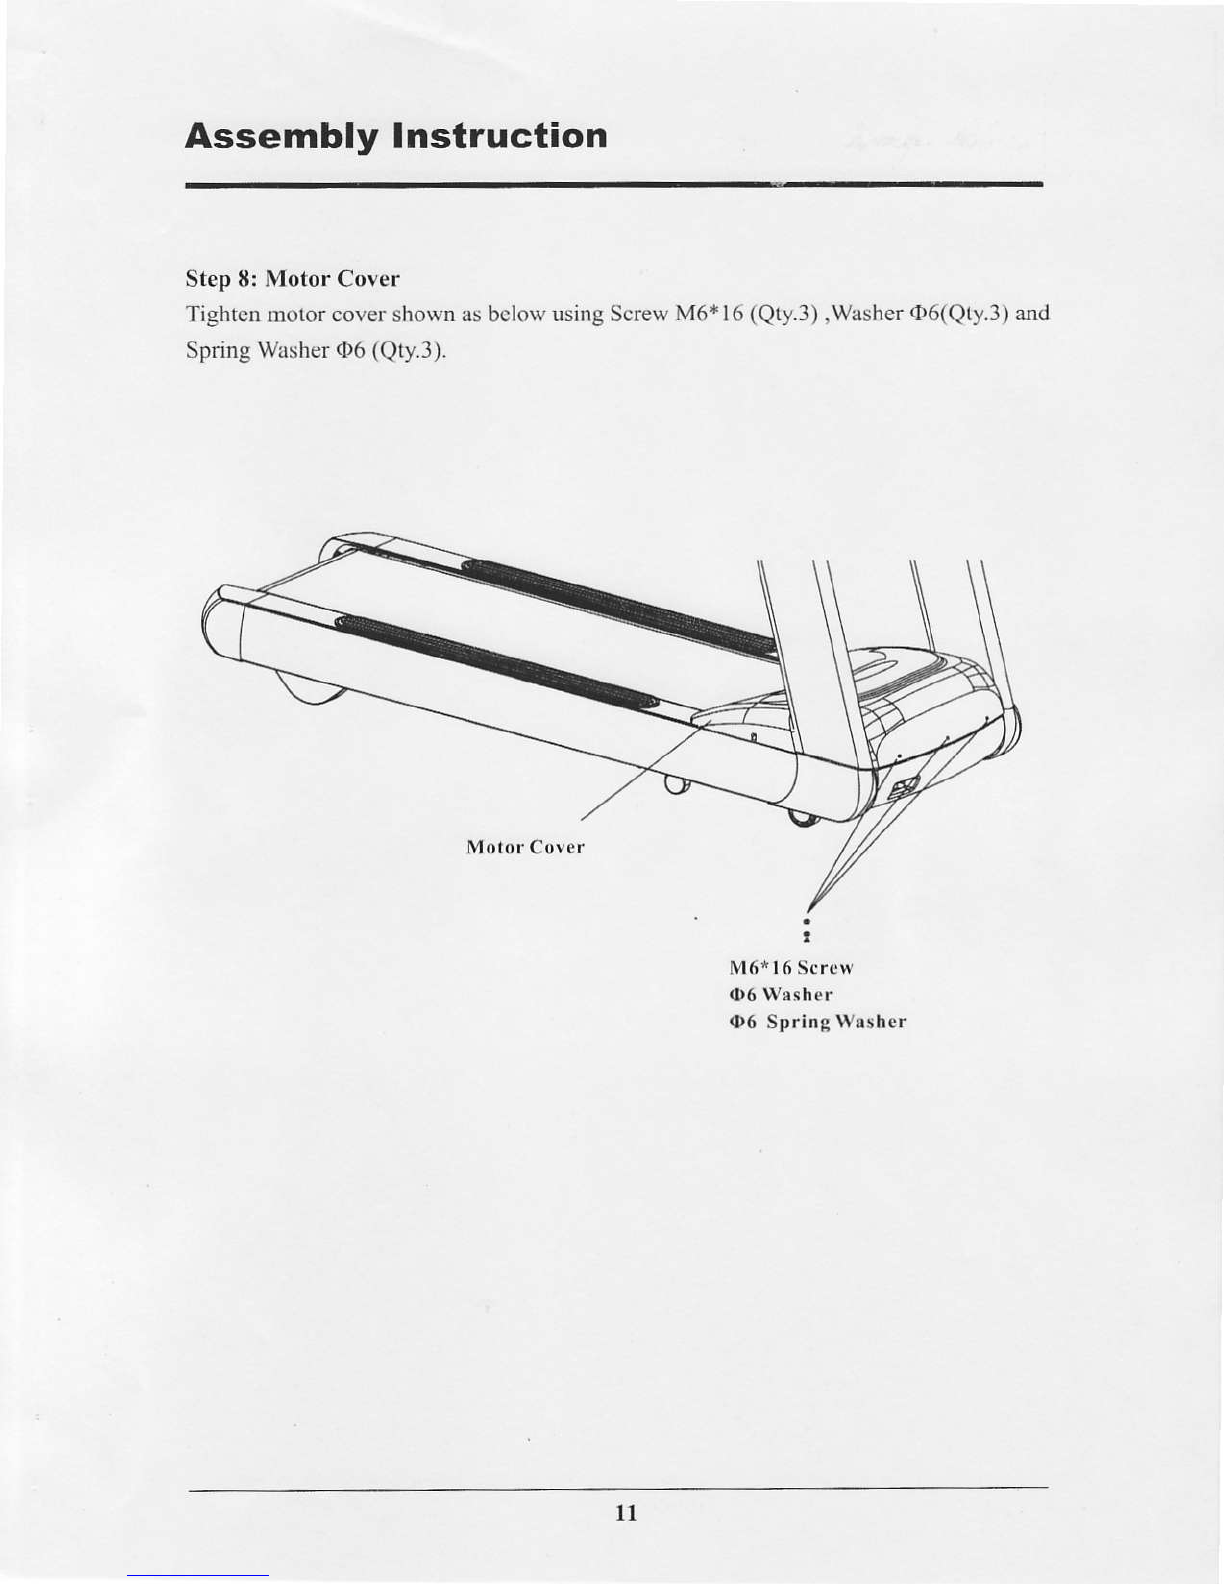
Step8:Motor Cover
Tightermotorcovershown
as
bclow
usingScrew
M6*
l6 (Qty-3)
,Washer
@6(Qty.3)and
Springwasher
(D6
(Qty.3).
I
M6al6Scrcw
O6Wsrhcr
(D6
Spring
Wrsher
11

Assembly Instruction
Adjustmorehighershown
asbelow
A tokeepthetreadmill
in balance
,next,tighten
all
boltsby wrench.
Congratulations
!!
Youhave
completed
theassemblyo{your newtreadmill.
t2

Power Requirements
IMPROPER
CONNECTIONOF
THE
EOUIPMENTGROUNDINCCONNECTOR
CANRESULTTNARISK
OF
ANELF]CTRICSUOCK.CHECK
W|IH AQUALIFIED
ELECTRICIAN
ORSERVICE
MAN
IF
YOU
NRE
IN
DOUBTASTOWIIE'|HER
I'HEPRODUCT
ISPROPERI-YGROUNDED,DO
NOI'
MODIFYI'II-E
PLUC
PROVIDEDWII'HTH-EPI{ODUCT.IFPLUCWILLNOTFIT
THEOUTLET.HAVD
A PROPEROUTI,ETINSTAI-LED
BYAOUAI.,IFIEDEI-I]CTRICIAN,
Thistreadmill
canbeseriouslydamagedbysudden
voltagc
changesin
your
home's
electrical
power.Voitage
spikcs,surges,androiscinterlerencecan
tesult
f'K)mwcathcr
conditionsorlrofi othcr
appliancesbeingtumed
onoroll .Toreduce
thc
possibilityof
trcadmill
damagc
,always
useadedicatedsurgc
protector
(not
includcd)with
your
treadll1ill.
Surge
protectors
canhe
purchased
atmosthardwlrestores._lhemanuf'acturer
rccomnlends
asingleoutletsurgc
protectorwith
CEratingasaltansient
Vollage
Surgc
Suppressor
(-I
VSS)with
CEsupprcsscd
voltageratingol400V
or
less
and
an
electrical
rating
of25oVAC,l5 amps.
Thistreadmillmust
be
grounded
to
reduce
the
risk
ofelectricalshock
.Crounding
orovidcsaoathofleastresistancctbrelectriccunentshouldthctreadnrillmalf'unctiorr.
Thistreadrnill
conres
with
anelectricalcord
with
anequipment-groundingconductorand
a
grounding
plug
.Always
plug
the
powcr
cordi|to asurge
protector,andplug
thesurgc
protcctor
into
anappropriatcoulletthat
is
propcrly
inslallcd
and
grounded
inaccordancc
with
alllocal
codcs
and
ordinances.l)o
not
conncct
other
equipment
tothe
surgc
protector
orthiscouldcause
pcrmanent
danrageto
your
treadmill.
This
product
isloruseonanorrinal250-voltcircuitandhasa
groundingplug
thatlooks
like
thc
plug
illustratedinthc
drawing
below,
l3

Gonsole Panel Functions
I Display
Preset 1
Ptes€t2
Pr€s€t3
Customer
I
Custofner 2
Cu!torner 3
Customer
4
IIR Rate 1
HR Rate 2
HR Rate 3
Manual
a
a
a
a
a
o
a
a
a
a
a
a
Dot Matrix
Tirne

Gonsole Panel Functions
Therearesix
displaywindowsonthe
control
panel
to
provide
feedback
inlbrmation.
TIME WINDOW
TIME: lndicates
elapsedtime
after
pressing
startinminutesandseconds
(0-99
mrnures,
0-59
seconds).
INTERVAL
TIME: lndicatescountdowninseconds
tothenext
intewalstarting
at5
seconds
andcounlingto0seconds.
SPEEDWINDOW
SPEED:lndicates
KPH
(kilometer
per
hour)in.I increments.
DISTANCE
WINDOW
DISTANCE:
IndicatcsKilometers
traveledin.l increments
upto999and.1increments
startingat0.1
CALORIESWINDOW
CALORIES:lndicates
estimated
caloriesusedbasedon75Kg
.personattheindicated
speed,incline
,and
time.
INCLINE WINDOW
INCLINE:
lndicatesinclinc
inpercent
ofgrade0-15%in 1.0increments.
PULSEWINDOW
PULSE:lndicates
pulse
yourpulse
rate(BPM).
CENTERBRICKYARDWINDOW
The
dotmat x display
green
thenbecamered.Affer
4s
,the
dotmatrixdisplay
"Wclcome
toInray"
(lt can
show
your
idea)
l5

GonsolePanelFunctions
2Button
Spced+.Spced-;
Irrcline*,lncline-;
Start/Stop;
Prograrr;
Modc;
lan;
lnterval+,lnterval-;
Speed-onctouch
(2
,4
,6
,8
,
l0
.12,l4);
Inclinc-onetouch
(2
.4.6
,8,10
.12.
14);
Ilandlc
Speed+,Spced-;
HandlcIncline
t ,lncline-;
3llowtoturn
on
thc
powcr
'lum
ontlrcPorver-switchorrtlrcfiontoflreadmill
,Now
tlredotmatrixdisplay
green
thenbccamered.Alier4s
,thc
dolmatrixdisplay
"Welcome
toInray"
(lt
canshow
your
ide&)
HOWTOUST]TI'IEMANUALMODE
A.The
flanual
rrrodc
isdel'aultcd
wlren
tu edonthe
power.
ll.Press
"mode-key"
toselcct
'l
ime& Calories
& Distance
,Use
speed+
& speed-kcys
loadJuslparanretel-
(1.
Press
"start-key".
D.Thensclcctspeed& incline.
HOWTOUSEPresctl-Preset4MODE
Press
"Program-key"
tosclcctPresetl-Preset4modewhentumedonPowerthcn
press
"start-key"
torun.NoticeFronl
presetl
to
prcset4
bedon'tadjust.
HOW
TOUSECustomerl-Customcr
MODE
Press
"Prograrn-key"
toselect
Custormerl--Customcr
modewhentumedon
power
thcn
press
"start-key"
torun.FromC-ustomerltoCustomer4betoadjust,Use
interval+&
interval-
keys
toselecl
I0 pans
ofcustomer
program
,Use
speed+& speed-keysto
adjustlcvelolSpccd& Incline.
l6

GonsolePanelFunctions
HOW TO USEHR RateMODE
Theconsoleollgrsthre€heanmteprograms:
HRI Rate\t{R2
Rate\HR3Rate
programs
.
Each
progEm
will automatically
controlthe
speed
andincJineofthetreadmill
to
keep
your
heaitmte
withintargctedheartratezonc.Followthestops
below
touse
aheartrate
program.
Put
onthechestheanratesensor.
YOUMUST WEAR THE CHEST
PULSE
SENSOR
TOUSEA HEART RATN
PROCRAM.
Asthe
programprogresses
,thc
speedandinclineofthetrcadmill
will change
periodically
tokeep
your
heart
ratenear
predetermined
settings
,shown
bythe
graphs
on
theleftsicle
ol theconsole.
HOW
TO USETHEFAN
Thcreare4diftbrent
fanspeeds10choosefiomLOW MEDIUM,HICH,and
STOP.'fo
setthedcsiredfanspecd
press
theFANbutton.
CalibrationMode
Calibrationmodeisentercd
by
pressing
SPEED+
& SPEED-AND lNClLtNE
r'
&
INCLINE-
keys
-The
treadmillauto.tocalibratespccd& inclinerate.
ERRORCODES
Dotmatrixcan
todisplay
l, "Please
checksafc-key"whensafe-keynowork
2."Please
chcckspced
pulse"
when
nospeed
pulse
3."Please
checkincline
pulse"
when
noinclinc
pulse
17

Gonsole
PanelFunctions
'l'roublcshooting
C;uide
Treadmill
will notstart
(l) Makesurcthepower
cordisplugged
intoasurgeprotector,the
surge
protector
is
pluggcd
intoa
properly
grounded
outlet
,ard
thesurgeprotector
istumedon.
(2)
ChccktheMAIN SWITCHlocatedonthefrontofthe
treadmill.lfthe switch
protrudes
,ithastrjpped.
(3)Have
anelectrician
checktoinsurethercis
adequatevoltageatthe
outlet.
Treadmill
loses
power
during
use.
(I) ChecktheMATN
SWITCI.Ilocatedontheliontofthcrrcadmill.I1'rheswitcn
protrudes
,i1
hastripped,
(2)
Ifthe treadmillwill notoperale
,please
call
CustomerService.
Treadmill
walkingbeltslowsduringuse.
(I
)Checktonlakc
sure
thetreadmill
issecurely
pluggcd
into
anCEsurge
protecror
,
rated
atl5 amps
,with
al4-gauge
cordoffive feelorless
andthesurge
protector
is
securely
pluggcd
intotheoutlet.
(2)
Iftreadmill
willnot
operate,pleasecall
CustomcrScrvice,
l8
Other ProSpot Fitness Treadmill manuals


