PTZOptics Studio Pro User manual

Rev 2.0 2023-10-23
Share Your Vision
PTZOptics
Studio Pro
User Manual
MODEL No.
PT-STUDIOPRO

Rev 2.0 2023-10-23
™
1
Preface ............................................... 1
Precautions ........................................... 2
Warning............................................... 2
Packing List ........................................... 3
Warranty ............................................. 3
FCC Statement ....................................... 4
Copyright Notice ...................................... 4
Features............................................... 5
Camera Features ...................................... 6
Technical Specications............................... 8
Powering the LED Light .......................... 10
Dimensions ...................................... 11
Connection Guide ..................................... 12
IR Remote Controller Guide ........................... 13
Shortcut Functions ............................... 16
Resetting Your Camera’s IP Address .............. 16
On-Screen Display .................................... 17
Network Connection .................................. 21
NDI ®| HX3 Connection................................ 24
Setting & Calling Presets .............................. 24
Achieving the Bokeh Eect ............................ 29
Web UI ................................................ 31
Serial & IP Command List.............................. 52
Troubleshooting....................................... 65
ptzoptics.com II 1-800-486-5276
2
™
534 Trestle Place Downingtown, PA, 19335 USA · Tel: +1(484)593-2247 · Email: support@ptzoptics.com
Rev 2.0 2023-10-23
Preface
Before installation and usage, please read the manual thoroughly. If you have any
questions or issues with this process, please contact our Support Team.
Precautions
▪Do not subject the camera to rain or moisture.
▪Do not remove the cover. Removal of the cover will void the camera’s warranty and may
cause an electric shock. For any abnormal operation, please contact support@ptzoptics.
com.
▪Never operate outside of the specied operating temperature range or humidity.
▪The power supply included in the box is the only power supply to be used with this cam-
era. To purchase a replacement, please visit ptzoptics.com/where-to-buy/.
▪Please use a soft cloth to clean the unit. If the unit is very dirty, clean it with diluted neutral
detergent; do not use solvents which may damage the surface.
Warning
▪Electrical safety
Installation must be in accordance with national and local electric safety
standards.
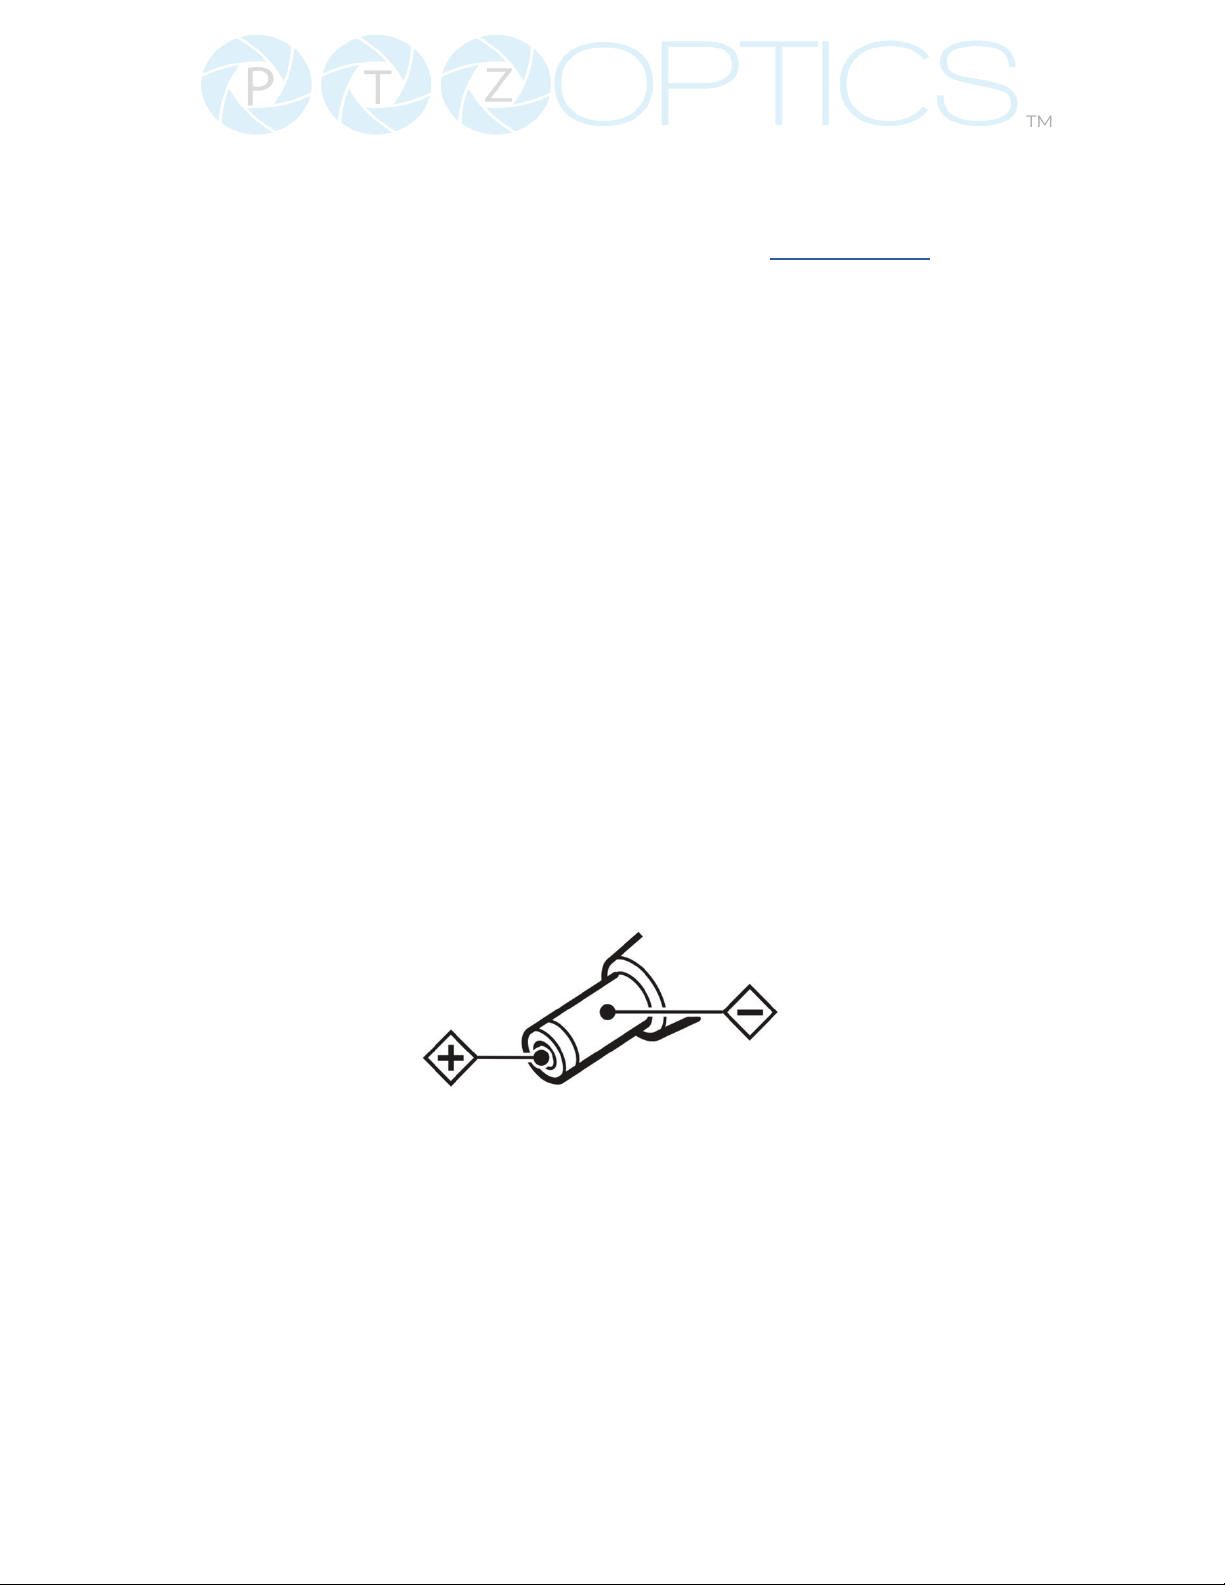
▪Polarity of Power Supply
The power supply output for this product is 12V DC with a maximum current
supply of 2A. The polarity of the power supply plug is critical and is as follows:
▪Handling
ŜAvoid subjecting the camera to stress, vibration, or moisture during
transportation, storage, installation, and operation.
ŜDo not lift or move the camera by grasping the camera head. To avoid
mechanical damage, do not turn the camera head by hand.
ŜDo not expose the camera to any corrosive solid, liquid, or gas.
ŜPlease make sure that there are no obstacles in the pan or tilt ranges of the
camera lens.
ŜAfter installation is complete, power on the camera.
ŜDo not dismantle the camera - PTZOptics is not responsible for any
unauthorized modication or dismantling.

3
™
Rev 2.0 2023-10-23
▪This is an FCC Class-A product. In a domestic environemt, this camera may cause radio
interference. In the event of radio interference, the user may be required to adequately
mitigate it.
▪Remote Control Battery Safety Information:
▪Store batteries in a cool and dry place.
▪Do not throw away used batteries in the trash. Properly dispose of used batteries through
specially approved disposal methods.
▪Remove the batteries if they are not in use for long periods. Battery leakage and corrosion
can damage the remote control.
▪Do not use old batteries with new batteries.
▪Do not mix and use dierent types of batteries: alkaline, standard (carbon-zinc), or re-
chargeable (nickel-cadmium).
▪Do not dispose of batteries in a re. Do not attempt to short-circuit the battery terminals.
Packing List
Please make sure the items below are included in your camera box:
ŜCamera
ŜAC Power Supply
ŜUSB A-C Cable
ŜLED Panel Light
ŜQuick Start Guide
ŜIR Remote
Ŝ2 AAA Batteries
Warranty
PTZOptics includes a limited parts & labor warranty for all PTZOptics manufactured
cameras. The warranty is valid only if PTZOptics receives proper notice of such
defects during the warranty period. PTZOptics, at its option, will repair or replace
products that prove to be defective. PTZOptics manufactures its hardware products
from parts and components that are new or equivalent to new in accordance with
industry-standard practices.
Here is the link to the PTZOptics Hardware Warranty Documentation. This product
has a 5-year warranty.
Covered by one or more claims of
the HEVC patents listed at
patentlist.accessadvance.com.

4
™
534 Trestle Place Downingtown, PA, 19335 USA · Tel: +1(484)593-2247 · Email: support@ptzoptics.com
Rev 2.0 2023-10-23
™
FCC Statement
This equipment has been tested and found to comply with the limits for a Class A
digital device, pursuant to part 15 of the FCC Rules. These limits are designed to
provide reasonable protection against harmful interference when the equipment is
operated in a commercial environment. This equipment generates, uses, and can
radiate radio frequency energy and, if not installed and used in accordance with
the instruction manual, may cause harmful interference to radio communications.
FCC Caution: Any changes or modications not expressly approved by the
party responsible for compliance could void the user’s authority to operate this
equipment. Operation is subject to the following two conditions: This device may
not cause harmful interference, and (2) this device must accept any interference
received, including interference that may cause undesired operation.
Copyright Notice
The entire contents of this manual / guide, whose copyright belongs to PTZOptics,
may not be cloned, copied, or translated in any way without the explicit permission
of the company. The product specications referred to in this document are for
reference only and as such are subject to updating at any time without prior notice.

5
™
Rev 2.0 2023-10-23
Features
• Full-featured USB Interface
Full-featured USB Type-C interface, compatible with USB 3.0 and USB 2.0, supports
audio, encoding output, and UVC 1.5.
• Precise Focus
Equipped with TOF close-range assisted focusing, combined with advanced focusing
algorithms, it can quickly and stably focus regardless of distance.
• 1080P HD Image
Adopts a new generation of Panasonic 1/2.8-inch, 2.07 million eective pixel high-quality
HD CMOS sensor, which can achieve high-quality images with a maximum resolution of
1920x1080.
• Easy to Use
Supports Portrait and Landscape screen switching. Suitable for horizontal and vertical
screen display screens. USB plug-and-play, simple and fast. The cold shoe mount al-
lows the panel light or an external microphone to be integrated to enrich the scene.
• HDMI 1.4b
Supports HDMI 1.4b, can directly output uncompressed 1080P60 original video.
• 72.5° Wide Lens + 12x Optical Zoom
Adopts 72.5° high quality ultra wide-angle lens, optical zoom up to 12x, and supports 16x
digital zoom.
• LED Panel Light
Color adjustment with warm/natural light and dimming range. Can be charged by Studio
Pro USB 2.0 port.
• Supports PoE
Supports PoE power control, video and audio only needs one network cable to complete.
• Network Encoding Output
Supports dual network video stream output (rst stream, second stream).
• Multiple Interfaces
Supports HDMI, USB 3.0 and network interface, can output 1080P60 video at the same
time.
• Three Power Supply Methods
Supports USB 5V, DC 12V power adapter and PoE power supply.

6
™
534 Trestle Place Downingtown, PA, 19335 USA · Tel: +1(484)593-2247 · Email: support@ptzoptics.com
Rev 2.0 2023-10-23
Camera Features
• Camera Control
Video Templates: The PTZOptics team is making it easy to select the best
performance IP video streams for your project by providing easily selectable
video templates for NDI and IP streaming.
White Balance Modes: This feature helps in adjusting the color balance
in your images, specically focusing on the color white. Dierent lighting
conditions can change the color of white, which may alter other colors in the
image. White balance modes can help correct for dierent types of light like
sunlight, shade, tungsten, uorescent, etc. so that the white in your image
remains true and other colors are displayed correctly.
Exposure Modes: This refers to the dierent methods the camera uses
to decide the correct combination of aperture, shutter speed, and ISO to
achieve the perfect exposure. Dierent modes could include manual (where
you control everything), auto (the camera decides), or other modes that
allow control over one aspect (like shutter priority, where you control the
shutter speed and the camera adjusts the other settings)
• Additional Updates
On-Camera Firmware Updates: This feature allows you to update the
camera’s rmware directly from the camera itself. Firmware is the low-level
software that controls the hardware of your camera. Being able to update
it directly on the camera simplies the process and ensures you can easily
have the latest features and bug xes.
Proles: PTZOptics cameras now feature multiple proles that allow you to
quickly set up your camera for dierent shooting situations. For example,
you might have one prole for indoor shooting, another for outdoor shooting,
and another for low light situations. Each prole would have dierent
settings for things like white balance, exposure, frame rate, etc.

7
™
Rev 2.0 2023-10-23
• Networking
Simple Network Discovery: This is a feature that allows the camera to be
easily discovered and connected to a network. PTZOptics cameras can now
be found by simply entering http://ptzoptics.local/ into any web-browser.
The IP address can then easily be changed through the user interface.
NTP for NDI sync: Network Time Protocol (NTP) is a networking protocol
for clock synchronization between computer systems over packet-
switched, variable-latency data networks. This can be used to ensure that
the timestamps on the Network Device Interface (NDI) streams from your
cameras are accurate and synchronized, ensuring that your video streams
are in sync with each other and with any other networked devices.
Multicast/Unicast: This feature refers to the method of data transmission
over a network. In multicast, data is sent to multiple recipients at the same
time. In unicast, data is sent from one sender to one receiver. Depending on
your network setup and the requirements of your video stream, you might
want to use one or the other.

8
™
534 Trestle Place Downingtown, PA, 19335 USA · Tel: +1(484)593-2247 · Email: support@ptzoptics.com
Rev 2.0 2023-10-23
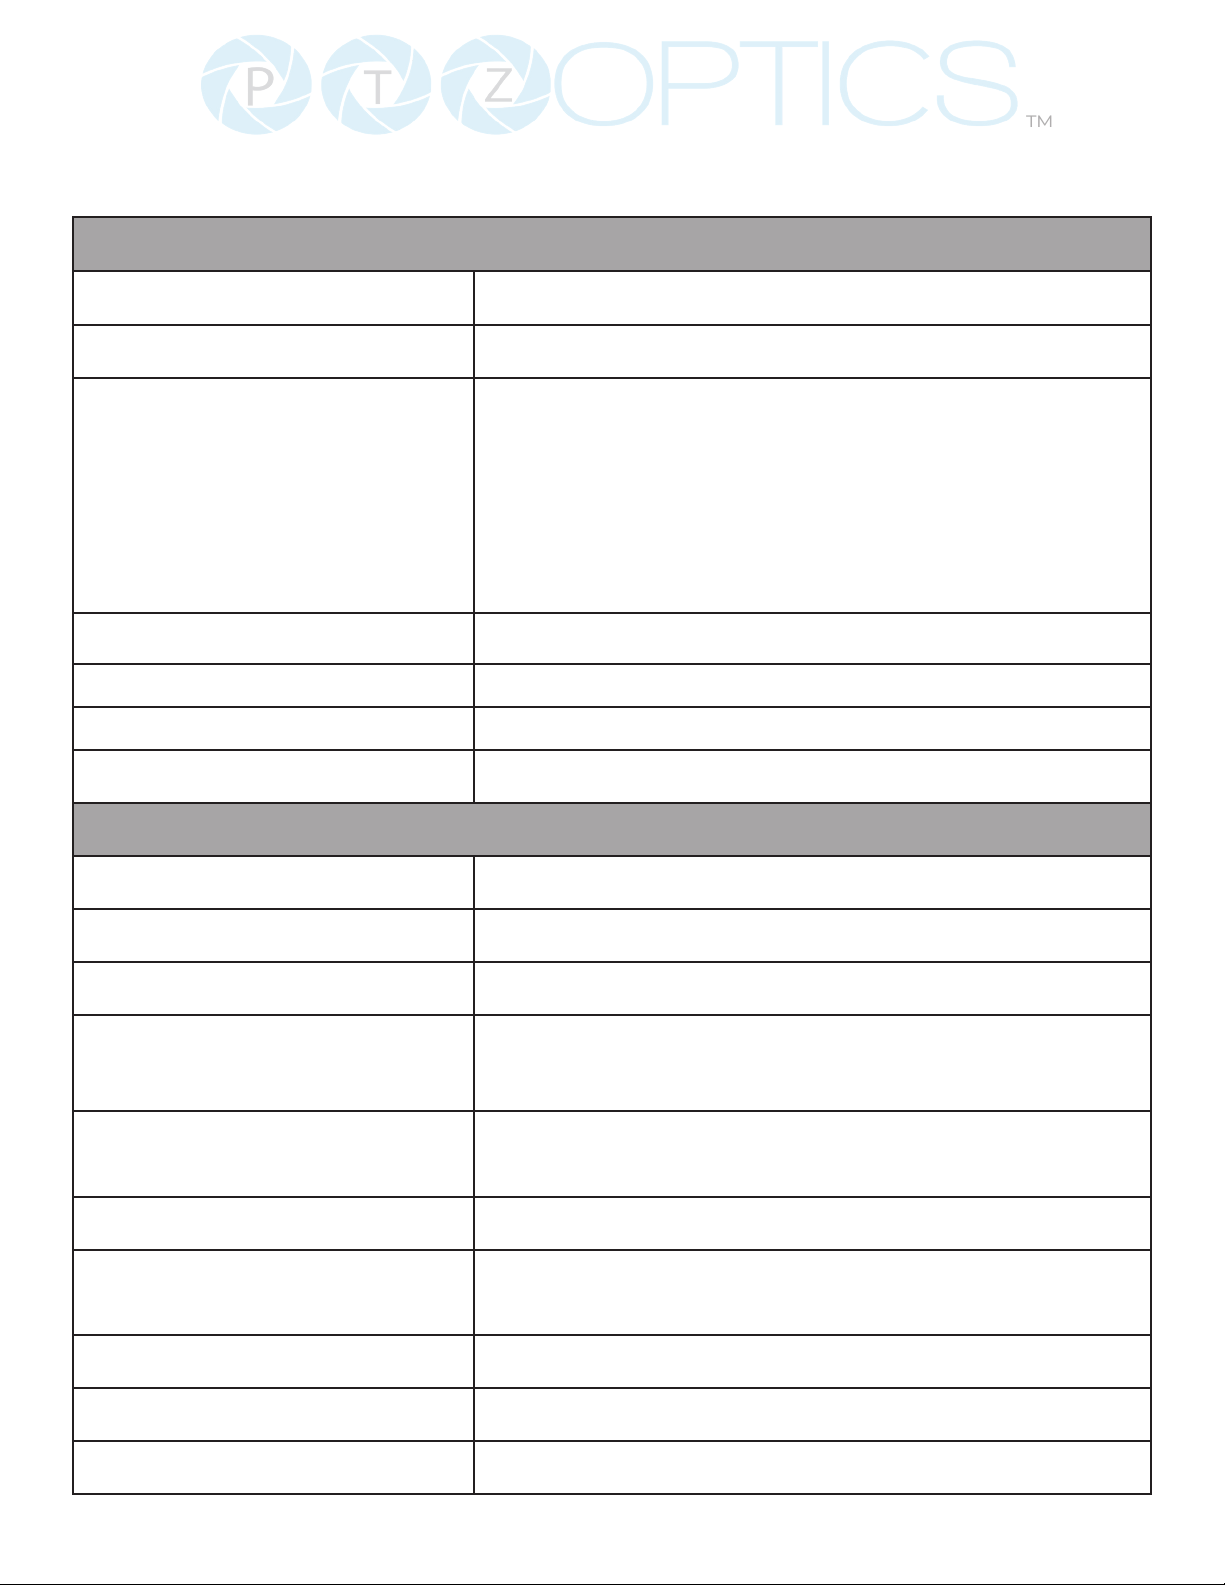
Camera & Lens
Resolution & Frame Rate HDMI & USB Type C: 1080P@60 / 50 / 30, 1080I@60 /
50, 720P@60 / 50
Sensor 1/2.8”, CMOS, Eective Pixels 2.07M
Scanning Mode Progressive
Lens 12X Optical Zoom f=3.5mm ~ 42.3mm, F1.8 ~ F2.8
Digital Zoom 16X Digital Zoom
Horizontal Field of View 6.9° ~ 72.5°
Veritical Field of View 3.9° ~ 44.8°
Minimum Illumination 0.5 Lux @ (F1.8, AGC ON)
Shutter 1/30s ~ 1/190s
White Balance Auto, Indoor, Outdoor, One Push, Manual, VAR
Backlight Compensation Supported
Digital Noise Reduction 3D & 2D Digital Noise Reduction
Video Signal Noise Reduction ≥55dB
Horizantal & Vertical Flip Supported
Image Freeze Supported
Number of Presets 255
Technical Specications
9
™
Rev 2.0 2023-10-23
USB Specications
Operating System Windows 7 / 8.1 / 10 / 11 / Mac OS, Linux, Android
Color System/Compression YUY2 / MJPEG / H.264
Video Format ▪YUY2: Max resolution: 1920x1080p@30
▪MJPEG: Max resolution: 1920x1080p@60
▪H.264 AVC: Max resolution: 1920x1080p@30
▪H.265: Max resolition: 1920x1080p@30
USB Audio Supported
UVC PTZ Supported
UVC Version UVC 1.1 ~ 1.5
UVC Control Supported
IP Video Specications
Video Compression H.264 / HEVC/H.265* / MJPEG
Video Stream First Stream, Second Stream
First Stream Resolution 1920x1080, 1280x720, 640x480, 640x360
Second Stream Resolution 1280x720, 1024x576, 720x576(50Hz support),
720x480(60Hz support), 720x408, 640x360, 480x270,
320x240, 320x180
Video Bit Rate First Stream: 32Kbps ~ 102400Kbps
Second Stream: 32kbps ~ 20480kbps
Bit Rate Control Constant Bit Rate (CBR), Variable Bit Rate (VBR)
Frame Rate 50Hz: 1fps ~ 50fps
60Hz: 1fps ~ 60fps
Audio Compression AAC
Audio Bit Rate 96Kbps, 128Kbps, 256Kbps
Support Protocols TCP/IP, HTTP, RTSP, RTMP, ONVIF, DHCP, and Multicast.

534 Trestle Place Downingtown, PA, 19335 USA · Tel: +1(484)593-2247 · Email: support@ptzoptics.com
Rev 2.0 2023-10-23
10
™
Input & Output Interface
HD Output ▪1x RJ45: 10/100/1000M Adaptive Ethernet Port
▪1x HDMI: Version 1.4b
▪1x USB 2.0: Type A (Supplies phantom oower to LED panel)
▪1x USB 3.0: Type C (Supplies video)
Audio Interface ▪1x 3.5mm Line level Input
IR 4x IR Addresses, Max distance 30ft / 9m
Horizontal & Vertical Image Flip
Switch
Power Jack JEITA Type (DC IN 12V)
Physical Parameter
Input Voltage DC 12V / PoE(802.3af)
Current Consumption 12V 1.0A(Max) / 5V 1.5A (Max)
Operating Temperature 14F ~ 104F (-10°C ~ 40°C)
Storage Temperature -40°F ~ 140°F (-40°C ~ 60°C)
Humidity Range 10% - 80%
Power Consumption Max 6W
Size in. (W x D x H) 3.03” W x 5.55” D x 4.21” H
Size mm. (W x D x H) 77mm W x 141mm D x 107mm H
Camera Weight 1.74 lbs | 0.7 kg
Powering the LED Panel Light
The Studio Pro is able to power and charge the LED Panel Light when connected to the included
power supply or via a power over ethernet (PoE) connection. When connected via USB, the cam-
era does not receive enough power to also charge the LED light. Please make sure to fully charge
your LED Panel Light before powering the Studio Pro via USB.

11
™
Rev 2.0 2023-10-23
Dimensions
5.55”5.55”
4.21”4.21”
3.03”3.03”

12
™
534 Trestle Place Downingtown, PA, 19335 USA · Tel: +1(484)593-2247 · Email: support@ptzoptics.com
Rev 2.0 2023-10-23
Connection Guide
1. To start your camera, please connect the power adapter to the DC-12V power connector port on
the back of the camera, ensuring all connections are correct and secure.
2. The power indicator on the front panel of the camera will illuminate.
1 2
1. Color Temp Dial
2. Dimmer Dial
3. LED USB C Port
4. LED Power Button
5. Cold Shoe Tilt Mount
6. HDMI
7. USB 2.0 5V Power
8. USB 3.0 Type C (Video)
9. Horizontal & Vertical
Screen Flip Switch
10. Mic Line In
11. LAN (POE)
12. DC 12V Power
3
7
6
8
9
10
11
12
5
4

13
™
Rev 2.0 2023-10-23
IR Remote Controller Guide
1
2
3
4
5
6
7
8
10
9
11
12
13
15
14

14
™
534 Trestle Place Downingtown, PA, 19335 USA · Tel: +1(484)593-2247 · Email: support@ptzoptics.com
Rev 2.0 2023-10-23
To control multiple IR PTZOptics cameras, this camera uses the same IR remote
included with our Pan Tilt Zoom models. However, being a xed camera lens, this
camera cannot pan or tilt.
1. Standby Button
Press this button to enter standby mode. Press it again to enter normal mode.
Note: Power consumption in standby mode is approxinately half of the normal mode.
2. Number Keys
Press to set or call preset camera position or input a number.
3. * Button
Used predominantly when calling shortcuts.
4. Set / Clear Presets
To Set a Preset: save a camera position, press [PRESET] + any number zero through nine.
To Clear a Preset: erase a camera position, press [RESET] + any number zero through
nine. To erase all presets, press [*] + [#] + [RESET]
5. Pan / Tilt Control Buttons
Press the [LEFT or RIGHT] arrow to pan. Press the [UP or DOWN] arrow to tilt. Press the
[HOME] button to return the camera to the front facing home position.
6. Return Button
Press the [RETURN] button to go back to a previous menu within the on screen display
(OSD)
7. Zoom Buttons
Press [+} to zoom in (Slow and fast speed)
Press [-] to zoom out (Slow and fast speed)
8. L / R Set Buttons
Set the Left & Right directional buttons for the remote.
Press the following buttons si-
multaneously.
Press {L/R SET] + [1]: Buttons function normally
Press [L/R SET] + [2]: Buttons function inverted
9. Focus Buttons
Adjust camera focus.
[AUTO]: focuses the image on the center object.
{Manual]: Manually control focus. Press [FAR] to focus on a far object. Press [NEAR] to
focus on a near object.
10. Camera Select Buttons
Press a number to select the corresponding camera you want to operate.

15
™
Rev 2.0 2023-10-23
11. # Button
For multiple functions. Typically used
when calling shortcuts
12. Multiple Function Buttons.
You can use this remote to control the auto-tracking functions of PTZOptics cameras that
support auto-tracking, but these functions will not function for the Studio Pro Camera.
Function 1: Auto Tracking Control
▪[F1]: Enable video-based auto-framing (Studio Pro nonfunctional)
▪[F2]: Enable audio-based auto-tracking (Studio Pro nonfunctional)
▪[F3]: Enable video-based auto-tracking (Studio Pro nonfunctional)
▪[F4]: Disable auto-tracking (Studio Pro nonfunctional)
▪[F4]: When the IR remote is on the same IR channel as the Studio Pro, pressing the [F4]
button will pause the video feed. Pressing the [F4] button again will play the video feed.
Function 2: For setting camera IR address.
Press these 3 keys one after another to set the
camera IR address as follows:
[*] > [#] > [F1]: Address 1
[*] > [#] > [F2]: Address 2
[*] > [#] > [F3]: Address 3
[*] > [#] > [F4]: Address 4
Function 4: Image Freeze
• [#] > [*] > [F4]: Freeze the video feed. Repeat to unfreeze. (Studio Pro nonfunctional.
This feature is only available for PTZOptics cameras that support auto-tracking)
13. Menu Button
Press to enter the camera’s On Screen Menu (OSD)
[MENU]: Open or close the On Screen
Display menu
14. Backlight Button
Use to enable or disable backlight
compensation.
Note: Only eective in auto exposure
mode.
Note: If there is light behind the subject,
they may appear darker. In this case, use
Backlight Compensation to enhance image.
15. P / T RST Button
Perform camera self-calibrate pan and tilt
movement. (PTZ Cameras Only)

16
™
534 Trestle Place Downingtown, PA, 19335 USA · Tel: +1(484)593-2247 · Email: support@ptzoptics.com
Rev 2.0 2023-10-23
Shortcut Functions
[*] > [#] > [1]: Display OSD menu in English
[*] > [#] > [3]: Display OSD menu in Chinese
[*] > [#] > [4]: Show IP address
[*] > [#] > [6]: Quickly restore the default settings
[*] > [#] > [8]: Show the camera version
[*] > [#] > [9]: Quickly set mount mode (ip / normal)
[#] > [*] > [7]: OnePush White Balance Trigger (Camera must be in OnePush White Balance)
[*] > [#] > [AUTO] Performs the “Startup Dance” on repeat
Resetting the IP address of your camera from the remote:
[*] > [#] > [MANUAL]: Resets IP information to default
[#] > [*] > [4]: Enable Dynamic IP address
[#] > [*] > [#] > [1]: Sets IP address to 192.168.100.81
[#] > [*] > [#] > [2]: Sets IP address to 192.168.100.82
[#] > [*] > [#] > [3]: Sets IP address to 192.168.100.83
[#] > [*] > [#] > [4]: Sets IP address to 192.168.100.84
[#] > [*] > [#] > [5]: Sets IP address to 192.168.100.85
[#] > [*] > [#] > [6]: Sets IP address to 192.168.100.86
[#] > [*] > [#] > [7]: Sets IP address to 192.168.100.87
[#] > [*] > [#] > [8]: Sets IP address to 192.168.100.88
[#] > [*] > [#] > [9]: Sets IP address to 192.168.100.89
[#] > [*] > [#] > [0]: Sets IP address to 192.168.100.80

17
™
Rev 2.0 2023-10-23
On-Screen Display
Main Menu
There are many ways to adjust the
camera’s On-Screen Display (OSD) Menu.
The following instructions will go over
the OSD Menu while using the included
IR remote.
Press the [Menu] button to display the
OSD Menu. Use the arrow buttons to
navigate the OSD menu, the [Home]
button to make selections, and the
[Return] button to go back a sub menu.
Menu
Exposure
Color
Image
Focus
Noise Reduction
Setting
Information
Restore Default
[Home] Select
[Menu] Exit
Exposure
Move the cursor to the “Exposure” option
and press the [Home] button to enter the
Exposure page, as shown in the gure
below.
Exposure
Mode Auto
Exp-CompMode On
ExpComp -1
Gain Limit 5
Meter Average
Backlight O
DRC 1
Anti-Flicker 60Hz
[Menu] Back
(Exposure) Mode: Auto, Manual, SAE,
AAE, Bright
ExpCompMode: On, O (Eective only in
Auto mode).
Exp-Comp: -7 ~ +7 (Eective only when
ExpCompMode is On).
Backlight: Toggle Backlight
Compensation. Options include: On, O
(Only available in Full Auto mode).
Bright: 0 ~ 23 (Eective only in Bright
mode).
Gain Limit: 0 ~ 15 (Eective only in Auto,
SAE, AAE, & Bright mode).
Anti-Flicker: O, 50Hz, 60Hz (Eective
only in Full Auto, AAE, Bright mode).
Iris: Close, F11.0, F9.6, F8.0, F6.8, F5.6,
F4.8, F4.0, F3.4, F2.8, F2.4, F2.0, F1.8
(Eective only in Manual, AAE mode).
Meter: Average, Center, Smart, Top.
(Available only in Full Auto, SAE, AAE, &
Bright)
Shutter: 1/30, 1/40, 1/50, 1/60, 1/70,
1/80, 1/90, 1/100, 1/110, 1/120, 1/130,
1/140, 1/150, 1/160, 1/170, 1/180, 1/190
(Eective only in Manual, SAE mode).
Gain: 0 ~15 (Eective only in Manual
mode).
DRC Strength: Dynamic Range Control
0 ~ 8
18
™
534 Trestle Place Downingtown, PA, 19335 USA · Tel: +1(484)593-2247 · Email: support@ptzoptics.com
Rev 2.0 2023-10-23
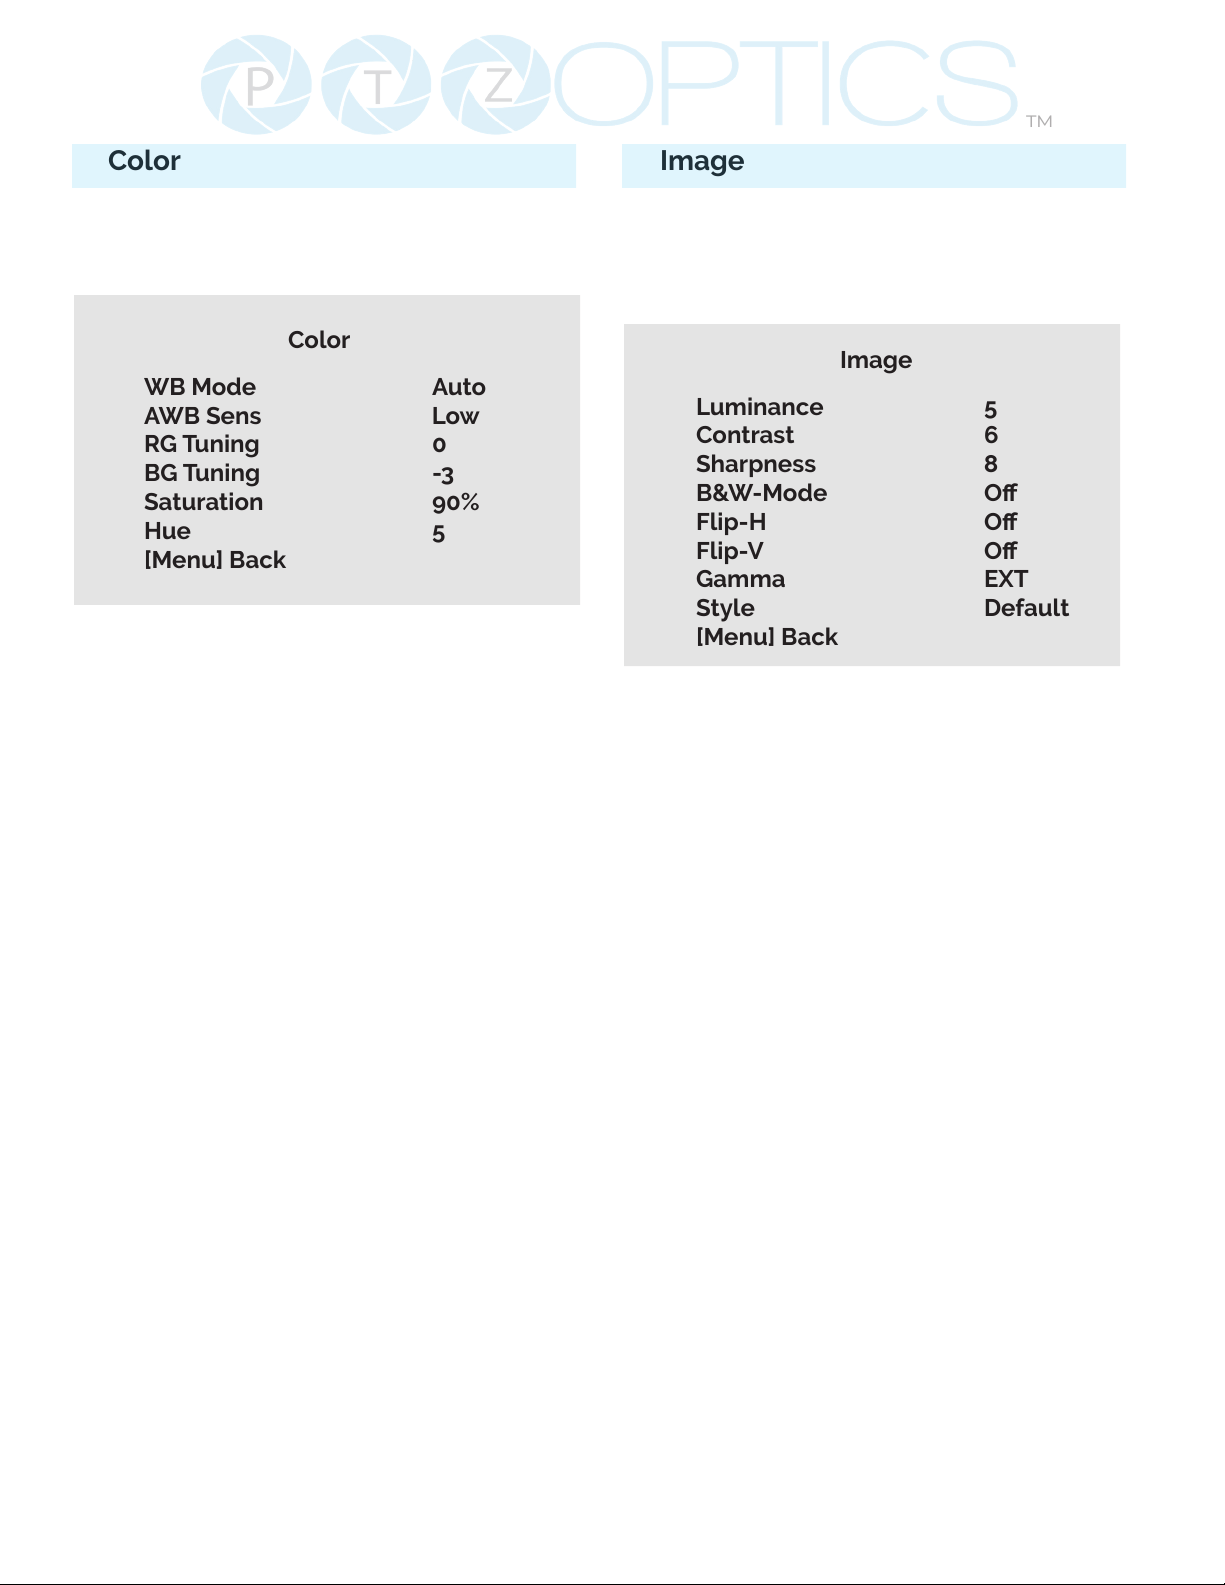
Color
Move the cursor to the “Color” option
and press the [Enter] button to enter the
Color page, as shown in the gure below.
Color
WB Mode Auto
AWB Sens Low
RG Tuning 0
BG Tuning -3
Saturation 90%
Hue 5
[Menu] Back
WB Mode: Auto, Indoor, Outdoor, One
Push, Manual, VAR
AWB Sens: Auto White Balance
Sensitivity Low, Middle, & High
R. Gain: Camera Red Gain value. Options
include: 0 ~ 255 (Only available in Manual
mode).
B. Gain: Camera Blue Gain value. Options
include: 0 ~ 255 (Only available in Manual
mode).
Color Temp: 2500K ~ 8000K (Eective
only in VAR mode).
RG Tuning: -10 ~ +10 (Eective only in
Auto, One Push, VAR mode).
BG Tuning: -10 ~ +10 (Eective only in
Auto, One Push, VAR mode).
Saturation: Camera Saturation value.
Options include: 20% - 200%
Hue: Camera Hue value. Options include:
0 ~ 14
Image
Move the main menu cursor to [Image],
and press [HOME] key enter the Image
page, as shown in the following gure.
Image
Luminance 5
Contrast 6
Sharpness 8
B&W-Mode O
Flip-H O
Flip-V O
Gamma EXT
Style Default
[Menu] Back
Luminance: Brightness value. Options
include: 0 ~ 14
Contrast: Contrast value. Options
include: 0 ~ 14
Sharpness: Sharpness value. Options
include: 0 ~ 15, Auto
B&W Mode: Toggle Black & White mode.
Options include: On, O
Flip-H: Flip image horizontally. Options
include: On, O
Flip-V: Flip image vertically. Options
include: On, O
Gamma: Default, EXT, 0.56, 0.63
Style: Default, Face, Jewelry

19
™
Rev 2.0 2023-10-23
Focus
Move the main menu cursor to [Focus],
and press [HOME] key enter the Focus
page as shown in the following gure:
Focus
TOF Focus O
AF-Sense Normal
Auto Focus On
AF-Zone Middle
Focus Lock Unlock
Focus Limit O
Furthest Pos INF
Nearest Pos 1m
[Menu] Back
TOF (Time of Flight): On, O. Measures
distance between camera and subject
based on light signal travel time.
AF-Sense: High, Normal, Low
Auto Focus: On, O, One Push
AF-Zone: Determine what area the
camera focus targets. Front, Top, Middle,
Bottom
Focus Lock: Lock, Unlock
Focus Limit: On, O
Furtthest Pos: INF, 1M - 20m (Only
available when focus limit is on)
Nearest Pos: INF, 1M - 20m (Only
available when focus limit is on)
Noise Reduction
Move the main menu cursor to [Noise
Reduction], and press [HOME] key enter
the Noise reduction page, as shown in
the following gure.
Noise Reduction
2D NR 4
3D NR 6
[Menu] Back
2D NR: Auto, Close, 1 - 5
3D NR: Auto, Close, 1 - 8
Setting
Move the main menu cursor to [Setup],
and press [HOME] key enter the Setup
page, as shown in the following gure.
Setup
Language English
Guard Position Preset 0 Priority
Video Format 1080p60
Audio Enable On
Audio PC Mono On
[Menu] Back
Language: Options include: English,
Chinese
Guard Position: Preset 0 Priority, Zoom
Stop Save
Video Format: 1080p60, 1080p50,
1080p30, 720p60, 720p50
Audio Enable: On, O
Audio PC Mono: On, O
This manual suits for next models
1
Table of contents
Other PTZOptics Digital Camera manuals

PTZOptics
PTZOptics PT30X-4K-WH-G3 User manual

PTZOptics
PTZOptics Move 4K User manual

PTZOptics
PTZOptics 12X NDI|HX ZCAM User manual

PTZOptics
PTZOptics 20X-ZCAM User manual

PTZOptics
PTZOptics PT20X-NDI-ZCAM User manual

PTZOptics
PTZOptics NDI HX PT20X-NDI-ZCAM User manual

PTZOptics
PTZOptics VL-ZCAM User manual

PTZOptics
PTZOptics PTEPTZ-ZCAM-G2 User manual

PTZOptics
PTZOptics VL NDI HX ZCAM User manual

PTZOptics
PTZOptics PT20X-NDI-GY User manual


