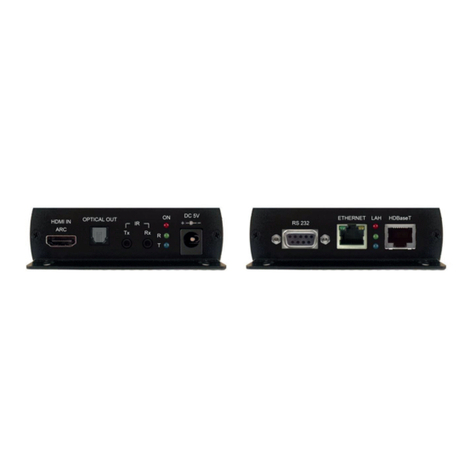
PureLink VIP200H-RX User manual

VIP-200
Video over IP Extender and Matrix System
Many to Point Switching Configuration
Quick Start Guide
PureLink
TM
535 East Crescent Avenue
Ramsey, NJ 07446
USA

PureLink VIP-200 Many to Point Distribution Quick Start Guide V .0
2
Contents
What is in the box ........................................................................................................................................... 3
Transmitter kit Receiver kit ................................................................................................................. 3
Rack Mount Option Plates .............................................................................................................................. 3
Overview ......................................................................................................................................................... 4
Auto IP Addressing (recommended) ........................................................................................................... 4
Manual IP Addressing ................................................................................................................................. 4
DHCP Addressing ......................................................................................................................................... 5
One Transmitter to Multiple Receiver Setup (point to many distribution) .................................................... 6
KVM Operation ............................................................................................................................................... 7
Typical reference streaming rates ................................................................................................................... 7
Remote Control............................................................................................................................................... 8
Initial setup of remote control .................................................................................................................... 8
Typical remote control operation for Point to Point Operation .................................................................. 8
Mute/unmute image ................................................................................................................................... 9
Troubleshooting – Point to Many ................................................................................................................. 0
Appendix ....................................................................................................................................................... 0
Specifications ................................................................................................................................................ 2
Network Switch Requirements ..................................................................................................................... 3
Pure Assurance Tested Network Switches ................................................................................................ 3
GS 08: 8 port https://www.netgear.com/support/product/GS 08?cid=wmt_netgear_organic ............ 3
JGS524E: 24 port
https://www.netgear.com/support/product/JGS524E.aspx?cid=wmt_netgear_organic ................... 3

PureLink VIP-200 Many to Point Distribution Quick Start Guide V .0
3
What is in the box
Transmitter kit Receiver kit
x transmitter (VIP200H/D/V-TX) x transmitter (VIP200H/DV-RX)
x Power Adapter x Power Adapter
x Infrared Receiver x Infrared Emitter
Remote Control
Remote control for receivers VIP200H-RX and VIP200DV-RX
Rack Mount Option Plates
VIP200H-TX-RACK3
VIP200H-RX-RACK3
VIP200DV-TX/RX-RACK2
HDMI Transmitter
HDMI
Receiver
VGA
Transmitter
DVI
Transmitter
VGA/DVI Receiver
VIP200H
-
TX
VIP200H
-
RX
VIP200V
-
TX
VIP200D
-
TX
VIP200DV
-
RX

PureLink VIP-200 Many to Point Distribution Quick Start Guide V .0
4
Overview
The VIP200 series allows point to point, point to many, many to point, and many to many
configurations. The VIP200 series allows easy configuration of many transmitters to one
receiver. You can operate a many to one VIP200 system easily with the supplied remote
control or the VPX software. The VIP200 utilizes the VPX Software to discover and configure
the system for quick implementation and easy operation.
Using the VIP200’s Auto IP assignment method provides the easiest and fastest setup.
There may be applications where you want to use a network switch that either provides
DHCP addressing where the switch assigns all devices an IP address, or manual addressing
where you set the IP addresses of the devices.
The VIP200 series provides three modes of IP addressing.
Auto IP Addressing
The VIP200 system default configuration provides automatic IP addressing in the
169.254.xxx.xxx range. The Auto IP method provides instant and easy setup and operation
of the VIP200 devices when a specific manual IP address method is not required, and DHCP
is not required.
Manual Static) IP Addressing
The VIP200 device IP addresses can be configured manually (static). Using our simple
software application (iCON VIP Device Manager) to identify the devices current IP scheme
and address, you can then access their built in web page interface to change the devices to
Manual IP mode if not already set. Manual IP addressing is utilized when the network is not
DHCP, and the Auto IP range 169.254.xxx.xxx does not work with the current network, or the
intended design. These settings are normally done prior to adding on to a network. Please
see the ‘Setting Devices for Manual IP Addressing” in this manual.
iCON VIP200 Setup Tool – Device Manager

PureLink VIP-200 Many to Point Distribution Quick Start Guide V .0
5
DHCP Addressing
The VIP200 device IP addresses can be configured to accept IP addresses using DHCP.
Using our simple software application to identify the devices, you can then access their built
in web page interface to change the devices to DHCP IP mode.
NOTE: Because transmitters create continuous streaming traffic of video on the network, it is
recommended when possible to create your IP video network independent of your data
network, or use a managed network switch to create a VLAN. Use of gigabit switches with
jumbo frame and IGMP support will create the most appropriate scenario for both
independent IP video networks, and cases where IP video systems are included within your
data network.

PureLink VIP-200 Many to Point Distribution Quick Start Guide V .0
6
Many Transmitters to One Receiver Setup Many to Point Distribution)
remote control
iCON VPX Software
Many to point connection via CAT5e or better cable (CAT6a cable recommended)
VIP200 Transmitters and Receivers ship in Auto IP mode, which allows them to discover each other
with no configuration required. While it is possible to reconfigure the transmitter and receiver to
Manual IP or DHCP IP mode, it may not be necessary to make these changes in a many to point
configuration, unless you need them to be on a network with other devices, or a network that has a
DHCP or static IP method already employed.
•Connect the transmitters to your network switch
•Connect your receiver to the network switch
•Connect your source to the input of your transmitter
•Connect a display to the output of each receiver
•If desired, connect your confidence monitor to the loop out of the transmitter
•Connect the power adapters for each unit, and apply power. The system will go through a
normal boot up sequence that takes approximately ten seconds to display the image.
Transmitter
Receiver
Network Switch
Exam le A lication – Many to One

PureLink VIP-200 Many to Point Distribution Quick Start Guide V .0
7
KVM Operation
The receiver has four USB ports, the first port operates at . speeds, and the remaining ports operate at
2.0 speeds. Please use ports 2,3 or 4 when using a mouse or keyboard via USB to ensure ultra-low
latency. All receivers are by default enable to connect via USB to the transmitter. You can disable the
USB for each receiver if desired using our utility software, or from the OSD.
Typical reference streaming rates
Use of USB may add up to 50 mpbs to stream rate, depending on the USB device(s).

PureLink VIP-200 Many to Point Distribution Quick Start Guide V .0
8
Remote Control
Initial setup of remote control
A remote being use for the first time, or after battery replacement, nee s to be assigne an ID
The universal ID that will control all receivers is 8. Press the ‘Power’ an ‘8’ button at the same
time.
Typical remote control operation for Point to Point Operation
OSD will clear ten seconds from displaying any men .
•Display receiver MAC address
o“Menu”, “0”, “Enter”
•Display Local (Receiver) address
o“Menu”, “ ”, “Enter”
•Display Host (Transmitter) address
o“Menu”, “2”, “Enter”
•Display Receiver Firmware
o“Menu”, “5”, “Enter”
•Restart Link
o“Menu”, “6”, “Enter”

PureLink VIP-200 Many to Point Distribution Quick Start Guide V .0
9
•Stop Link
o“Menu”, “7”, “Enter”
•Enable Channel Buttons on Receiver (one transmitter = one channel)
o“Menu”,”26”,”Enter”
•Disable Channel Buttons on Receiver (recommended setting)
o“Menu”,”27”,”Enter”
In order to avoid system errors, it is recommended when sing one transmitter,
s ch as point to many distrib tion, to disable the channel b ttons, as yo will
always se only one channel. Yo can reverse this setting if needed.
•Display Selected Channel
o“Enter”
In a point to many config ration, it is recommended to se the defa lt
transmitter channel 1.
•Set to Receiver to Factory Default
o“Menu”,”333”,”Enter”
Sets the Receiver only to factory default
•Receiver reboot
o“Menu”,”999”,”Enter”
It is recommended for a one to many configuration that the transmitter is set on channel 1. The receiver
must match in order to receive the signal. Setting the units to factory default will set the transmitter to
channel 1 and Auto IP, and the receiver to listen for channel 1 and Auto IP.
Mute/unmute image
Press the ‘Power’ button to toggle mute/unmute. Note: there is an approximate four second
delay to unmute.

PureLink VIP-200 Many to Point Distribution Quick Start Guide V .0
10
Troubleshooting – Many to One
Transmitter re orts no source (via OSD on Receiver lower left corner)
•Check source is active
•Ensure input cable is plugged in to correct port on transmitter (input vs loop out)
•Confirm cable passes signal and is not damaged
•Check power to transmitter is on
Receiver dis lays “looking for transmitter” in lower left of dis lay
•Receiver may not be set to a channel that a transmitter is broadcasting on
oSolution: Set the receiver to a different channel using the minus/plus buttons on the
receiver, or the supplied remote control.
•More than one transmitter has the same channel
oSolution: Check the transmitters using the VIP200 Setup Tool Utility program, and
reprogram broadcast channels as necessary.
•Check that the CAT cables at both the transmitter and receiver are plugged in
•Check that all VIP200 devices have an illuminated green power LED.
Infrared remote control not o erating the receiver
•Check that the IR confirmation LED on the receiver blinks when you send a command from the
remote control
oCheck remote control battery (CR2025)
oCheck line of sight to IR receiver is not obstructed
oIf using an extension IR receiver, make sure the plug is inserted all the way in to the IR In
jack.
Appendix
MethodstodetermineAutoIPassignments
There are two ways to determine the IP assignments of the transmitters and receivers.
1. On Screen Display
Once the receiver discovers the transmitter that equals the channel it is assigned to, it will
display both IP addresses in the lower right corner when no video signal is present. If

PureLink VIP-200 Many to Point Distribution Quick Start Guide V .0
11
a video signal is present, you can request display of the host (transmitter) and client
(receiver) with the following remote control buttons:
2. Network Discovery
This method is available only when the transmitter(s) and receiver(s) are connected
together via a network switch, and a computer running the iCON VIP Device Manager
discovery tool is utilized. The computer’s ip4v address must be set correctly to detect the
devices.

PureLink VIP-200 Many to Point Distribution Quick Start Guide V .0
12
Specifications
Subject to change without notice

PureLink VIP-200 Many to Point Distribution Quick Start Guide V .0
13
Network Switch Requirements
While a Point to Point normally is configured with the transmitter and receiver directly connected to
each other by CAT cable, it is possible to have point to point over a network switch. The
requirements for a network switch are:
•IGMP
•JumboFrame
The VIP-200 devices do not require a managed switch to operate. When the VIP devices are specifically
on their own independent network switch, an unmanaged switch is sufficient. However, a managed
switch may provide value in an application where the VIP devices reside on a network with other
devices that may be impeded due to network traffic created by the VIP video/audio/usb streams.
Pure Assurance Tested Network Switches
S bject to change witho t notice. Please check o r website for c rrent pdated listing.
PureLink
VIP-NET 1G and 10G managed switches
http://main.purelinkav.com/main/index.php?dispatch=news.view&news_id=210
Netgear
GS108: 8 port unmanaged switch
https://www.netgear.com/support/product/GS108?cid=wmt_netgear_organic
JGS524E: 24 port unmanaged switch
https://www.netgear.com/support/product/JGS524E.aspx?cid=wmt_netgear_organic

PureLink VIP-200 Many to Point Distribution Quick Start Guide V .0
14
The VIP lines of PureStream IP Video products can be found at the purelinkav.com website
http://main.purelinkav.com/main/index.php?dispatch=products.view&product_id=223
This manual suits for next models
4
Table of contents
Other PureLink Transmitter manuals