Purezone Personal Air Filtration System Operating and maintenance manual

99.97% of allergens are removed where
it matters most—your breathing zone.
Allergy Relief
Clinically Proven
Proven in a randomized trial to reduce
allergy and asthma symptoms.
Comfortable & Convenient
Sets up easily on most bed styles and
uses your favorite pillow.
Removes 99.97% of airborne allergens where
it matters most—your breathing zone.
Allergy Relief
Clinically Proven
Proven to reduce night time allergy
symptoms in a randomized, placebo-
controlled trial.
Comfortable & Convenient
Sets up easily on most bed styles
using your favorite pillow.
edits
Clinically Proven
99.97% of allergens are removed where
it matters most—your breathing zone.
Allergy Relief
Clinically Proven
Proven in a randomized trial to reduce
allergy and asthma symptoms.
Comfortable & Convenient
Sets up easily on most bed styles and
uses your favorite pillow.
Removes 99.97% of airborne allergens where
it matters most—your breathing zone.
Allergy Relief
Clinically Proven
Proven to reduce night time allergy
symptoms in a randomized, placebo-
controlled trial.
Comfortable & Convenient
Sets up easily on most bed styles
using your favorite pillow.
edits
Allergy Relief
99.97% of allergens are removed where
it matters most—your breathing zone.
Allergy Relief
Clinically Proven
Proven in a randomized trial to reduce
allergy and asthma symptoms.
Comfortable & Convenient
Sets up easily on most bed styles and
uses your favorite pillow.
Removes 99.97% of airborne allergens where
it matters most—your breathing zone.
Allergy Relief
Clinically Proven
Proven to reduce night time allergy
symptoms in a randomized, placebo-
controlled trial.
Comfortable & Convenient
Sets up easily on most bed styles
using your favorite pillow.
edits
Comfortable & Convenient
Instructions for Installation and Use
www.purezone.com

2 PureZone Technologies, LLC
PureZone Technologies, LLC 3
Introduction ...................................................3
Parts List.......................................................4
Installation ....................................................6
Fan Unit Assembly .............................................8
Dual Chambered Pillowcase Assembly.........................16
Operation ....................................................18
Cleaning and Maintenance ....................................20
Troubleshooting ..............................................21
Specications.................................................22
Reordering information .......................................24
Technical Support.............................................24
Congratulations! You’ve taken the rst step to getting a better
night’s sleep. The PureZone Personal Air Filtration System protects
your breathing zone from allergens and pollutants by utilizing a com-
bination therapy of pillow dust mite encasement and high eciency
particulate air (HEPA) ltration. Sleep on your favorite pillow and expe-
rience the allergy symptom relief you deserve.
Denition of Symbols
Caution, consult
accompanying
documents
Heater Temperature
Fan Speed Change lter
Power
Read and Save These Instructions
Contents Introduction

4 PureZone Technologies, LLC
PureZone Technologies, LLC 5
Parts List Parts List
Fan Unit Remote Control
Mounting Bracket
Dual Chambered Pillow Case
(either standard, queen, or king sized)
Charged-Fiber HEPA Filter
(A) 1-Base (G) 1-5 mm Allen wrench
(B) 1-Back (H) 2-narrow bed rail hooks
(C) 2-Long cap head screws (allen) (I) 2-wide bed rail hooks
(D) 2-Pan head screws* (phillips) (J) 2-washers
(E) 2-Short cap screws (allen)
(F) 1-Thumb screw
* Note: Phillips head screw driver not included.
AB
D C E F
H
G
J
I
TM
TM

6 PureZone Technologies, LLC
PureZone Technologies, LLC 7
Installation Installation
The Fan Unit Can be Mounted in Three Positions
Option A: Floor Stand Mount
Accommodates beds up to 36
inches in height
Option C: Bed Rail Mount
Fits bed rails from
0.75 to 2.75 inches
Option B: Under Mattress Mount
How to Select the Mounting Method
1. For most bed styles, we recommend using Option A, the oor stand
mounting method. This method works best for beds that are less
than 36 inches in height.
2. Option B is the under mattress mount , which works well
for beds where the mounting bracket can be slid under
the mattress.
3. The bed rail mount option can be used on beds that have side rails
from 0.75 to 2.75 inches wide where the under mattress or oor
stand mounts are not ideal.
WARNING: Use of bed rail mount on elevated beds, such as an upper
bunk bed, is not recommended and may result in product damage or
injury if the fan unit becomes dislodged.
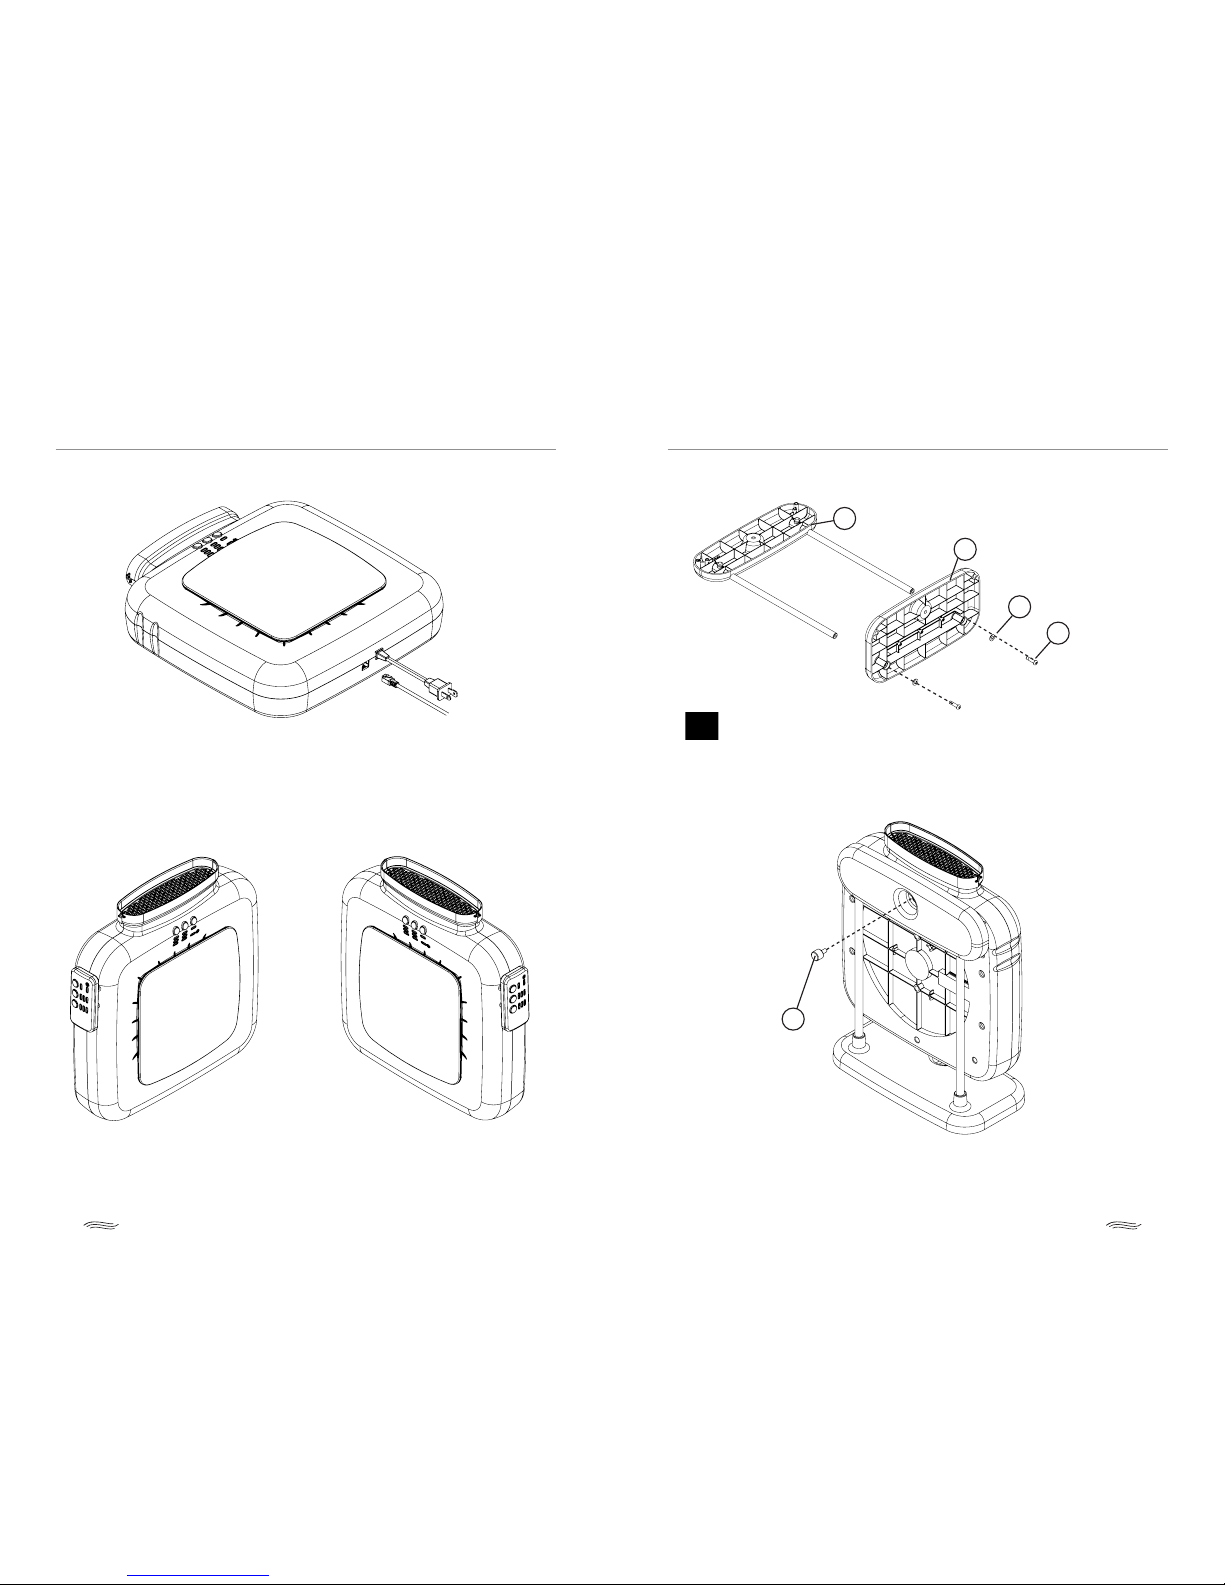
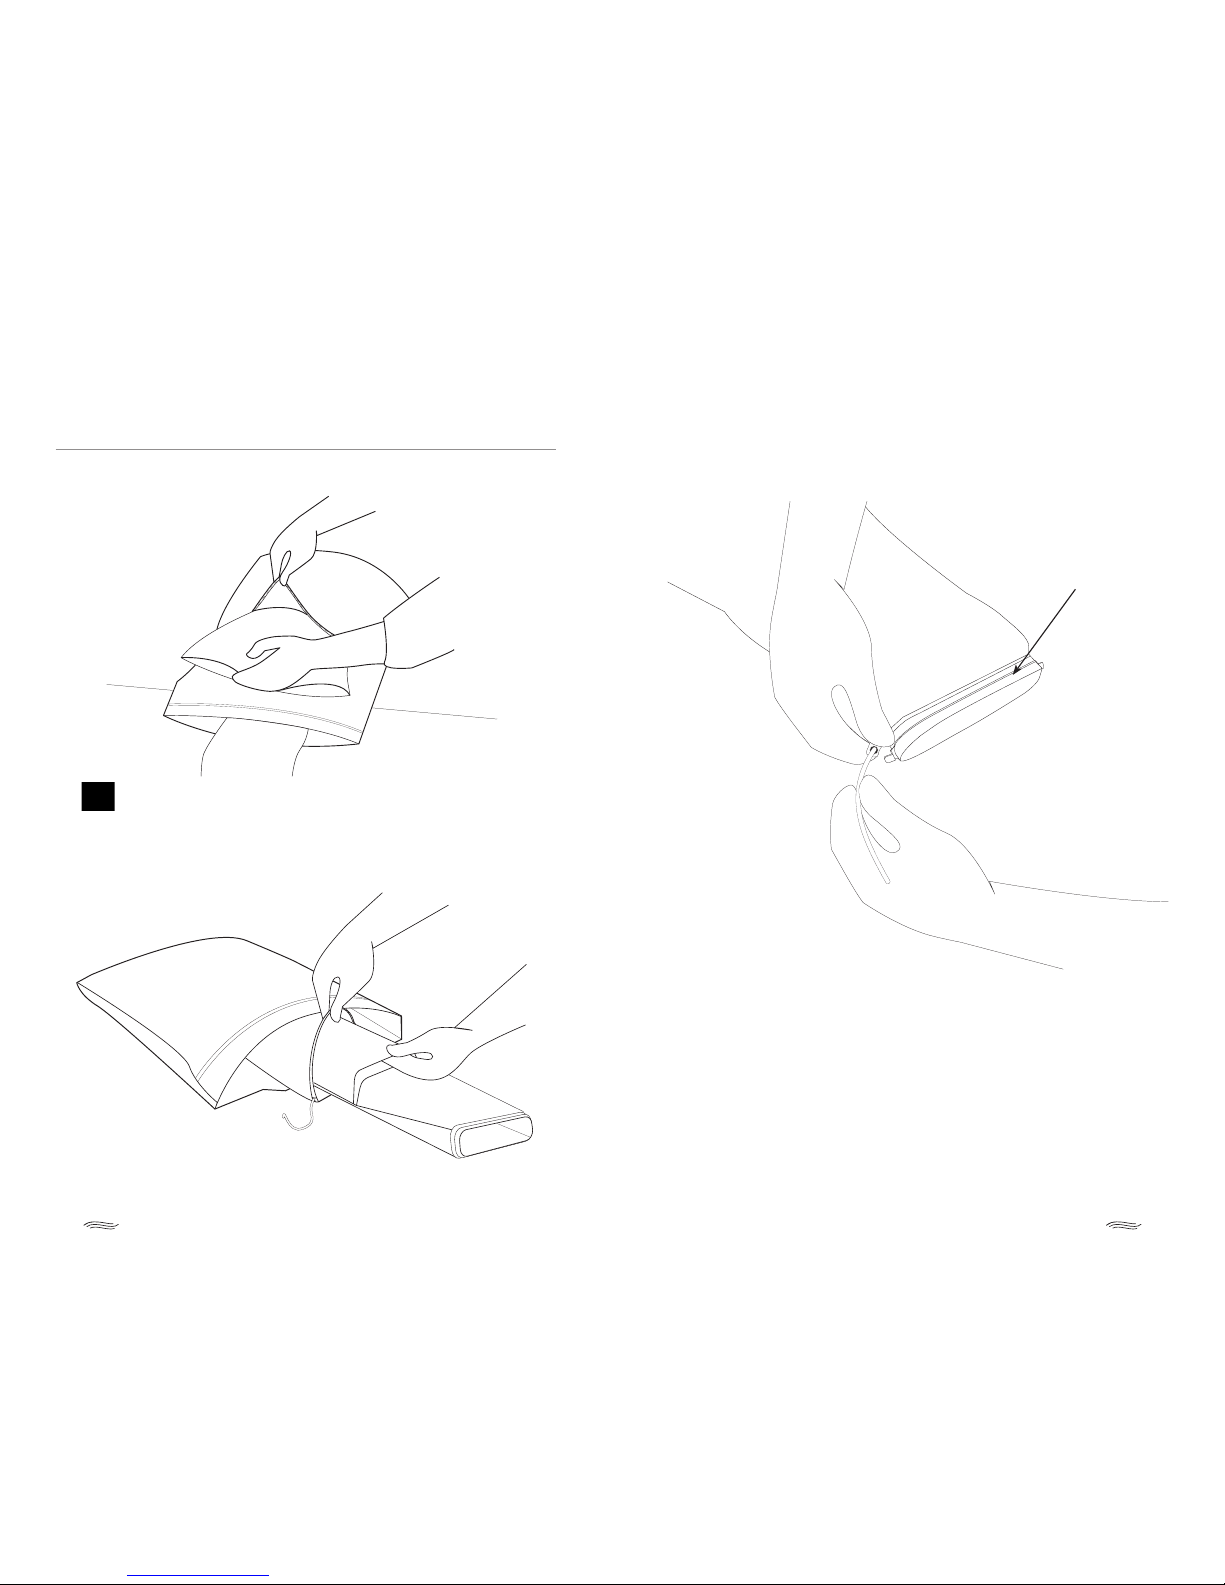
Four Basic Steps to Install the PureZone System
1. Connect remote to fan unit
2. Assemble mounting bracket and secure fan unit to bracket
3. Insert a pillow into pillowcase pocket and HEPA
lter into sleeve
4. Connect pillowcase assembly to fan unit and plug in
power cord
CAUTION: This appliance has a polarized plug (one blade is wider
than the other). To reduce the risk of electric shock, this plug is
intended to t in a polarized outlet only one way. If the plug does not
t fully in the outlet, reverse the plug. If it still does not t, contact a
qualied electrician. Do not attempt to defeat this safety feature.

8 PureZone Technologies, LLC
PureZone Technologies, LLC 9
Installation Installation
Fan Unit Assembly
Connect Wired Remote to Jack on Underside of Fan Unit
Remote Magnetically Attaches to Either Left or Right side
(depends on which side of bed is selected for set up)
Choose Fan Unit Mounting Option
A. Floor Stand Mount
B. Under Mattress Mount
C. Bed Rail Mount
Option A: Floor Stand Mount
Assemble Floor Mounting Bracket
WARNING: Incorrect alignment of the back piece may cause the oor
mount to tip over and result in damage.
NOTE: Adjust fan unit height on bracket by selecting appropriate threaded
insert (shown next page) such that the top of the unit is
several inches below the top of the mattress.
Secure Fan Unit to Mounting Bracket
F
J
A
C
B

10 PureZone Technologies, LLC
PureZone Technologies, LLC 11
Installation Installation
Threaded Inserts
for Floor Mount
Place Fan Unit Next to Bed
Secure Fan Unit to Mounting Bracket in Upward or Downward Orienta-
tion Depending on Bed Height
Option B: Under Mattress Mount
Assemble Under Mattress Mounting Bracket
Upward Orientation
For Thick Mattresses
Downward Orientation
For Thin Mattresses
NOTE: Adjust fan unit height on bracket by selecting appropriate threaded
insert (shown next page) such that the top of the unit is
several inches below the top of the mattress.
J
A
C
E
B
F
F

12 PureZone Technologies, LLC
PureZone Technologies, LLC 13
Installation Installation
Threaded Inserts
for Upward
Orientation
Threaded Inserts
for Downward
Orientation
Slide Mounting Bracket Under the Mattress
Adjust Spacing to Fit Bed Rail
Option C: Bed Rail Mount
Assemble Bed Rail Mounting Bracket
NOTE: Adjust fan unit height on bracket by selecting appropriate threaded
insert (shown below) such that the top of the unit is several inches below
the top of the mattress.
E
D
J
A
I
H
Tighten screw
to adjust

14 PureZone Technologies, LLC
PureZone Technologies, LLC 15
Installation Installation
Secure Fan Unit to Mounting Bracket Hang Fan Unit on Bed Rail
NOTE: Adjust fan unit height on bracket by selecting appropriate threaded
insert (shown below) such that the top of the unit is several inches below
the top of the mattress.
Threaded Inserts
for Bed Rail
Mounting
F

16 PureZone Technologies, LLC
PureZone Technologies, LLC 17
Installation Dual Chambered Pillowcase AssemblyInstallation
Dual Chambered Pillowcase Assembly
Insert Pillow into Zippered Pocket and Close Zipper
CAUTION: Use of a queen or king size pillow in a standard size dual cham-
ber pillow case may damage the seams. Check dual chambered pillow
case size on tag, which is located inside the zippered pocket.
Slide HEPA Filter into Pillowcase Sleeve
Tighten Drawstring Directly Below Lip on Plastic Filter Body
NOTE: Position HEPA lter so pleat faces upwards as shown.
Lip

18 PureZone Technologies, LLC
PureZone Technologies, LLC 19
Operation Operation
Snap Plastic Filter Body into Top of Fan Unit
Plug Fan Unit Into Outlet and Operate Using Control buttons on the Fan
Unit or Remote
User Interface Symbols and Settings
Heater Setting (o, low, medium, high)
Fan Setting (low, medium, high)
Note: On startup, fan runs at high speed for 15 seconds and is then
adjustable.
Power (o, on)
Change-Filter Indicator (change lter if lit)
NOTE: After 1500 hours of use, change lter indicator will
activate. To reset, turn the fan unit on and hold down the
heater and fan buttons simultaneously for 20 seconds.
Keep Intake Clear
PRECAUTION: For proper airow ensure that the fan unit intake is clear of
bedding.
CAUTION: Do not operate any fan with a damaged cord or plug. Discard fan
or return for examination and/or repair.
CAUTION: Do not run cord under carpet. Do not cover cord with throw
rugs, runners, or similar coverings. Arrange cord away from trac area and
where it will not be tripped over.

20 PureZone Technologies, LLC
PureZone Technologies, LLC 21
Cleaning and Maintenance Troubleshooting
WARNING: To ensure proper operation, change the HEPA lter ever 1500
hours of use (approximately 6 months) according to the change lter indi-
cator light.
CAUTION: The fan unit is an electrical appliance and should be
unplugged before performing cleaning or maintenance to reduce the
risks of electrical shock, injury or re.
The pillowcase/lter assembly is designed for a quick disconnect from
the fan unit by lifting the side tabs on the lter cowling.The pillowcase is
launderable in cold or warm water. Do not use a
fabric softener as the residue may block the airow and interfere with
performance. Do not wash the HEPA lter. Clean the pre-lter monthly
by running it under cold tap water. The intake pre-lter is located under
the plastic logo piece (Figure 1), which is snap-t onto the fan unit. A
new intake pre-lter is included with each
replacement lter and should be changed with the HEPA lter every six
months.
The system is working correctly when the pillowcase inates
with the airow from the fan unit. If this is not the case, check
the following troubleshooting tips or call customer service
at 1-877-787-3977.
Figure 1
Problem Solution
Pillowcase is not
inating but the fan
unit is running.
The most common cause for this problem is a
collapsed pillowcase sleeve that is restricting
the airow.
1. First, check that the pillowcase sleeve is not
twisted. If twisted, untwist the pillow case to open
the airow path.
2. Make sure the fan unit is not too far away or too
close to the pillowcase assembly. If so, move the
fan unit to an appropriate distance from the pil-
lowcase assembly.
3. Check that the intake pre-lter is not heavily
loaded. If so, clean under cold tap water or replace.
4. Inspect pillow case for ripped seams or holes.
Fan unit is not turning
on when I press the power
button.
Check that the unit is securely plugged into the outlet.
Also, check that the circuit breaker is active and has
not been tripped either at the outlet if a protection
circuit is in place or at the breaker where mains power
is distributed.
The remote doesn’t light
up or work.
Check that the remote is rmly plugged into the con-
nector at the bottom of the fan unit.
The lights on the fan unit
are lit, but the system is
not responding to com-
mands from the user
interface or remote.
Try unplugging the unit from the wall for 20
seconds before resuming normal operation to reset the
software and processor.
I replaced the lter, but the
change lter light is still lit
on the fan unit.
You need to reset the change lter light. To do so, turn
the fan unit on and hold the heat and fan speed but-
tons simultaneously for about 20
seconds (either on the fan unit or remote). This should
reset the change lter light.
Heater and fan lights
are blinking.
The Tilt Switch has engaged; unplug the unit from the
wall outlet and then plug the unit back into the wall
outlet to reset the Tilt Switch. This can occur
if the unit is knocked over or is tipped more than
35 degrees.
Pre-Filter
Plastic Logo
Piece

22 PureZone Technologies, LLC
PureZone Technologies, LLC 23
Specications Specications
Physical Characteristics
Package Dimensions 16.5”x 14.5”x 7”
Weight of Package 13 lbs
Safety System
Thermostat The heater has dual over-temperature protection in
the form of a bi-metallic cutout and thermal fuse.
Alarm System Electronic protection from component faults
and over-temperature are provided by the system
software. Alarm conditions will result from the
following events:
• Measuredoutputairtemperatureexceeds60°C
(alarm condition: heater light blinks and audible
signal)
• Heatermalfunction(alarmcondition:heaterlight
blinks and audible signal)
• Motormalfunction(alarmcondition:fan
control blinks and audible signal)
Electrical Characteristics
Power Consumption Peak 145 Watts with heat
Peak 20 Watts without heat
Power Cord 6 feet
Rating 1.17A, 60 hz, 120 volts
Diagnostics The fan unit has no user serviceable parts except the
pre-lter. Tampering with the seal on the fan unit or
remote voids the warranty.
Temperature Characteristics
Temperature Control Electronically controlled
Operating Airows Fan Set Points
Low fan 0.9 m³/min 30 ft³/min
Medium fan 1.1 m³/min 40 ft³/min
High fan 1.4 m³/min 50 ft³/min
Operating Temperatures Heater Temperature Set Points
Low fan 27º ± 0.5º C 80.5º ± 1º F
Medium fan 33º ± 0.5º C 91.5º ± 1º F
High fan 40º ± 0.5º C 104º ± 1º F
NOTE: Heater set points do not reect surface temperature of pillowcase.
Use of warming option is to balance the natural
cooling eect of the fan unit and is not considered to be a source of
supplemental heat.
248115

Reordering Information
The lter change indicator light will turn on after 6 months of use (1500
hours of operation) to alert you that the HEPA lter needs replacing. You
can order replacement HEPA lters and other
PureZone System accessories at:
• Ourwebsite,www.purezone.com
• Orbyphone,Toll-Free:877-PURE-977
Warranty & Technical Support
The fan unit is warranted to be free of manufacturing defects for
the life of the product. The pillow case is warranted to be free
of defects for a period of two years. The warranty does not cover abuse
or mishandling. See detailed limited warranty information on Terms and
Conditions attached to the invoice. Call the
technical support number below to receive a Return Material
Authorization for any warranty claims.
PureZone Technologies, LLC
6581 City West Parkway
Minneapolis, MN 55344
toll free 1-877-787-3977
info@purezone.com
©2009 PureZone Technologies, LLC. All rights reserved. 1945B.
Table of contents