RCMMN PRTNG NTRUCTN
cnt
Consult the vehicle oners manual prior to using the a and its
components
The vehicle must be attached to the to vehicle before and hen acing
eep the or area clean and free of haards
eep children at a safe distance hilst oring on the vehicle
a
o not occupy the vehicle hilst lifting or oring on it
Choc all heels before using the a to lift the vehicle
o person should place any portion of their body under the vehicle supported only
by the a
After the vehicle is raised to the correct height secure it by placing a vehicle
support stand under the chassis
PRTNG NTRUCTN
1
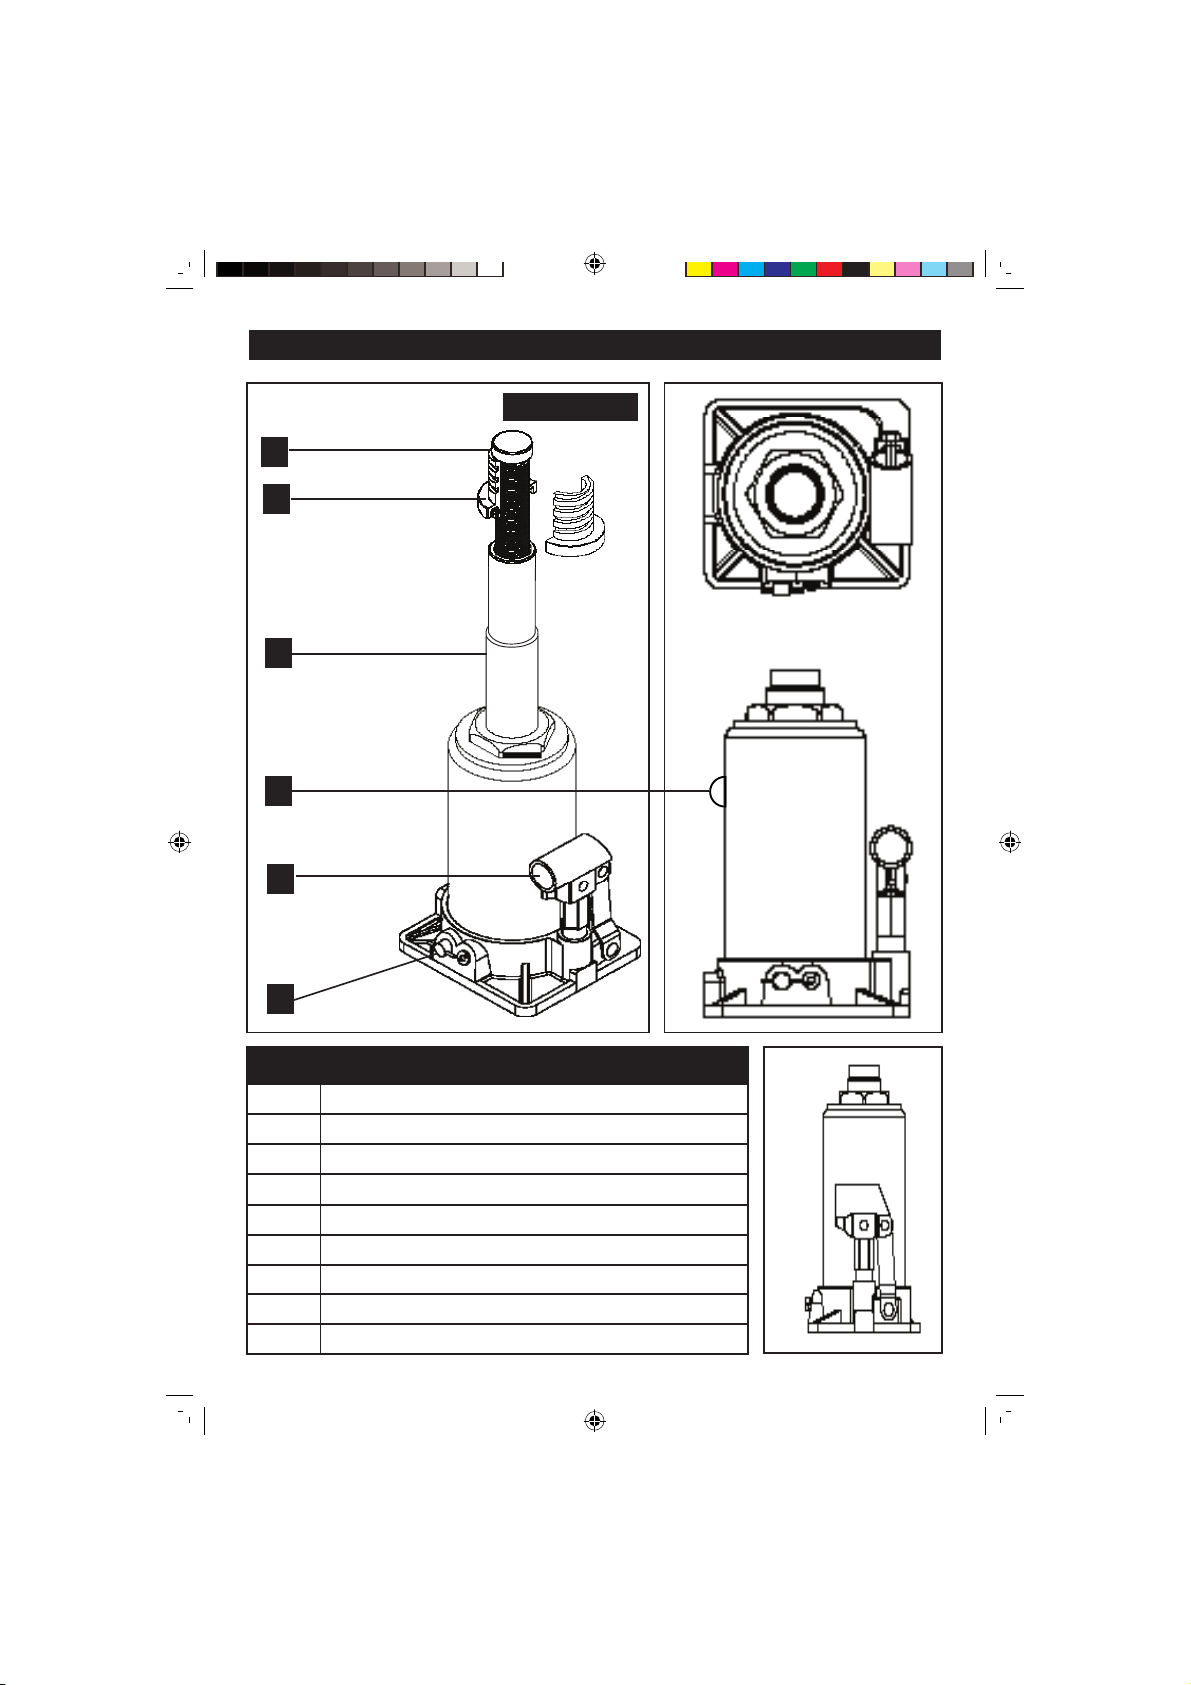
oin the three sections of the ac Handle together
2
nscre the Cap by turning it anti-clocise on a minimal distance until it ill
accommodate the Collar aprox 5cm above the Hydraulic Ram
Fit the to sides of the Collar around the threaded section under the Cap
Scre the Cap don to restrict vertical movement of the Collar beteen the Cap
and the Hydraulic Ram before fitting any Adaptor or Extension
3
4 Fit the Ball or Square Head Adapter over the Collar depending upon application
5 nsert the Hex ey into the rub Scre located on the Adapter and tighten by
6 osition the a under the ball socet or square mount on the vehicle
7
8 nsert the notched end of the ac Handle into the a Release Valve and
rotate clocise to close the valve
9 lace the other end of the
ac
Handle in the Tube mounted on the a and
move the ac Handle up and don to raise the vehicle
10 f
Once the Release Valve is sufficiently turned it ill release
the ac is unable to lift the vehicle to the desired height insert the ac Handle
into the Release Valve and gently turn anti-clocise to
MPRT NT NTC
uring shipment and handling air can become trapped in the hydraulic system
degrading the performance of the a This can also occur hen changing and
as
far as it ill go place the ac horiontally ith the Oil Filler Cap facing upards
and remove the cap hich ill allo the air to escape