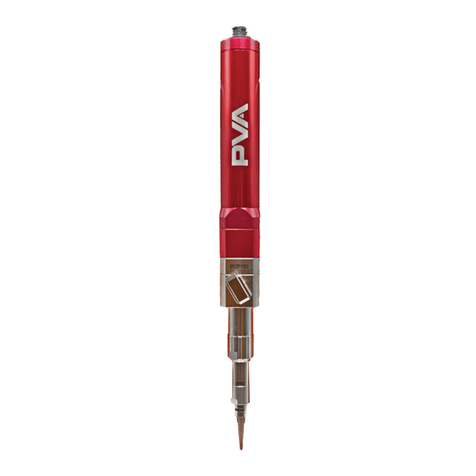
PVA SPP User manual

SPP
Servo Piston Pump Manual
Revision A
INNOVATION. PRECISION. EXCELLENCE.

SPP Operation Manual
Revision A /May 2021
Page 2 of 34
This document is based on information available at the time of its publication. While efforts
have been made to ensure the contents of this manual are accurate, the information
contained herein does not purport to cover all specific details or variations in hardware, or
to provide for every possible contingency in connection with installation, operation, or
maintenance. Features may be described herein which are not present in all hardware and
software systems. Precision Valve and Automation, Inc. assumes no obligation of notice to
holders of this document with respect to changes subsequently made.
Precision Valve and Automation, Inc. makes no representation or warranty, expressed,
implied, or statutory with respect to, and assumes no responsibility for the accuracy,
completeness, sufficiency, or usefulness of the information contained herein. No warranties
of merchantability or fitness for purpose shall apply.
This document, including the information contained herein, is the property of
Precision Valve and Automation, Inc. and is considered confidential and proprietary
information. It is delivered on the express condition that it not be used, disclosed, or
reproduced, in whole or in part, for any reason without prior written consent of
Precision Valve and Automation, Inc.
Copyright © 2021
Precision Valve and Automation, Inc.
All Rights Reserved.

SPP Operation Manual
Revision A /May 2021
Page 3 of 34
Table of Contents
Introduction......................................................................................................... 4
PVA Contact Information ........................................................................................................4
Document History.....................................................................................................................4
Safety ..........................................................................................................................................5
System Description ..................................................................................................................7
Maintenance ........................................................................................................ 8
Remove the Pump ................................................................................................................... 8
Pump Maintenance.................................................................................................................13
Install Pump .............................................................................................................................27
Technical Specifications..................................................................................30
Shot Volume............................................................................................................................ 30
Single Component ............................................................................................................. 30
Dual Component ............................................................................................................ 30
Flow Rate ................................................................................................................................. 30
Single Component ......................................................................................................... 30
Dual Component ............................................................................................................ 30
Drawings ............................................................................................................ 31
Table of Figures .................................................................................................32
Notes...................................................................................................................33
Warranty.............................................................................................................34

SPP Operation Manual
Revision A /May 2021
Page 4 of 34
Introduction
Before you operate this system, read the operation and setup manual. This will help you to
become familiar with the product and ensure successful operation.
If any questions or problems arise, contact PVA’s Technical Support department.
PVA Contact Information
Main Office PVA
One Mustang Drive
Cohoes, NY 12047
Tel +1-518-371-2684
Fax +1-518-371-2688
Website: http://www.pva.net
Technical Support
Tel +1-844-734-0209
Document History
Revision
Revision Date
Reason for Changes
REV A
April 2021
Initial Release
Note: All photographs and CAD model representations in this document are a
“general representation” of the system and its components. The actual appearance
of the system and its components can differ based upon customer specific
configuration.

SPP Operation Manual
Revision A /May 2021
Page 5 of 34
Safety
Certain warning symbols are affixed to the machine and correspond to notations in this
manual. Before operating the system, identify these warning labels and read the notices
described below. Not all labels may be used on any specific system.
Always wear approved safety glasses when you operate or work near the
workcell.
Before you operate the system, read and understand the manuals provided
with the unit.
Never put hands or tools in areas with this symbol when the machine is in
operation. A dangerous condition may exist.
Read and understand the manuals provided with the unit before any repairs
or maintenance is done. Only a qualified individual should do service.
Use caution when there are pressurized vessels. Find and repair any leaks
immediately. Always wear appropriate safety equipment when you work
with pressurized vessels or vessels that contain chemicals
Shear hazard from moving parts. Avoid contact.
Do not remove protective guarding.
In situations where inattention could cause either personal injury or damage
to equipment, a warning notice is used.

SPP Operation Manual
Revision A /May 2021
Page 6 of 34
Do not smoke near the machine. Always have a fire extinguisher available
for emergency use.
Before performing any repairs or maintenance to the system, turn off power
and lock out the power disconnect switch.
Warning notices are used to emphasize that hazardous voltages, current,
temperatures, or other conditions that could cause personal injury exist in
this equipment or may be associated with its use. Only qualified personnel
should enter areas designated with this symbol.
Laser light source present. Do not stare directly into the beam. Do not use in
the presence of highly reflective surfaces
Pinch hazard from moving parts. Avoid contact.
Hot surface. Avoid contact.
Warning, Ultraviolet (UV) light hazard. Do not look directly at the UV light
source.
This product meets EU standards for health, safety, and environmental
protection.
Warning, no open flames.
Electrostatic sensitive device warning. Observe precautions for handling.

SPP Operation Manual
Revision A /May 2021
Page 7 of 34
System Description
PVA’s SPP Servo Piston Pump system is the ideal choice for precise metered dispensing of
heavily filled and abrasive materials. The SPP’s piston displacement design is equipped
with a tungsten carbide sleeve that provides a zero dead space shot meter and long
service life under adverse conditions.
An inert barrier fluid provides no contact with the atmosphere, keeping seals lubricated
and free from material crystallization. The SPP system is perfect for moisture sensitive
fluids like isocyanate urethanes.
Via a menu-driven HMI, the closed loop servo drives enable the programming of several
functions including shot size, mix ratio, flow rate, pressure control, recirculation, and auto
purge.

SPP Operation Manual
Revision A /May 2021
Page 8 of 34
Maintenance
Remove the Pump
Prior to removing the pump, it is important to relieve all pressure in the lines. This will
ensure a safe and cleanly removal of the pump.
1. Disable the pump.
Figure 1: Disable Pump
2. Enable the valve.
Figure 2: Enable Valve

SPP Operation Manual
Revision A /May 2021
Page 9 of 34
3. Select the Dispense button.
Figure 3: Dispense
4. Turn the pressure off on the tank.
Note: The main air must be turned off.
Figure 4: Turn Main Air Off

SPP Operation Manual
Revision A /May 2021
Page 10 of 34
5. Remove the hoses from the top and side of the SPP.
Figure 5: Remove Hoses from SPP
6. Disconnect the power transducer cable.
Figure 6: Disconnect Power Transducer Cable

SPP Operation Manual
Revision A /May 2021
Page 11 of 34
7. Remove all airlines.
Figure 7: Remove Air Lines
8. Use a 3 mm hex key to remove the two front screws on both sides of the SPP.
Figure 8: Remove Front Screws

SPP Operation Manual
Revision A /May 2021
Page 12 of 34
9. Use a 5 mm hex key to remove the M6 bolts from the front of the SPP.
Figure 9: Remove Front Bolts
10. Remove the SPP from the Endurance cart.
Figure 10: Remove SPP from Endurance

SPP Operation Manual
Revision A /May 2021
Page 13 of 34
Pump Maintenance
1. Push the metering rod to discard the excess material.
Figure 11: Push Rod to Discard Material
2. Use a 6 mm hex key to remove the four M6 screws from the upper manifold block.
Figure 12: Remove Screws from Upper Manifold Block

SPP Operation Manual
Revision A /May 2021
Page 14 of 34
3. Separate the sleeve rod assembly.
Figure 13: Separate Sleeve Rod Assembly
4. Remove the piston from the sleeve.
Figure 14: Remove Piston from Sleeve

SPP Operation Manual
Revision A /May 2021
Page 15 of 34
5. Place an adjustable wrench on the flat part of the piston.
6. Use a flathead screwdriver to turn the screw counterclockwise and remove the lip
seal screw.
Figure 15: Remove Lip Seal Screw
7. Remove the wear ring from the wear ring groove.
Figure 16: Remove Wear Ring

SPP Operation Manual
Revision A /May 2021
Page 16 of 34
8. Remove the seal from the piston assembly.
Figure 17: Remove Seal
9. Install the new seal on the piston assembly.
10. Install the wear ring groove on the piston assembly. Ensure that the chamfer is
facing down.
Figure 18: Install Wear Ring Groove

SPP Operation Manual
Revision A /May 2021
Page 17 of 34
11. Install the wear ring onto the wear ring groove.
Figure 19: Install Wear Ring
12. Reattach the piston assembly to the rod.
13. Use a 4 mm hex key to remove the M5 socket head cap screws.
Figure 20: XXXXXXX

SPP Operation Manual
Revision A /May 2021
Page 18 of 34
14. Use a 4 mm hex key to remove the four M5 screws. Remove the seal plate.
Figure 21: Remove Screws and Seal Plate
15. Remove the o-rings and clean the material with a cotton tipped applicator.
Figure 22: Remove O-Rings and Clean

SPP Operation Manual
Revision A /May 2021
Page 19 of 34
16. Replace the o-rings.
17. Use a 4 mm hex key to remove the air cap.
Figure 23: Remove Air Cap
18. Remove the seal spacer.
Figure 24: Remove Seal Spacer

SPP Operation Manual
Revision A /May 2021
Page 20 of 34
19. Place the wrench around the sealing rod and use a 2.5 mm hex key to remove the air
cap entry screw.
Figure 25: Remove Air Cap Entry Screw
20. Remove the rod and clean with a cotton tipped applicator.
Figure 26: Remove Rod and Clean
21. Remove the old seals and replace with new seals supplied in spare parts kit.
Note: Reference the FCC150 Manual for full seal replacement instructions.
Table of contents
Other PVA Water Pump manuals
Popular Water Pump manuals by other brands

GORMAN-RUPP
GORMAN-RUPP AMT 3391-V9 Specifications information and repair parts manual

Sealey
Sealey WPB062S.V2 instructions

PerfomancePro
PerfomancePro Artesian Pro Series owner's manual

Ozito
Ozito TRP-650 user manual

Graco
Graco Dyna-Star 77X202 instructions

Beeco
Beeco WAUKESHA CHERRY-BURRELL UG Series SPECIFICATIONS INSTALLATION & PARTS LIST

T.I.P.
T.I.P. TKX 7000 Translation of original operating instructions

Attwood
Attwood 4640 installation instructions

Pentair
Pentair Jung Pumpen K2 instruction manual

Airetool
Airetool PATP-9400-P OPERATING & SERVICE MANUAL

ATD Tools
ATD Tools ATD-3425 user manual

Makita
Makita DOLMAR EP1500-DS operating instructions