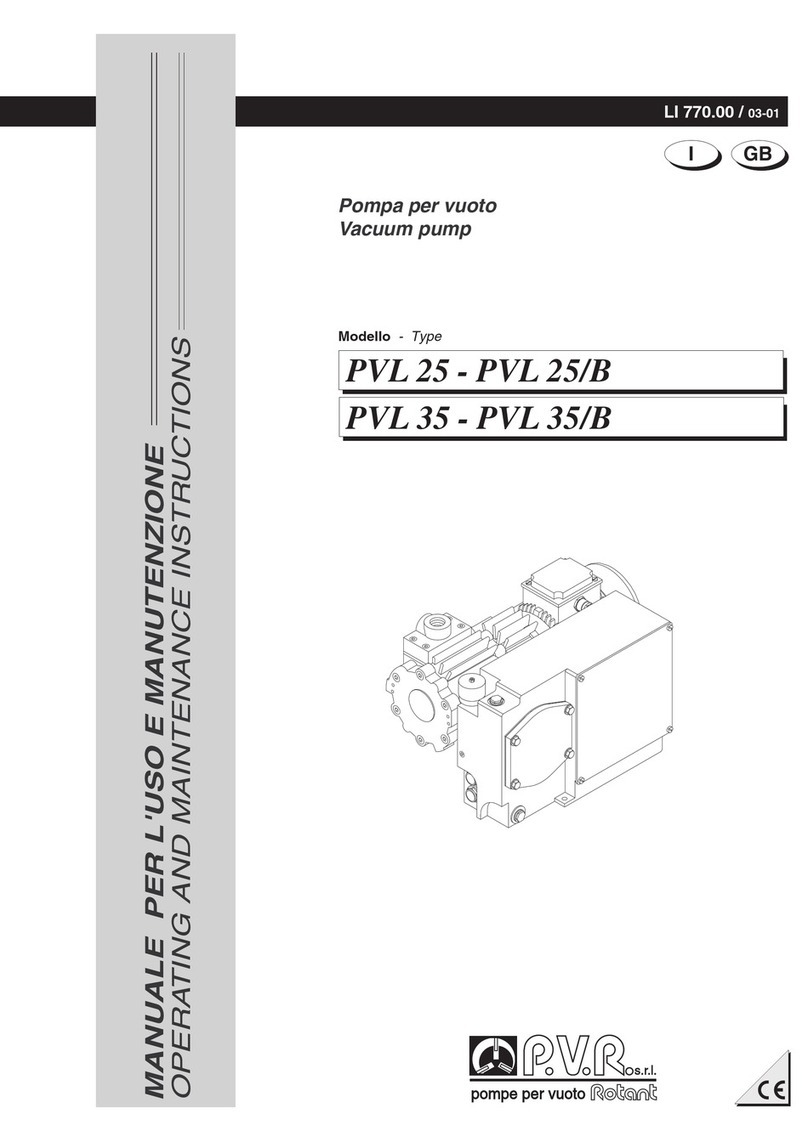
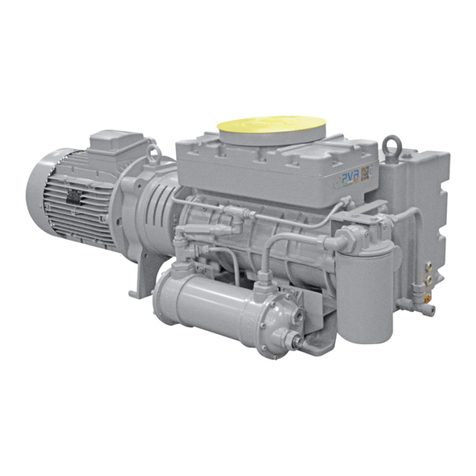
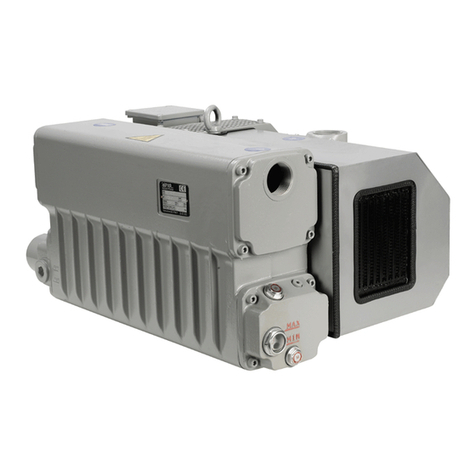
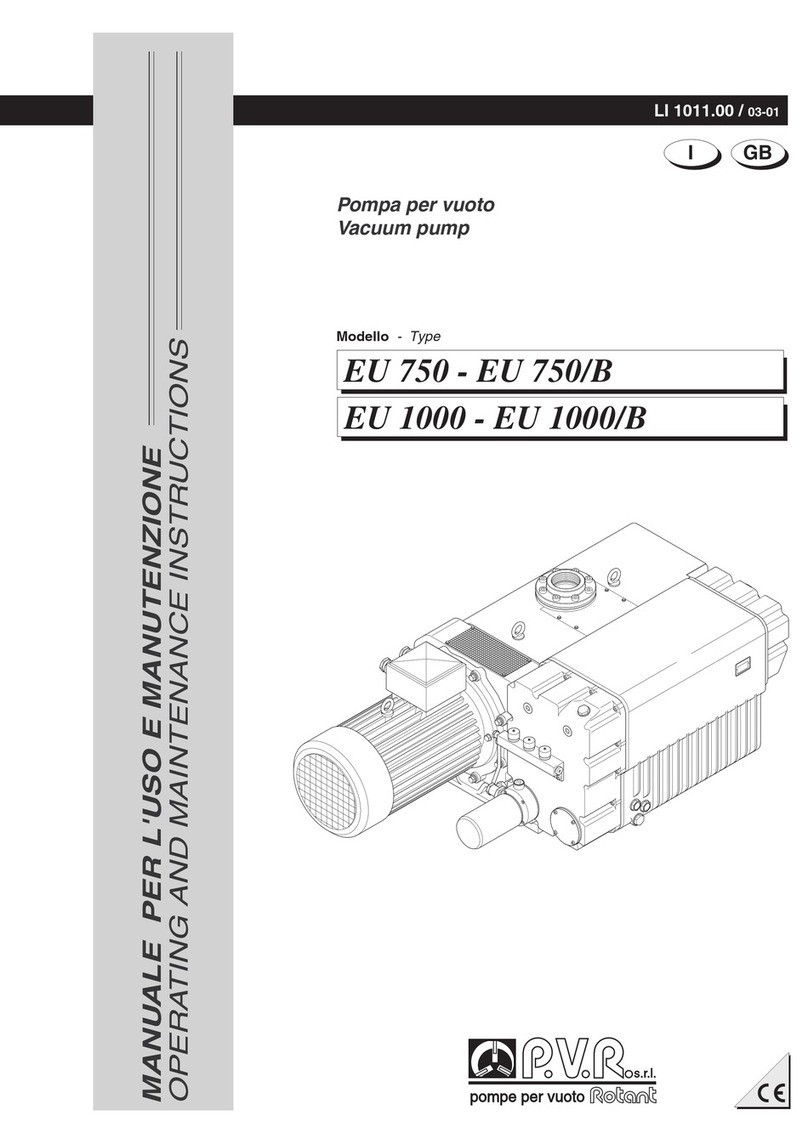
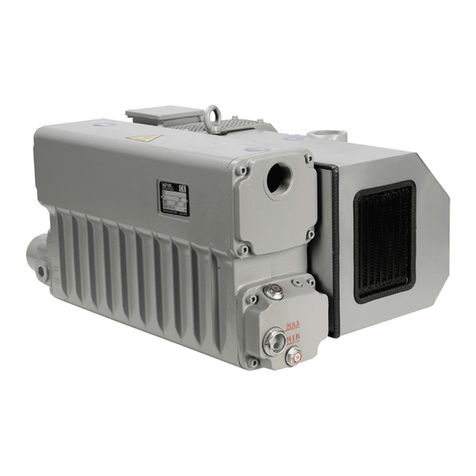
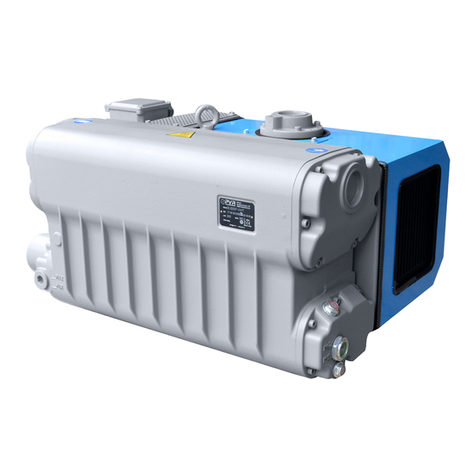
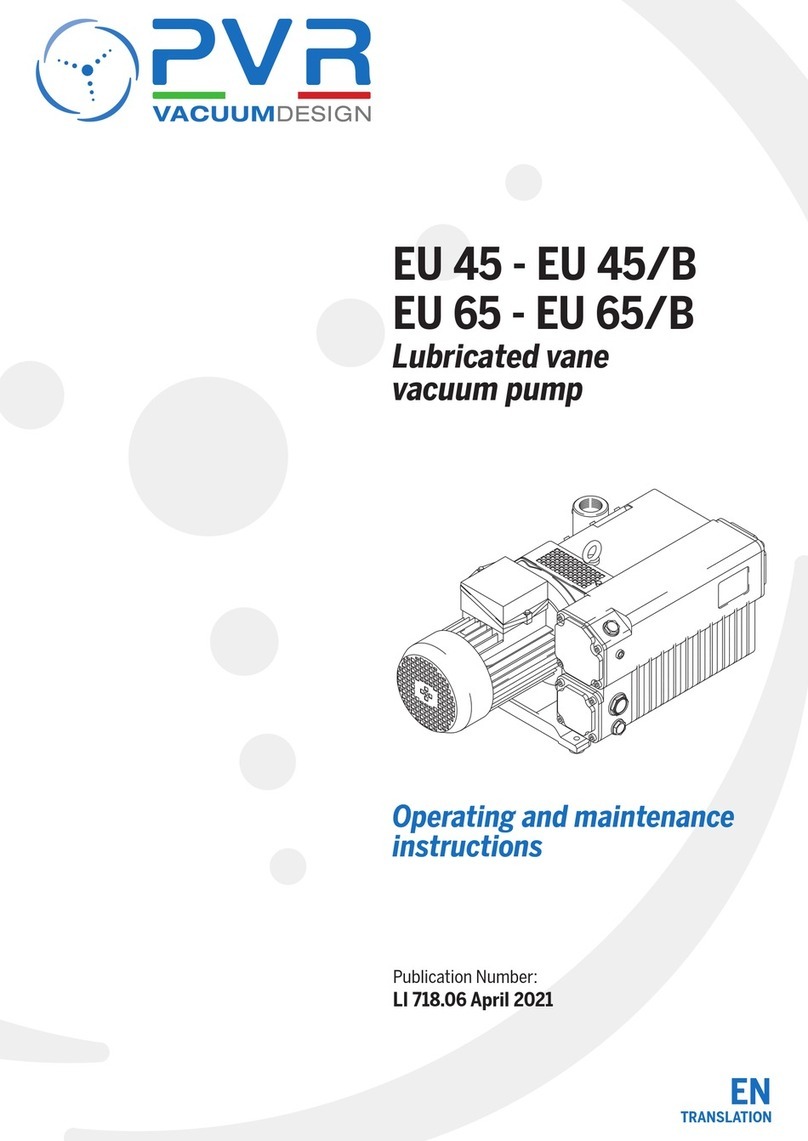
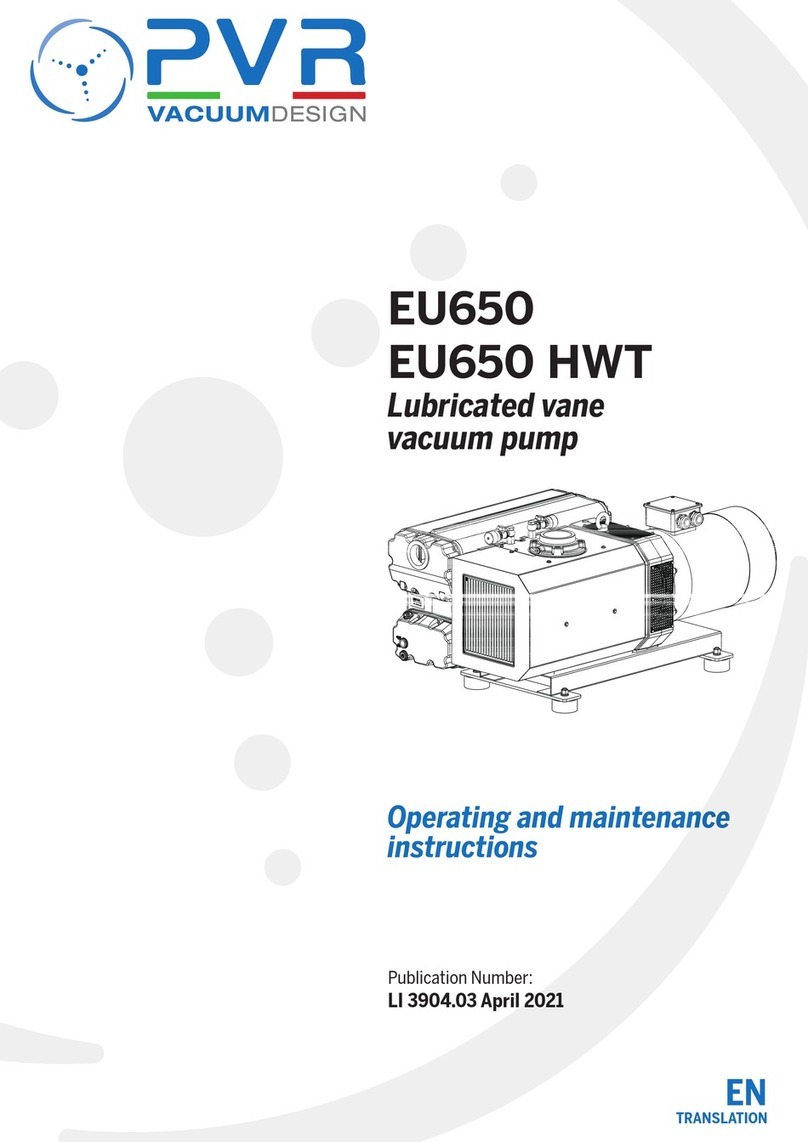
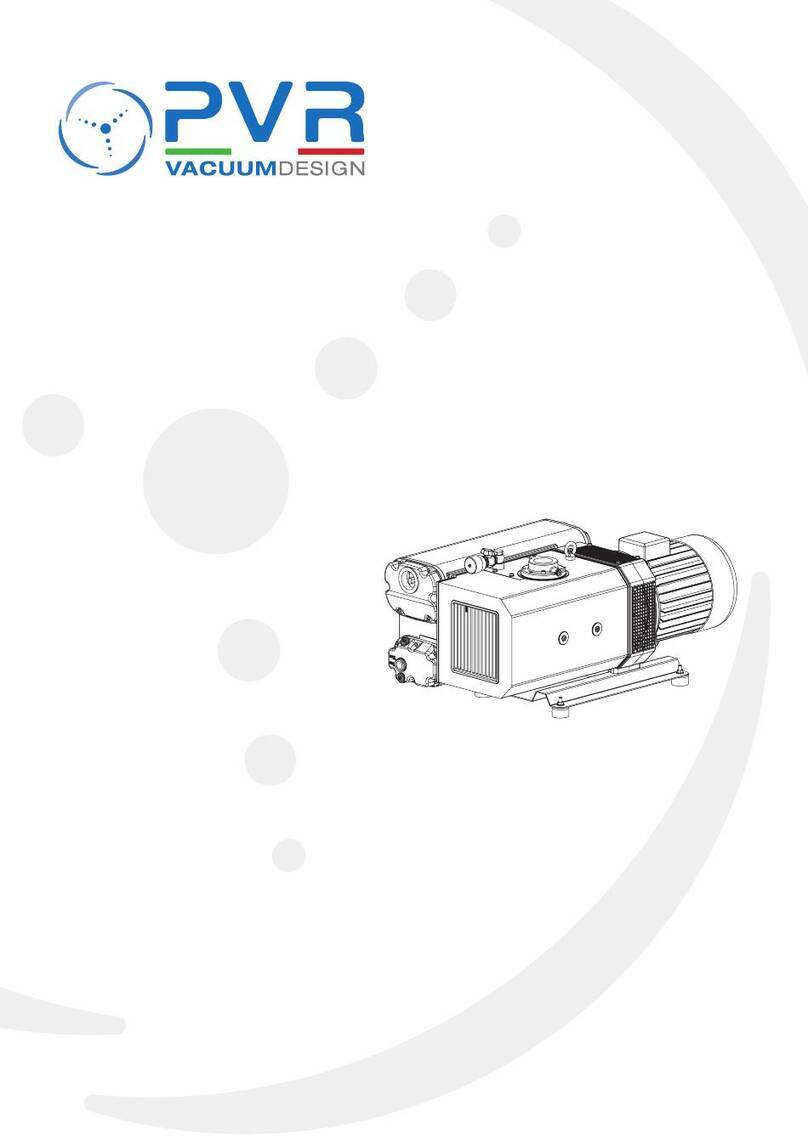
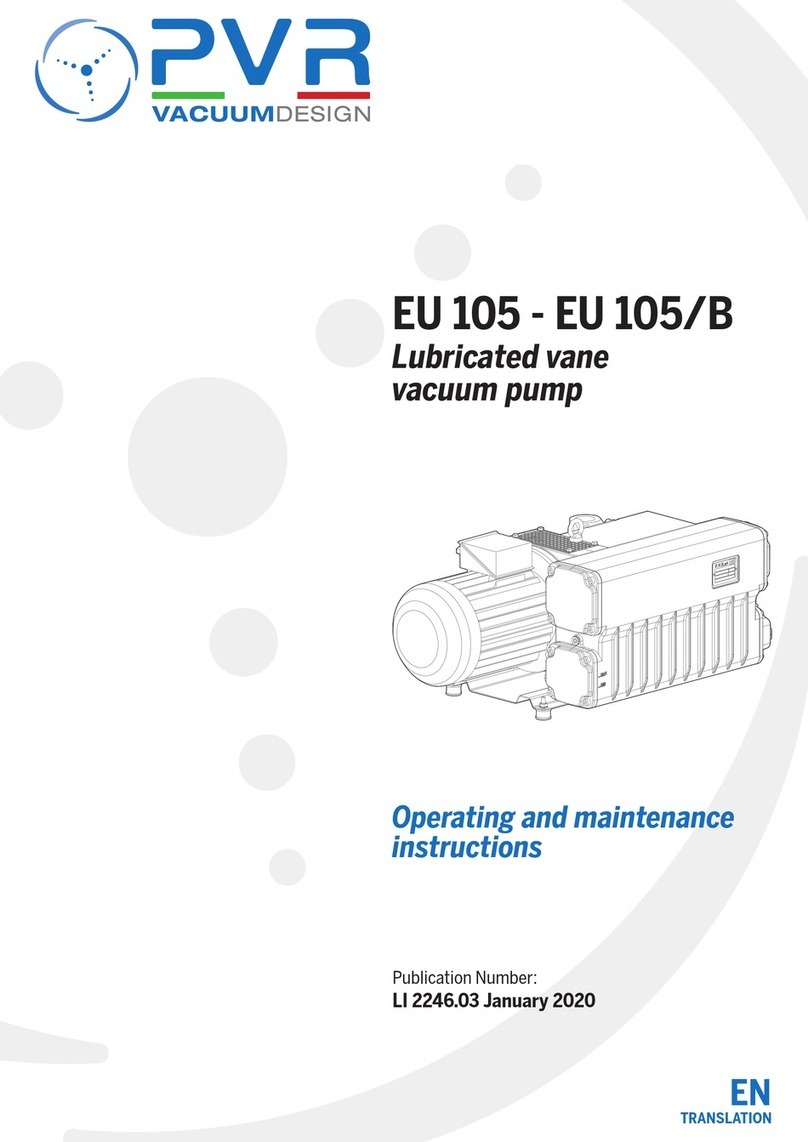
PVR EM Series User manual

MANUALE PER USO E MANUTENZIONE
OPERATING AND MAINTENANCE INSTRUCTIONS
Serie EM
Pompe per vuoto monoblocco lubrificate a palette
Lubricated vane monobloc vacuum pumps
ITA ENG
EM4 - EM4/B - EM8 - EM8/B
EM12 - EM12/B - EM20 - EM20/B - EM28 - EM28/B - EM40 - EM 40/B

ENGLISH INDEX ...............................................................................................Pag. 10
1. INFORMAZIONI GENERALI.......................................................................Pag. 1
2. SPECIFICHE DI PRODOTTO.......................................................................Pag. 1
2.1 Descrizione della pompa ...................................................................Pag. 1
2.2 Impiego previsto ................................................................................Pag. 1
2.3 Impiego proibito................................................................................Pag. 2
2.4 Protezioni ...........................................................................................Pag. 2
2.5 Accessori .............................................................................................Pag. 2
3. PRESCRIZIONI DI SICUREZZA ...................................................................Pag. 2
4. TRASPORTO-MOVIMENTAZIONE ............................................................Pag. 3
4.1 Sollevamento .....................................................................................Pag. 3
4.2 Disimballaggio e verifica componenti..............................................Pag. 3
4.3 Stoccaggio ..........................................................................................Pag. 3
5. INSTALLAZIONE E FUNZIONAMENTO .....................................................Pag. 3
5.1 Assemblaggio.....................................................................................Pag. 3
5.2 Ubicazione..........................................................................................Pag. 4
5.3 Collegamento alla macchina utilizzatrice ........................................Pag. 4
5.4 Convogliamento aria di scarico.........................................................Pag. 4
5.5 Collegamento elettrico......................................................................Pag. 5
5.6 Messa in servizio ................................................................................Pag. 5
5.7 Consigli per l’utilizzo .........................................................................Pag. 5
5.8 Aspirazione vapor acqueo.................................................................Pag. 5
6. MANUTENZIONE ......................................................................................Pag. 6
6.1 Informazioni generali........................................................................Pag. 6
6.2 Sostituzione olio ................................................................................Pag. 7
6.3 Sostituzione elemento disoleatore...................................................Pag. 7
6.4 Revisione pompa................................................................................Pag. 8
6.5 Ricambi necessari per la manutenzione ...........................................Pag. 8
6.6 Come ordinare i ricambi....................................................................Pag. 8
7. LUBRIFICANTI ...........................................................................................Pag. 8
8. MESSA FUORI SERVIZIO...........................................................................Pag. 8
9. RITORNO PER RIPARAZIONE....................................................................Pag. 8
10. INCONVENIENTI E RIMEDI .......................................................................Pag. 9
RIFERIMENTI DISEGNI E TABELLE
EM4 - EM4/B
Ingombri e parti principali ......................................................................Pag. 20
Caratteristiche tecniche...........................................................................Pag. 22
Esploso......................................................................................................Pag. 30
Elenco esploso..........................................................................................Pag. 31
EM8 - EM8/B
Ingombri e parti principali ......................................................................Pag. 21
Caratteristiche tecniche...........................................................................Pag. 22
Esploso......................................................................................................Pag. 32
Elenco esploso..........................................................................................Pag. 33
EM12 - EM12/B
Ingombri e parti principali ......................................................................Pag. 24
Caratteristiche tecniche...........................................................................Pag. 28
Esploso......................................................................................................Pag. 34
Elenco esploso..........................................................................................Pag. 35
EM20 - EM20/B
Ingombri e parti principali ......................................................................Pag. 25
Caratteristiche tecniche...........................................................................Pag. 28
Esploso......................................................................................................Pag. 36
Elenco esploso..........................................................................................Pag. 37
EM28 - EM28/B
Ingombri e parti principali ......................................................................Pag. 26
Caratteristiche tecniche...........................................................................Pag. 28
Esploso......................................................................................................Pag. 38
Elenco esploso..........................................................................................Pag. 39
EM40 - EM40/B
Ingombri e parti principali ......................................................................Pag. 27
Caratteristiche tecniche...........................................................................Pag. 28
Esploso......................................................................................................Pag. 40
Elenco esploso..........................................................................................Pag. 41
ITA
INDICE

1
1. INFORMAZIONI GENERALI
Questo manuale contiene le informazioni necessarie al corretto funzionamento della
pompa ed alla sua manutenzione ordinaria per prevenirne l’uso improprio e per la
sicurezza delle persone addette al suo funzionamento. Nessun altro tipo di operazio-
ne dovrà essere fatto senza aver prima contattato il nostro Servizio Assistenza. Le
informazioni fornite non intendono sostituire, integrare o modificare qualsiasi norma,
prescrizione, decreto, direttiva o legge a carattere specifico in vigore nel luogo in
cui avviene l’installazione. I consigli rivolti al personale addetto all’installazione e alla
manutenzione presuppongono che lo stesso sia esperto e preparato nell’affronta-
re qualsiasi problematica di manutenzione, sia meccanica che elettrica. Per qualsiasi
dubbio o informazioni non riportate su questo manuale si prega di contattare il nostro
Servizio Assistenza, comunicando sempre: modello (tipo), numero di serie, anno di
costruzione, riportati sulla targhetta di identificazione.
Nel manuale vengono impiegate due simbologie:
ATTENZIONE:
Per istruzioni che se disattese possono causare condizioni di pericolo
per le persone.
AVVERTENZE:
Per istruzioni che se disattese possono provocare danni alla macchina.
2. SPECIFICHE DI PRODOTTO
2.1 Descrizione della pompa
Le pompe serie:
EM4 - EM4/B - EM8 - EM8/B pag. 22
EM12 - EM12/B - EM20 - EM20/B - EM28 - EM28/B - EM40 - EM40/B pag. 28
Sono pompe del tipo rotativo a palette, lubrificate a ricircolo d’olio.
La pompa è calettata direttamente sul motore elettrico.
Il raffreddamento ad aria viene assicurato tramite la ventola del motore.
In aspirazione è presente un filtro a rete per proteggere la pompa da corpi solidi di
diametro maggiore di 1mm. Inoltre una valvola di ritegno integrata impedisce la ri-
salita dell’olio ed il rientro dell’aria nella camera da svuotare durante la fase d’arresto
(escluso EM4 - EM4/B).
Nel serbatoio è inserito un sistema di separazione delle nebbie d’olio dall’aria di
scarico (residuo max.2 PPM/peso equivalenti a 2,4 mg/m3). L’olio abbattuto viene
recuperato in modo automatico dalla pompa.
Uno zavorratore, sempre inserito, impedisce la condensazione all’interno della pom-
pa quando si aspirano piccole quantità di vapore (escluso EM4 - EM4/B).
Questo simbolo identifica l’attacco filettato in aspirazione.
Questo simbolo identifica l’attacco filettato allo scarico.
2.2 Impiego previsto
Le pompe per vuoto descritte in questo manuale possono aspirare esclusivamente
aria e piccole quantità di vapor d’acqua. Sono adatte per l’evacuazione di sistemi
chiusi o per funzionare ad un vuoto costante compreso nei seguenti campi:
EM4 sono adatte per l’evacuazione di sistemi chiusi dove si raggiunge la pressione
massima di 2 mbar (assoluti) (es. confezionamento sottovuoto)
EM4/B sono adatte per l’evacuazione di sistemi chiusi e per funzionare ad un vuoto
costante compreso tra 10 e 700 mbar (assoluti)
ITA

EM8 da 2 a 300 mbar (assoluti) EM8/B da 20 a 800 mbar (assoluti)
EM12 da 2 a 400 mbar (assoluti) EM12/B da 20 a 850 mbar (assoluti)
EM20 da 2 a 400 mbar (assoluti) EM20/B da 20 a 850 mbar (assoluti)
EM28 da 2 a 400 mbar (assoluti) EM28/B da 20 a 850 mbar (assoluti)
EM40 da 2 a 400 mbar (assoluti) EM40/B da 20 a 850 mbar (assoluti)
La temperatura ambiente e la temperatura di aspirazione devono essere comprese
fra 5 e 40 °C. Nei casi di temperatura al di fuori di questi campi vi preghiamo di
interpellarci. L’aspirazione di altri tipi di gas o di vapori deve essere preventivamente
dichiarata alla P.V.R. che rilascerà la conformità all’impiego specifico.
2.3 Impiego proibito
ATTENZIONE:
È proibito aspirare attraverso la pompa:
- liquidi o sostanze solide;
- gas e vapori pericolosi, esplosivi o aggressivi;
- ossigeno puro o miscele d’aria arricchita di ossigeno;
È proibito utilizzare lo scarico della pompa per creare pressioni anche
limitate.
ATTENZIONE:
È severamente proibito installare la pompa in un ambiente potenzial-
mente esplosivo.
2.4 Protezioni
EM4 - EM4/B
La pompa viene fornita priva di valvola di non ritorno in aspirazione.
Per impedire la risalita dell’olio ed il rientro dell’aria nella camera da svuotare durante
la fase di arresto occorre:
Inserire una valvola di non ritorno esterna vicino all’attacco aspirazione della pompa.
In alternativa è possibile utilizzare una elettro-valvola.
PER TUTTI I MODELLI
La pompa deve essere protetta contro aspirazioni di polveri e liquidi.
Nelle applicazioni dove non è garantita questa protezione si consiglia d’installare sul
serbatoio dell’olio un manometro per un controllo visivo d’intasamento del separato-
re d’olio. Per ottenere un arresto automatico della pompa si può installare un presso-
stato tarato a 0,5 bar. La pompa viene fornita priva di quadro elettrico di comando.
Il motore elettrico deve essere protetto secondo le norme vigenti.
ATTENZIONE:
Nei casi di impiego in cui l’arresto o un guasto della pompa per vuoto
possa causare danni a persone o cose, devono essere previste delle
misure di sicurezza nell’impianto.
2.5 Accessori
Sono disponibili i seguenti accessori utili per l’installazione ed il funzionamento:
- filtro esterno in aspirazione;
- vacuometri/vacuostati;
- manometri/pressostati;
- raccordi di collegamento;
- piedini antivibranti.
3. PRESCRIZIONI DI SICUREZZA
ATTENZIONE:
Nonostante le precauzioni prese in fase di progetto, esistono elementi
di rischio che si presentano durante le operazioni di lavoro e manu-
tenzione.
SUPERFICI CALDE
Le superfici della pompa possono superare la temperatura di 70°C.
Installare la pompa in una zona protetta accessibile solo da personale autorizza-
to, in modo da evitare scottature da contatto fortuito.
La pompa può essere inserita in altri macchinari predisponendo le protezioni
necessarie. Prima di effettuare qualsiasi intervento sulla pompa attendere il suo
raffreddamento.
EMISSIONI DI SOSTANZE NOCIVE
L’aria di scarico della pompa contiene tracce di nebbie d’olio.
Verificare la compatibilità con l’ambiente di lavoro. Un guasto o l’usura delle
tenute possono provocare perdite d’olio lubrificante. Evitare la dispersione nel
terreno e l’inquinamento di altri materiali. Nel caso di aspirazione d’aria conte-
nente sostanze pericolose (esempio agenti biologici o microbiologici), adottare
dei sistemi di abbattimento prima di immettere l’aria nell’ambiente di lavoro.
Gli oli esausti provenienti dalla pompa devono essere smaltiti secondo le norma-
tive vigenti nel Paese d’utilizzo della pompa.
Non disperdere nell’ambiente.
2ITA

PERICOLO GENERATO DA DEPRESSIONE
Evitare il contatto con l’attacco aspirazione della pompa durante il funziona-
mento. Immettere aria nel circuito di aspirazione prima di ogni intervento.
Il contatto con punti in depressione può essere causa di infortuni.
PERICOLO GENERATO DALLA PRESSIONE
Il serbatoio della pompa è pressurizzato. Non aprire e non dimenticare aperti i
tappi di carico o scarico durante il funzionamento.
PER UNA MANUTENZIONE SICURA
Tutte le operazioni di manutenzione devono essere effettuate da personale spe-
cializzato a pompa ferma.
Devono essere adottate misure per garantire l’isolamento dall’energia elettrica,
impedendo avviamenti improvvisi (es. bloccare l’interruttore di potenza con un
lucchetto personale).
SICUREZZA ELETTRICA
Nell’equipaggiamento elettrico esistono parti sottoposte a tensione che, al con-
tatto, possono provocare gravi danni a persone e cose.
I lavori di allacciamento e di controllo dell’impianto elettrico devono essere effet-
tuati esclusivamente da personale specializzato in materia.
Gli equipaggiamenti elettrici devono essere conformi alla norma EN 60204-1 e
ad altre leggi vigenti nel Paese d’utilizzo della pompa.
PERICOLO DI INCENDIO
ATTENZIONE! L’utilizzo della pompa per impieghi non previsti o proibiti da que-
sto manuale, oppure la mancanza di una corretta manutenzione, possono pro-
vocare anomalie di funzionamento con rischio di surriscaldamento e incendio.
In caso di incendio non usare acqua per spegnere le fiamme.
Utilizzare estintori a polvere o CO2od altri mezzi compatibili con la presenza di
equipaggiamenti elettrici ed oli lubrificanti.
4. TRASPORTO-MOVIMENTAZIONE
4.1 Sollevamento
L’orientamento dei componenti imballati deve essere mantenuto conforme alle indi-
cazioni fornite dai pittogrammi presenti sull’involucro esterno d’imballaggio. In con-
siderazione del peso limitato è possibile sollevare la pompa manualmente.
4.2 Disimballaggio e verifica componenti
Al ricevimento della pompa occorre verificare che l’imballo sia integro o se presenta
evidenti segni di danneggiamenti intercorsi durante il trasporto. Se il tutto é integro,
procedere al disimballaggio e al controllo della pompa.
Nel caso si riscontrino danneggiamenti o imperfezioni occorre avvertire immediata-
mente P.V.R. e l’agente di trasporto, che dovrà inviare sul posto un suo responsabile
per le constatazioni del caso.
4.3 Stoccaggio
Le pompe devono essere immagazzinate o trasportate senza olio al riparo dagli
agenti atmosferici ad una temperatura compresa tra -15°C e 50°C. Tasso di umidità
normale.
5. INSTALLAZIONE E FUNZIONAMENTO
5.1 Assemblaggio
EM4 - EM4/B
AVVERTENZE:
È indispensabile inserire una valvola di non ritorno esterna vicina al
l’attacco aspirazione della pompa. In alternativa è possibile utilizzare
una elettro-valvola.
Togliere il sottotappo in aspirazione e montare la valvola di non ritorno, l’eventuale
filtro esterno e relativi raccordi come indicato nell’esploso a pag. 30. (Tutti i compo-
nenti sono disponibili come accessori)
PER I RESTANTI MODELLI
Togliere i sottotappi in aspirazione ed allo scarico.
Montare l’eventuale filtro esterno in posizione orizzontale per evitare l’ingresso di
sporco nella pompa durante la pulizia della cartuccia filtrante.
Montare gli eventuali piedini antivibranti sui punti di appoggio.
EM8 - EM8/B vedi esploso pag. 32 EM28 - EM28/B vedi esploso pag. 38
EM12 - EM12/B vedi esploso pag. 34 EM40 - EM40/B vedi esploso pag. 40
EM20 - EM20/B vedi esploso pag. 36
3
ITA

5.2 Ubicazione
La pompa deve essere inserita in una zona protetta (vedi paragrafo 3. Prescrizio-
ni di sicurezza).
Deve essere bloccata in corrispondenza dei piedi di appoggio, su un piano
orizzontale.
Assicurare il ricambio d’aria nel locale o all’interno della macchina dove è instal-
lata la pompa. Per garantire un sufficiente raffreddamento, evitare di superare i
40°C di temperatura ambiente.
La pompa va protetta da getti o spruzzi d’acqua che potrebbero penetrare nel
serbatoio dal foro di scarico.
Se installata all’esterno proteggere dagli agenti atmosferici ed usare l’olio ido-
neo alla temperatura ambiente.
Evitare che l’aria calda proveniente dallo scarico o dalle ventole di raffreddamen-
to possa creare disagio al personale.
Deve essere accessibile per una corretta e facile manutenzione rispettando le
distanze minime da eventuali ingombri:
EM4 - EM4/B EM8 - EM8/B
AVVERTENZE:
Non installare la pompa in una zona con polvere o altri materiali che
potrebbero intasare o coprire rapidamente le superfici di raffredda-
mento.
5.3 Collegamento alla macchina utilizzatrice
Il collegamento della pompa alla camera da evacuare deve essere eseguito con tu-
bazioni dello stesso diametro della bocca di aspirazione.
Il peso delle tubazioni e le eventuali dilatazioni non devono gravare sulla pompa.
Si consiglia di effettuare il collegamento finale alla pompa con tubi o raccordi flessi-
bili. È importante che tutte le tubazioni ed i vari giunti siano a tenuta.
Tubazioni molto lunghe o di diametro piccolo diminuiscono le prestazioni della
pompa.
5.4 Convogliamento aria di scarico
In caso di necessità è possibile convogliare l’aria di scarico della pompa in altri
ambienti o all’esterno.
Utilizzare tubazioni di diametro uguale alla bocca di scarico del serbatoio per
una lunghezza massima di 15 m.
Per lunghezze superiori aumentare il diametro del tubo.
Il peso delle tubazioni non deve gravare sulla pompa.
Utilizzare nel tratto finale raccordi o tubi flessibili.
AVVERTENZE:
Questa tubazione deve essere discendente per evitare il rientro di
4ITA
3030
15
20
30
50
50
A
EM12 - EM12/B: A = 110
EM20 - EM20/B: A = 150
EM28 - EM28/B: A = 170
EM40 - EM40/B: A = 190

condensa nel serbatoio della pompa.
ATTENZIONE:
Non inserire rubinetti in questa tubazione.
5.5 Collegamento elettrico
Il quadro di comando e l’allacciamento elettrico devono essere effettuati da per-
sonale specializzato secondo la norma EN 60204-1 o altre normative vigenti nel
paese d’utilizzo. Gli equipaggiamenti elettrici devono essere conformi alle norme
EN - 61000-6-4 e EN - 61000-6-2 riguardanti la compatibilità elettromagnetica,
emissione ed immunità per ambiente industriale.
Verificare la tensione e la frequenza di rete con i dati riportati sulla targhetta del
motore. Il motore elettrico deve essere protetto da sovraccarichi.
Utilizzare il valore di assorbimento elettrico riportato sulla targhetta motore
come riferimento.
Assicurarsi dell’efficienza dell’impianto di messa a terra.
Eseguire l’allacciamento elettrico seguendo lo schema riportato sulla morsettiera
del motore.
Controllare il senso di rotazione del motore accendendo la pompa per un b re-
ve istante (2-3 secondi). Il senso corretto è quello indicato dalla freccia posta
sulla pompa:
EM4 - EM4/B pag. 20 - EM8 - EM8/B pag. 21 - EM12 - EM12/B pag. 24 - EM20
- EM20/B pag. 25 - EM28 - EM28/B pag. 26 - EM40 - EM40/B pag. 27.
Nel caso di rotazione contraria, occorre invertire il campo di rotazione del motore
cambiando posizione a due dei tre conduttori di fase alla morsettiera di cablag-
gio del motore.
5.6 Messa in servizio
La pompa viene fornita priva di olio lubrificante.
AVVERTENZE:
Il funzionamento senza olio lubrificante provoca gravi danni alla
pompa.
Eseguire il primo riempimento attraverso il tappo (E) sino alla metà dell’indicatore di
livello (F) e richiudere il tappo (G):
EM4 - EM4/B pag. 20 - EM8 - EM8/B pag. 21 - EM12 - EM12/B pag. 24 - EM20
- EM20/B pag. 25 - EM28 - EM28/B pag. 26 - EM40 - EM40/B pag. 27.
AVVERTENZE:
Una quantità d’olio superiore al necessario può provocare un inta-
samento del separatore olio e un danneggiamento alla pompa o al
motore elettrico.
Accendere la pompa e portarla al massimo grado di vuoto per almeno 2 minuti.
Fermare la pompa, ricontrollare il livello d’olio ed eseguire un’eventuale rabbocco di
olio ripristinando il livello corretto.
5.7 Consigli per l’utilizzo
Con temperature ambiente inferiori a 10°C è bene riscaldare per 5 minuti la pompa
facendola funzionare a vuoto massimo. Durante questa fase la pompa potrebbe non
raggiungere i limiti di pressione dichiarati.
AVVERTENZE per EM4:
Per assicurare un regolare recupero dell’olio abbattuto dall’elemento
separatore è necessario che la pompa raggiunga ciclicamente il vuoto
massimo (entro 5 min.); in alternativa la pompa deve essere arrestata
con la medesima tempistica.
AVVERTENZE:
Evitare il funzionamento della pompa per lunghi periodi con la bocca
aspirazione a pressione atmosferica. Evitare il funzionamento con fre-
quenti accensioni. (Si consiglia di non superare i 30 avviamenti/ora)
5.8 Aspirazione vapore acqueo (escluso EM4 - EM4/B)
Per l’aspirazione di vapor acqueo è indispensabile portare la temperatura della pom-
pa a regime. In caso di ulteriore presenza di condensa nell’olio lasciare funzionare la
pompa a vuoto massimo per almeno 30 minuti alla fine del ciclo di lavoro.
È consigliato effettuare questa operazione prima di fermi macchina prolungati; lo
zavorratore consentirà di eliminare le condense dall’olio lubrificante.
5
ITA

Controllo livello olio prima dell’avviamento.
24 Ore/ogni giorno Operatore
DESCRIZIONE INTERVENTOINTERVALLO DI MANUTENZIONE PERSONALE ABILITATO
Pulizia cartuccia esterna con aria compressa. Se necessario sostituirla.**
Pulizia con getto d’aria le superfici di raffreddamento della pompa e del motore elettrico.
100 Ore/ogni settimana
Operatore
Operatore
Sostituire olio lubrificante.
Se installato il manometro verificare l’intasamento dell’elemento disoleatore (max 0,5 bar), se necessario
sostituire. (Escluso EM4 - EM4/B)
Pulire con getto d’aria il filtro silenziatore e filtro a rete.**(Escluso EM4 - EM4/B)
Pulire accuratamente i circuiti di lubrificazione e recupero olio
500/1000* Ore/ogni 6 mesi
Tecnico qualificato
Tecnico qualificato
Tecnico qualificato
Tecnico qualificato
Sostituire elemento disoleatore.**
Verificare collegamenti elettrici.
2000 Ore/ogni anno
Tecnico qualificato
Tecnico qualificato
Revisione pompa.
30000 Ore/ogni 5 anni Servizio assistenza
Tecnico qualificato
* Eseguire il primo cambio d’olio dopo 500 ore di funzionamento, se non si riscontrano inquinanti nell’olio si potranno effettuare i successivi cambi dopo 1000 ore.
6ITA
**
EM4 - EM4/B vedi esploso pag. 30 - EM8 - EM8/B vedi esploso pag. 32 - EM12 - EM12/B vedi esploso pag. 34
EM20 - EM20/B vedi esploso pag. 36 - EM28 - EM28/B vedi esploso pag. 38 - EM40 - EM40/B vedi esploso pag. 40
6. MANUTENZIONE
6.1 Informazioni generali
Prima di ogni intervento:
• Isolaresemprelapompadallareteelettricainmodochenonpossaavviarsi
automaticamente.
• Attendereilraffreddamentoadunatemperaturanonpericolosa.
• Immetterearianelcircuitodiaspirazione.
La tabella di seguito mostra tutti gli interventi periodici necessari per mantenere in
perfetta efficienza la pompa. Manutenzioni più frequenti possono rendersi necessarie
in base al tipo di utilizzo (aspirazioni di vapori condensabili, aspirazioni di polveri o
sostanze inquinanti). In questi casi solo l’esperienza diretta può suggerire i corretti
intervalli di manutenzione. L’olio esausto e i pezzi di ricambio sostituiti, devono essere
considerati rifiuti speciali e gestiti secondo la normativa vigente nel paese d’utilizzo.

6.2 Sostituzione olio
Sostituire l’olio lubrificante effettuando l’operazione a pompa calda.
ATTENZIONE:
Utilizzare guanti protettivi per evitare scottature.
Con riferimento:
EM4 - EM4/B pag. 20
EM8 - EM8/B pag. 21
EM12 - EM12/B pag. 24
EM20 - EM20/B pag. 25
EM28 - EM28/B pag. 26
EM40 - EM40/B pag. 27
svitare il tappo di carico (E) e quello di scarico olio (G) solo dopo aver posizionato
sotto il serbatoio un contenitore adatto (per forma e dimensioni) a raccogliere tutto
l’olio della pompa; quando l’olio esausto contenuto nel serbatoio sarà fuoriuscito
rimontare i tappi (“E” e “G”) e far girare la pompa sotto vuoto per circa un minuto
in modo da svuotare anche il circuito di lubrificazione/raffreddamento dai residui
dell’olio esausto, quindi togliere i tappi e scaricare la rimanenza d’olio.
Se nell’olio sono presenti grosse quantità di sostanze inquinanti o si riscontra la pre-
senza di acqua, procedere ad un lavaggio della pompa facendola funzionare a vuoto
massimo, con una carica di olio pulito per almeno 5 minuti.
Scaricare nuovamente l’olio. Procedere quindi al nuovo riempimento d’olio (Vedi
“messa in servizio” e “tabella oli consigliati”).
Pulizia circuito di lubrificazione (per EM4 - EM4/B)
Il circuito di lubrificazione sporco o intasato (in particolare il raccordo pos. 13 conte-
nente un orifizio) è causa di malfunzionamento della pompa e perdita di prestazione.
Per ripulire il circuito eseguire le seguenti operazioni:
•Conriferimentoall’esplosoapag.30,smontareilserbatoio(pos.14)svitandolere-
lative viti (pos. 20). Rimuovere il coperchio LE (pos. 8) svitando le relative viti (pos. 9).
•Pulireoraconariacompressailraccordolubricazione(elarelativariduzionein-
terna) soffiando in direzione opposta al normale flusso dell’olio, attraverso il foro di
passaggio presente sul piano interno del coperchio LE.
• Pulire accuratamente l’interno del serbatoio facendo attenzione di non lasciare
nessun tipo di residuo.
•Perilmontaggiodeicomponentiprocedereinsensoinverso.
Pulizia circuito di recupero olio (per EM4/B)
Il circuito di recupero olio sporco o intasato (in particolare l’orifizio e il filtro pos. 22
e 21) è causa di accumulo d’olio nel vano dell’elemento disoleatore e conseguente
espulsione durante il funzionamento della pompa. Per ripulire il circuito eseguire le
seguenti operazioni:
•Conriferimentoall’esplosoapag.30,smontareilserbatoio(pos.14)svitandole
relative viti (pos. 20). Rimuovere dal serbatoio l’elemento disoleatore (pos. 19) e la
spia olio (pos. 16 e 16A).
•Pulireconariacompressa,glielementidelcircuitodilubricazione(pos.21e22)
soffiando in direzione opposta al normale flusso dell’olio, attraverso il foro di passag-
gio presente sul piano interno del serbatoio.
• Pulire accuratamente l’interno del serbatoio e il vano dell’elemento disoleatore
facendo attenzione di non lasciare nessun tipo di residuo.
•Perilmontaggiodeicomponentiprocedereinsensoinverso.
6.3 Sostituzione elemento disoleatore
Elementi disoleatori molto sporchi possono causare un sensibile aumento di tempe-
ratura della pompa e in casi estremi autocombustione dell’olio lubrificante.
La massima pressione ammessa nel serbatoio è di 0,5 bar misurata a portata massima
(quando la pompa sta funzionando con l’aspirazione a pressione atmosferica).
Se è presente il manometro sul serbatoio verificare l’intasamento della cartuccia a
pompa calda. Per la sostituzione togliere il coperchio del serbatoio svitando le relative
viti. Svitare l’elemento disoleatore e sostituirlo. Se necessario sostituire la guarnizione
del coperchio serbatoio.
EM4 - EM4/B vedi esploso pag. 30
EM8 - EM8/B vedi esploso pag. 32
EM12 - EM12/B vedi esploso pag. 34
EM20 - EM20/B vedi esploso pag. 36
EM28 - EM28/B vedi esploso pag. 38
EM40 - EM40/B vedi esploso pag. 40
Per il montaggio dell’elemento disoleatore, procedere in senso inverso e rispettare la
coppia massima di serraggio di 15 Nm.
7
ITA

6.4 Revisione pompa
Per questa operazione si consiglia di rivolgersi al servizio assistenza oppure richiedere
le istruzioni.
La revisione consiste nello smontaggio completo, la pulizia di tutti i particolari e la
sostituzione delle parti soggette ad usura (cuscinetti, palette e guarnizioni).
6.5 Ricambi necessari per la normale manutenzione
I ricambi essenziali sono indicati nell’elenco esploso e sono evidenziati con la lettera
“R”. È inoltre indispensabile tenere a disposizione una serie di guarnizioni evidenzia-
te nell’elenco con la lettera “G”.
6.6 Come ordinare i ricambi
Per ordinare i ricambi indicare sempre il modello della pompa (tipo), numero di
matricola, anno di costruzione, caratteristiche del motore elettrico (monofase/tri-
fase, Kw,V, Hz), numero di posizione sull’elenco dei ricambi, descrizione e quantità
richiesta.
7. LUBRIFICANTI
Olio consigliato per uso generico
Utilizzare olio minerale per compressori secondo DIN 51506 gruppo VC-VCL o
VDL classificazione ISO L-DAG.
EM4 - EM4/B
EM8 - EM8/B
EM12 - EM12/B - EM20 - EM20/B - EM28 - EM28/B - EM40 - EM40/B
Olio consigliato per impiego nell’industria alimentare
Utilizzare olio lubrificante sintetico compatibile per contatto accidentale con ali-
menti secondo specifiche USDA H1.
EM4 - EM4/B
EM8 - EM8/B
EM12 - EM12/B - EM20 - EM20/B - EM28 - EM28/B - EM40 - EM40/B
Nei casi di temperatura ambiente al di fuori del campo indicato vi preghiamo di
interpellarci.
8. MESSA FUORI SERVIZIO
Per la messa fuori servizio togliere l’olio dalla pompa prima della sua movimentazio-
ne. Se l’olio appare inquinato eseguire un lavaggio con olio nuovo (vedi “sostitu-
zione olio”).
Svuotare il serbatoio dell’olio, tappare l’aspirazione e lo scarico della pompa e im-
magazzinare.
In caso di demolizione differenziare le parti della pompa secondo i materiali di fabbri-
cazione e procedere allo smaltimento rispettando le norme vigenti.
9. RITORNO PER RIPARAZIONE
In caso di riparazione presso la P.V.R. vanno dichiarate le sostanze che sono venute a
contatto con la pompa ed eventuali rischi che la manipolazione può comportare.
Scaricare il lubrificante prima della spedizione.
8ITA
Temperatura ambiente Viscosità Olio P.V.R.
5 - 40°C ISO 32 LPM1 32
Temperatura ambiente Viscosità Olio P.V.R.
5 - 40°C ISO 46 LPM1 46
Temperatura ambiente Viscosità Olio P.V.R.
5 - 40°C ISO 32 LPM1 32 USDA H1
Temperatura ambiente Viscosità Olio P.V.R.
5 - 40°C ISO 46 LPA1 46 USDA H1
Temperatura ambiente Viscosità Olio P.V.R.
5 - 40°C ISO 68 LPM1 68
Temperatura ambiente Viscosità Olio P.V.R.
5 - 40°C ISO 68 LPA1 68 USDA H1

Caduta delle prestazioni Filtro aspirante sporco
Perdite nelle tubazioni in aspirazione o sulla macchina utilizzatrice
Mancanza di lubrificazione
Pulire o sostituire **
Eliminare le perdite
Controllare livello e condizioni dell’olio
Ripristinare il livello o eseguire la sostituzione
Pulire accuratamente il circuito di lubrificazione (solo per EM4 - EM4/B)
Rumorosità anomala Mancanza lubrificazione
Cuscinetti motore o pompa rovinati
Palette rovinate
Superfici di contatto rovinate
Vedi punto precedente
Sostituire
Sostituire
Revisione macchine presso nostra officina
Perdita olio Anello tenuta dell’albero consumato
Sistema recupero olio inefficiente
Elemento disoleatore inefficiente
Sostituire anello di tenuta**
Verificare e pulire il circuito del recupero olio
Sostituire elemento disoleatore**
Intervento protezione motore Elemento disoleatore intasato
Mancanza di lubrificazione
Grippatura o bloccaggio pompa
Paletta rotta
Sostituire elemento disoleatore**
Ripristinare livello olio
Revisione macchina
Sostituire le palette
Nebbie d’olio allo scarico Elemento disoleatore inefficiente
Elevata temperatura dovuta all’olio contaminato
Elevata temperatura di esercizio dovuta a temperatura ambiente troppo elevata
Sostituire elemento disoleatore**
Sostituire olio
Diminuire temperatura ambiente assicurando un migliore ricambio d’aria
INCONVENIENTE CAUSA SOLUZIONE
**
Vedi esploso: EM4 - EM4/B pag. 30 - EM8 - EM8/B pag. 32 - EM12 - EM12/B pag. 34 - EM20 - EM20/B pag. 36 - EM28 - EM28/B pag. 38 - EM40 - EM40/B pag. 40
9
ITA
10. INCONVENIENTI E RIMEDI
Espulsione olio allo scarico
(solo per EM4 - EM4/B)
Funzionamento pompa al di fuori dei campi di pressione limite previsti
Sistema recupero olio inefficiente
Elemento disoleatore inefficiente
Rientrare nei limiti di pressione previsti
Verificare e pulire il circuito del recupero olio
Sostituire elemento disoleatore**

1. GENERAL INFORMATION .........................................................................Page 11
2. PRODUCT SPECIFICATIONS ......................................................................Page 11
2.1 Pump description ...............................................................................Page 11
2.2 Expected use ......................................................................................Page 11
2.3 Forbidden use ....................................................................................Page 12
2.4 Protections .........................................................................................Page 12
2.5 Accessories..........................................................................................Page 12
3. SAFETY RULES..........................................................................................Page 12
4. TRANSPORT - HANDLING ........................................................................Page 13
4.1 Lifting .................................................................................................Page 13
4.2 Unpacking and components control ................................................Page 13
4.3 Storage ...............................................................................................Page 13
5. INSTALLATION AND OPERATION.............................................................Page 13
5.1 Assembly............................................................................................. Page 13
5.2 Location..............................................................................................Page 14
5.3 Connection to the machine...............................................................Page 14
5.4 Discharge air pipe line installation ...................................................Page 14
5.5 Electric connection.............................................................................Page 15
5.6 Commissioning...................................................................................Page 15
5.7 Suggestions for the use .....................................................................Page 15
5.8 Water vapour suction ........................................................................Page 15
6. SERVICING ................................................................................................Page 16
6.1 General information..........................................................................Page 16
6.2 Oil change ..........................................................................................Page 17
6.3 Exhaust filter replacement ................................................................Page 17
6.4 Pump overhaul...................................................................................Page 18
6.5 Spares necessary for servicing ...........................................................Page 18
6.6 How to order spare parts ..................................................................Page 18
7. LUBRICANTS .............................................................................................Page 18
8. DE-COMISSIONING ..................................................................................Page 18
9. RETURN FOR REPAIR ................................................................................Page 18
10. TROUBLESHOOTING ................................................................................Page 19
DRAWINGS AND TABLE REFERENCES
EM4 - EM4/B
Overall dimensions and main parts ........................................................Page 20
Technical characteristics........................................................................... Page 22
Exploded view..........................................................................................Page 30
Part list...................................................................................................... Page 31
EM8 - EM8/B
Overall dimensions and main parts ........................................................Page 21
Technical characteristics........................................................................... Page 22
Exploded view..........................................................................................Page 32
Part list...................................................................................................... Page 33
EM12 - EM12/B
Overall dimensions and main parts ........................................................Page 24
Technical characteristics........................................................................... Page 28
Exploded view..........................................................................................Page 34
Part list...................................................................................................... Page 35
EM20 - EM20/B
Overall dimensions and main parts ........................................................Page 25
Technical characteristics........................................................................... Page 28
Exploded view..........................................................................................Page 36
Part list...................................................................................................... Page 37
EM28 - EM28/B
Overall dimensions and main parts ........................................................Page 26
Technical characteristics........................................................................... Page 28
Exploded view..........................................................................................Page 38
Part list...................................................................................................... Page 39
EM40 - EM40/B
Overall dimensions and main parts ........................................................Page 27
Technical characteristics........................................................................... Page 28
Exploded view..........................................................................................Page 40
Part list...................................................................................................... Page 41
ENG
ENGLISH INDEX

11
1. GENERAL INFORMATION
This manual contains information necessary for the proper operation of the pump in
order to prevent unsuitable use and for the safety of the operators. Do not attempt
any other type of operation without having first contacted our Service Depart-
ment. The information provided herewith does not intend to replace, integrate or
change any rules, regulations, law by decree, directive or law of specific character in
force in the Country where the installation takes place.
The suggestions given to the staff engaged in the installation and servicing assumes
that the personnel is expert and prepared in facing any problem of servicing, both
mechanical and electrical. For any questions or information not included in this man-
ual, please contact our Service Department, always providing: model (type), serial
number, year of manufacture, stated on the pump name plate.
In this manual, the following symbols are used:
ATTENTON
Instructions that, if not followed, could result in serious personal in-
juries.
WARNING
Instructions that, if not followed, could result in pump damages.
2. PRODUCT SPECIFICATIONS
2.1 Pump description
The pump series:
EM4 - EM4/B - EM8 - EM8/B page 22
EM12 - EM12/B - EM20 - EM20/B - EM28 - EM28/B - EM40 - EM40/B page 28
are lubricated, with oil recirculation system, rotary vane vacuum pumps.
The pump is splined to the electric motor directly.
The air cooling is ensured by the electric motor fan. At the inlet there is a mesh filter
in order to protect the pump form sold parts having diameter bigger than 1 mm.
Furthermore, an integrated non-return valve prevents the oil from coming back and
the return of air in the chamber to be pumped down during the stop phase (EM4
- EM 4/B excluded). Inside the tank there is a system for separating oil smokes from
discharged air (maximum oil residual 2 PPM/weight corresponding to 2.4 mg/m3).
The separated oil is recovered automatically by the pump.
A gas ballast valve, always on, prevents condensation inside the pump when pump-
ing down small quantity of vapour (EM 4 - EM 4/B excluded).
This symbol identifies the inlet threaded port.
This symbol identifies the exhaust threaded port.
2.2 Expected use
These vacuum pumps have been designed to handle air and small quantity of water
vapour only. They are suitable to evacuate closed systems or to operate at a constant
vacuum within the following vacuum range:
EM4 are suitable to evacuate closed systems where the max. pressure of 2 mbar
(abs.) is achieved (for ex. vacuum packaging).
EM4/B are suitable to evacuate closed systems and to operate at a constant vacuum
within 10 and 700 mbar (abs.).
ENG

EM8 2 to 300 mbar (abs.) EM8/B 20 to 800 mbar (abs.)
EM12 2 to 400 mbar (abs.) EM12/B 20 to 850 mbar (abs.)
EM20 2 to 400 mbar (abs.) EM20/B 20 to 850 mbar (abs.)
EM28 2 to 400 mbar (abs.) EM28/B 20 to 850 mbar (abs.)
EM40 2 to 400 mbar (abs.) EM40/B 20 to 850 mbar (abs.)
The ambient temperature and the inlet temperatures must be included between 5°
and 40°C. In case you get temperatures outside this range, please get in touch with
us. Handling of other types of gas or vapours must be declared in advance to P.V.R.
that will give the conformity to the specific use.
2.3 Forbidden use
ATTENTION:
The pump MUST NOT handle:
- liquids or solid substances;
- dangerous, explosive or aggressive gases and vapours;
- pure oxygen or air mixtures enriched with oxygen;
It is forbidden to use the discharge of the pump to create even limited
pressures.
ATTENTION:
It is forbidden to install the pump in a potentially explosive environ-
ment.
2.4 Protections
EM4 - EM4/B
The pump is supplied without inlet non-return valve.
To prevent the oil from coming back and the air from entering the chamber to be
pumped down during the stop operation, it is necessary to install an external non-re-
turn valve near the pump inlet port. Alternatively a solenoid valve might be used.
FOR ALL THE PUMP MODELS
The pump must be protected against suction of dust, solids or liquids.
For those applications where such a protection is not ensured, a vacuum gauge must
be installed on the oil tank for a visual check of the exhaust filter clogging. In order
to get an automatic pump stop, a pressure switch set at 0.5 bar can be installed. The
pump is supplied without electric control panel. The electric motor must be protected
according to the regulations in force.
ATTENTION:
In case of applications where the pump stop or failure can cause dam-
ages to people or things, safety measures for the system must be
adopted.
2.5 Accessories
The following accessories useful for the installation and the operation are available:
- external inlet filters;
- vacuum gauges / vacuum switches;
- pressure gauges / pressure switches;
- pipe fittings;
- vibration dampers.
3. SAFETY PRESCRIPTIONS
ATTENTION:
Despite of all the precautions adopted when designing the equip-
ment, there are some risk elements that arise during operation and
servicing.
HOT SURFACES
The temperature of the pump surfaces may exceed 70°C.
Install the pump in a protected area accessible only by authorized personnel, to
prevent possible personal injures by coming into contact with hot surfaces.
The pump can be placed inside other machines by adopting the necessary safe-
guards.
Before carrying out any maintenance on the pump, be sure the pump is cold.
HARMFUL SUBSTANCES EMISSIONS
The discharged air contains part of traces of oil mist.
Check the compatibility with the work environment. A failure or the seals wear
can cause an oil leakage. Avoid the dispersion to the ground and the pollution of
other materials. In case air containing dangerous substances must be pumped
down (for example, biological or microbiological agents), adopt filtering systems
before introducing air in the work environment.
Used oil coming from the pump must be disposed of in accordance with the
regulations in force in the Country of use.
Do not dispose into the environment.
12 ENG

HAZARD CAUSED BY VACUUM
Avoid the contact with the pump inlet port during the pump operation.
Introduce air in the inlet circuit before every operation.
The contact with parts under vacuum can cause injuries.
HAZARD CAUSED BY PRESSURE
The pump tank is pressurized. Do not open the oil filling and discharge plugs
during operation.
FOR A SAFE MAINTENANCE
All maintenance operations must be carried out with the pump idle, discon-
nected from the electrical supply, with the pump cold, vented to atmospheric
pressure. Prevent unexpected start-up (e.g. block the power switch with a per-
sonal lock).
ELECTRIC SAFETY
Some components of the electric equipment are electrically charged during op-
eration whose contact may cause serious injuries to persons or objects.
Connection and control of the electric system must be carried out by skilled
personnel only.
The electric equipment must comply with the EN 60204-1 standard and with the
other laws in force in the Country of use.
FIRE HAZARD
WARNING! The use of the pump for situations unforeseen or not recommended
by this manual, as well as lack of correct maintenance, may create high risks for
overheating or fire.
In case of a fire do not use water to extinguish but use a powder CO2 extin-
guisher or other means compatible with the electric equipment and lubricating
oil.
4. TRANSPORT-HANDLING
4.1 Lifting
The orientation of the packed components must correspond to the instructions given by
the pictograms on the external covering of the packaging. Given the light weight, it is pos-
sible to lift the pump manually.
4.2 Unpacking and components control
When receiving the machine, check that the packing is intact or if is shows signs of
damages occurred during transportation.
If there is no damage, proceed to the unpacking and check further the machine.
In case damages are found, inform immediately P.V.R. and the carrier. A representa-
tive will contact you or it may be dispatched to the site to inspect and file full damage
report.
4.3 Storage
The pumps must be stored or transported without oil and protected from the atmos-
pheric agents at a temperature between -15°C and 50°C (normal humidity rate).
5. COMMISSIONING AND OPERATION
5.1 Assembly
EM4 - EM4/B
WARNING: Install an external non-return valve near the pump inlet port.
Alternatively a solenoid valve might be used.
Remove the inlet cap and assemble the non-return valve. Fit the inlet filter with fit-
tings as shown on page 30 on the exploded view (all the components are available
as accessories).
FOR ALL THE OTHER MODELS
Remove the inlet and exhaust caps.
Fit the external filter in horizontal position to prevent dirt coming inside the pump
during the cleaning of the cartridge..
Fit the vibration dampers, if any, on the points of support.
EM8 - EM8/B see exploded view on page 32
EM12 - EM12/B see exploded view on page 34
EM20 - EM20/B see exploded view on page 36
EM28 - EM28/B see exploded view on page 38
EM40 - EM40/B see exploded view on page 40
13
ENG

5.2 Location
The pump must be installed in a protected area (see paragraph 3, safety rules).
It must be fastened with support feet on horizontal surface.
Ensure there is ventilation in the room or inside the machine where the pump
has been installed. To assure a sufficient cooling, avoid to overpass 40°C of
ambient temperature.
The pump must be protected against jets or sprays of water that may penetrate
tank through the exhaust port.
Whenever the pump is installed outside, it must be protected against atmos-
pheric agents and used with an oil suitable for the ambient temperature.
Avoid warm air coming from the exhaust or the cooling fans causing discomfort
to the personnel.
It must be accessible for correct and easy maintenance, by respecting the mini-
mum distances from possible obstructions:
EM4 - EM4/B EM8 - EM8/B
WARNING:
Do not install the pump in a dusty area or where other materials may
block or cover the cooling surfaces quickly.
5.3 Connection to the machine
The connection to the chamber to be pumped down must be carried out by means
of pipes of the same diameter as the inlet port.
Pipe weights and expansions, if any, must not rest on the pump.
It is advisable to make the final connection to the pump with flexible pipes or fittings.
It is important that all the pipes and the different fittings are tight.
Very long or small diameter pipes decrease the pump performances.
5.4 Discharge air pipe line installation
When required, it is possible to pipe the pump discharge air to other rooms, or
outside.
Use pipes with the same diameter as the tank discharge port with a maximum
length of 15 m.
For longer pipes increase pipe diameter. Pipe weights must not rest on the
pump.
In the final length use flexible pipes or pipe fittings.
WARNING:
This pipe must be descending, to avoid the condensate going back to
the tank.
14 ENG
3030
15
20
30
50
50
A
EM12 - EM12/B: A = 110
EM20 - EM20/B: A = 150
EM28 - EM28/B: A = 170
EM40 - EM40/B: A = 190

ATTENTION:
Do not connect ball valves to this pipeline.
5.5 Electric connection
The control panel and electric connections must be carried out by skilled per-
sonnel and conform to the EN 60204-1 rules or to other local regulations in the
Country of use. The electric equipment must comply with EN 61000-6-4 and EN
61000-6-2 standard concerning electromagnetic compatibility, emission stand-
ard and immunity for industrial environments
Check the main voltage and frequency in use to correspond to the data stamped
on the motor name plate.
The electric motor must be protected against overload. The full load amperage
value on the motor name plate must be considered when sizing the electrical
components and motor protection against overloading.
Make sure the grounding is correctly done.
Carry out the electric connection following the diagram shown on the motor
terminal box.
Check the direction of rotation by starting the pump for a short time (2-3 sec-
onds). The correct direction is shown by the arrow on the pump:
EM4 - EM4/B see on page 20 – EM8 - EM8/B see on page 21 – EM 12 - EM
12/B see on page 24 – EM 20 - EM20/B see on page 25- EM 28 - EM 28/B see
on page 26 – EM 40 - EM 40/B see on page 27.
In case of wrong rotation, it is necessary to change the motor rotation by ex-
changing position of two of the three connections in the motor terminal box.
5.6 Commissioning
The pump is supplied without lubricating oil.
WARNING:
The operation without oil causes big damages to the pump.
Carry out the first filling up through the plug (E) up to the half of the sight glass (F)
and close the plug (G):
EM4 - EM4/B see on page 20 - EM8 - EM8/B see on page 21 - EM12 - EM12/B
see on page 24 - EM20 - EM20/B see on page 25 - EM28 - EM28/B see on page
26 - EM40 - EM40/B see on page 27.
WARNING:
A quantity of oil greater than necessary may clog the oil separator
and damage the pump or the electric motor.
Start the pump and take it to the maximum vacuum level for at least 2 minutes.
Stop the pump, check again the oil level and add it if needed, in order to get to the
correct oil level.
5.7 Suggestions for the use
When the room temperature is lower than 10°C, it is good to let the pump operate
at maximum vacuum level for about 5 minutes. During this period the pump may not
reach the stated pressure limits.
WARNING for EM4:
Allow the pump to achieve the maximum vacuum (within 5 minutes)
cyclically, so that a regular recovery of the oil knocked down by the
exhaust filter is assured. Alternatively, stop the pump every five min-
utes.
WARNING:
Avoid operating pump for long periods with inlet port at atmospheric
pressure. Avoid frequent stop-starting. (It is advisable not to exceed
30 startings per hour).
5.8 Water vapour suction (excluded EM4 - EM4/B)
In order to pump down water vapour it is essential to take the pump temperature to
its operating value. In case there are other condensate in the oil, let the pump run at
maximum vacuum for at least thirty minutes, at the end of the working cycle.
It is advisable to carry out this operation before stopping the pump for a long time.
The gas ballast valve will allow the elimination of water condensate from the lubri-
cating oil.
15
ENG

6. SERVICING
6.1 General information
Before every maintenance operation:
• Ensurethepumpinsulationfromtheelectricenergysothatthepumpcan’tstart
automatically.
• Makesurethepumphasreachedanon-dangeroustemperature.
• Introduceairintheinletcircuit.
In order to keep the pump operating at a high efficiency level, follow all periodical
service points listed in the table below. However, more frequent service operations
may be necessary depending on what the pump is used for (suction of condensable
vapours, suction of powders or polluting substances). For such cases, only direct
experience can indicate the correct service frequency needed. The exhausted oil and
the replaced spare parts must be considered as special waste products and handled
according to the local regulations in the Country of use.
16 ENG
Check oil level before starting.
24 Hours/ Every day Operator
DESCRIPTION OF THE OPERATIONSERVICING FREQUENCY AUTHORIZED PERSONNEL
Clean the external element with compressed air. If necessary, replace it.**
Clean with a blast of air the cooling surfaces of the pump and of the electric motor.
100 Hours / Every week
Operator
Operator
Change the lubricating oil.
If the pressure gauge is fitted on the pump, check the exhaust filter (max 0.5 bar). If necessary, replace it.
(EM4 - EM4/B excluded)
Clean with a blast of air the silencer and the filtering mesh.**( EM4 - EM4/B excluded)
Clean the lubrication and oil recovery circuits carefully.
500/1000* Hours/every 6 months
Skilled worker
Skilled worker
Skilled worker
Skilled worker
Replace the exhaust filter.**
Check the electrical connection.
2000 Hours/every year
Skilled worker
Skilled worker
Pump overhaul.
30000 Hours/every 5 years Customer Service
Skilled worker
* The first oil change has to be done after 500 hours of operation. If any polluting substances are found in the oil, next oil change could take place within 1000 hours.
**
EM4 - EM4/B see exploded view on page 30 - EM8 - EM8/B see exploded view on page 32 - EM12 - EM12/B see exploded view on page 34
EM20 - EM20/B see exploded view on page 36 - EM28 - EM28/B see exploded view on page 38 - EM40 - EM40/B see exploded view on page 40

17
ENG
6.2 Oil change
Oil change should be done when the pump is still warm.
ATTENTION:
Use protective gloves to avoid injury caused by heat.
References:
EM4 - EM4/B on page 20
EM8 - EM8/B on page 21
EM12 - EM12/B on page 24
EM20 - EM20/B on page 25
EM28 - EM28/B on page 26
EM40 - EM40/B on page 27
Unscrew the oil filling plug (E) and the discharge plug (G) only after having placed
below the pump tank a suitable container (proper size and shape) for collecting the
total quantity of oil. Once the oil has been completely discharged from the tank, re-
assemble both plugs (“E” and “G”) and let the pump run under vacuum for about
one minute, so that the lubricating/cooling line get emptied and any oil residual
keeps inside the pump. Then, remove the plugs and discharge the rest of the oil.
If the oil is polluted or if some water is in the oil, clean the pump by letting it run
at maximum vacuum level with about 0.5 litre of fresh oil for at least 5 minutes.
Change again the lubricating oil. Fill the pump with fresh oil (please see “commis-
sioning” and “recommended oil table”).
Lubricating line cleaning (for EM 4- EM 4/B)
Dirty or blocked lubricating line (the fitting pos. 13 in particular) might be the reason
for the pump bad operation or performance decrease.
In order to clean the pipeline, please carry out the following operations:
• Withreferencetotheexplodedviewonpage30,disassemblethetank(pos.14)
by unscrewing its screws (pos. 20). Remove the end plate (pos. 8) by unscrewing its
screws (pos. 9).
• Using compressed air, clean the lubricating tting (and its internal adapter) by
blowing in the opposite direction with respect to the normal oil flow, through the
passage hole which is in the internal flat side of the end plate pos. 8.
• Cleantheinsideofthetankcarefully.Pleasemakesurenottoleaveanyresidual.
• Forassembly,proceedthereverseofabovesteps.
Oil recovery line cleaning (for EM4/B)
A dirty or blocked oil recovery line (orifice pos. 22 and filter pos. 21 particularly) is
the reason for oil accumulation in the exhaust filter seat and can be the reason for its
ejection during the pump operation.
In order to get the line cleaned, please follow the instructions:
• Takingtheexplodedviewonpage30asareference,disassemblethetank(pos.
14) by unscrewing its screws (pos. 20). Remove the exhaust filter (pos. 19) and the
oil sight glass (pos. 16 and 16A) from the tank.
• Usingcompressedair,cleantheparts(pos.21and22)ofthelubricatingcircuit,
by blowing the opposite direction with respect to the normal oil flow, through the
passage hole in the tank inside surface.
• Cleanthetankinsideand theexhaustlter seatcarefully. Donotleave anyre-
sidual.
• Forassembly,proceedthereverseofabovesteps.
6.3 Replacement of exhaust filter
Exhaust elements which are overly dirty may cause a considerable pump temperature
rise and the electric motor protection tripping. Maximum allowed pressure in the
tank is 0.5 bar measured at the maximum capacity (when the pump is working with
the inlet open to atmospheric pressure). If a pressure gauge has been fitted on the
tank, check the exhaust filter blockage with the pump warm. To replace the filter,
unscrew the exhaust filter by removing its screws. Unscrews the exhaust filter and
replace it. If needed, change the tank cover gasket, too.
EM4 - EM4/B see exploded view on page 30
EM8 - EM8/B see exploded view on page 32
EM12 - EM12/B see exploded view on page 34
EM20 - EM20/B see exploded view on page 36
EM28 - EM28/B see exploded view on page 38
EM40 - EM40/B see exploded view on page 40
For assembly, proceed the reverse of above steps and observe the max. tightening
torque of 15Nm.

Recommended oil for application in food industry
Use the synthetic oil compatible for chance contact with food according to
USDA H1.
EM4 - EM4/B
EM8 - EM8/B
EM12 - EM12/B - EM20 - EM20/B - EM28 - EM28/B - EM40 - EM40/B
For ambient temperature outside the stated range , please get in touch with our
Customer Service Department.
8. DE-COMMISSIONING
Drain the oil from the pump prior to the removal.
If the oil is polluted, flush the pump with fresh oil (see “oil change”).
Drain the oil from the tank, plug the inlet and the discharge ports and store the
pump without oil.
In case of pump disposal, separate the pump parts by materials and trash the parts
in accordance with the local regulations in the Country of use.
9. RETURN FOR REPAIR
In case of pump return for repair to P.V.R., provide a list of substances which have
come in contact with the pump and advise the risks involved in handling, if any.
Drain the lubricant from the pump prior to shipping the pump back
18 ENG
6.4 Pump overhaul
For this operation please request the proper instructions and direct any questions to
our Customer Service department. The overhaul consists of a complete disassembly,
cleaning of all components as well as replacement of parts that are subject to wear
(bearings, vanes and gaskets).
6.5 Spares necessary for the normal servicing
The recommended spares are shown in the list of the exploded drawing marked with
the letter “R”. Gasket kit marked in the list with the letter “G” is also essential for
spare parts.
6.6 How to order spare parts
When ordering spare parts, always state the pump model (type), serial number, year
of production, electric motor characteristics (single-phase/three-phase, kW. V, Hz),
position reference on the spare parts list, description and quantity needed
7. LUBRICANTS
Recommended oil for generic use
Use the mineral oil for compressors according to DIN 51506 group VC-VCL or
VDL classification ISO L-DAG
EM4 - EM4/B
EM8 - EM8/B
EM12 - EM12/B - EM20 - EM20/B - EM28 - EM28/B - EM40 - EM40/B
Ambient temperature Grade P.V.R. oil
5 - 40°C ISO 32 LPM1 32
Ambient temperature Grade P.V.R. oil
5 - 40°C ISO 46 LPM1 46
Ambient temperature Grade P.V.R. oil
5 - 40°C ISO 32 LPM1 32 USDA H1
Ambient temperature Grade P.V.R. oil
5 - 40°C ISO 46 LPA1 46 USDA H1
Ambient temperature Grade P.V.R. oil
5 - 40°C ISO 68 LPM1 68
Ambient temperature Grade P.V.R. oil
5 - 40°C ISO 68 LPA1 68 USDA H1
This manual suits for next models
12
Table of contents
Other PVR Water Pump manuals
Popular Water Pump manuals by other brands

Grindex
Grindex MASTER N Installation, Care and Maintenance

CSI
CSI Tri-Clover CL Series Service & installation manual

STERWINS
STERWINS 750 DW-3 Assemby - Use - Maintenance Manual

WAGNER
WAGNER ZIP52 Finishing operating manual

Kremlin-Rexson
Kremlin-Rexson EOS 60-C980-HD manual

Sage
Sage the Vac Q SBL002 quick guide