Pyle Pro PT652T User manual


PRECAUTIONS
Thank you for purchasing this HI-FI product. Taking time
to read these operating instructions carefully before use
will acquaint you fully with all its features and help ensure
optimum performance.
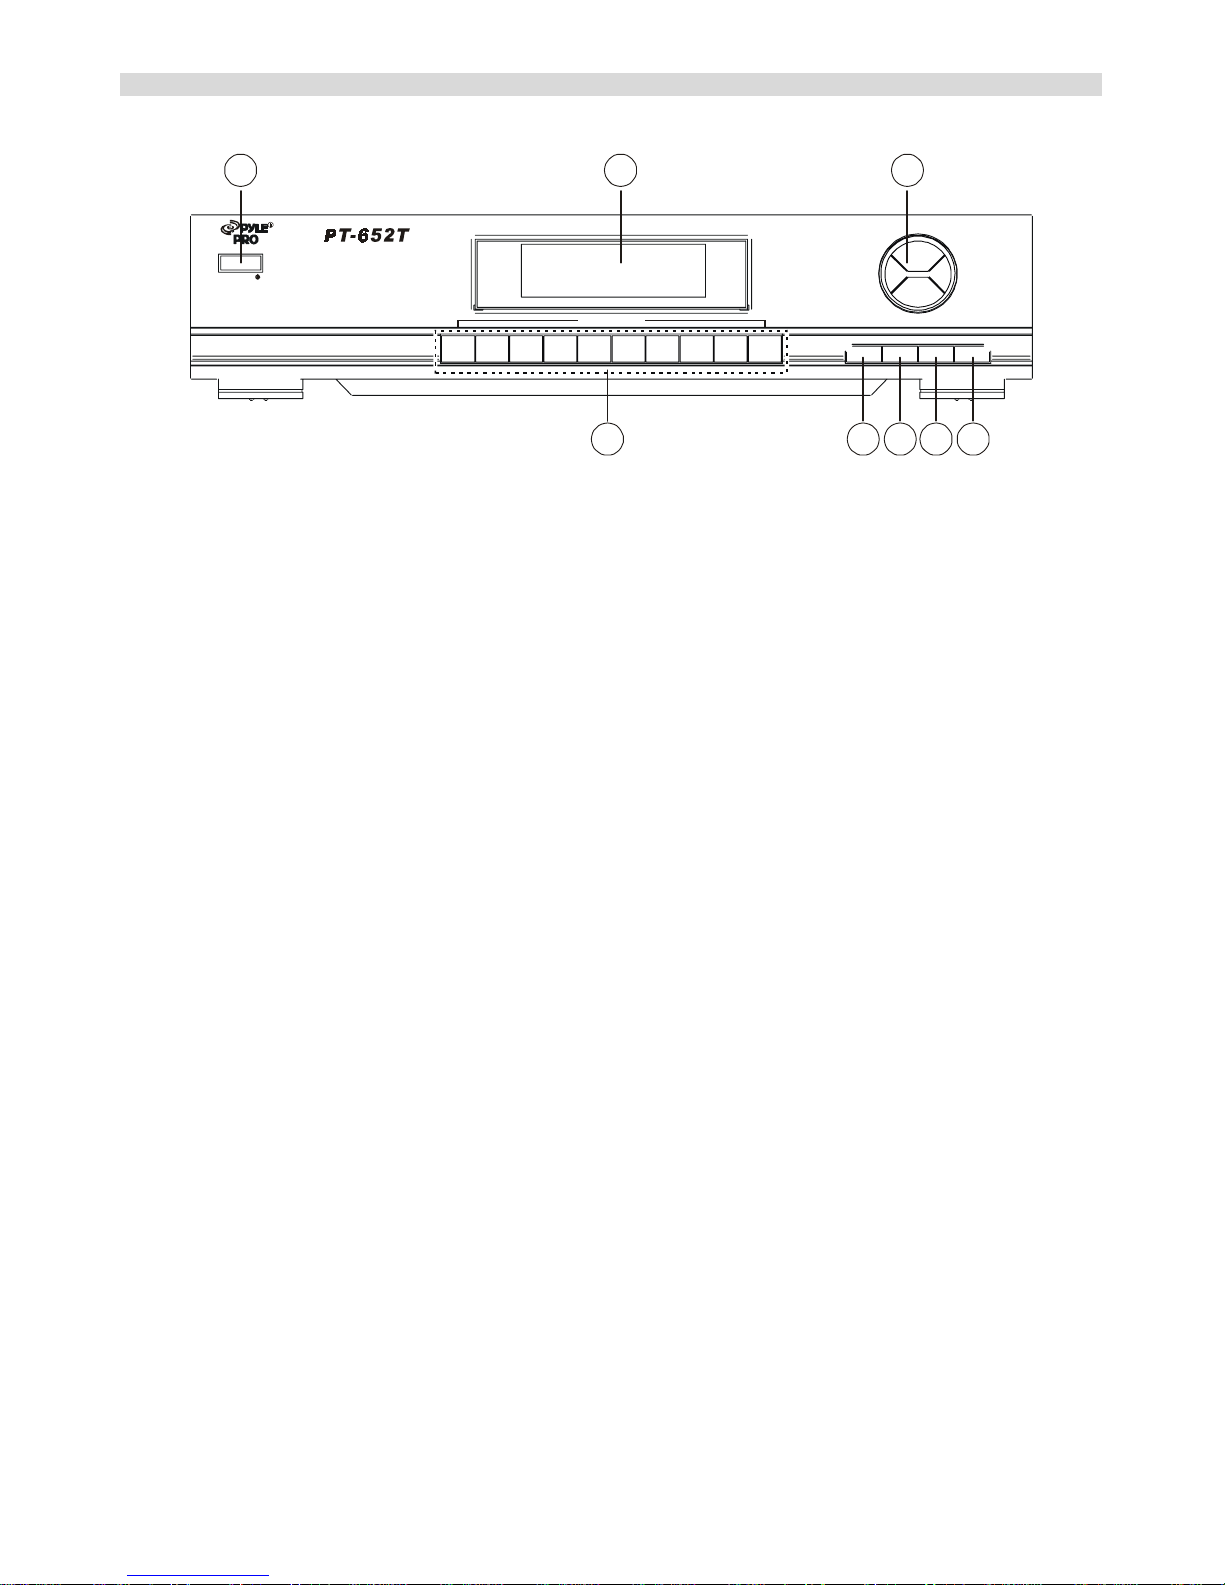
In order to simplify the explanation illustrations may
sometimes differ from the originals.
RISK OF ELECTRIC SHOCK
DO NOT OPEN
CAUTION: TO REDUCE THE RISK OF ELECTRIC SHOCK,
DO NOT REMOVE COVER(OR BACK)
NO USER-SERVICEABLE PARTS INSIDE.
REFER SERVICING TO QUALIFIED SERVICE PERSONNEL.
The lightning flash with arrowhead symbol,
within an equilateral triangle, is intended to alert
the user to the presence of uninsulated
“dangerous voltage” within the product’s
enclosure that may be of sufficient magnitude to
constitute a risk of electric shock to persons.
The exclamation point within an equilateral
triangle is intended to alert the user to the
presence of important operating and maintenance
(servicing) instructions in the literature
accompanying the appliance.
WARNING: To prevent fire or shock hazard, do not
expose this appliance to rain or moisture
Power plug
When disconnecting the power cord from the
power outlet, always take hold of the plug, and
not the wire, and pull free. Never connect or
disconnect the power plug with wet hands since
you may receive an electric shock.
Remember to disconnect the power plug from
the power outlet when you do not intend to use
the unit for a prolonged period of time.
Do not remove the case and bottom panel
Any inspections or adjustments inside the unit
may lead to malfunctions and electric shocks.
Do not touch any of the inside parts.
Ventilation warning
The normal ventilation of the product shall not
be impeded for intended use.
Installation precautions
Do not install the unit in any of the following
locations since this may result in deterioration
in performance or malfunction:
* Locations exposed to direct sunlight or near objects
radiating heat such as heating appliances.
* Locations exposed to moisture or humidity.
* Locations with poor ventilation exposed to dust and
dirt.
* Locations which are unstable and not perfectly flat or
which are susceptible to vibration.
Do not wipe with thinners
Wipe the panels and case from time to time
with a soft cloth. Using any kind of thinner,
alcohol or volatile liquid will mar the surface,
cause blotching on the exterior and erase the
markings and should therefore be avoided. Do
not use insecticide sprays in the vicinity.
Dripping warning
The product shall not be exposed to dripping or splashing
and that no objects filled with liquids, such as vases, shall
be placed on the product.

CONNECTIONS
EQ TAPE TUNER
PHONO CD TUNER PLAY REC
TAPE
PLAY REC
EQ
CD
L
R
REMOTE SYSTEM
_
AUDIO
L
RIGHT LEFT
_
AV1 AV2
L
R
INTEGRATED CIRCUIT
AC 220V - 230V ~50Hz
SPEAKERS6~8
Ω
GND
75
Ω
FM AM
Loop
REMOTE SYSTEM
TO AMP
OUTPUT
ANTENNA
TUNER
INTEGRATED CIRCUIT
AC 220-230V~50Hz
POWER CONSUMPTION: 10W
RISK OF ELECTRIC SHOCK
DO NOT OPEN
TU
FMAntenna (75 )
Ω
AM Loop Antenna
* Instructions and requirements indicated may vary to some extent depending on sales area, local law and regulations.
Connection precautions
* When connecting or re-locating the unit, be sure to turn the power off or disconnect the power cable.
* Check the left and right channels and align them correctly (L to left and R to right.)
Connections to amplifier
The supplied pin-plug cables should be used for connection between the unit’s rear panel OUTPUT terminals and your
amplifier’s TUNER terminals. Make sure not to confuse the left and right cables in connection.
FM antenna connection
Use FM 75-ohms terminals when connecting a 75 ohms coaxial cable from an outdoor antenna.
AM loop antenna connection
Connect the cord of the accessory AM loop antenna to the AM LOOP antenna terminals, and attach it to the accessory
antenna holder.
Attach antenna holder to a wall with the range of the loop antenna cord. When tuning into AM (MW, LW) stations, move
the antenna to the left or right and set it in the direction which yields the optimum reception.
* AM (MW, LW) reception is not possible with the loop antenna detached. Even if n outdoor AM antenna is erected, keep
this loop antenna in place.
* Do not bring the power cord or the speaker cords near the loop antenna since noise will be generated.
* Do not bring the loop antenna near the display, otherwise it will affect the reception.

PANELINFORMATION
AUTOMEMORY BAND STEREO/MO.
POWER
ON/STANDBY
PRESET STATIONS
54321 6 7 8 9 10/10+
TUNING
UP
DOWN
1 2 3
8 7 6 5 4
1. ON/STANDBY SWITCH
Press this button to switch “ON” the unit and press again to switch “OFF” unit into “STANDBY MODE”. If the unit is left
unattended for long periods, remove the AC cord from the power socket.
2. TUNER DISPLAY
The frequency of the station which has been in is indicated in digits. MHz units are used for FM frequencies and KHz units
for AM frequencies. When the PRESET STATION switch is pressed, the current station number will be displayed.
3. TUNING SWITCH (UP or DOWN)
Press UP or DOWN to search your favourite station.
Tuning can be performed either automatically or manually, depending on the setting of the tuning mode selector switch.
Auto tuning: When the DOWN TUNING switch is depressed, the frequency which is tuned in is counted down and this
countdown operation stops automatically as soon as the station is tuned in the LOCK indicator together with the relative
frequencies will be continuously counted down without stopping when stations are tuned in until you release the switch.
This will stop the automatic tuning operation when the lower frequency limit is reached, count-down changes over to
count-up.
Manual tuning: Every time one of the TUNING switches is depressed, the received frequency moves up or down in 50Khz
units for FM and 9 KHz for AM. (For USA, 10 KHz for AM). When the switches are kept in the depressed position, the
received frequency moves up and down rapidly in the units you release the switches.
* With manual tuning, the frequency will not stop changing as long as the UP or DOWN switch is held pressed.
4. FM STEREO/MONO SWITCH
This switch has a dual function: It switches the stereo and mono reception. FM stereo broadcasts can be heard in stereo
while FM mono broadcast are heard in mono. Normally, the stereo is received when press the stereo/mono knob once. And
the mono when the switch is pressed once again, the relative light will be shown on the display. When received stereo
signal is too weak, then there will be some noise, you can press the mono key to cut the noise.
5. AM / FM SELECTOR SWITCH
Press this switch to select the broadcast band (AM or FM).
6. AUTO SEARCH SWITCH
This switch is used to select AUTO or MANUAL tuning for AM or FM stations. Press once to set to AUTO, press again to
set MANUAL.
7. MEMORY SWITCH
●Tune in the station you wish to preset.
Press the MEMORY switch. While this switch is held pressed, the MEMORY indicator will show.
Then press the PRESET STATION switch to enter the tuned station into the memory within 5 seconds.
8. PRESET STATION SWITCHES
Up to 20 AM or FM stations may be preset at random. Presetting the switches will allow you to tune in your favourite
stations simply and easily.

SPECIFICATIONS
FM Section
Tuning range………………….87.5 to 108 MHz
Usable Sensitivity
Mono IHF…………………..12 dB (3.9 uv)
50 dB quieting sensitivity
Mono………………………..16.5 dBf
Stereo……………………….37.0 dBf
Signal to noise ratio at 65 dBf
Mono………………………..70 dB
Stereo……………………….70 dB
Distortion at 65 dBf
Mono……………………..…less than 0.15% at 1,000Hz
Stereo…………………….....less than 0.2% at 1,000Hz
Alternate channel selectivity
(at 400 KHz)………………….30 dB
Stereo separation………….…40 dB at 1,000 Hz
Frequency response………….40 to 14 KHz
+3.0 dB, -3.0 dB
Antenna input impedance…..300 ohms balanced
75 ohms unbalanced
AM (MW) Section
Tuning range……………………MW: 522 to 1629 kHz
Usable sensitivity………………MW: 68 dB/m (446uVm)
Signal to noise ratio…………….40 dB
Image response ratio……………MW: 40 dB at 1,000kHz
Others
Output voltage and impedance…220 mV/2.2kohms
Power requirements
Power voltage………………..220V ~ 50Hz
For U.K………………………240V ~ 50Hz
For U.S.A & Canada…………110V ~ 60Hz
Power consumption…………10 watts maximum
Dimensions……………………… 420mm W
93mm H
225mm D
Weight……………………………2.7 Kg
Table of contents
Other Pyle Pro Tuner manuals