3
6) Do not connect power terminal reversely.
7) All the battery terminals must be disconnected for maintenance
8) Please contact the supplier within 24 hours if there is something
abnormal.
9) Do not use cleaning solvents to clean battery
10) Do not expose battery to flammable or harsh chemicals or vapors
11) Do not paint any part of battery, include any internal or external
components
12) Do not connect battery with PV solar wiring directly
13) The warranty claims are excluded for direct or indirect damage due to
items above.
14) Any foreign object is prohibited to insert into any part of battery
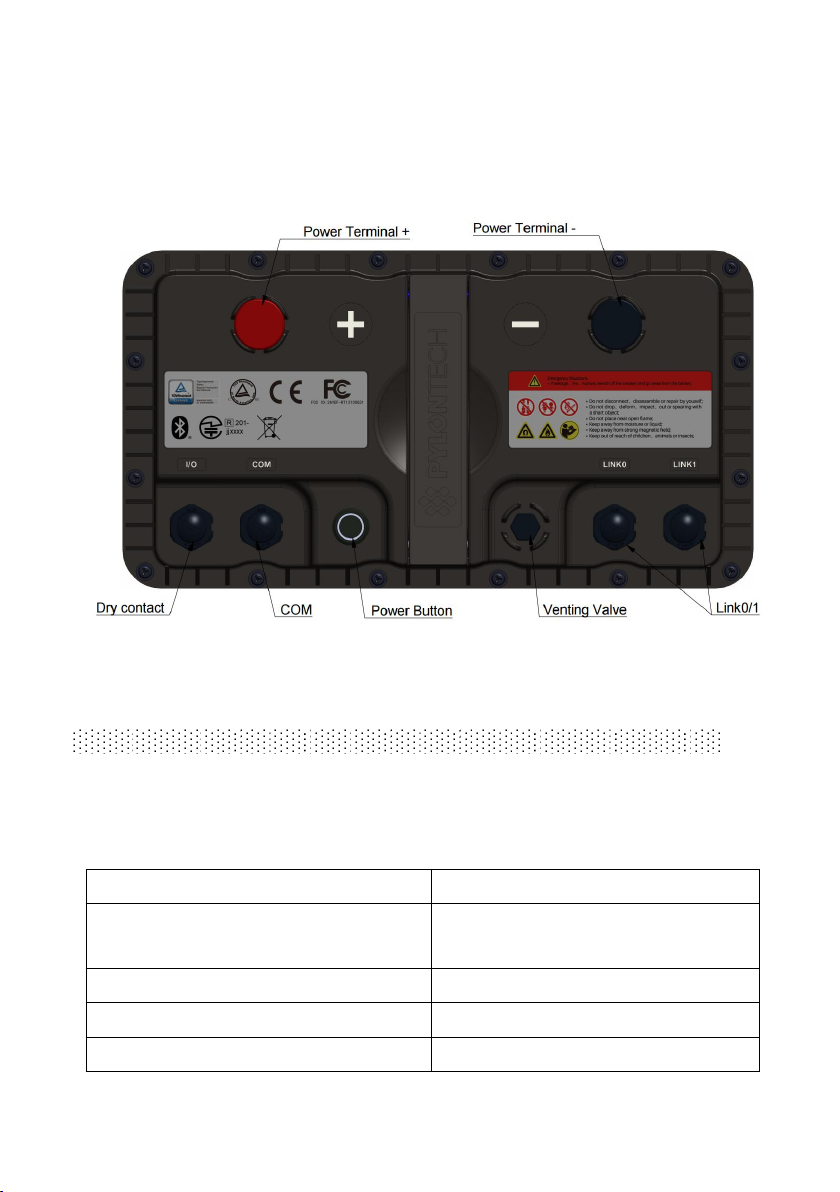
2.1 Before Connecting
1) After unpacking, please check product and packing list first, if product is
damaged or lack of parts, please contact with the local retailer
2) Before installation, be sure to cut off the grid power and make sure the
battery is in the turned-off mode
3) Wiring must be correct, do not mistake the positive and negative cables,
and ensure no short circuit with the external device
4) It is prohibited to connect the battery and AC power directly
5) The battery supports up to 4 groups of batteries in series. The maximum
charge/discharge voltage should not exceed 57V to avoid the backward
voltage generated by the BMS when the input/output is cut off exceeds the
withstand voltage value of BMS.
6) Please ensure the electrical parameters of battery system are compatible
to related equipment.
7) Keep the battery away from water and fire.