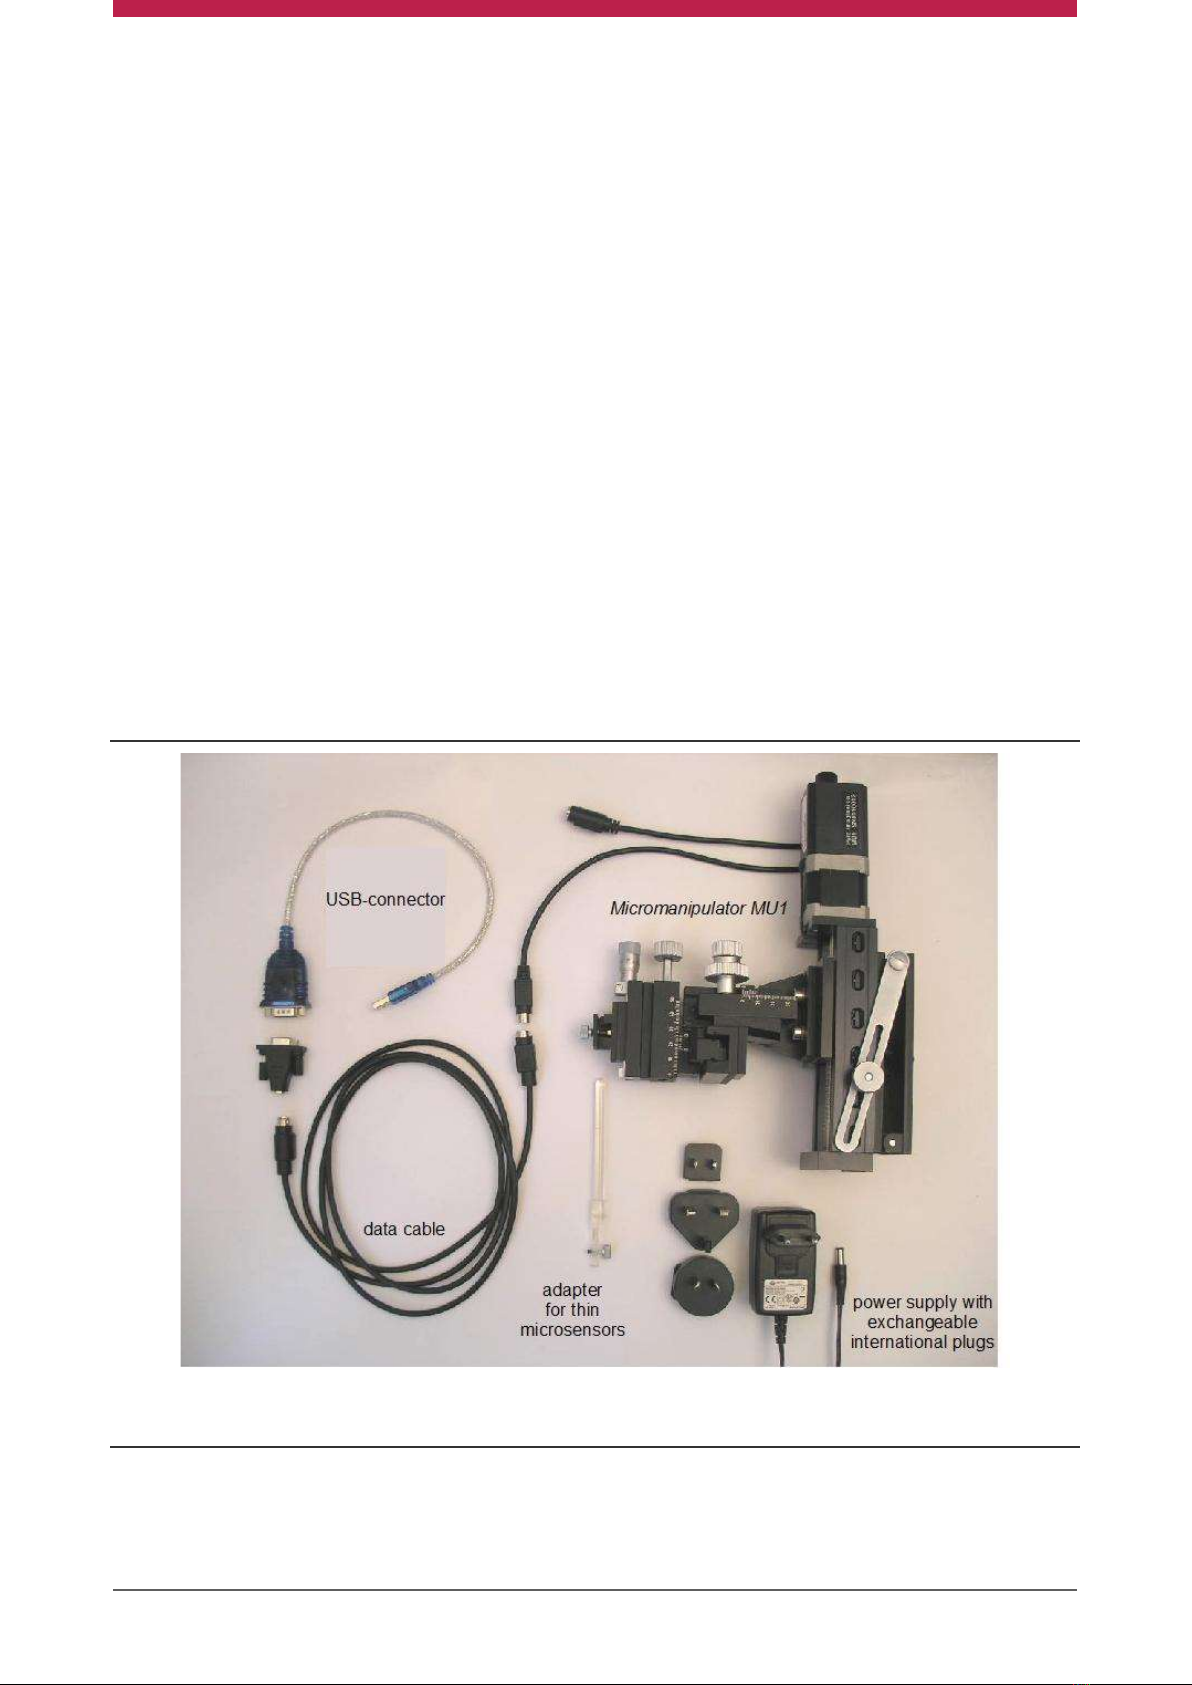
pyroscience MU1 User manual

Micromanipulator MU1
Micromanipulator with motorized z-axis
USER MANUAL
www.pyroscience.com

MU1 | User Manual
© PyroScience GmbH 2
Micromanipulator MU1
Micromanipulator with motorized z-axis
Document Version 1.4
The MU1 is provided by:
PyroScience GmbH
Hubertusstrasse 35
52064 Aachen
Germany
Phone +49 (0)241 5183 2210
Fax +49 (0)241 5183 2299
Email info@pyroscience.com
Web www.pyroscience.com
Registered: Aachen HRB 17329, Germany

MU1 | User Manual
© PyroScience GmbH 3
TABLE OF CONTENT
1Introduction.....................................................................................................................................4
1.1 Packing List........................................................................................................................................4
1.2 Overview ............................................................................................................................................5
2Safety Guidelines............................................................................................................................6
3Installation and Operation ...........................................................................................................8
3.1 Mounting and Adjustment............................................................................................................8
3.2 Power Supply and Manual Motor Control..........................................................................11
3.3 Computer-Controlled Operation.............................................................................................13
4Maintenance ................................................................................................................................. 14
5Technical Specifications............................................................................................................. 16

MU1 | User Manual
© PyroScience GmbH 4
1INTRODUCTION
The Micromanipulator MU1 has been developed within the last decade in close
cooperation with leading scientists, who are specialized in microsensor measurements.
Please read carefully this manual before starting to use the device.
1.1 Packing List
Please check that all following items are included in your package:
•Main unit of the Micromanipulator MU1
•Power supply with exchangeable international plugs
•Data cable with adapter plug and USB connector
•Adapter for mounting of thin microsensors
Figure 1: Overview of the parts included in the package. Note that the exact appearance of
some delivered items might differ to this photograph.

MU1 | User Manual
© PyroScience GmbH 5
1.2 Overview
Figure 2: Overview of the micromanipulator MU1
The Micromanipulator MU1 has been developed for performing automized microprofile
measurements with microsensors. It consists of a compact manual micromanipulator for
the x-, y-, and z-axis, supplemented with a high-precision motorized slide (0.1 µm
resolution) for the z-axis. Versatile control software is provided by PyroScience as
freeware. If no computer is connected, the motorized slide can be operated by a control
knob integrated on top of the MU1 housing. For best operation conditions, the
micromanipulator MU1 should be mounted on the Heavy Stand HS1 from PyroScience.
Alternatively, it can be mounted on any flat surface providing a M6 mounting hole.

MU1 | User Manual
© PyroScience GmbH 6
2SAFETY GUIDELINES
PLEASE READ THESE INSTRUCTIONS CAREFULLY BEFORE STARTING TO WORK
WITH THIS DEVICE
•Before connecting the device to the mains voltage, please ensure that the operating
voltage stated on the power supply corresponds to the mains voltage.
•Ensure that the device is only operated under the climatic conditions specified in
the chapter "Technical Specifications" in this instruction manual.
•Maintenance, modifications and repair work must only be carried out by a suitable,
qualified technician, trained by PyroScience.
•If there is any reason to assume that the instrument can no longer be employed
without a risk (especially regarding any electrical parts), it must be set aside and
appropriately marked to prevent any further use.
•The safety of the user may be endangered, e.g. if the instrument a) is visibly
damaged, b) no longer operates as specified, c) has been stored under adverse
conditions for a longer period.
•If there is any problem, contact PyroScience and send the micromanipulator back
for repair.
•The user has to ensure the following laws and guidelines:
oEEC directives for protective labor legislation
oNational protective labor legislation
oSafety regulations for accident prevention
•This device is not protected against water spray
•This device is not water-proof
•This device must not be used under environmental conditions which cause water
condensation
•This device must not be opened

MU1 | User Manual
© PyroScience GmbH 7
THIS DEVICE MAY ONLY BE OPERATED BY QUALIFIED PERSONAL:
This device is only intended for use in the laboratory by qualified personal
according to this instruction manual and these safety guidelines!
Keep this device out of the reach of children!
Keep away from moving parts of the device!
This device is not intended for medical or military purposes!

MU1 | User Manual
© PyroScience GmbH 8
3Installation and Operation
PRECAUTION: The Micromanipulator MU1 comprises high-precision mechanics
which can easily be damaged by improper or harsh treatment. Handle with care!
3.1 Mounting and Adjustment
Please follow these steps for mounting the Micromanipulator MU1:
1. Release the tilting screws and open
the tilting mechanism. Screw the
mounting screw carefully into the
mounting nut of the Heavy Stand HS1 (if
the spring-loaded mounting nut is not
exactly centred within the groove, move
it back into position with your fingers).
2. Fasten the mounting screw.

MU1 | User Manual
© PyroScience GmbH 9
3. Fasten the tilting screws.
4. By releasing the tilting screws and the
mounting screw, the mounting angle and the
position of the micromanipulator can be
adjusted. Ensure to fasten the screws carefully,
if the desired position is reached.
5. Microsensors with diameters from 6.5 mm to
12 mm can be mounted directly to the sensor
mount.

MU1 | User Manual
© PyroScience GmbH 10
6. For mounting microsensors with diameters
from 0.5 mm up to 3 mm use the included
adapter for thin microsensors. The adapter can
hold two thin microsensors simultaneously.
PRECAUTION: The motor exerts considerable forces when moving. Keep any
parts of your body (especially fingers and hairs!) out of the mechanics!

MU1 | User Manual
© PyroScience GmbH 11
3.2 Power Supply and Manual Motor Control
1. Ensure that the manual control knob
is in its centre position (feel the slight
"click"!). Otherwise the motor might
start moving, when the power supply is
plugged in.
2. Plug in the power supply connector.
3. Choose the right mains plug
according to your country, and connect
it to the mains supply. Now the green
LED on the Micromanipulator MU1
should light up, indicating proper
power supply.

MU1 | User Manual
© PyroScience GmbH 12
4. Turn the control knob in order to move the
motor. Clockwise turning lets the motor move
down, counter-clockwise turning will let move
it up. The motor speed is proportional to the
turning angle. In order to stop again, turn the
knob back into its centre position. The motor
will automatically stop if it reaches either end
of the slide.
.
IMPORTANT: Each time the power supply is switched off and on, the motor has
to be "homed", otherwise it will not be possible to move over the full range.
Turn the control knob counter-clockwise, and let the motor move upwards until
it stops at the upper limit. Now the motor can be moved along the full distance
of the slide.

MU1 | User Manual
© PyroScience GmbH 13
3.3 Computer-Controlled Operation
1. Establish power supply connections as described
in the last section. There are two connector cables
permanently attached to the Micromanipulator MU1.
Take the longer connector cable and plug it into one
end of the data cable.
2. Connect the USB-adapter-plugs at the
other end of the data cable as shown on
the picture.
IMPORTANT: Before connecting the USB-plug for the first time to the USB-port
of your computer, first install the control software Profix!
The installer package of Profix will install all needed USB-drivers.
The versatile control software Profix is available by download from the PyroScience
homepage (https://www.pyroscience.com). For further instructions, please refer to the
installation guidelines and manuals of Profix.

MU1 | User Manual
© PyroScience GmbH 14
4MAINTENANCE
PRECAUTION: The performance of the MU1 depends strongly on the conditions
of its precision mechanics. Ensure that its parts are kept free from dirt, dust,
liquids and other contaminants!
Be aware, that aquariums aerated with bubble stones will deposit a fine spray
of water drops in the surrounding. Ensure that the Micromanipulator MU1 is
shielded from this spray! Especially seawater is very aggressive, causing rapid
corrosion of metallic parts!
The mechanical performance of the Micromanipulator MU1 depends strongly on the
condition of its precision mechanics. Periodically you might carefully clean the gear
wheels, gear racks, and the lead screw (Figure 3). For cleaning, first remove
contaminants and old grease with ethanol. Then apply a small amount of silicon based
grease to the gear wheels, gear racks, and the lead screw. In order to protect all other
parts of the MU1 against contaminants, you might coat them thinly with a Teflon spray.
Figure 3: The performance of the MU1 depends strongly on the conditions of its precision
mechanics. Ensure that especially the gear racks and lead screws are kept free from dirt, dust and
other contaminants!

MU1 | User Manual
© PyroScience GmbH 15
Under conditions with increased relative humidity it is important to avoid water
condensation in the housing of the MU1. Condensing water might cause irreparable
damage to the electronics. Under humid conditions you should leave the power supply
connected (green LED on) even if you do not perform any measurements. That way the
motor will provide a constant heating within the housing of the MU1, lowering the risk
of water condensation.
If you follow these guidelines, the Micromanipulator MU1 will operate reliantly for
many years.

MU1 | User Manual
© PyroScience GmbH 16
5TECHNICAL SPECIFICATIONS
Feature
Specification
Dimensions
275 mm x 95 mm x ca. 220 mm
Weight
1.9 kg
Travel range x-axis (manual)
25 mm
Travel range y-axis (manual)
20 mm
Travel range z-axis (manual)
37 mm + 10 mm fine adjustment
Travel range z-axis (motor)
75 mm (on request 150, 300, 450 mm)
Max. motor velocity
2 mm/s
Min. motor velocity
0.1 µm/s
Motor resolution
0.1 µm
Motor repeatability
<2.5 µm
Maximum force
100 N
Maximum cantilever load
100 N cm
Operating temperature
0 to +75°C
Max. relative humidity
up to 95% (non-condensing conditions)
Power Supply
12 to 16 VDC (2.1 mm plug, centre positive)
Mains adaptor
100-240 VAC 50-60 Hz
(exchangeable international plugs are included)
Power consumption
ca. 4 W
Computer interface
USB

MU1 | User Manual
CONTACT
www.pyroscience.com
PyroScience GmbH
Hubertusstraße 35
52064 Aachen
Deutschland
Tel.: +49 (0)241 5183 2210
Fax: +49 (0)241 5183 2299
info@pyroscience.com
www.pyroscience.com
Table of contents
Popular Industrial Equipment manuals by other brands

PCB Piezotronics
PCB Piezotronics 1322-01A Installation and operating manual

R.V.R. Elettronica
R.V.R. Elettronica PJ10KPS-CA User's & technical manual

Eastey
Eastey Value VSA2530TK-V1 user guide

MCCOY
MCCOY FARR KT14-50K Technical manual

Rigaku
Rigaku MFM65 instruction manual

ABB
ABB HT597524 Operation manual