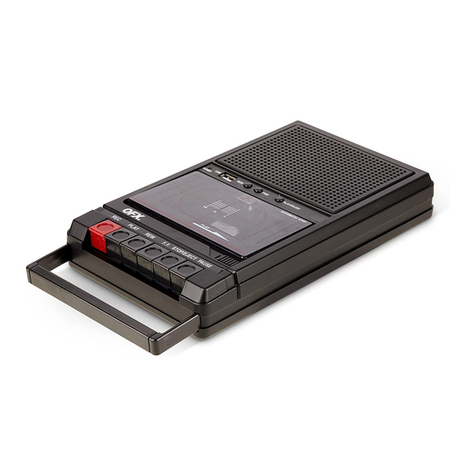
QFX J-125 User manual

Bedienungsanleitung/Garantie
Gebruiksaanwijzing • Mode d’emploi
Instrucciones de servicio • Manual de instruções
Istruzioni per l’uso • Instruction Manual
Instrukcja obsługi/Gwarancja •Használati utasítás
Інструкція з експлуатації •Руководство по эксплуатации
Soundmachine
Soundmachine •Sound Machine
Sound Machine •Soundmachine
Soundmachine •Sound Machine
Sound Machine •Sound Machine
Магнітола •Звуковоспроизводящий центр
PERFECT IN FORM AND FUNCTION
J-125 CD/MP3

3Übersicht der Bedienelemente
Locatie van bedieningselementen
Situation des commandes
Ubicación de los controles
Localização dos controlos
Posizione dei comandi
Location of Controls
Lokalizacja kontrolek
A Kezelőszervek Elhelyezkedése
Розташування органів керування
Расположение элементов

4
ESPAÑOL
Indicaciones generales de seguridad
Antes de la puesta en servicio de este aparato lea detenida-
mente el manual de instrucciones y guarde éste bien incluido la
garantía, el recibo de pago y si es posible también el cartón de
embalaje con el embalaje interior. En caso de dejarel aparato a
terceros, también entregue el manual de instrucciones.
•Vd. no debe dejarexpuesto el aparato ni a la lluvia ni a la
humedad, a fin de disminuirasí el riesgo de incendio o de
sacudida eléctrica. Por tanto, no debe utilizarel aparato
cerca de agua – porejemplo, cerca de la bañera, de una
piscina o de un sótano húmedo.
•Use este dispositivo exclusivamente para fines particulares
y con la finalidad descrita. Este dispositivo no está pensado
para fines comerciales.
•El aparato se ha de conectarúnicamente a una caja de
toma de corriente instalada reglamentariamente. Cerciórese
de que la tensión indicada concuerda con la tensión de la
caja de enchufe.
•Tenga en cuenta la correcta polaridad y alimentación cuando
use adaptadores de alimentación externos, e introduzca
siempre las baterías con la polaridad correcta.
•El aparato se ha de dejarpuesto de modo que no se tapen
los orificios de aireación existentes.
•Jamás se abrirá la carcasa del cuerpo del aparato. Las
reparaciones mal hechas pueden generar considerables
peligros para el usuario. En caso de estardeteriorado el
aparato, en especial el cable de conectara red, ya no se ha
de ponermás en servicio el aparato, sino que se hará que lo
repare un especialista. Controle periódicamente el cable de
conexión a red para versi se ha deteriorado.
•Sólo el fabricante, nuestro servicio posventa o un técnico
con una cualificación similarpueden cambiarun cable
defectuoso porotro similar, para evitartodo tipo de riesgo.
•Saque de la toma de corriente la clavija de conectara la red
o bien quite las pilas cuando no se vaya a usarel aparato
durante largo tiempo.
Estos símbolos pueden encontrarse en el dispositivo e indican
lo siguiente:
El símbolo del rayo advierte al usuario que hay
componentes internos del aparato que pueden
tenertensiones peligrosamente altas.
El símbolo con el signo de exclamación advierte
al usuario que hay instrucciones de manejo y de
mantenimiento importantes en la documentación
que va adjunta.
Aparatos que llevan puesto este símbolo operan
con un “Lector Clase 1”para explorar el CD. Los
interruptores de seguridad incorporados sirven
para impedirque el usuario esté expuesto a luz
láserinvisible peligrosa para la vista del usuario
cuando está abierto el compartimiento del CD.
Bajo ningún concepto se ha de hacerun puenteado sobre
estos interruptores de seguridad ni deben sermanipulados. De
hacerlo, existe el peligro de que Vd. esté expuesto a la luz láser.
Niños y personas débiles
•Para la seguridad de sus niños no deje material de embalaje
(Bolsas de plástico, cartón, poliestireno etc.)a su alcance.
¡AVISO!
No deje jugara los niños con la lámina. ¡Existe peligro de
asfixia!
•Este dispositivo no está pensado para serusado porperso-
nas (incluyendo niños)con capacidades físicas, sensoriales
o mentales reducidas, falta de experiencia o conocimientos,
salvo si reciben supervisión o instrucciones sobre el uso del
dispositivo poruna persona responsable de su seguridad.
•Los niños deben servigilados para garantizarque no
jueguen con el aparato.
Símbolos eneste manual de instrucciones
Advertencias importantes para su seguridad están señaladas
en especial. Siga estas advertencias incondicionalmente, para
evitaraccidentes y daños en el aparato:
AVISO:
Advierte ante los peligros para su salud y demuestra posibles
riesgos de herida.
ATENCIÓN:
Indica los posibles riesgos para el aparato u otros objetos.
NOTA:
Pone en relieve consejos e informaciones para usted.
Advertencias de seguridad especiales
Este aparato trabaja con un láser
de la clase 1.
Indicación de los elementos de manejo
1 VOLUME MIN/MAX (reguladorde volumen)
2 OPEN Compartimento de CD
3 Compartimento de CD
4 Regulador TUNING
5 Asa de transporte de nilón
6 Puerto USB
7 Ranura de tarjeta
8 Altavoces
9 Casetón
10 Tecla Pause – cassette
11 Tecla de stop / expulsión / - cassette
12 Tecla de búsqueda en avance - cassette
13 Tecla de búsqueda en retroceso - cassette

5ESPAÑOL
14 Tecla de reproducción - cassette
15 Visualizador LCD
16 Tecla STOP
17 Tecla MODE (Repetir/Reproducción casual)
18 Tecla PROGRAM (Memoria)
19 Escala de emisores
20 Tecla SKIP UP (Búsqueda en avance)
21 SKIP DOWN (Búsqueda en retroceso)
22 Selector de bandas (AM/FM/FM ST.)
23 Interruptor BBS
24 Selector de función (AUX / TAPE/ RADIO / MEDIA)
25 Tecla PLAY/PAUSE (Reproducción/Pausa)
Parte posterior (sin imagen)
26 PHONES Toma para auriculares
27 AUX IN conector
28 Compartimento para baterías
29 UKW/FM Antena
30 Toma entrada DC IN 13.5V
Puesta en servicio del aparato / Introducción
•¡Antes de la puesta en servicio, lea detenidamente el
manual de instrucciones!
•Elija una ubicación apropiada para su aparato, p.ej. una
superficie seca, llana y antideslizante, donde pueda manejar
bien su aparato.
•¡Tenga atención que su aparato tenga suficiente ventilación!
•Retire la película protectora de la pantalla si aún está adherida.
Alimentación
•Enchufe el cable de red (vea en caso de necesidad la cáma-
ra de baterías) adjunto en una caja de enchufe con puesta a
tierra debidamente instalada de 100-240 V/ 50-60 Hz y en el
clavijero de red AC~ IN en el dorso del aparato.
•Preste atención a que la tensión de red coincida con los
datos en la placa de características.
•Ponga el interruptor “POWER”de la parte posterior del
dispositivo en “ON”.
NOTA:
Opcionalmente, puede usar el dispositivo con un adaptador
CA. Conecte el dispositivo al adaptador CA introduciendo el
conector del adaptador en la toma de entrada DC IN 13.5V
(30). El interruptor de encendido quedará anulado.
ATENCIÓN:
Use exclusivamente un adaptador de alimentación CAde 13.5 V
(), otros adaptadores pueden dañar el dispositivo.
Introducir baterías (Las pilas no forman parte del suministro)
•Abra la tapa de la cámara para pilas en la parte posterior.
•Introduzca 10 baterías del tipo UM 1/R20 1,5V. ¡Tenga aten-
ción con la polaridad correcta (véase la tapa de la cámara
para pilas)!
•En caso de que no utilice el aparato durante un largo
periodo de tiempo, aparte por favor las baterías para evitar
un derrame del ácido para acumuladores.
•Cierre el compartimiento de baterías.
NOTA:
Si tiene el aparato conectado con un cable de red, se desco-
nectarán las baterías de forma automática.
ATENCIÓN:
•Las baterías no se deben tirar a la basura doméstica.
Por favor lleve las baterías usadas a sitios especiales de
recogida o a su concesionario.
•Tipos de pila desiguales o pilas nuevas y usadas no se
pueden utilizar conjuntamente.
AVISO:
No exponga las baterías al calor ni a la luz del sol directa. No
exponga nunca las baterías al fuego. Riesgo de explosión.
Seguridad de transporte del portadisco
•Abra por favor el portadisco (3), presionando la tecla ▲
OPEN (2).
•Antes del servicio aparte el dispositivio de seguridad del
transporte, en caso de que haya uno.
PHONES Clavijero para auriculares (26)
Para el funcionamiento de auriculares utilice un auricular con
una clavija jack estéreo de 3,5 mm que se introducirá en la
conexión de auriculares. Se desconectan los altavoces.
Interruptor BBS (23)
Sirve para reforzar o reducir los tonos bajos.
=Conectado, =Desconectado.
Volumen
Con el regulador de volumen VOLUME (1) se deja regular el
volumen deseado.
Desconexión
El aparato está fuera de servicio, si el interruptor selector de
funciones (23) está en la posición TAPE. Ponga el interruptor
“POWER”de la parte posterior del dispositivo en “OFF”. Desco-
necte a continuación el enchufe.
AUX IN conector
Para la conexión a aparatos análogos de reproducción. Mediante
esta hembrilla también puede escuchar el sonido de otros aparatos
de reproducción como reproductores de MP3, reproductores de CD
etc. a través de los altavoces.

6
ESPAÑOL
1. Conecte porfavorel aparato externo, con una clavija jack
estéreo 3,5 mm, a la toma hembra AUX IN (27).
2. Posicione el selectorde funciones (24)a la posición AUX.
3. Através de los altavoces escucha la reproducción de sonido
del aparato externo, con el reguladorde volumen VOLUME (1)
puede cambiarel volumen. Las teclas CD no tienen función.
4. Para proseguirtome las indicaciones de operación del
equipo/aparato externo.
NOTA:
•Ajuste el volumen del aparato externo a un volumen
apropiado.
•Para conectar un micrófono externo, guitarra eléctrica,
etc.:Debido al volumen variable de las señales, puede ne-
ceistarun preamplificador, disponible en su proveedorlocal.
Puerto USB (6)
Este dispositivo se ha diseñado según las últimas tecnologías
USB. La gran diversidad de dispositivos USB de todo tipo en el
mercado impide garantizaruna compatibilidad total con todos
los medios de almacenamiento USB. Por este motivo, los pro-
blemas durante la reproducción de medios de almacenamiento
USB pueden producirse en algunos casos. No se trata de una
avería del dispositivo.
1. Posicione el selector defunciones (24) a la posición MEDIA.
2. Conecte un dispositivo USB directamente al puerto USB.
3. Presione y mantenga el botón STOP (16)y seleccione el
modo USB. Se mostrará USb.
4. Pasados unos segundos, se mostrará el número total de
carpetas y pistas. La reproducción comenzará a continuación.
5. La pantalla mostrará alternativamente la pista actual y la
carpeta, junto con los indicadores , MP3 y USB.
Consulte el capítulo “Tocar Compact Disks/MP3” para obtener
más información.
NOTA:
El puerto USB se seleccionará automáticamente si no hay
ningún CD cargado en la unidad de CD.
ATENCIÓN:
Deslice el selectorde función (24)a la posición RADIO antes
de desconectarel dispositivo USB.
Ranura de tarjeta (7)
1. Para reproducirdatos de una tarjeta SD/MMC, introdúzcala
en la ranura.
2. Posicione el selector defunciones (24) a la posición MEDIA.
3. Presione y mantenga el botón STOP (16)y seleccione
el modo USB. Se mostrará USb. Presione y mantenga el
botón STOP de nuevo para seleccionarel modo SD. Se
mostrará Sd.
4. Pasados unos segundos se mostrará el número total de
carpetas y pistas en pantalla. A continuación comenzará la
reproducción.
5. La pantalla mostrará la pista actual y la carpeta, junto con
los indicadores , MP3 y SD.
Para obtenermás información sobre el funcionamiento, consulte
el capítulo “Tocar Compact Disks/MP3”.
NOTA:
La ranura de tarjeta queda seleccionada automáticamente
si no se ha cargado ningún CD en la unidad de CD ni se ha
conectado ningún medio de almacenamiento USB.
Escuchar la radio
1. Posicione el selector defunciones (24) a la posiciónRADIO.
2. Seleccione con el interruptorselectorde bandas (22)la
banda de frecuencias deseada.
Onda ultracorta (estereo)= FM ST., Onda ultracorta = FM,
Onda media = AM (monofónica)
3. Utilizarel control de sintonización de emisoras TUNING (4)
para sintonizarla emisora deseada.
4. En el funcionamiento de ondas ultracortas saque la antena
telescópica (30)y girela para obteneruna mejor recepción.
Si la recepción es muy débil y el emisor recibido tieneruidos,
recomendamos conmutara FM.
5. Para la recepción de emisores AM hay una antena integra-
da en el aparato. Cambiando o girando el aparato se puede
orientaréste con el emisor. En esta banda de frecuencia,
los programas se emiten sólo en calidad “monofónica”.
Operación de casettes
Reproducircasetes
1. Posicione el selectorde funciones (24)a la posición TAPE.
2. Presione la tecla de expulsión / Stop (11) para abrir el
casetón (9).
3. Introduciren el compartimiento un cassette grabado, con la
cinta hacia abajo y el lado que se pretende escucharhacia
adelante (bobina completa a la izquierda). Cierre de nuevo
el casetón.
4. Presione la tecla de reproducción (14)para reproducirla
cinta.
5. Con la tecla de expulsión / Stop puede parar la repro-
ducción.
6. En caso de que sea necesario bobine o rebobine con la
teclas de flecha, conforme al sentido
= en avance (12), = en retroceso (13).
7. Presione, entre los cambios y para parar la pasada de la cinta,
siempre la tecla de expulsión / Stop. De esta forma evita
daños en el aparato o un desperfecto de la cinta.
8. Al presionarde nuevo la tecla de expulsión / Stop se
abre la tapa del casetón.

7ESPAÑOL
9. Para interrumpirbrevemente la reproducción, presione la
tecla Pause (10). Al presionarde nuevo, continuará la
reproducción.
Tocar Compact Disks/MP3
Manera de reproducir un CD
1. Posicione el selector de funciones (24) a la posición
“MEDIA”.
2. Abra porfavorel portadisco (3), presionando la tecla
OPEN (2).
3. Coloque un CD con la etiqueta hacia arriba y cierre de
nuevo el portadisco.
4. Pasados unos segundos, la pantalla mostrará el número
total de pistas.
NOTA:
Con los CD en formato MP3, el número de carpetas se
muestra brevemente en primerlugar.
5. El CD es reproducido a partirde la primera pieza. El título
actual, la indicación es decir MP3 se indican en el display.
NOTA:
Con CD en formato MP3, se muestran alternativamente la
pista actual y la carpeta.
6. Para apartarun CD, accione porfavorla tecla STOP (16),
abra el portadisco OPEN (2) y retire con cuidado el CD.
Mantenga la tapadera del portadisco siempre cerrada.
NOTA:
•Cuando se haya colocado un disco de forma errónea o al
no haberdisco en el portadisco, parpadeará la notificación
“- - -” y “no”aparecerá en el display.
•No se puede garantizarla reproducción de discos compactos
producidos porparte del usuario, ya que existe multitud de
software y medios de discos compactos disponibles.
Descripción de las teclas CD
PLAY/PAUSE (Reproducción/Pausa) (25)
Esta tecla le permite pausartemporalmente la reproducción. El
icono y la pista actual parpadearán en la pantalla. Al presionar
de nuevo, continuará la reproducción.
SKIP DOWN / SKIP UP (21/20)
Teniendo un CD de audio o un CD en formato MP3 puesto:
Con SKIPUPpuede saltaral título próximo y al subsiguiente, etc.
•Al mantenerla tecla apretada, empieza la busca de una can-
cion.
La tecla SKIP DOWN puede manejarla de siguiente forma:
1 x presionar = Salta al título anterior
2 x presionar = Reproduce una canción previa etc. Al mantenerla
tecla apretada, empieza la busca de una canción.
STOP (16)
Pulse brevemente:
El CD se para.
Presione:
Se seleccionará la connexion USB o la ranura de tarjeta.
MODE (17)
1x presionar: (se ilumina el REP) el título actual se repite
continua-mente.
2x presionar: (se ilumina el REP )el CD completo se repite
continuamente.
3x presionar: en el display aparece la indicación RND y el
primernúmero de título que será reproducido
como primero. Todos los títulos se reproducirán
uno detrás de otro en orden casual.
NOTA:
En la reproducción aleatoria (RND) se inicia la
reproducción porprincipio con el primertítulo
del CD/MP3 CD.
4x presionar: todas las funciones están suprimidas. El funcio-
namiento normal de reproducción continuará.
Solamente para CD´s con formato MP3
1x presionar: el título actual se repite continuamente (en el
visualizadoraparecerá REP).
2x presionar: el archivadorseleccionado del CD MP3 se
reproducirá continuamente (en el visualizador
aparecerá REP ALBUM).
3x presionar: el disco actual se repite continuamente (en el
visualizadoraparecerá REP ).
4x presionar: en el display aparece la indicación RND, MP3 y
el primernúmero de título que será reproducido
como primero. Todos los títulos se reproducirán
uno detrás de otro en orden casual.
5x presionar: la función es desactivada, reproduciéndose el
disco compacto en el modo normal.
Selección de carpeta, solamente para CD MP3:
Para ascenderuna carpeta, presione y mantenga el botón
durante la reproducción. Parpadeará F01 en la pantalla. Pulse
SKIPDOWN / SKIPUPpara seleccionarla carpeta desea-
da. La reproducción de CD comienza automáticamente. Al pulsar
el botón en modo detención, la pantalla también parpadeará.
Pulse el botón PLAY/PAUSE para iniciarla reproducción.
Reproducción programada
Permite la programación de una sucesión de títulos al azar.
1. Presione la tecla STOP (16).
2. Presione la tecla PROGRAM (18). En el visualizador
parpadea“P01” (posición de memoria)y la indicación PROG.
Elija con las teclas SKIP DOWN / SKIPUP(21/20)el
título deseado y presione de nuevo la tecla PROGRAM. La
indicación en el visualizadorcambia al puesto de memoria P02.

8
ESPAÑOL
3. Elija con la tecla SKIP DOWN / SKIP UP el próximo
título y presione de nuevo la tecla PROGRAM. Repita el
procedimiento hasta que haya elegido todos los títulos.
NOTA:
Si se ha alcanzado la capacidad de almacenaje de los títulos
a programar, la indicación parpadea “FUL” en el display.
4. Presione la tecla PLAY/PAUSE (25). Se inicia la repro-
ducción. En el display se indicarán los números de título
seleccionados según el orden y la indicación es decir
MP3 y PROG. se iluminan. Con esta tecla puede también
interrumpirbrevemente el programa.
5. Si presiona una vez la tecla STOP (16)se para la repro-
ducción, pero el programa se sigue manteniendo.
6. Para reproducirde nuevo el programa, presione primero 1 x
la tecla PROGRAM y después la tecla PLAY/PAUSE.
7. Pulse dos veces el botón STOP para borrar el programa.
El icono PROG de la pantalla se apagará.
El aparato para automáticamente después de la reproducción
de todos los títulos programados. La sucesión programada
permanecerá en la memoria hasta que cambie a otro modo, o
retire el disco compacto del portadisco o desconecte el aparato.
Después de haberprogramado y activado el aparato, presione
porfavorla tecla MODE (17)hasta 3x y las funciones se
podrán aplicarcomo indicado bajo el apartado “MODE”.
Reproducción de música en formato MP3
Con este aparato tiene la posibilidad de reproducirpiezas de
música en formato MP3. El aparato soporta además los tipos de
discos compactos corrientes: CD, CD-RW, CD-R.
Es posible reproducirdiscos compactos MP3 en su aparato. En
estos discos compactos pueden almacenarse hasta 200 títulos
en forma comprimida. Su aparato reconocerá automáticamente
un disco compacto MP3 (en el display aparece el número total
de títulos y MP3). Para reproducirestos discos compactos
proceda tal como se describe bajo reproducción de CDs/MP3.
La programación de títulos se puede efectuarcomo ya indicado
bajo el apartado “Reproducción programada”.
Por favor tenga encuenta:
Existe una multitud de métodos de copia y de compresión, así
como diferencias de calidad en CDs y CDs copiados.
La industria de la música además no sigue ningunos estándares
fijos (Protección contra copia).
Por estos motivos hay casos en los cuales puede haberproble-
mas al reproducir CDs y CDs MP3. Esto no es ninguna función
de error del aparato.
Limpieza y conservación
•Antes de la limpieza, debe desenchufarel aparato.
•Las manchas exteriores pueden limpiarse con un paño
ligeramente húmedo, sin detergente adicional.
NOTA: Discos compactos:
•Con este aparato se pueden reproducirdiscos compactos
con un diámetro de 8cm o 12cm.
NOTA:
Solamente debe introducirun disco en el portadisco.
•Solamente se podrán reproducircon este aparato discos
compactos Audio, CD-R y CD-RW.
•Siempre debe introducirel disco compacto con la etiqueta
hacia arriba en el portadisco. Los discos compactos sólo se
podrán reproducirporuna cara.
•Huellas dactilares y polvo deberían serdespolvoreados cuida-
dosamente de la cara de señal (cara sin etiqueta). La limpieza
debería efectuarse con un movimiento ligero y en línea recta
del interioral borde.
•Después de la reproducción deberían guardarse los discos
compactos de nuevo en el estuche para que no se rayen.
•No exponga discos compactos a la directa irradiación
solar, a alta humedad o durante mucho tiempo a altas
temperaturas de calor. De esta forma evitará que los
discos compactos se deformen.
•No pegue papel sobre el disco compacto o escriba algo
sobre éste.
•No rocie detergentes o aerosoles antiestáticos como es el
caso con los fonógrafos.
Reparación de fallos
Síntomas Causa Solución
No se puede
reproducir CD.
CD no está colocado
o no está colocado
correctamente.
Asegúrese que el
disco esté introducido
con la etiqueta hacia
arriba.
Pilas muy débiles. Coloque nuevas pilas
o utilice el aparato con
un cable de red.
CD salta durante
lareproducción.
Controle el disco
si tiene huellas
dactilares, suciedado
arañazos.
Limpie estos con un
paño suave desde el
centro.
La unidad no
funciona
La unidad está
bloqueada y se
“congela”
Retire el enchufe de
la toma de corriente
durante aproximada-
mente 5 segundos y a
continuación vuelva a
enchufar

9ESPAÑOL
Especificaciones técnicas
Modelo:.................................................................. J-125 CD/MP3
Suministro de tensión:.................................. 100-240 V, 50-60 Hz
Funcionamiento de pila:..............................10 x 1,5 V UM 1/R 20
Consumo: ...............................................................................25 W
Potencia de salida:...................................................400 W PMPO
Clase de protección:......................................................................II
Componente de radio:
Gama de frecuencias:........................UKW / FM 88 ~ 108,0 MHz
.......................... MW / AM 520 ~ 1710 kHz
Peso neto:..............................................................................5,4 kg
No reservamos el derecho de efectuar modificaciones técnicas.
Este aparato se ha examinado según las normativas actuales y
vigentes de la Comunidad Europea, como p.ej. compatibilidad elec-
tromagnética y directiva de baja tensión y se ha construido según
las más nuevas especificaciones en razón de la seguridad
Eliminación / Significado del símbolo del
“cubo de basura”
Proteja nuestro medio ambiente, aparatos eléctricos no forman
parte de la basura doméstica.
Haga uso de los centros de recogida previstos para la eliminación
de aparatos eléctricos y entregue allí sus aparatos eléctricos que no
vaya a utilizar más.
Ayudará en evitar las potenciales consecuencias, a causa de
una erronéa eliminación de desechos, para el medio ambiente y
la salud humana.
Con ello, contribuirá a la recuperación, al reciclado y a otrasformas
de reutilización de los aparatos viejos eléctricos y electrónicos.
La información cómo se debe eliminar los aparatos, se obtiene
en su ayuntamiento o su administración municipal.

10
ENGLISH
General Safety Instructions
Read the operating instructions carefully before putting the
appliance into operation and keep the instructions including the
warranty, the receipt and, if possible, the box with the internal
packing. If you give this device to otherpeople, please also pass
on the operating instructions.
•To avoid the risk of fire oran electric shock, you should not
expose the device to rain ormoisture. Consequently, do not
use the device in the immediate vicinity of water-forexam-
ple neara bath tub, a swimming pool orin a damp cellar.
•Only use this device forprivate purpose as intended. This
device is not intended forcommercial use.
•Only connect the device at a properly installed plug socket.
Pay attention that the specified voltage corresponds to the
voltage of the plug socket.
•Observe the correct polarity and power output when using
external power adapters, always insert batteries with correct
polarity.
•Assemble the device in such a way that the available ventila-
tion openings are not covered.
•Neveropen the housing of the device. Incorrect repairs can
constitute a considerable risk forthe user. Should the device
become damaged, in particularthe mains supply cable, do
not operate the device any longer, but ratherhave it repaired
by an expert. Check the mains supply cable regularly for
damage.
•For safety reasons a broken ordamaged mains lead may
only be replaced by an equivalent lead from the manufac-
turer, ourcustomerservice department ora similary qualified
person.
•If the device is not used fora longerperiod, remove the plug
connectorfrom the plug socket ortake out the batteries.
These symbols may be found on the device and are to indicate
the following:
The lightning symbol should advise the user
of parts in the inside of the device which carry dan-
gerously high voltage levels.
The symbol with an exclamation mark should
advise the userof important operation ormainte-
nance instructions in the accompanying documen-
tation.
Devices bearing this symbol work with a “class 1
Laser“ fortracing the CD. The built-in safety
switches should prevent the userbeing exposed
to dangerous laserlight, which is invisible to the
human eye, when the CD compartment is opened.
Underno circumstances should these safety switches be
bypassed ormanipulated, as this could result in a dangerof
exposure to the laserlight.
Children and Frail Individuals
•In orderto ensure yourchildren‘s safety, please keep all
packaging (plastic bags, boxes, polystyrene etc.)out of their
reach.
WARNING!
Do not allowsmall children to play with the foil as there isa
danger of suffocation!
•This device is not intended foruse by persons (including
children) with reduced physical, sensory ormental capabili-
ties, orlack of experience and knowledge, unless supervised
by a person responsible fortheirsafety orthey have been
instructed howto use the device by such person.
•Children should be supervised to ensure that they do not
play with the appliance.
Symbols in these Instructions for Use
Important information foryoursafety is specially marked. It is
essential to comply with these instructions in orderto avoid ac-
cidents and prevent damage to the machine:
WARNING:
This warns you of dangers to yourhealth and indicates pos-
sible injury risks.
CAUTION:
This refers to possible hazards to the machine orother
objects.
NOTE:
This highlights tips and information.
Special safety information
This device works with a class 1
laser.
Location of Controls
1 VOLUME MIN/MAX (volume control)
2 OPEN CD compartment
3 CD compartment
4 TUNING control
5 Nylon carrying handle
6 USB port
7 Card slot
8 Loudspeaker
9 Cassette compartment
10 Pause button -cassette
11 / Stop/Eject button -cassette
12 Forward button -cassette
13 Reverse button -cassette
14 Playback button -cassette
15 LCD display
16 STOP button
17 MODE button (repeat/random)
18 PROGRAM button (memory)
19 Station scale

11 ENGLISH
20 SKIP UP button (forward search)
21 SKIP DOWN button (reverse search)
22 Band selector switch (AM / FM / FM ST.)
23 BBS switch
24 Function selector switch (AUX / TAPE / RADIO / MEDIA)
25 PLAY/PAUSE button
Reverse Side (not shown)
26 PHONES Headphone connection
27 AUX IN socket
28 Battery compartment
29
30
UKW/FM aerial
DC IN 13.5V jack
Start-up of the device/introduction
•Read the operating instructions thoroughly before the start-
up!
•Select an appropriate location for the device, e.g. a dry, flat,
non-slip surface on which the device can be easily operated.
•Make sure that the device is adequately ventilated!
•Remove the protective film from the display, if still attached.
Power supply
•Connect the power cable supplied (see battery compartment
if necessary) to a properly installed 100-240 V / 50-60 Hz
safety power socket and the mains connector AC~ IN on the
back of the machine.
•Ensure that the voltage is the same as that indicated on the
model identification plate.
•Turn on the device by switching the “POWER” switch on the
backside of the device to “ON”.
NOTE:
Optionally, you can run the device on an AC adapter. Connect
the device to the AC adapterby inserting the connectorof the
adapterinto the DC IN13.5 Vjack (30). The power switch will
be disabled hereby.
CAUTION:
Only use an AC power adapter with 13.5 V ( ), other
power adapters may damage the device.
Inserting the Batteries (Batteries not supplied)
•Open the battery compartment cover on the rear.
•Insert 10 batteries of type UM 1/R20 1.5 V. Please ensure
that the polarity is correct (see battery compartment cover)!
•If the device is not used for a long period of time, remove the
batteries to avoid the spilling of battery acid.
•Then close the battery lid.
NOTE:
If the power cable is connected, the batteries are switched off
automatically.
CAUTION:
•Batteries are not to be disposed of together with domestic
wastes. Dispose of the used batteries at the relevant col-
lection bin or at your dealer’s.
•Different battery types or new and used batteries must not
be used together.
WARNING:
Do not subject batteries to heat or direct sunlight. Never
expose batteries to fire. Danger of explosion!
CD deck transport protection
•Please open the CD compartment (3) by pressing the
OPEN button (2).
•Remove the transport protection from the CD player if
present before use.
PHONES Headphone Socket (26)
Please use headphones with a 3.5 mm stereo jack plug; these
should be inserted into the socket. The loudspeakers are then
switched off.
BBS switch (23)
To increase or decrease the bass output.
= on, = off.
Volume
The desired volume can be sent using the VOLUME regulator (1).
Switch-off
The machine is switched off when the function selector switch
(24) is turned to the TAPE position. Then set the “POWER”
switch on the rear of the device to “OFF”. Now disconnect the
mains plug.
AUX IN socket
To connect analogue replay devices. Via this socket you can
also hear the sound of other playback devices such as MP3
players, CD players etc. through the loudspeakers.
1. Please connect the external device with a 3.5 mm stereo
jack plug to the AUX IN socket (27).
2. Turn the function selector switch (24) to the AUX position.
3. Through the loudspeakers you can hear the playback of the
sound from the external device; with the VOLUME control (1)
you can change the volume. The CD buttons do not have
any function.
4. For the remaining procedure please see the operating
instructions of the external sound source.

12
ENGLISH
NOTE:
•Adjust the volume of the external device to a comfortable
level.
•To connectexternal microphone, electric guitar, etc.:
Due to the different signal levels, you may need a pre-
amplifier which is available at yourlocal dealer.
USB port (6)
This device has been designed according to the latest state of
the art in USB technology. The large numberof different USB
devices of all kinds on the market today makes it impossible to
guarantee full compatibility with all USB storage media. For this
reason, problems during playback from USB storage media may
occurin rare cases. This is no malfunction of the device.
1. Turn the function selectorswitch (24)to the MEDIA position.
2. Connect a USB device directly to the USB port.
3. Press and hold the STOP button (16)and select USB
mode. USb will be displayed.
4. Aftera fewseconds, the total numberof folders and tracks
will be displayed. Playback will start subsequently.
5. The display alternately shows the current track and the
foldertogether with MP3 and USB indicators.
See chapter “Playing CDs/MP3” formore information.
NOTE:
The USB port will be automatically selected if there is no CD
loaded in the CD drive.
CAUTION:
Slide the function selector (24)to the RADIO position before
disconnecting the USB device.
Card Slot (7)
1. To play data from an SD/MMCcard, insert it into the card
slot.
2. Turn the function selectorswitch (24)to the MEDIA position.
3. Press and hold the STOP button (16)and select USB
mode. USb will be displayed. Now press and hold the
STOP button again to select SD mode. Sd will be displayed.
4. Aftera fewseconds, the total numberof folders and tracks
appears on the display. Playback starts subsequently.
5. The display will showthe current track and the folderalter-
nately together with the MP3 and SD icons.
For more information on operation, see chapter “Playing
CDs/MP3”.
NOTE:
The card slot is automatically selected if there are no CD
loaded in the CD drive and no USB storage media connected.
Listening to the Radio
1. Turn the function selectorswitch (24)to the RADIO position.
2. Use the band selectorswitch (22)to select the desired
frequency band.
VHF (Stereo)= FM ST., VHF = FM,
Medium wave = AM (Mono)
3. Tune in the desired station with the station adjustment knob
TUNING (4).
4. For VHF/FM mode pull out the telescopic antenna (30)and
turn it to improve reception. If the reception is too weak
and there is interference on the station being received, we
recommend switching to FM.
5. An aerial is integrated into the device forthe reception of
AM stations. The machine can be aligned to the station by
turning it. In this frequency band programs are transmitted
in “mono”only.
Cassette Operation
Playing Cassettes
1. Turn the function selectorswitch (24)to the TAPE position.
2. Press the / stop/eject button (11) to open the cassette
compartment (9).
3. Push a recorded audio cassette, with the tape downwards
and the listening side facing forwards, into the compartment
(full reel to the left). Then close the cassette compartment
again.
4. Press the playback key (14)to listen to the tape.
5. With the / stop/eject key you can stop playback.
6. Wind the tape forwards orbackwards if necessary in the
direction of the arrow keys
= forwards (12), = reverse (13).
7. Always press the / stop/eject key when changing the
direction orstopping the tape. This prevents damage to the
machine and the tape.
8. If the / stop/eject button is pressed again the flap of the
cassette compartment opens.
9. In orderto interrupt playback briefly, press the pause but-
ton (10). Pressing again continues playback.
Playing CDs/MP3
This is how you play a CD
1. Turn the function selectorswitch (24)to the “MEDIA” posi-
tion.
2. Please open the CD compartment (3) by pressing the
OPEN button (2).
3. Insert a CD with the printed side facing up and close the CD
deck.
4. Aftera fewseconds, the display will showthe total number
of tracks.

13 ENGLISH
NOTE:
With CDs in MP3 format, the numberof folders is dis-
played briefly first.
5. The CD will play from the first title. The track currently being
played, or MP3 are shown in the display.
NOTE:
With CDs in MP3 format, the current track and the folder
are displayed alternately.
6. In order to remove a CD, please press the STOP key (16),
open the CD compartment OPEN (2) and lift the CD out
carefully.
Always keep the CD deck closed.
NOTE:
•If a disc is incorrectly inserted -orno disc has been
inserted -the symbol “- - -” and the word “no”appearin the
display.
•Playback of CDs produced by the usercannot be guar-
anteed due to the large variety of software and CD media
available.
Description of the CD buttons
PLAY/PAUSE (Play/Pause) (25)
This key allows you to briefly pause playback. The icon and
the current track are flashing on the display. Pressing again
continues playback.
SKIP DOWN / SKIP UP (21/20)
With an audio CD ora CD in MP3 format playing:
With SKIP UP you can jump to the next orprevious track etc.
•If the button is kept pressed down, the machine starts to
search through the tracks.
The SKIP DOWN button can be used as follows:
Press once = This jumps back to the previous track.
Press twice = This plays the song before etc. If the button is
kept pressed down, the machine starts to search
through the tracks.
STOP (16)
Press briefly:
The CD stops.
Press long:
The USB connection orthe card slot will be selected.
MODE (17)
Press once: (the REP emits a fixed light)the current
track is repeated continuously.
Press twice: (the REP emits a fixed light)the whole
CD is played continuously.
Press three times: the display contains the word RND and the
track number that is to be played first. All
tracks are played back in random order.
NOTE:
Random playback (RND) always begins
with the first track on the CD/MP3 CD.
Press fourtimes: all functions are cancelled. The normal play
mode is resumed.
Only for CDs in MP3 format
Press once: the current track is repeated continuously
(REPappears in the display).
Press twice : the selected folderof the MP3 CD is re-
peated continuously (REPALBUM appears
in the display).
Press three times : the whole CD is played continuously (REP
appears in the display).
Press fourtimes : the display contains the word RND, MP3
and the track numberthat is to be played
first. All tracks are played back in random
order.
Press five times : the function is deactivated and the CD is
played in the normal mode.
Folderselection only forMP3 CDs:
To navigate one folderup press and hold the button during
playback. F01 will flash on the display. Press SKIP DOWN /
SKIP UP to select the desired folder. CD playback starts auto-
matically. On pressing the button in stop mode, the display will
also flash. Press the PLAY/PAUSE button to start playback.
Programmed Play
This can be used to program any desired sequence of tracks.
1. Press the STOP key (16).
2. Press the PROGRAM key (18). The number “P01” (storage
location)and the symbol PROG flash in the display. Use the
SKIP DOWN / SKIP UP buttons (21/20)to select the
desired track and then press the PROGRAM button again.
The display changes to memory slot P02.
3. Select the next track with the SKIP DOWN / SKIP UP
key and press the PROGRAM key again. Repeat the
procedure until all the desired tracks are selected.
NOTE:
Once the storage capacityof the tracks to be programmed
has been reached, “FUL” flashes in the display.
4. Press the PLAY/PAUSE key (25). The playback starts.
The selected track numbers are shown in the display in the
correct orderand the symbol or MP3 and PROG. light
up. Press this button to pause briefly the playback.
5. Press once the STOP key (16)to stop the playback while
retaining the program.
6. To resume the playback of the program press first the
PROGRAM key once and then the PLAY/PAUSE.

14
ENGLISH
7. Press the STOP button twice to delete the program. The
PROG icon on the display turns off.
The device stops automatically once the entire sequence of pro-
grammed tracks is completed. The programmed order of tracks
remains in the memory until you change to a different mode,
remove the CD from the CD compartment or switch off the
device.
It is also possible to combine the programmed tracks with the
REPEAT function. After you have programmed and started the
device, please press the MODE button (17) up to three
times and then you can use the functions as described under
“MODE”.
Playing back Music in MP3 Format
With this device it is possible to play back pieces of music in
MP3 format. The device also supports all standard CD types:
CD, CD-RW, CD-R.
This machine of is able to play MP3 CDs. Up to 200 tracks can
be compressed and stored on these CDs. Your machine detects
an MP3 CD automatically (the total number of tracks
and MP3s appears in the display). If you would like to play one
of these CDs, proceed as described under “Playing CDs/MP3”.
Tracks can be programmed as described under “Programmed
Play”.
Please note:
There are a number of different recording and compression
methods, as well as quality differences between CDs and
selfrecorded CDs.
Furthermore, the music industry does not adhere to fixed stand-
ards (copy protection).
For these reasons it is possible that in rare cases there are
problems with the playback of CDs and MP3 CDs. This is not a
malfunction of the device.
Cleaning and Maintenance
•Always remove the mains plug before cleaning the machine.
•Any marks on the surface can be wiped off with a slightly
•Note: After this product keeps inactive for 15 minutes in
pause or stop mode. It automatically switches to the normal
standby mode, press the PLAY/PAUSE( ) button to
resume working.
damp cloth without any additives.
NOTE: Compact Disks:
•This device is able to play CDs with a diameter of 8 cm
and 12 cm.
NOTE:
Only place one disc in the CD compartment at a time.
•Only audio CDs, CD-R and CD-RW disks can be played
on this machine.
NOTE: Compact Disks:
•Always place the CD into the CD compartment with the
label facing upwards. Compact discs can only be played
on one side.
•Fingerprints and dust should be carefully removed from
the recorded side of the CD (the side without the label)
with a soft cloth. Wipe off in straight lines from the centre to
the edge.
•After being played, CDs should be returned to their case
so that they do not become scratched.
•Do not expose CDs to direct sunlight, high humidity levels
or prolonged high temperatures in order to prevent them
from warping.
•Do not adhere any paper to the CD or write on it.
•Do not spray any cleaning agents or antistatic sprays on to
the CDas in the case of phonographs.
Troubleshooting
Symptoms Course Solution
CD can not be
played back.
CD is not inserted
or inserted incor-
rectly.
Ensure that the disc is
inserted with the label
facing upwards.
Batteries too weak. Insert new batteries or
operate the device with
the mains lead.
CD jumps dur-
ing playback.
Check the disc for
fingerprints, dirt or
scratches.
Check the disc for finger-
prints, dirt or scratches.
The unit cannot
be operated
The unit is blocked
and “hangs”
Pull the mains plug for
approximately 5 seconds.
Then connect the unit
again
Technical Specifications
Model: ................................................................... J-125 CD/MP3
Power supply:.............................................. 100-240 V, 50-60 Hz
Battery operation:........................................10 x 1.5 V UM 1/R 20
Power consumption:...............................................................25 W
Output rating:............................................................400 W PMPO
Protection class:............................................................................II
Radio section:
Frequency ranges: .............................VHF / FM 88 ~ 108.0 MHz
..............................MW / AM 520 ~ 1710 kHz
Net weight:...........................................................................5.40 kg
Subject to technical changes without prior notice!
This device was tested according to all relevant current CE
directives, such as electromagnetic compatibility and the low
frequency directive, and was manufactured according to the
latest safety regulations.

15 ENGLISH
Disposal/Meaning of the “Dustbin” Symbol
Protect ourenvironment: do not dispose of electrical equipment
in the domestic waste.
Please return any electrical equipment that you will no longer
use to the collection points provided fortheirdisposal.
This helps avoid the potential effects of incorrect disposal on the
environment and human health.
This will contribute to the recycling and otherforms of reutilisa-
tion of electrical and electronic equipment.
Information concerning where the equipment can be disposed of
can be obtained from yourlocal authority.
Table of contents
Languages:
Other QFX Cassette Player manuals