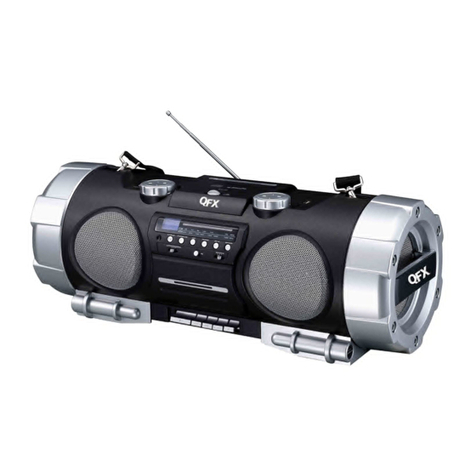
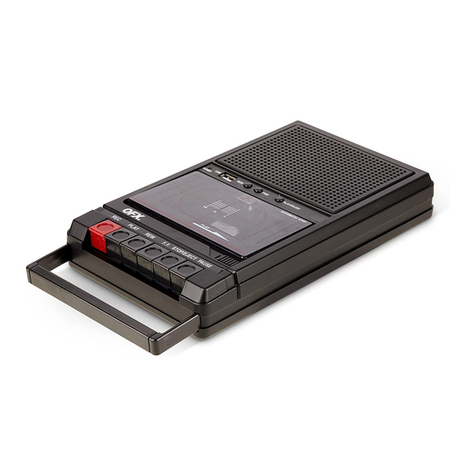
QFX J-23 User manual

INSTRUCTION MANUAL
J-23
AM/FM STEREO RADIO WITH CASSETTE RECORDER
CD/MP3/AUX/USB/BT PLAYER

WELCOME
Thank you for purchasing the Radio CD player J-23. In order to fully benefit from this product, please
follow the instructions in this user manual very carefully. Store this user manual in a safe place for future
reference. We are sure your new Radio CD will satisfy your needs.
PREPARATION FOR USE
Unpacking and Setup
* Carefully remove the unit from the display carton and remove all packing material from the unit itself.
* Remove any descriptive labels that may be found on either the front or top cabinet of the unit. Do not
remove any labels located on either the back or button cabinet of the unit.
* Press the CD door OPEN Button to open the CD compartment door. There is a white card in the CD
Compartment which is intended to prevent the CD pickup from moving during shipment of the product,
Remove this card from the CD compartment before use.
POWER SUPPLY
Using AC Power
1. Check if the power voltage, as shown on the type plate located on the bottom of the set, corresponds
to your local AC power supply. If it does not, consult your dealer or service center.
2. Connect the power cord to the AC socket inlet and the wall outlet, the power supply is now
connected and ready for use.
3. To switch off completely, unplug the power cord from the wall outlet.
4. Unplug the power cord from the wall outlet to protect your set during heavy thunderstorms.
Batteries (not included)
Open the battery compartment and insert eight batteries, type LR14, UM-2 or C-cells,
(Preferably Alkaline) with the correct polarity as indicated by the“+”and“-” symbols inside the
compartment
Batteries contain chemical substances, so they should be disposed of properly.
Incorrect use of batteries can cause electronic leakage and will corrode the compartment or cause the
batteries to burst. Therefore:
. Do not mix battery types: e.g. alkaline with carbon Zinc. Only use batteries of the same type for the set.
When inserting new batteries do not mix the old batteries with new ones.
. When inserting new batteries, do not try to mix old batteries with new ones.
Remove the batteries if the set is not be used for a long time.
EN-1

Description
EN-2
1.VOLUME-/VOLUME+ BUTTON
2.REP-DN/REP-UP BUTTON
3.POWER BUTTON
4.FUNCTION SELECT
5.STEREO HEADPHONE JACK
6.CD DOOR OPEN BUTTON
7.USB SLOT
8.SEARCH BACK
9.STOP/BAND BUTTON
10.PLAY/PAUSE BUTTON
11.SEARCH NEXT
12.REPEAT/MO/ST BUTTON
13.LCD DISPLAY
14.STANDBY INDICATOR
15.CASSETTE OPERATION KEYS
16.FM ANTENNA
17.PROGRAM/TIME BUTTON
18.BATTERY DOOR
19.AUX JACK
20.AC MAINS

BASIC FUNCTION
1. VOLUME-/VOLUME+ BUTTON
- adjust volume level.
2.PRE-DN/REP-UP BUTTON
- In the radio mode, press PRE-DN/PRE-UP
button to choose the back channel.
- In the mp3 mode, Press PRE-DN/PRE-UP
button to enter the back folder.
3.POWER BUTTON
-Press POWER button on.
4.FUNCTION SELECT
- select source of sound MP3/CD, TAPE
(OFF), RADIO and BT.
5.STEREO HEADPHONE JACK
- 3.5 mm stereo headphone jack.
6.CD DOOR OPEN BUTTON
- press here to open the CD door.
7.USB SLOT
To listen to your USB flash memory
stick with Mp3 music files.
8.SEARCH BACK
BACK track selection
- Press and Hold more than 1.5 sec
BACK Search intra track
9.STOP/BAND BUTTON
- stop CD/MP3/USB/playback;
erase a CD program.
- In the radio mode, press this button to
select the FM, AM.
10.PLAY/PAUSE BUTTON
- start or pause MP3/CD/USB/BT play
11.SEARCH NEXT
NEXT track selection
- Press and Hold more than 1.5 sec
Forward Search intra track
12. REPEAT/MO/ST BUTTON
- Repeat a track CD/MP3/USB program.
- Repeat mode: repeat ->repeat all->
repeat album ->normal
- Press MO/ST button once, to mono state.
- Press MO/ST button twice, to stereo state,
stereo is displayed(In FM mode).
EN-3
13.LCD DISPLAY
- show the radio frequency
- show the number of tracks
14.STANDBY INDICATOR
15. CASSETTE RECORDERS KEYS
RECORD ( ) - start recording
PLAY ( ) - start playback
F.REW ( ) -rewind the tape
toward the beginning.
F.FWD ( ) -advance the tape
toward the end.
STOP/EJECT ( ) - stop the tape
- open the cassette compartment
PAUSE ( ) - interrupt recording
or playback
16.FM ANTENNA
- to improve FM reception
17.PROGRAM/TIME
-In standby mode, to setup the time of the unit.
-program and review programmed track
numbers.
-In the working status, push down this button
can on CD/MP3 for programming..
18.BATTERY DOOR
-to open battery compartment
19.AUX JACK
20.AC MAINS
- inlet for power cord.
21.CASSETTE COMPARTMENT.

USE CLOCK
To setup the time of the unit
1. Connect the ac on (The following operation must be in standby mode).
2. Short according to the TIME button, the time will be flashing on the LCD display.
3.Press BACK、NEXT to select the number of the time. You can long press function button setup the time
format by 12h or 24h.
4. Press time button to confirm.
5. Set the hour and the minute with the same method of steps 3-4.
6. After setup the unit time, long press the time button can setup the unit begin working time, with the
same method of steps 3-4.
Note: after setup the beginning time, the LCD will display the radio/cd/USB/aux mode, Press the BACK
or NEXT to choose the mode, then press time button to affirm, Other wise it plays USB or aux mode first.
USE RADIO
Radio reception
1. Press FUNCTION button select RADIO mode.
2. Press BAND to select the desired wave band: AM, FM, FM ST.
3. Tune to required station by press BACK or NEXT.
Manual Tuning: Press BACK or NEXT and then release within 1 sec.
Auto Tuning: Press the play/pause button enter the automatic channel scan mode, and to be put
automatically sets.
Preset Channel:( FM 30 Preset memories, AM 10 Preset memories)
(1) Press BACK or NEXT Select desired station.
(2) Press PROGRAM button once, The MEMORY number indicator begins steady in the display.
(3) Press PRE-UP or PRE-DN buttons to select the desired number.
(4) Press PROGRAM button to save that station.
(5) Repeat steps (1) to (4) procedures for other stations.
4. After end of program. Press PRE-UP or PRE-DN to start play the frequency that you selected.
5. Press [VOL-] or [VOL +] to adjust the volume.
6. Extend TELESCOPICANTENNA to its full length if you are listening to FM broadcasting.
7. Turn off the radio by press FUNCTION button select other mode or press power button to off the unit.
8. Switch on again after shut down, the memory frequency still exists.
MONO/STEREO
- Press MO/ST button once to mono state;
- Press MO/ST button twice to stereo, stereo is displayed.
USE AUX
This model includes an Aux in jack which enables connection to any external audio device such as MP3,
Discman or Walkman.
1. Connect your external audio device to the AUX in of the micro system.
2. Select the function to AUX. Play the music from your audio device to hear it through the speakers.
Adjust the volume level to your desire.
Note: The Micro system buttons cannot control the external device.All functions must be operated from
the external audio device.
EN-4

PROGRAM METHOD
(1)Press the [PROGRAM] key at STOP mode, system will go to PROGRAM mode.
-The PRG icon and P01 will blink at 2Hz. This prompts the user to enter the first songs in the program
PLAY list.
(2)The user can select the desire tracks by using [NEXT], [BACK] keys.
- Once these keys are pressed, the Display will show the selected track.
(3)After select the desired track, press [PROGRAM] key again and it will be stored in the memory.
- Mp3 Maximum 99 and CD Maximum 20 tracks can be programmed when Repeat steps (2) to (3)
procedures.
(4)If press the [STOP] key during the program mode, then the selected TRACKS will be stored.
- In the memory and return to STOP mode (Continuous Play mode)
(5)If press the [PLAY] key during the program mode, it will start the program PLAY mode.
- PLAY start from P01 Track
Erasing a program
You can erase the content of the memory by:
- While playing, press STOP button twice.
- Opening the CD door
- Select the other mode.
USING THE CASSETTE
UNDERSTANDING THE BUTTONS
RECORD - Press to record from the radio or CD play.
PLAY - Press to play cassettes.
REW - From stop mode, press to rewind the tape toward the beginning.
F.FWD - From stop mode, press to advance the tape toward the end.
STOP/EJ. - Press to stop current tape activity or to open the cassette compartment door when no
buttons are active.
PAUSE - Press to interrupt tape play or record mode, press the second time to resume tape play or tape
record mode.
PLAY A CASSETTE TAPE
1.Press FUNC button select TAPE mode.
2.Press STOP/EJ. key to open the cassette compartment door.
3.Insert a recorded cassette and close the cassette compartment door.
4.Press PLAY to start playback.
5.To interrupt playback, press PAUSE. To resume, press the key again.
6.Press REW/F.FWD to move tape to the desired starting point.
7.Adjust the volume to your desired listening level.
8.To stop the tape, press STOP/EJ.
- The keys are automatically released at the end of the tape, except if PAUSE has been activated.
EN-5

RECORDING
GENERAL INFORMATION ON RECORDING
*Recording is permissible in so far as copyright or other
rights of third parties are not infringed.
*This deck is not suitable for recording on CHROME(IEC II)
or METAL (IEC IV) type cassette. For recording, use NORMAL
type cassettes (IEC I)on which the tabs have not been broken.
*The best recoding level is set automatically, altering the VOLUME
controls will not affect the recording in progress.
*To protect a tape from accidental erasure, have the tape in front of you and break out the left tab.
Recoding on this side is no longer possible. To record over this side again, cover the tabs with
a piece of adhesive tape.
MAINTENANCE
Tape deck maintenance
To ensure quality recording and playback of the tape deck,
clean parts A,B and C shown in the diagram below, after approx.
50 hours of operation, or on average once a month, use a
cotton bud slightly moistened with alcohol or a special head
cleaning fluid to clean the deck.
1. Open the cassette door by pressing STOP*EJECT.
2. Press PLAY and clean the rubber pressure rollers C
3. Press PAUSE and clean the magnetic heads A and also the Capstan B
4. After cleaning, press STOP*EJECT.
Note: Cleaning of the heads can also be done by playing a cleaning cassette through once.
BT
Press FUNCTION button select to BT mode. Search BT equipment "J-23" math connection,
such as need to enter pass word for “0000".
1. Press PLAY/PAUSE button to play or pause playback.
2. Press [VOL-] or [VOL +] to adjust the volume size.
3. Press BACK or NEXT to select tracks.
NOTE: BT effective receiving distance of about 10M, different BT devices may be slightly different
operation, please read carefully before operation you use the BT device (IPHONE,
IPAD,MOBILE PHONE,ETC.) instructions.
EN-6

CD/MP3 PLAYER
This Micro system can playback the
following formats: Audio Discs,MP3,CD-R.
Do not attempt to play CD-ROM, CDI, VCD,
DVD or computer CD´s.
1. Press the function button to select CD mode.
2. To open the CD door, press the CD open
button.
3. Insert anMP3/CD or CD-R, with the printed
side facing up and press the CD door gently
to close.
4. Press Play/Pause button on the unit to start
playback.
5. Press the pause button to pause at any time.
Press the play button once again to resume
playback.
6. Press STOP, to end CD playback.
Note: CD/MP3 playback will also stop when:
-You open the CD compartment;
- You select the Radio source;
- The CD/MP3 has reached to the end.
Selecting a different track.
During playback you can use the Back or Next
Buttons to select a particular track.
If you have selected a track number while in
stop or pause position, press play to start
playback.
Press next once briefly for the next track,
or press repeatedly until the desired track
number appears on the display.
Press back once briefly to return to the
beginning of the current track.
Press back twice to access to the previous
track.
Finding a passage within a track
1. Press and hold down the back or next button.
The CD will move at higher speed.
2. When you recognize the passage you want
Simply, release the back or next button.
EN-7
Play back modes: repeat,
Repeat: Plays the current track continuously.
Repeat all: plays the entire cd continuously.
Playing a USB
USB Audio functions
1. Select the USB function to enter USB mode.
2. Press NEXT or BACK to advance or go back.
3. Program up to 99 tracks in MP3 mode.
4. Play Modes: there are 4 different play modes:
Normal->Repeat 1-> Repeat all ->Repeat album->
5. A maximum of 99 folders can be read from the
USB.
6. Maximum files supported in 1 folder: 999
7. Maximum capacity supported: 32GB
Note: The unit does not support any external
HDD.

MAINTENANCE & SAFETY
Precautions & General Maintenance
* Place the unit on a hard and flat surface so that the
unit does not tilt.
* Do not expose the unit, batteries or CD´s to humidity,
rain, sand or excessive heat caused by heating
equipment or direct sunlight.
* Do not cover the unit. Adequate ventilation with a minimum
gap of 6 inches between the ventilation holes and surrounding
surfaces are necessary to prevent heat build-up.
* The mechanical parts of the unit contain self-lubricating
bearings and must do not be oiled or lubricated.
*To clean the set, use a soft dry cloth. Do not use any cleaning
agents containing alcohol, ammonia, benzene or abrasives as
these may harm the cabinet.
CD player and CD handling
* The lens of the CD player should never be touched!
* Sudden changes in the surrounding temperature can cause condensation to form and the lens of your
CD player or cloud over. Playing a CD is then not possible. Do not attempt to clean the lens but leave the
set in a warm environment until the moisture evaporates.
* Always close the CD door to keep the CD compartment dust-free. To clean, dust the compartment with
a soft dry cloth.
* To clean the CD, wipe in a straight line from the center towards the edge using a soft, lint-free cloth.
Do not use cleaning agents as they may damage the disc.
Never write on a CD or attach any stickers to it.
EN-8

TROUBLESHOOTING
Troubleshooting
If a fault occurs, it is important you first check the points listed below before taking the unit for repair.
Do not open the unit as there is a risk of electric shock.
If you are unable to remedy a problem by following these hints, consult your dealer or service center.
WARNING: Under no circumstances should you try to repair the unit yourself, as this will invalidate the
warranty.
- Problem
- Solution
No Sound / Power
- Volume not adjusted
- Adjust the Volume level
- Power cord not securely connected
- Connect the AC power cord properly
- Batteries dead/ incorrectly inserted
- Insert new batteries correctly
Display does not function properly.
No reaction to operation of any of the controls
-Electrostaticdischarge
- Switch off and unplug the unit. Connect it after a few seconds
No disc indication
- No CD inserted
- Insert a CD, MP3,CD-R.
-CD badly scratched or dirty
- Replace/clean CD. See Maintenance.
- CD-R is blank or the disc is not finalized
- Use a finalized CD-R.
CD/MP3/USB playback does not work
-CD/MP3/USB badly scratched or dirty
- Replace or clean the CD/MP3/USB (see maintenance)
-Laser lens steamed up
- Wait until the lens has adjusted to room temperature.
The CD/MP3 skips tracks
-CD/MP3 damaged or dirty
- Replace or clean CD/MP3
-Program is active
- Quit Program mode(s)
EN-9

TECHNICAL SPECIFICATIONS
GENERAL
Power Requirement ..................................................................................AC:120/220V,set 120V
Power consumption .................................................................................................AC 18 Watts
Dimensions............................................................Approx.268 mm(L)x 270mm(W) x156 mm(H)
Operation temperature............................................................................................+5 ℃- +35℃
RECEIVER SECTION
Receiving Bands.............................................................................................................. AM/FM.
Tuning Range................................................................................................... AM: 530-1710KHz
FM: 87.5-108MHz
COMPACT DISC SECTION
Optical Pickup...................................................................................................... .3-Beam Laser
Frequency Response.............................................................................................100Hz-16KHz
AUDIO SECTION
Power output ...........................................................................................Maximum 2.5 Watt x 2
Headphone Impedance ..........................................................................................4 ~ 32 Ohms
ACCESSORIES
Instruction Booklet......................................................................................................................1
AC line cord................................................................................................................................1
EN-10

FCC Statement
This device complies with Part 15 of the FCC Rules. Operation is subject to the following
two conditions:
(1)This device may not cause harmful interference.
(2)This device must accept any interference received, including interference that may
cause undesired operation.
2. Changes or modifications not expressly approved by the party responsible for
compliance could void the user’s authority to operate the equipment.
Note:This equipment has been tested and found to comply with the limits for a class B
digital device,pursuant to Part 15 of the FCC Rules. These limits are designed to provide
reasonable protection against harmful interference in a residential installation.
This equipment generates uses and can radiate radio frequence energy and,if not
installed and used in accordance with the instructions,may cause harmful interference to
radio communications.However,there is no guarantee that interference will not accor in a
particular installation.if this equipmemt does cause harmful interference to radio or
television reception,which can be determined by turning the equipment off and on,the user
is encouraged to try to correct the interference by one or more of the following measures:
• Reorient or relocate the receiving antenna.
•Increase the separation between the equipment and receiver.
• Connect the equipment into an autlet on a circuit different from that to which the
receiver is connectec.
• Consult the dealer or an experienced radio/TV technician for help.
FCC Radiation Exposure statement
This equipment complies with FCC radiation exposure limits set forth for an
uncontrolled environment.This equipment should be installed and operated with minimum
distance 20 cm between the radiator &your body
Table of contents
Other QFX Cassette Player manuals