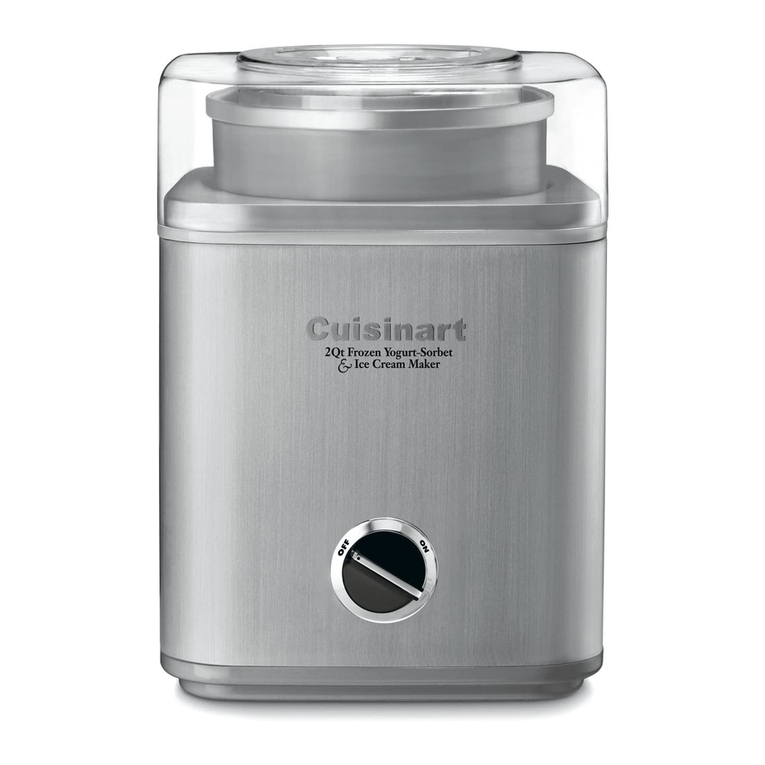
Qilive Q.5446 User manual

Ice cream maker
Q.5446
FR
ES
PT
PL
HU
RO
RU
UA
Sorbetière
Sorbetera
Máquina de gelados
Maszynka do lodów
Szorbetkészítő
Aparat pentru îngheţată
Мороженица
Морожениця

EN User manual P. 4
Manuel d’utilisation P. 16
Manual del usuario P. 30
Manual do utilizador P. 44
Instrukcja użytkownika S. 57
Használati útmutató 71. o.
Manual de utilizare P. 84
Руководство пользователя C. 97
Посібник користувача C. 111
FREN
ES
IT
PT
PL
HU
RU
RO
UA
FR
ES
PT
PL
HU
RU
RO
UA

EN
FR
ES
PT
PL
HU
RO
RU
UA

4
EN
1. SAFETY INSTRUCTIONS
Before using this product, carefully read these instructions
and keep the user manual for future reference.
1. This appliance can be used by children aged
from 8 years and above if they have been given
supervision or instruction concerning use of the
appliance in a safe way and if they understand the
hazards involved. Cleaning and user maintenance
shall not be made by children unless they are aged
from 8 years and above and supervised.
2. Keep the appliance and its cord out of reach of
children aged less than 8 years.
3. Appliances can be used by persons with reduced
physical, sensory or mental capabilities or lack of
experience and knowledge if they have been given
supervision or instruction concerning use of the
appliance in a safe way and if they understand the
hazards involved.
4. Children shall not play with the appliance.
5. Refer to the 5. MAINTENANCE AND CLEANING
for information on how to clean the surfaces having
contact with food.
6. Switch o the appliance and disconnect from supply
before changing accessories or approaching parts
that move in use.
7. WARNING: Do not use accessories other than those
supplied with the appliance.
TABLE OF CONTENTS:
1. SAFETY INSTRUCTIONS P. 4
2. TECHNICAL SPECIFICATIONS P. 8
3. PRODUCT DESCRIPTION P. 8
4. USE P. 8
5. MAINTENANCE AND CLEANING P. 10
6. RECEIPE BOOK P. 10
7. GUARANTEES AND LIMITATIONS OF LIABILITY P. 14

5
EN
8. Always disconnect the appliance from the supply
if it is left unattended and before assembling,
disassembling or cleaning.
9. Regularly check the power plug and supply cord for
damage. If the supply cord is damaged, it must be
replaced by the manufacturer, its service agent or
similarly qualied persons in order to avoid a hazard.
10. WARNING: Misuse may lead to injury. Use
this appliance solely in accordance with these
instructions. Do not attempt to modify the appliance
in any way.
11. Follow the information pertaining to the disassembly,
assemby, handling, servicing and disposal of the
appliance given in this manual.
12. WARNING: Keep ventilation openings, in the
appliance enclosure or in the built-in structure, clear
of obstruction.
13. Never leave the appliance unattended when in use.
14. WARNING: Do not damage the refrigerant circuit.
15. WARNING: Do not use electrical appliances inside
the food storage compartments of the appliance,
unless they are of the type recommended by the
manufacturer.
16. Only use this appliance with ingredients appropriate
for making ice cream, sorbet, popsicle. These include
base ingredients such as cream, milk, yogurt and
sugar, and additional ingredients like vanilla extract,
chocolate chips, melted chocolate, chopped nuts or
pieces of fruit. If in doubt, please follow the included
recipes.
17. Avoid contact with moving parts. Keep hands,hair
and clothing, as well as spatulas and other utensils,
away during operation to reduce the risk of injury
and/or damage to the appliance.
18. Do not ll the cooling bowl more than 450 ml of its
capacity to prevent overowing. The ingredients will
expand in volume through being stirred.

6
EN 19. Do not store explosive substances such as aerosol
cans with a ammable propellant in this appliance.
20. This appliance is intended to be used in household
and similar applications such as:
- sta kitchen areas in shops, oces and other
working environments;
- farm houses;
- by clients in hotels, motels and other residential
type environments;
- bed and breakfast type environments.
21. For household, indoor use only. Do not use outdoor.
22. WARNING: Keep hands and utensils out of cooling
bowl and the lid while in use to reduce the risk of
injury to persons or to the appliance itself. DO NOT
USE SHARP OBJECTS OR UTENSILS INSIDE
THE COOLING BOWL! Sharp objects will scratch
and damage the inside of the cooling bowl. A rubber
spatula or wooden spoon may be used when the
appliance is in the OFF position and disconnected
from supply.
23. Never place the cooling bowl in an oven, on top of
a stove or in a microwave. Do not expose to a heat
source. Do not wash in dishwasher; doing so may
cause risk of re, electric shock or injury.
24. Before each use, check that the cooling bowl is not
damaged. Do not mishandle the cooling bowl.
25. When the cooling bowl is cold, do not touch it while
your hands are wet. It is recommended to use over
mitts or cloth to avoid chilblains.
26. Never place the power unit in the cooling! Never
immerce into water or other liquids.
27. Never refreeze any ice cream that has been fully or
partially defrosted.
28. Any ice cream or sorbet containing raw ingredients
should be consumed within one week.
29. Never use the cooling bowl if it is damaged or leaking.
30. Do not puncture or heat the cooling bowl.

7
EN
31. Ice cream or sorbet containing raw or partially
cooked eggs should not be given to young children,
pregnant women, the elderly or unwell people.
32. Danger of electric shock! Do not tamper with the
product. Never attempt to service, dismantle the
product yourself, or push objects of any kind into the
products, as this may result in re, electric shock,
or equipment damage and will also invalidate the
warranty. In case of malfunction, repairs are to be
conducted by qualied personnel only.
33. WARNING: When positioning the appliance, ensure
the supply cord is not trapped or damaged.
34. Do not operate the appliance with a damaged
cord or plug, or after the appliance malfunctions
or is dropped or damaged in any manner. Prior to
operation, check the device for physical damage.
35. Do not let the cord hang over the edge of table or
counter, or touch hot surfaces.
36. Remove all packaging materials before using the
appliance. Keep the packaging materials away
from children they pose a risk of swallowing and
suocation.
37. Ensure the rated voltage shown on the rating label
corresponds with the voltage of the power supply.
38. Do not open the housing under any circumstances.
Do not insert ngers or foreign objects in any opening
of the appliance and do not obstruct the air vents.
39. This marking indicates that this product should
not be disposed of with other household wastes.
To prevent possible harm to the environment or
human health from uncontrolled waste disposal,
recycle it responsibly to promote the sustainable
reuse of material resources. To return your used
device, please use the return and collection systems
or contact the retailer where the product was
purchased. They can take this product for
environmentally safe recycling.

8
EN 2. TECHNICAL SPECIFICATIONS
Rated voltage/frequency 230 V~, 50-60 Hz
Rated power 12 W
Cooling bowl capacity 1 L
Popsicle mold capacity 50 ml x 7
Cable length 80 cm
Operating times for accessories 12 hours
Speed settings for accessories 1 speed
Operating temperature -18 °C
3. PRODUCT DESCRIPTION
1. Power button
2. Power unit
3. Funnel
4. Lid
5. Mixing paddle
6. Cooling bowl
7. Popsicle sticks
8. Popsicle molds
9. Popsicle container
4. USE
4.1 Before each use of the product
Clean thoroughly the appliance before each using. Disassemble the appliance to clean it.
4.1.1 Cleaning
Refer to the 5. MAINTENANCE AND CLEANING for information on how to clean the
surfaces having contact with food.
4.1.2 Disassembling
1. Unplug the appliance if it is plugged in.
2. Remove the lid by turning it clockwise or anti-clockwise to unlock and lift up. The
circular recess should be in the center of the groove.
3. Separate the mixing paddle from the power unit by pulling it towards you.
4. Press the release levers on the sides of the power unit, lift and remove the power
unit from the lid.
4.1.3 Assembling
1. Attache the power unit into the lid and press down rmly. It will click into place.
2. Simply put the mixing paddle in the power unit. It does not to be screwed in.
3. Place the lid with the power unit on the cooling bowl and turn clockwise or
anti-clockwise to lock it into position.

9
EN
4.2 Cooling bowl preparation and freezing time
• The cooling bowl must be completely frozen beforehand each time you begin to
prepare ice cream.
• Before freezing, hand wash and dry the cooling bowl thoroughly. Do not place wet
cooling bowl to the freezer!
• The length of time needed to reach the frozen state depends on how cold your
freezer is. It is recommended that you place the cooling bowl in the back of your
freezer where it is coldest. Be sure to place the cooling bowl on a at surface in its
upright position for even freezing. Generally, the freezing time is between 16 and
24 hours.
• Shake the bowl to determine whether it is completely frozen. If you do not hear the
liquid within the bowl moving, the cooling liquid is therefore frozen.
• Use the bowl immediately after removing it from the freezer. It will begin to quickly
defrost once it has been removed from the freezer.
• For the most convenient frozen desserts, leave your cooling bowl in the freezer at
all times.
• Reminder: Your freezer should be set to at least -18 °C to ensure proper freezing of
all foods. In the summer season, the set temperature should be slightly increased.
4.3 Making ice cream
Important notes:
• Prepare the ice cream mixture at least 4 hours beforehand and refrigerate.
• The cooling bowl is intended for up to 450 ml of liquid mixture. Do not exceed 3 cups
when preparing your ice cream mixture.
• When adding ingredients into the cooling bowl, control the amount of the mixture.
The mixture cannot exceed the rim of the bowl. The mixture will expand as it churns,
requiring more space.
• Do not stop and start the machine during the freezing process, as the mixture may
freeze in contact with the bowl and prevent movement of the paddle.
1. When the cooling bowl is suciently frozen, place it on a stable, cold resistance
surface.
2. Assemble the ice cream maker quickly to avoid thawing the insulated bowl.
3. Plug the power unit into an easily accessible wall outlet.
4. Press the power button to start the appliance.
5. Slowly pour the prepared and well-chilled ice cream mixture into the funnel as the
appliance is churning.
6. When the mixture is fully frozen and rises to ll the freeze bowl, the ice cream is
ready to serve.
7. Unlock and lift up the lid. Use a wooden or silicone utensil to remove the ice cream.
There are up to 4 cups of fresh, homemade ice cream.
4.4 Making popsicles
1. Slowly pour the popsicle mixture into the popsicle mold, leaving room in the popsicle
slots so that the popsicles do not overow when the sticks are inserted.
2. Place popsicle sticks into popsicle slots.
3. Freeze your popsicles until solid.
Note: Be sure to place the popsicle container with popsicle mold on a at surface in its
upright position for even freezing. The minimum freezing time is 5 hours, but this time
may vary based on your recipe.
4. Remove the popsicle mold from the popsicle container and run the popsicle mold
under warm water to loosen the popsicles.

10
EN 5. MAINTENANCE AND CLEANING
Notes:
• After use, disconnect from supply and always wait until the cooling bowl has reached
room temperature before cleaning it.
• This appliance is NOT dishwasher safe.
• Clean the appliance immediately after use.
1. WARNING: Never immerse the power unit in water or other liquids.
2. Use a soft, damp cloth to wipe the power unit, if necessary. Dry thoroughly.
3. Disassembly the appliance and thoroughly wash the cooling bowl, lid, mixing paddle
in hot soapy water. Then rinse clean with hot water. Thoroughly clean the inside of
the cooling bowl using hot (up to 40°C) soapy water and a damp cloth. Dry all parts
completely.
4. Thoroughly wash the popsicle container, popsicle mold and its sticks in hot soapy
water. Then rinse clean with hot water. Dry all parts completely.
5.1 Strorage
Ensure all pieces are clean and dry before storing. Store the appliance in its box or in a
dry, clean place.
6. RECEIPE BOOK
Notes:
• It is very important that the ice cream mixture is completely chilled before churning.
• The ice cream cooling bowl can be refrigerated for up to 4 days before churning.
• IMPORTANT: In all recepies: 1 cup = 150 ml
6.1 Classic vanilla ice cream
INGREDIENTS:
1. 1 cup heavy cream
2. ½ cup milk
3. ¾ cup sugar
4. 1 tbsp vanilla extract
DIRECTIONS:
Prepare the ice cream mixture:
1. In a bowl, stir together the cream and milk.
2. Add the sugar and whisk until the sugar is dissolved, 3 to 4 minutes. Test for
graininess by tasting a small amount of the liquid; it should feel smooth on the
tongue and there should be no sugar visible on the bottom of the bowl when it is
stirred or spooned out. Continue whisking, if necessary, to ensure that the texture of
the nished ice cream will be smooth.
3. Stir in the vanilla.
4. Chill the mixture in the refrigerator until you are ready to make your ice cream.
5. Turn on your ice cream maker, then while the machine is churning, pour in your ice
cream mixture through the funnel at the top.
6.2 Chocolate ice cream
INGREDIENTS:
1. 1 cup heavy cream
2. ½ cup milk
3. ¾ cup sugar
4. 1 tbsp vanilla extract
5. ⅓ cup unsweetened cocoa powder

11
EN
DIRECTIONS:
Prepare the ice cream mixture:
1. In a bowl, stir together the cream and milk.
2. Add the sugar and whisk until the sugar is dissolved, 3 to 4 minutes. Continue
whisking, if necessary, to ensure that the texture of the nished ice cream will be
smooth.
3. Stir in the vanilla and cocoa powder.
4. Chill the mixture in the refrigerator until you are ready to make your ice cream.
5. Turn on your ice cream maker, then while the machine is churning, pour in your ice
cream mixture through the funnel at the top.
6.3 Mint chocolate chip ice cream
INGREDIENTS:
1. 1 cup heavy cream
2. ½ cup milk
3. ¾ cup sugar
4. 1 tbsp vanilla extract
5. 6 tbsp water
6. 1 tbsp sugar
7. ⅔ cup fresh mint leaves, packed
DIRECTIONS:
Prepare the ice cream mixture:
1. In a bowl, stir together the cream and milk.
2. Add the sugar and whisk until the sugar is dissolved, 3 to 4 minutes. Continue
whisking, if necessary, to ensure that the texture of the nished ice cream will be
smooth.
3. In a food processor, combine the mint leaves, water, and 1 tbsp of sugar, then pulse
until the mixture is as puréed as possible. Next, strain through a ne-mesh sieve
then skims the foam o the top of the strained liquid so that you are left with the mint
juices. Lastly, whisk the liquid mint into the ice cream mixture, combining well.
4. Chill the mixture in the refrigerator until you are ready to make your ice cream.
5. Turn on your ice cream maker, then while the machine is churning, pour in your ice
cream mixture through the funnel at the top.
6.4 S'mores ice cream
INGREDIENTS:
Graham Cracker Ice Cream Base
1. 1 package graham crackers (9 crackers total)
2. 1 ¼ cup whole milk
3. 1 ¼ cup heavy cream
4. 4 egg yolks
5. ¼ cup white sugar
6. ½ tsp kosher salt
S’mores Ice Cream
1. ½ cup milk chocolate chips
2. melted 1 cup mini marshmallows
DIRECTIONS:
1. Crumble graham crackers into a ne powder with hands or food processor.
2. Combine graham cracker with milk and heavy cream.
3. Let sit in refrigerator 8 hours or overnight.
4. Strain graham crackers from milk mixture through cheesecloth, coee lter or ne
mesh strainer.
5. Whisk together egg yolks and sugar until well combined.

12
EN 6. Heat graham cracker milk in a suitably sized pot over low heat until the mixture
begins to bubble lightly.
7. Ladle warm milk into yolk mixture slowly, whisking continuously, to combine.
8. Transfer mixture back into pot and continue heating on low heat, whisking
continuously, until the mixture thickens to the consistency of pancake batter.
9. Remove from heat and whisk in salt.
10. Transfer to airtight container.
11. Chill the mixture in the refrigerator until you are ready to make your ice cream.
12. Turn on your ice cream maker, then while the machine is churning, pour in the
graham cracker ice cream base through the funnel at the top.
13. While ice cream maker is spinning, pour in melted chocolate and mini marshmallows
into the base.
14. Transfer ice cream from ice cream maker to an airtight container and freeze another
2 hours to rm up completely.
6.5 Peach sorbet
INGREDIENTS:
1. 8-10 yellow peaches, skin on, pitted
2. 1 cup simple syrup*
3. ¼ tsp kosher salt
4. ½ lemon, juiced
DIRECTIONS:
1. Combine peaches, simple syrup, salt and lemon juice in a blender.
2. Puree until smooth.
3. Chill the mixture in the refrigerator until you are ready to make your sorbet.
4. Turn on your ice cream maker, then while the machine is churning, pour in your
sorbet mixture through the funnel at the top.
* Simple syrup is equal parts white sugar (by weight) and water (by volume), dissolved
over low heat to make a syrup.
PRO TIP: Infuse simple syrup with rosemary for an easy herbaceous twist on this sorbet!
6.6 Honeydew mint sorbet
INGREDIENTS:
1. 2 cups honeydew melon, seeded, chopped
2. ¼ cup mint, leaves only
3. ½ cup simple syrup*
4. ½ lemon, juiced
5. ¼ tsp kosher salt
DIRECTIONS:
1. Combine honeydew, mint, simple syrup, lemon juice and salt in a blender.
2. Puree until smooth.
3. Chill the mixture in the refrigerator until you are ready to make your sorbet.
4. Turn on your ice cream maker, then while the machine is churning, pour in your
sorbet mixture through the funnel at the top.
* Simple syrup is equal parts white sugar (by weight) and water (by volume), dissolved
over low heat to make a syrup.
PRO TIP: Fresh basil is also a great substitute for mint in this recipe!

13
EN
6.7 Strawberry sorbet
INGREDIENTS:
1. 500 g ripe and well-avored strawberries (300 g of stewed pulp)
2. 125 g caster sugar
3. 1 tbsp lemon, juiced
4. 65 ml water
DIRECTIONS:
1. Make a syrup from water and sugar. Stir the sugar until fully dissolved and let it boil
for 2 minutes. Allow to cool.
2. Rinse and hull the strawberries. Mix them, then pass them through a thin conical
strainer to remove the seeds.
3. Mix the cooled syrup and lemon juice with the strawberry puree.
4. Pour the mixture into the ice cream maker and let set for at least 2 hours.
6.8 Watermelon mint popsicles
INGREDIENTS:
1. 3 cups seedless watermelon, cubed
2. ¼ cup simple syrup*
3. 1 tbsp mint, minced
DIRECTIONS:
1. Puree watermelon with simple syrup until smooth.
2. Stir in mint.
3. Pour into popsicle molds and freeze 8 hours or overnight.
4. Let popsicles thaw 1-2 minutes or run under hot water for easy removal from molds.
* Simple syrup is equal parts white sugar (by weight) and water (by volume), dissolved
over low heat to make a syrup.
6.9 Strawberry orange creamsicle
INGREDIENTS:
1. 1 cup strawberries, hulled
2. ½ cup plain yogurt
3. ¼ cup simple syrup
4. ½ cup fresh orange juice
DIRECTIONS:
1. Combine strawberries, yogurt, simple syrup and orange juice in blender.
2. Puree together until smooth.
3. Pour into popsicle molds and freeze 8 hours or overnight.
4. Let popsicles thaw 1-2 minutes or run under hot water for easy removal from molds.
6.10 Greek yogurt and blueberry popsicles
INGREDIENTS:
1. 1 cup blueberries
2. 2 tbsp simple syrup or honey (optional)
3. 1 cup nonfat Greek yogurt
DIRECTIONS:
1. Puree blueberries and simple syrup in blender.
2. Add yogurt and either mix by hand (to produce swirls) or puree together until
combined.
3. Pour into popsicle molds and freeze 8 hours or overnight.
4. Let popsicles thaw 1-2 minutes or run under hot water for easy removal from molds.

14
EN 6.11 Mixed berry popsicles
INGREDIENTS:
1. ½ cup strawberries, hulled
2. ½ cup blueberries
3. ½ cup raspberries or blackberries
4. ¼ cup simple syrup
5. ½ cup coconut water
DIRECTIONS:
1. Combine strawberries, blueberries, raspberries, simple syrup and coconut water in
blender.
2. Puree together until smooth.
3. Pour into popsicle molds and freeze 8 hours or overnight.
4. Let popsicles thaw 1-2 minutes or run under hot water for easy removal from molds.
6.12 Chocolate pudding popsicles
INGREDIENTS:
Ice Cream Base
1. 1 cup whole milk
2. 1 packet gelatin (1 ¼ tsp)
3. ¼ cup white sugar
4. ¼ tsp kosher salt
5. 2/3 cup semisweet chocolate chips
Magic Shell
1. 1 cup semisweet chocolate chips
2. 3 tbsp rened (not virgin) coconut oil, measured when solid
DIRECTIONS:
1. Whisk together milk and gelatin to dissolve any lumps. Let bloom 5 minutes. Transfer
to suitably sized pot and bring to a simmer.
2. Add sugar and salt. Add chocolate chips and continue to stir until melted and
smooth*. Let boil 1 minute and remove from heat.
3. Pour into popsicle molds and freeze 8 hours or overnight. Let popsicles thaw
1-2 minutes or run under hot water for easy removal from molds.
* Chocolate will rst seize when melting, but will eventually melt down and incorporate
into milk.
4. For magic shell, microwave chocolate chips until melted, approximately 1 minute,
in 15-second bursts. Melt coconut oil in microwave until melted, approximately
30 seconds. Mix together until smooth.
5. When still warm, dip popsicles into magic shell and quickly dip again in desired
toppings before chocolate in magic shell hardens.
PRO TIP: For a vegan chocolate pudding, substitute milk for coconut milk.
PRO TIP: Magic shell can be saved in the refrigerator and melted again for reuse.
7. GUARANTEES AND LIMITATIONS OF LIABILITY
This product is guaranteed for a period of 36 months (including the legal guarantee of
24 months as dened by local law as well as a commercial guarantee of 12 additional
months oered by the brand) from the date of purchase, against any failure resulting
from a manufacturing or material defect.
This guarantee does not cover damage resulting from a faulty installation, incorrect use,
or normal wear and tear. More specically, the guarantee does not cover:
• Damage or problems caused by incorrect use, accidents, modications or an
electrical connection with the wrong current or voltage.

15
EN
• Products that have been modied or whose tamper evident seal or serial number
has been damaged, altered, removed or rusted.
• Replaceable batteries and accessories are guaranteed for 6 months.
• Battery failure, as a result of over-charging or non-compliance with the safety
instructions set out in the manual
• Cosmetic damage, including scratches, bumps and any other element.
• Damage caused by any servicing operations carried out by non-authorised persons.
• Faults caused by normal wear and tear or the normal ageing of the product
• Software updates as a consequence of changes to network settings
• Product failure resulting from the use of third party software to modify, change or
adapt the product as supplied
• Product failure resulting from its use without manufacturer-approved accessories
• Rusted products
The manufacturer is not liable for the loss of data stored on the hard drive. Similarly,
the manufacturer is not required to check that SIM/SD cards have been removed from
returned products.
Repaired or replaced products may include new and/or repackaged hardware and
components.
IMPLEMENTATION METHODS
To make a claim under the guarantee, please return your product to the reception desk
of your local sales outlet with the proof of purchase (receipt, invoice, etc.) of the product
and accessories supplied, along with the original packaging.
The following information will be required: date of purchase, model and serial or IMEI
number (this information generally features on the product, the packaging or proof of
purchase).
Failing this, you must return the product with all accessories needed for it to work properly
(power cable, adapter etc.).
If your product is covered by the guarantee, the after-sales service will (within the bounds
of the local legislation):
• Repair or replace the faulty parts
• Exchange the returned product with a product which has the same features or better
and is equivalent in terms of performance.
• Refund the product at the price stated on the proof of purchase.
In the case of a repair covered by the guarantee, your guarantee period will be extended
by 6 months. This period cannot be combined in the event of repeated failures.

16
FR
1. CONSIGNES DE SÉCURITÉ
Avant d’utiliser cet accessoire, lisez attentivement ces
instructions et conservez la notice d’utilisation comme
référence.
1. Cet appareil peut être utilisé par des enfants âgés
d’au moins 8 ans s’ils sont surveillés ou ont reçu
des instructions relatives à l’utilisation sécurisée
de l’appareil et comprennent les risques y relatifs.
Les enfants ne doivent pas être autorisés à nettoyer
ou entretenir l’appareil à moins d’être surveillés et
d’avoir au moins 8 ans.
2. Tenez l’appareil et son cordon d’alimentation hors
de portée des enfants de moins de 8 ans.
3. Les appareils peuvent être utilisés par des personnes
ayant des capacités physiques, sensorielles ou
mentales restreintes ou manquant de connaissances
ou d’expérience si celles-ci sont surveillées ou ont
été informées quant à l’utilisation sûre de l’appareil
et des risques existants.
4. Les enfants ne doivent pas prendre cet accessoire
pour un jouet.
5. Référez-vous à 5. ENTRETIEN ET NETTOYAGE
pour savoir comment nettoyer les surfaces en
contact avec les aliments.
6. Éteignez l'appareil et débranchez-le du secteur avant
de changer d'accessoire ou d'approcher des pièces
qui sont en mouvement pendant que l'appareil est
en marche.
SOMMAIRE :
1. CONSIGNES DE SÉCURITÉ P. 16
2. CARACTÉRISTIQUES TECHNIQUES P. 21
3. DESCRIPTION DU PRODUIT P. 21
4. UTILISATION P. 21
5. ENTRETIEN ET NETTOYAGE P. 23
6. LIVRE DE RECETTES P. 23
7. GARANTIE ET LIMITES DE RESPONSABILITÉ P. 28

17
FR
7. MISE EN GARDE : N’utilisez pas d’autres
accessoires que ceux fournis avec l’appareil.
8. Débranchez toujours l'appareil du secteur s'il est
laissé sans surveillance et avant toute opération de
montage, démontage ou nettoyage.
9. Vériez régulièrement que la che secteur et le
câble d’alimentation ne sont pas endommagés. Si
le cordon est endommagé, il doit être remplacé par
le fabricant, son agent d’entretien ou une personne
qualiée pour éviter tout danger.
10. MISE EN GARDE : Une mauvaise utilisation peut
entraîner des blessures. Utilisez cet appareil en
respectant strictement ces instructions. N’essayez
de modier cet appareil en aucun cas.
11. Suivez les informations relatives au démontage, au
montage, à la manipulation, à la réparation et à la
mise au rebut contenues dans ce manuel.
12. MISE EN GARDE : Les ouvertures d'aération doivent
rester exemptes de toute obstruction, à l'intérieur ou
à l'extérieur de l'appareil.
13. Ne laissez jamais l’appareil sans surveillance lors
de son utilisation.
14. MISE EN GARDE : N’endommagez pas le circuit
réfrigérant.
15. MISE EN GARDE : N'utilisez pas d'appareils
électriques à l'intérieur des compartiments dédiés
au stockage des aliments, sauf s'ils font partie de
ceux conseillés par le fabricant.
16. N’utilisez l’appareil qu’avec les ingrédients
appropriés pour fabriquer de la glace, de sorbets
ou des sucettes glacées. Il s’agit d’ingrédients de
base tels que la crème, le lait, le yaourt et le sucre,
et d’autres ingrédients tels que l’extrait de vanille,
les pépites de chocolat, le chocolat fondu, les noix
hachées ou des morceaux de fruits. En cas de doute,
suivez les recettes incluses.

18
FR
17. Évitez tout contact avec des pièces mobiles. Tenez
les mains, les cheveux et les vêtements, ainsi que
les spatules et autres ustensiles, loin durant le
fonctionnement de l’appareil an de réduire le risque
de blessure ou de dommages sur celui-ci.
18. Ne remplissez pas le bol de refroidissement à plus de
450 ml de sa capacité pour éviter tout débordement.
Les ingrédients prennent du volume pendant qu’ils
sont mélangés.
19. Ne stockez pas de substances explosives comme
des bombes aérosol contenant du gaz inammable
dans cet appareil.
20. Cet appareil est destiné à un usage domestique et
pour des applications similaires telles que :
- coin cuisine dédié aux employés dans une boutique,
un bureau et tout autre environnement de travail ;
- fermes ;
- pour les clients des hôtels, motels et autres
environnements résidentiels ;
- environnements de type bed-and-breakfast.
21. Pour une utilisation domestique, en intérieur
uniquement ! Ne l’utilisez pas à l’extérieur.
22. MISE EN GARDE : Gardez les mains et les
ustensiles hors du bol de refroidissement et du
couvercle pendant l’utilisation de l’appareil an
d’éviter tout risque de l’endommager ou de blesser
des personnes. N’UTILISEZ PAS D’OBJETS OU
D’USTENSILES POINTUS DANS LE BOL DE
REFROIDISSEMENT ! Les objets pointus éraillent et
endommagent l’intérieur du bol de refroidissement.
Vous pouvez utiliser une spatule en caoutchouc ou
une louche en bois lorsque l’appareil est en position
ARRÊT et débranché de l’alimentation.
23. Ne placez jamais le bol de refroidissement dans
un four, sur un foyer ou dans un micro-ondes. Ne
l’exposez à aucune source de chaleur. Ne le lavez
pas au lave-vaisselle, car cela pourrait entraîner un
incendie, une décharge électrique ou des blessures.

19
FR
24. Avant chaque utilisation de l’appareil, vériez que
le bol de refroidissement n’est pas endommagé.
Ne manipulez pas maladroitement le bol de
refroidissement.
25. Lorsque le bol de refroidissement est froid, ne
le touchez pas avec des mains humides. Il est
recommandé d’utiliser des moues ou un tissu pour
éviter les engelures.
26. Ne placez jamais l’unité d’alimentation au frais. Ne
l’immergez jamais dans de l’eau ni dans d’autres
liquides.
27. Ne recongelez jamais de crème glacée ayant déjà
totalement ou partiellement dégivrée.
28. Les crèmes glacées ou sorbets contenant des
ingrédients crus doivent être consommés dans un
délai d’une semaine.
29. N’utilisez jamais le bol de refroidissement s’il est
endommagé ou s’il fuit.
30. Ne perforez pas et ne chauez pas le bol de
refroidissement.
31. Les crèmes glacées ou sorbets contenant des
œufs crus ou partiellement cuits ne doivent pas être
donnés aux jeunes enfants, aux femmes enceintes,
aux vieillards ou aux malades.
32. Danger d’électrocution ! N’altérez pas le produit.
N’essayez jamais de réparer ou de démonter le
produit vous-même ou d’introduire tout type d’objet
dans le produit, car cela peut entraîner des départs
de feu, des électrocutions ou endommager le
produit, ce qui rendra également la garantie nulle.
Tout défaut de fonctionnement doit impérativement
être réparé par une personne qualiée.
33. MISE EN GARDE : Lorsque vous placez l'appareil,
assurez-vous que le câble d'alimentation n'est pas
coincé ou endommagé.

20
FR
34. Ne faites pas fonctionner l’appareil avec une che
secteur ou un câble d’alimentation endommagé,
après un dysfonctionnement ou si l’appareil tombe
ou est endommagé de quelque façon que ce soit.
Avant tout fonctionnement, vériez si l’appareil ne
présente pas des dégâts physiques.
35. Ne laissez pas le câble pendre de la table ou du
plan de travail ou toucher des surfaces chaudes.
36. Enlevez tous les matériaux d’emballage avant
d’utiliser l’appareil. Éloignez les matériaux
d’emballage des enfants pour éviter tout risque
d’ingestion et d’étouement.
37. Assurez-vous que la tension nominale indiquée
sur l’étiquette correspond à la tension de la prise
électrique.
38. N’ouvrez pas le boîtier, quel qu’en soit le cas.
N’introduisez ni vos doigts, ni corps étrangers dans
l’ouverture de l’appareil et ne bouchez pas les
évacuations d’air.
39. Ce marquage indique que ce produit ne doit
pas être jeté avec les autres déchets ménagers.
Par mesure de prévention pour l’environnement
et pour la santé humaine, veuillez le recycler de
façon responsable, conformément au principe de
réutilisation des ressources matérielles. Pour
renvoyer votre ancien accessoire, veuillez utiliser
les systèmes de renvoi et de collecte ou contacter le
revendeur auprès duquel vous avez acheté
l’accessoire. Ils pourront procéder au recyclage de
ce produit en toute sécurité.
Table of contents
Languages:
Popular Ice Cream Maker manuals by other brands

Cuisinart
Cuisinart THE CUISINART ICE-100 user manual

Lacor
Lacor 69309 Instructions for use and maintenance

Royal Catering
Royal Catering RCHI-01 user manual

Vollrath
Vollrath Stoelting F212 Operator's manual

Frigomat
Frigomat Taylor C119 06 Series Operating instructions and maintenance

Cuisinart
Cuisinart Classic ICE-25 Series user manual