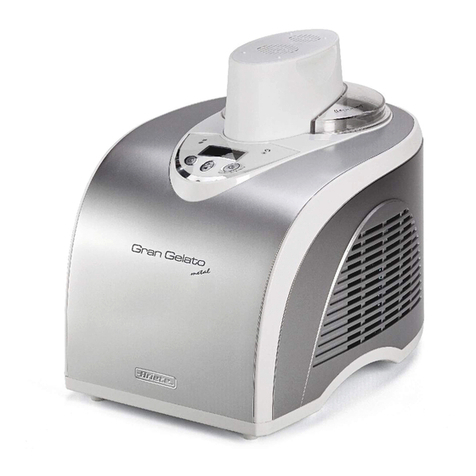
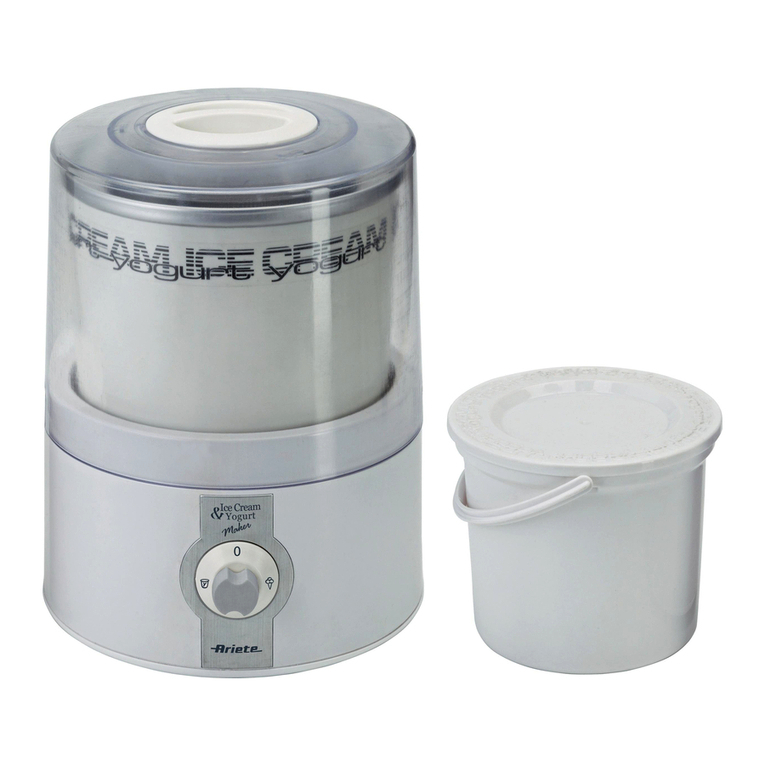
ARIETE Gran Gelato Metal User manual

Mod. 693

Fig. 1
A
Fig. 6
Fig. 4
Fig. 3
Fig. 7
Fig. 5
Fig. 2
B
C
D
E
F
G
HI
L
M
N
O
P
Q
R

EN
- 8 -
IMPORTANT SAFEGUARDS
READ THESE INSTRUCTIONS BEFORE USE.
The necessary precautions must be taken when using electrical appliances, and these include the
following:
Make sure that the voltage on the appliance rating plate corresponds to that of the mains elec-1.
tricity.
Never leave the appliance unattended when connected to the power supply; unplug it after2.
every use.
Never place the appliance on or close to sources of heat.3.
Always place the appliance on a flat, level surface during use.4.
Never leave the appliance exposed to the elements (rain, sun, etc....).5.
Make sure that the power cord does not come into contact with hot surfaces.6.
This appliance is not intended for use by persons (including children) with reduced physical,7.
sensory or mental capabilities, or lack of experience and knowledge, unless they have been
given supervision or instruction concerning use of the appliance by a person responsible for
their safety.
Children should be supervised to ensure that they do not play with the appliance.8.
NEVER PLACE THE POWER BASE OF THE APPLIANCE, THE PLUG OR THE POWER9.
CORD IN WATER OR OTHER LIQUIDS. CLEAN BY WIPING WITH A DAMP CLOTH.
ALWAYS UNPLUG THE POWER CORD FROM THE ELECTRICITY MAINS BEFORE FITTING10.
OR REMOVING SINGLE ATTACHMENTS OR BEFORE CLEANING THE APPLIANCE.
Always make sure that your hands are thoroughly dry before using or adjusting the switches on11.
the appliance, or before touching the power plug or power connections.
Never hang the appliance or angle it more than 45 degrees.12.
Place the appliance at least 8 cm away from other items so that there is an excellent heat13.
dispersion.
Before starting the ice cream maker, be sure that it has been perfectly assembled and that the14.
power base is firmly attached to the lid.
If the ice cream or sorbet contain fresh ingredients, these must be consumed within one week.15.
Ice cream tastes better cold.
If the ice cream or sorbet contain raw eggs, do not feed to children, pregnant women or the16.
elderly.
Never place ingredients in the freezer for pre-chilling as in this way, the mixing paddle could17.
become blocked before the ice cream has actually formed.
Only use the ice cream maker with the lid fitted.18.
Never operate the appliance when it is empty.19.
NEVER TOUCH MOVING PARTS.20.
Keep fingers, utensils, etc. at a safe distance from the removable container while the appliance21.
is operating; this is to reduce the risk of damage to people or to the machine itself. NEVER USE
SHARP OR METAL UTENSILS OR OTHER ITEMS INSIDE THE CONTAINER. These items can
damage the ice cream maker. It is fine to use rubber or wooden utensils when the ice cream
maker is switched off.

EN
- 9 -
Never remove the power base while the ice cream is being made.22.
To extend the freezing function after finishing the ice cream making cycle, it is necessary to23.
remove the power base immediately or risk shortening the useful life of the motor.
To unplug the appliance, grip the plug and remove it directly from the power socket. Never pull24.
the power cord to unplug the appliance.
Never use the appliance if the power cord or plug are damaged or if the appliance itself is faulty;25.
in this case, take it to your nearest Authorised Assistance Centre.
To prevent any risks, if the power cord is damaged, it must be replaced by the manufacturer, its26.
Technical Assistance Service or a similarly qualified person.
This appliance is designed for HOME USE ONLY and may not be used for commercial or27.
industrial purposes.
This appliance conforms to the 2006/95/EC and EMC 2004/108/EC directives.28.
Any changes to this product that have not been expressly authorised by the manufacturer may29.
lead to the user’s guarantee being rendered null and void.
In the event that you decide to dispose of the appliance, we advise you to make it inoperative30.
by cutting off the power cord. We also recommend that any parts that could be dangerous be
rendered harmless, especially for children, who may play with the appliance or its parts.
Packaging must never be left within the reach of children since it is potentially dangerous.31.
DO NOT THROW AWAY THESE INSTRUCTIONS
DESCRIPTION OF THE APPLIANCE (FIG. 1)
BEFORE YOU MAKE ICE CREAM
WARNING: ALWAYS UNPLUG THE POWER CORD FROM THE ELECTRICITY MAINS BEFORE
FITTING OR REMOVING SINGLE ATTACHMENTS OR BEFORE CLEANING THE APPLIANCE.
- Wash all parts that will be coming into contact with the ice cream thoroughly before: fixed container
(C), removable container (D), mixing paddle (E), lid (F), graded goblet (Q) and scoop (R).
- Prepare the ingredients for your recipe or one of the recipes in this booklet, mixing together well
in a large container.
IMPORTANT: To guarantee the correct operation of the appliance, it is necessary to insert two dessert
spoons (approx. 25-30 ml) of food-grade alcohol or other high-strength alcoholic drink between the fixed
and removable baskets.
AAppliance body
BControl panel
CFixed container
DRemovable container
EMixing paddle
FLid
GCap for ingredient insertion opening
HPower unit
ICooling LED
LDisplay
MMixing LED
NTimer button
OStart / Stop button
PPower button
QGraded goblet
RIce cream scoop

EN
- 10 -
IMPORTANT: It is not necessary to chill the container in a freezer because this ice cream maker has
an internal compressor that will chill the ingredients to make the ice cream.
APPLIANCE ASSEMBLY
WARNING: ALWAYS UNPLUG THE POWER CORD FROM THE ELECTRICITY MAINS BEFORE
FITTING OR REMOVING SINGLE ATTACHMENTS OR BEFORE CLEANING THE APPLIANCE.
IMPORTANT: Always use the ice cream maker upright and on a flat surface to get the best from the
compressor.
- Insert the removable container (D) into the fixed one (C) inside the machine (Fig. 2).
- Place the mixing paddle (E) inside the removable container (D) (Fig. 3).
- Fit the lid (F) onto the appliance body, holding the mixing paddle (E) in the upright position in the
centre of the lid and locking it in place by turning it clockwise so that the tabs on the power base
slot into the openings on the lid (Fig. 4).
- Close the opening for inserting ingredients with the special cap (G) (Fig. 5).
- Fit the power unit (H) onto the lid (F) and make sure that the motor axle has been inserted properly
into the hole on the top part of the mixing paddle (Fig. 6).
INSTRUCTIONS FOR USE
IMPORTANT: Before starting the ice cream maker, make sure that it has been perfectly assembled
and the power unit has been firmly attached to the lid.
- Plug the appliance into a mains power socket. Press the power button (P) to supply power to the
appliance; the display (L) will show“60.00” meaning that the default operating time is 60 minutes.
- Based on the recipe, press the Timer button (N) to set the operating time: press the button repeat-
edly until the required time (10, 20, 30, 40, 50, and 60 minutes) is shown on the display (L).
- Pour the previously prepared mixture in through the opening in the lid (F) (Fig. 6).
IMPORTANT: To avoid excessive volumes or waste, make sure that the ingredients never exceed
80% of the capacity of the removable container (D). Remember that ice cream increases in volume
while it is being made.
- At this point, press the start button (O) to start up the appliance and it will start to prepare ice
cream. At the same time, the mixing process will commence with the mixing paddle (E), together
with the chilling process, via the internal compressor and both LEDs (I-M) will switch on.
- When the power button (P) is pressed during the ice cream making process, the appliance will
immediately commence a countdown of three minutes, after which the machine will start up again;
the chilling and mixing functions will start up together. If, while counting down, the power button
(P) is pressed again, the mixing function will commence immediately while the chilling function will
only commence after the countdown.
IMPORTANT: If there is a power blackout or the appliance is suddenly disconnected while making
ice cream, there will be no automatic countdown function. We recommend starting the machine after
3 minutes, otherwise it will pass into compressor auto-protection mode.
- When the two processes have been completed and the ice cream is ready, the appliance will stop
automatically and an acoustic warning will sound 10 times. The display (L) will read “00.00” to
show the end of the countdown.
IMPORTANT: Never remove the power unit (H) while the ice cream is being made.

EN
- 11 -
- Press the stop button (O) and unplug the appliance.
- Remove the power unit (H) and the lid (F), by turning it anticlockwise, and the removable container
(D). Place the finished ice cream in another container, using the plastic scoop (R) (Fig. 7);never
use a metal utensil, as this could scratch the removable container (D).
- If 10 minutes after the ice cream making process is complete and the acoustic signal has been
heard 10 times, the appliance is not switched off using the stop button (O), the “extended chill
function” will start automatically so as not to allow the ice cream to melt.
Extended chill function
The appliance starts this function (no mixing) for 10 minutes every 10 minutes for a total of 1 hour
before returning to the initial state (power on but appliance not operating).
IMPORTANT: always unplug the appliance when serving the ice cream to prevent any risk of electric
shock.
Adjustments while operating
- To stop operation, press the start/stop button (O) for 3 seconds or press the power button (P) once
during the ice cream making process.
- While the appliance is operating, it is possible to extend operating times as required by pressing
the Timer button (N) repeatedly; each time the button is pressed adds 10 minutes up to a maxi-
mum of 60 minutes. Time can only be increased, not decreased.
How to extend operation (after the ice cream has been made).
For a thicker ice cream, after the previously set time is over and the machine has stopped and
returned to its original state, it is possible to add a time of 10, 20, 30, 40, 50, 60 minutes by pressing
the Timer button (N) and then the start/stop button (O). This way, the appliance will start again for
the required time and then stop and return to the extended chill function so that the ice cream does
not melt.
CLEANING
WARNING: NEVER PLACE THE POWER BASE OF THE APPLIANCE, THE PLUG OR THE
POWER CORD IN WATER OR OTHER LIQUIDS. CLEAN BY WIPING WITH A DAMP CLOTH.
WARNING: ALWAYS UNPLUG THE POWER CORD FROM THE ELECTRICITY MAINS BEFORE
FITTING OR REMOVING SINGLE ATTACHMENTS OR BEFORE CLEANING THE APPLIANCE.
IMPORTANT: To extend the life of the ice cream maker, never wash any of its parts in the dish-
washer.
Disassemble the appliance as described previously.
Wash the removable container (D), mixing paddle (E), lid (F), goblet (Q) and scoop (R) in warm soapy
water. The dry thoroughly.
Clean the fixed container (C), power unit (H) and appliance body (A) with a damp sponge or cloth.

EN
- 12 -
RECIPES
VANILLA ICE CREAM
For 10 portions (1/2 cup):
1 cup full milk
3/4 cup granulated sugar
2 cups cream
1/2 teaspoon pure vanilla extract to flavour
In a medium-sized container, mix the milk and sugar together with a handheld mixer or whisk, until
the sugar has dissolved (about 1-2 minutes at low speed). Stir in the cream and vanilla. Switch on
the appliance, pour the mix into the removable container (D) through the opening in the lid (F), then
leave to mix for about 40 minutes.
Variations:
- Mint flavour: Add 1- 1.5 spoons of mint syrup in place of the vanilla.
- Mint choc chip: Add 100 g plain or semisweet chocolate chips to the mint flavour.
- Walnut: Melt 50 g unsalted butter in a pan. Add a cup of chopped walnuts and 1/4 teaspoon of
salt. Cook over a medium-low heat until the nuts turn slightly brown. Drain off the butter, leave
the walnuts to cool and add to the ice cream mix during the last 5 minutes.
- Biscuits and cream: Add 3/4 cup of vanilla or chocolate shortbread biscuits to the mix
SIMPLE CHOCOLATE ICE CREAM
For 10 portions (1/2 cup):
1 cup full milk
1/2 cup granulated sugar
240 g plain or semisweet chocolate chips
1.5 cups cream
1 teaspoon pure vanilla extract
Heat the milk until it boils. Use a mixer with metal blade to finely chop the sugar and chocolate
together. Add to the boiling milk, stir together until the mix is even and smooth, then place in a
medium-sized container and leave to cool. Stir in the cream and vanilla extract. Switch on the appli-
ance, pour the mix into the removable container (D) through the opening in the lid (F), then leave to
mix for about 40 minutes.
Variations:
- Chocolate and almonds: Add 1/2 teaspoon of pure almond extract to the vanilla. Add 1/2-3/4 cups
roasted ground almonds or chocolate covered almonds during the final 5-10 minutes of cooling.
- Biscuits and chocolate: Add 1/2 cup shortbread biscuits during the final 5 minutes of cooling.
- Chocolate and caramel: Add 1/2-1 cup of chopped soft caramel sweets during the final 5 minutes
of cooling.

EN
- 13 -
ICE CREAM WITH FRESH STRAWBERRIES
For 10 portions (1/2 cup):
250 g fresh ripe strawberries, washed and chopped into small pieces
1.5 spoons lemon juice
1 cup of sugar (separate)
1 cup full milk
2 cups cream
1 teaspoon pure vanilla extract
In a small container, place the strawberries, lemon juice and 1/3 cup of sugar. Stir together gently
and leave the strawberries to marinade in the juice for 2 hours.
In a medium-sized container, mix the milk and sugar together with a handheld mixer or whisk, until
the sugar has dissolved (about 1-2 minutes at low speed). Stir in the cream and vanilla. Blend the
strawberries and add them to the mix. Switch on the appliance, pour the mix into the removable
container (D) through the opening in the lid (F), then leave to mix for about 40 minutes.
Note: the ice cream will look very pale pink; for a deeper colour, add a few drops of red colouring.
Variations:
- The strawberries can be replaced with other fresh fruit or fruit in syrup (raspberries, blackberries,
peaches, melon, pineapple, etc. ...)
FRESH LEMON SORBET
For 10 portions (1/2 cup):
2 cups sugar
2 cups water
1 cup freshly squeezed lemon juice
1 spoon finely chopped lemon rind (zest only)
Mix the sugar and water in a medium saucepan and bring to the boil over a medium-high heat. The
lower the heat to a minimum without stirring until the sugar has dissolved (about 3-5 minutes). Leave
to cool fully (this is the basic syrup, which can be made in larger quantities to have it ready for making
fresh lemon sorbets; store in the refrigerator ready for use).
When the syrup has cooled, stir in the lemon juice and rind.
Switch on the appliance, pour the mix into the removable container (D) through the opening in the lid
(F), then leave to mix for about 40 minutes.
Variations:
- Pink grapefruit sorbet: replace the lemon with 1-1.5 cups freshly squeezed pink grapefruit and
replace the lemon zest with a spoon of finely grated grapefruit zest.
- Orange sorbet: replace the lemon with 1-1.5 cups freshly squeezed orange and replace the lemon
zest with a spoon of finely grated orange zest.

EN
- 14 -
CHOCOLATE YOGURT ICE CREAM
For 10 portions (1/2 cup):
1 cup full milk
180 g. plain/milk chocolate chips, etc...
2 cups low-fat vanilla yogurt
1/4 cup sugar.
Put the milk and chocolate into a blender with metal blades and mix together until it is smooth (about
20-30 seconds). Add the yogurt e and sugar and mix together for about 15 seconds. Switch on the
appliance, pour the mix into the removable container (D) through the opening in the lid (F), then leave
to mix for about 40 minutes.
This manual suits for next models
1
Table of contents
Other ARIETE Ice Cream Maker manuals