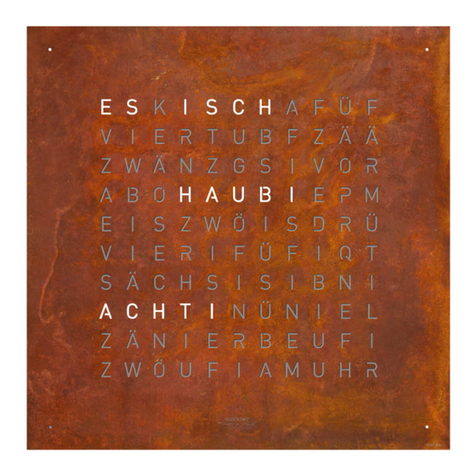
QLOCKTWO LARGE User manual

1
www.qlocktwo.com
Instructions for use
EN

Enjoy time

54
Instructions for use
Carefully read all instructions before using QLOCKTWO LARGE for the first time. Please follow
the instructions on safety, operation and connection at the end of the manual. You can also find this
document online at www.qlocktwo.com/info.
The package contains
QLOCKTWO LARGE incl. front cover
Wall bracket
Instructions for use
Wall-mounting template
10 mounting screws (matching wall plugs for various conditions are available at specialist shops)
Mains adapter with DC-connector for 18 V socket, power plug and strain relief and power supply
cable (see p. 6)
Mains adapter and junction box (for power supply via a direct power outlet from the wall)
Strain relief tape for external power supply unit (see p. 6)
Infrared remote control
Microfibre cleaning cloth
Cotton gloves
WARNING!
Mounting the QLOCKTWO LARGE is a demanding task. It must be carried out by at
least 2-3 people. The individual steps are described in detail in the chapter “Mounting” – All
instructions in the mounting guide and instructions on safety, operation and connection must be
followed. Read these carefully and familiarise yourself with the components. Plan the execution
and follow the guide step by step.
Mounting
WARNING!
Work on electrical systems and electrical equipment should only be carried out by
qualified electricians. Prior to installation ensure the power supply is isolated.
B&F Manufacture GmbH & Co. KG is not liable for improper connection or incorrect mounting of the
QLOCKTWO LARGE.
Required tools and materials
You need a secure platform for 2-3 people. Arrange for scaffolding or a working platform to be errected
by qualified people. The height of the platform depends on the mounting height. Select a platform height
ensuring people can safely hold and mount QLOCKTWO LARGE.
Wall-mounting template
Suitable screws and wall plugs depending on the construction of the wall (wall plugs are not included)
Power drill with appropriate drill bit
Cordless screwdriver or screwdriver
Pocket rule
Spirit level
Tape or 4 drawing pins
Pencil or centre punch
Please ensure that you have all the required parts and tools prior to mounting.

76
Descriptions Step by step setup
WARNING!
The weight of QLOCKTWO LARGE is approx. 20 kg with a size of 900 x 900 x 35 mm.
Depending on the height, scaffolding or a lifting platform may be required. Please follow the instructions
on safety.
WARNING!
Please ensure that the load-bearing capacity of the intended wall is sufficient for the
weight of the QLOCKTWO LARGE.
WARNING!
Selecting the right wall plug is vital in order to securely mount to the wall.
The type of wall plug depends on the construction of the wall. Make sure the load-bearing capacity of the
intended wall and wall plugs is sufficient for the 20 kg weight of the QLOCKTWO LARGE.
1. Finding the right position
To determine the position of QLOCKTWO LARGE on the wall please use the enclosed template. Make sure
there are no pipes or other supply lines near the marked drill holes. Mark the position of the wall bracket
with the help of the template using a pencil or centre punch.
2. Drilling
Adjust the wall bracket with the spirit level and mark the drill holes through the wall bracket with a pencil or
screw. Drill the mounting hole at the marked points. Insert the wall plugs, appropriate to the construction of
the wall, into the drill holes.
3. Wall bracket
Mount the wall bracket with the 10 suitable screws, depending on the construction of the wall.
Abb. 1
A QLOCKTWO LARGE back
B 18 V socket
C Buttons for
manual setting
D Mains adapter
E Mains adapter with
F DC connector for 18 V socket and
G power supply cable (for 110 V to
230 V sockets)
H Wall bracket
I Cable conduit
J Cable hook (only to be used
with strain relief M)
K Mounting rail
L Junction box
M Strain relief
(Velcro)
Infrared receiver

98
5. Mounting the QLOCKTWO LARGE
QLOCKTWO LARGE is ready to be hung onto the wall bracket. Before mounting the QLOCKTWO LARGE, hang
the mains adapter (E) with the strain relief in the cable hook and insert the DC-connector (F) into the 18 V
socket (B), see fig. 1, 2, 3.
Make sure there is no cable loop between the wall bracket and the body.
4. Electrical connection
Option 1: Power supply via a direct power outlet from the wall (see fig. 2).
Insert the power plug (G) into the mains adapter (D). Only trained electricians should connect the
mains adapter (D) to the power outlet in the wall (N) and fit the junction box (L).
Option 2: Power supply via a plug socket (see fig. 3).
Hang the mains adapter (E) with the strain relief (M) on the cable hook.
Insert the DC-connector (F) into the 18 V socket (B). Now, the QLOCKTWO LARGE can be hung on
the wall bracket. Afterwards, the power supply cable (G) is inserted into a plug socket. The cable
runs through the cable conduit (I) of the wall bracket. You might need an adapter to fit your coun-
try’s type of sockets (see scope of delivery/labelling on the packaging). If you are uncertain, ask a
qualified electrician for advice.
Securing
Stand in front of the QLOCKTWO LARGE. Reach
above the QLOCKTWO to the upper side of the wall
bracket (H) and secure the QLOCKTWO as follows:
Mounting rails (K)
Power supply cable loop
QLOCKTWO LARGE
Wall bracket (H)
Wall
1. Lift the lever upwards.
2. Move the lock pin into the designated slot
thus securing the QLOCKTWO LARGE.
TIP
Bring QLOCKTWO LARGE towards the wall
bracket evenly, about 1 cm higher than the
final position. Press lightly against the wall
bracket until the mounting rail engages.
Now QLOCKTWO LARGE can slowly be lowered.
Ensure that all four mounting rails are properly
placed into the counter pieces.
QLOCKTWO LARGE Wall bracket (H)

1110
Functions and operation
Displaying/reading the time
Example: 7:18
Fig. 4 Fig. 5
5
1
60
( 60 ) button
Hourly steps
( 5 ) button
5-minute steps
( ) button
Brightness
( 1 ) button
1-minute steps
Hourly display
Adjusting via button ( 60 )
Text in 5-minute intervals
Adjusting via button ( 5 )
Each illuminated dot =
1 minute later
Adjusting via button ( 1 )
Setting the time
QLOCKTWO LARGE operates using the built-in high-precision quartz chronometer. The time can be set
manually using the buttons on the back of the QLOCKTWO LARGE.
The time is set manually using the buttons on the back of the QLOCKTWO LARGE (see fig. 1):
Order of the buttons
seen from the back
( 1 ) = 1-minute steps ( 5 ) = 5-minute steps ( 60 ) = Hourly steps
By pressing the ( 1 ) button the internal seconds counter is set to zero.
This enables you to set the time accurately to the second.
Operating the QLOCKTWO
The 4 buttons on the back can still be used
while the clock is mounted to the wall.
Position of the buttons on the back.
Read from the front, in mounted position.

1312
Turning “IT IS” on/off
The introductory words “IT IS” can be turned on and off. To do so, press the ( 60 ) button for approx.
3 seconds. The words always appear when the mode is activated. In “purist mode” (factory setting)
“IT IS” only appears every full and half hour.
Infrared remote control
All functions mentioned can also be controlled via the supplied infrared remote control. Simply point the
remote upwards towards the bottom of the QLOCKTWO LARGE. The infrared receiver is positioned at the
back of the QLOCKTWO LARGE.
Seconds mode
To select the seconds mode press the ( ) button for longer than 3 seconds. The seconds will
appear as large numbers in the matrix. By pressing any button QLOCKTWO LARGE resumes
standard operation.
Setting the level of brightness
The LEDs’ brightness automatically adjusts to the surrounding light. You can also manually
set the level of brightness. By repeatedly pressing the ( ) button you can change the level of
brightness according to the following pattern:
Maximum brightness
Normal brightness
Medium brightness
Low brightness
Automatic mode (the dots in the corners briefly light up)

1514
WARNING! This device is not intended to be used by persons (including children) with restricted
physical, sensory or mental abilities or lacking experience and/or knowledge, unless they are supervised
by a person responsible for their safety or have received instructions on how to use the device by that
person. Children should be supervised to ensure they do not play with QLOCKTWO LARGE.
WARNING! Children can choke on the packaging film and small parts. Keep the packaging film,
QLOCKTWO LARGE and all associated parts away from children.
WARNING! Make sure the load-bearing capacity of the intended wall is sufficient for the weight of
the QLOCKTWO LARGE.
WARNING! Selecting the right wall plug is vital in order to securely mount to the wall. The type of
wall plug required depends on the construction of the wall. Make sure the load-bearing capacity of the
intended wall and wall plugs is sufficient for the 20 kg weight of the QLOCKTWO LARGE.
WARNING! QLOCKTWO LARGE contains strong magnets. They can disrupt the operation of electronic
implants like cardiac pacemakers thereby putting people at risk. Do not keep QLOCKTWO LARGE in
close proximity of the implants (minimum distance 30 cm). Due to their magnetic effect they can also
pull your tools onto the front plate thus scratching or damaging your QLOCKTWO LARGE.
Safety, operation and connection
WARNING! When connecting QLOCKTWO LARGE to a power outlet in the wall there is a danger
of electric shock. Work on electrical systems and electrical equipment should only be carried out by
qualified electricians. Prior to installation ensure the power supply is isolated and check for voltage.
WARNING! Consider the technical specifications appropriate for the connection to avoid the risk of
causing a short circuit, fire or electric shock. QLOCKTWO LARGE should only be operated by connecting
it to an appropriate mains socket. Installing it in a different manner is not permissible and can cause
damage to the QLOCKTWO LARGE.
WARNING! Please use QLOCKTWO LARGE only with the original accessories it is supplied with.
WARNING! QLOCKTWO LARGE must only be installed and operated in dry, interior spaces. Do not
install QLOCKTWO LARGE in locations with high levels of humidity, e.g. in the bathroom.
WARNING! Never touch the plug or the cable with wet hands due to risk of electrical shock.
WARNING! Ensure that QLOCKTWO LARGE is positioned and mounted securely to prevent injury
and/or damage to surfaces or objects from a fall.
WARNING! QLOCKTWO LARGE should never be exposed to direct sunlight, very high or very low
temperatures, moisture or strong vibration. The safe operating temperature ranges between 15 °C and
30 °C.

1716
Technical data
Dimensions
Body with front cover: 900 x 900 x 35 mm
Plug
Input: AC 100 V − 240 V ~ 50/60 Hz 2 A
Output: DC 18 V 2.33 A
Power supply QLOCKTWO LARGE
Input: DC 18 V 1.2 A
Warranty
The QLOCKTWO LARGE warranty period is two years. If damage is caused because the instructions in this
manual were not followed, the warranty is void. Furthermore, the warranty will expire if the QLOCKTWO
LARGE is altered, opened or modified. B&F Manufacture GmbH & Co. KG is not liable for any damage to
property or personal injury caused by not observing the instructions for use, improper handling or incorrect
placement or mounting of the QLOCKTWO LARGE.
Repairs
Maintenance, adjustment and repair work should only be carried out by an expert or a specialist workshop.
Never attempt to repair or dismantle the QLOCKTWO LARGE yourself. If your QLOCKTWO LARGE is damaged
or not functioning properly, please contact a specialist dealer or the manufacturer directly.
WARNING! Never use a damaged QLOCKTWO LARGE!
Cleaning & care
Stainless steel front cover, brushed or coated
During installation, make sure you wear the supplied cotton gloves!
Please use a special stainless steel cleanser to clean the front cover made of brushed stainless steel.
We recommend using only water to clean the front covers made of coated stainless steel.
WARNING! Do not use any cleaning agents containing solvents or alcohol like spirit!
GOLD / PLATINUM front cover
These surfaces should only be dusted with a dry, soft and dust-free cotton cloth or hair pencil
and without applying any pressure.
RUST / RAW IRON front cover
These surfaces should only be dusted with a dry, soft and dust-free cotton cloth or hair pencil.
WARNING! Never use water, washing-up liquid and cleaning agents that contain solvents or
alcohol like spirit!

Enjoy time

Dealer directory
Technical data subject to modifications and errors. No liability is assumed for printing errors.
16.21.Q2L3.GA.B.EN.17
B&F Manufacture GmbH & Co. KG
Alemannenstr. 65, DE-73529 Schwäbisch Gmünd
Made in Germany / © All rights reserved
www.qlocktwo.com
Other manuals for LARGE
2
Table of contents
Other QLOCKTWO Clock manuals
Popular Clock manuals by other brands

La Crosse Technology
La Crosse Technology W85746-BHG instruction manual

Velleman
Velleman ED8A101 user manual

La Crosse Technology
La Crosse Technology WS-8418U-IT user manual

Auriol
Auriol HG00041A Operation and safety notes

Sapling
Sapling SAL-2 Series installation manual

TFA
TFA 60.4519 operating instructions