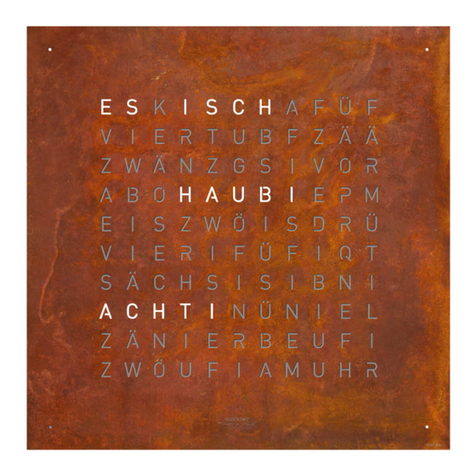
QLOCKTWO 180 User manual


3
2
Gebrauchsanleitung ...................................................................... 4
Instructions for Use ...................................................................... 10
DE
EN

5
4
2
Gebrauchsanleitung
Gebrauchsanleitung für eine sichere Anwendung und eine lange Nutzungs dauer
der QLOCKTWO 180 sorgfältig lesen und aufbewahren.
1. Sicherheitshinweise
1.1 Lieferumfang
Lieferumfang nach dem Auspacken prüfen, siehe Montage-Anleitung.
Bei fehlenden oder beschädigten Teilen an den Fachhändler wenden.
1.2 Transport und Lagerung
ACHTUNG Zur Vermeidung von Sachschäden beachten:
■Originalverpackung verwenden.
■Stöße, Erschütterungen und Vibrationen beim Transport vermeiden.
■Transport mit mind. 4 Personen durchführen. QLOCKTWO 180 wiegt ca. 295 kg inkl. Transportkiste.
■In trockenen Räumen bei Raumtemperatur und geringer Luftfeuchtigkeit lagern.
1.3 Montageort
ACHTUNG Zur Vermeidung von Sachschäden beachten:
■Nicht in Räumen mit hoher Luftfeuchtigkeit installieren.
■Außer Reichweite von Kindern und Tieren installieren.
■Nicht direkt auf oder neben Festplatten, Computern, Mobiltelefonen, Kreditkarten oder anderen elektronischen
Bauteilen, die auf Magnete empfi ndlich reagieren, installieren.
■QLOCKTWO 180 so installieren, dass diese bei unbeabsichtigten Stößen oder Ziehen (an den Leitungen) nicht
herunterfallen kann.
■Direkte Wärmestrahlung vermeiden, z. B. durch Heizkörper.
■Direktes Sonnenlicht vermeiden.
1.4 Reinigung
ACHTUNG Poliertücher oder Lösungsmittel (z. B. Terpentin, Benzol) oder alkoholhaltige Reinigungsmittel
(z. B. Spiritus) können Beschädigungen der Oberfl ächen verursachen.
Frontcover Edelstahl beschichtet (BLACK-, WHITE-, RED-, GREY PEPPER, HAZELNUT):
Verschmutzungen mit einem weichen Lappen und Wasser mit etwas Geschirrspülmittel entfernen.
Gebrauchsanleitung vor der Montage und Verwendung sorgfältig lesen,
um Personen- und Sachschäden auszuschließen.
3
Frontcover GOLD, RUST:
Oberfl ächen mit einem weichen, trockenen und staubfreien Baumwolltuch oder mit einem weichen Haarpinsel ohne
Druck vorsichtig abstauben.
1.5 Wartung und Reparatur
QLOCKTWO 180 niemals versuchen selbst zu reparieren oder zu zerlegen. Wartungs- und Reparatur arbeiten beim
Fachhändler oder Hersteller durchführen lassen. Kontaktdaten, siehe letzte Seite der Gebrauchsanleitung.
1.6 Gewährleistung
Die Gewährleistungszeit beträgt zwei Jahre. QLOCKTWO 180 ausschließlich mit originalem Zubehör verwenden.
Werden die Hinweise in dieser Gebrauchsanleitung nicht beachtet oder QLOCKTWO 180 wird verändert, geöffnet oder
umgebaut, besteht kein Gewährleistungsanspruch.
1.7 Entsorgung
ACHTUNG Eine unsachgemäße Entsorgung belastet die Umwelt.
2. Montage und Anschlüsse
2.1 Sicherheit bei der Montage
Edelstahl: Edelstahlteile als Metallschrott der Wiederverwertung zuführen.
Edelstahl ist ein wertvoller Rohstoff, der eingeschmolzen und erneut verwendet werden kann.
Elektrogeräte: Elektrogeräte dürfen nicht in den Hausmüll gegeben werden.
Regionale Entsorgungsvorschriften beachten. Der Händler ist zur Rücknahme verpfl ichtet.
WARNUNG
Schwere bis tödliche Verletzungen durch Elektrizität
■Nicht an elektrischen Leitungen ziehen, nur an den Steckern.
■Leitungen so verlegen, dass diese nicht geknickt oder eingeklemmt werden können und sich nicht im
Durchgangsbereich befi nden.
■Vor dem Anschluss an die Stromversorgung alle Leitungen auf sichtbare Schäden prüfen.
QLOCKTWO 180 bei Beschädigungen nicht montieren oder anschließen.
■Elektrische Anschlüsse nur von Elektrofachkräften durchführen lassen.
■Vor Beginn der Wandmontage Stromversorgung abschalten und die Spannungsfreiheit prüfen.
■Zulässige elektrische Daten der Stromversorgung beachten, siehe Kap. 4 „Technische Daten".
■Leitungen und Stecker nicht mit feuchten Händen berühren.
DE
DE
EN

7
6
4
ACHTUNG Zur Vermeidung von Sachschäden beachten:
■Tragvermögen der vorgesehenen Wand beachten und ein hierfür geeignetes Befestigungsmittel wählen,
z. B. Dübel und Schrauben bei Mauerwerk.
■Im Bereich der Bohrlöcher dürfen sich keine Versorgungsleitungen befi nden.
■Ist beim Einhängen der QLOCKTWO 180 in die Wandhalterung ein Widerstand (z. B. durch ungünstig liegende Kabel)
zu spüren, QLOCKTWO 180 nicht mit Gewalt in die richtige Position drücken oder drehen. Beim nicht korrekten
Einrasten der QLOCKTWO 180 in den Wandhalter kann der Netzstecker beschädigt werden.
■Immer Baumwollhandschuhe (Lieferumfang) benutzen.
2.2 Wandmontage
Stromzuführung über einen Wandanschluss:
Wandmontage und elektrischer Anschluss über einen
Wandanschluss, siehe Montage-Anleitung.
Stromzuführung über eine Netz-Steckdose:
Wandmontage, siehe Montage-Anleitung.
Bei einem elektrischen Anschluss über eine
Netz-Steckdose folgendermaßen vorgehen:
>Den kleinen Stecker der Anschlussleitung (1)
durch den Kabelkanal der Wandhalterung (2)
führen und in das Netzgerät einstecken.
>Zugentlastung des Netzgerätes in die
Kabelaufhängung einhängen (3).
>Stecker des Netzgerätes in die Anschluss-
buchse der QLOCKTWO 180 stecken (4).
>Netzstecker in eine Steckdose stecken (5).
WARNUNG
Schwere Quetschungen und Stöße beim Herunterfallen
■QLOCKTWO 180 wiegt ca. 115 kg. Für die Montage ist eine sichere Standfl äche für mind. 4 Personen
erforderlich.
■Je nach Montagehöhe ist ein Gerüst oder eine Hebebühne von Fachkräften bereit zu stellen.
■Höhe der Standfl äche so wählen, dass die Personen QLOCKTWO 180 sicher halten und montieren
können.
■Beim Einhängen der QLOCKTWO 180 in die Wandhalterung darauf achten, dass sich alle 6
Aufhängebolzen in den Halterungen befi nden und QLOCKTWO 180 in den Wandhalter einrastet.
(3)
(5)
(2)
G E
(1)
(4)
5
3. Funktionen und Bedienung
3.1 Zeitanzeige und Bedienelemente
Angezeigte Uhrzeit: 07:18 Uhr Bedienelemente
Anzeige der Stunde
Einstellung über Taste [60]
Anzeige in 5-Minuten-Schritten
Einstellung über Taste [ 5 ]
Jeder leuchtende Punkt
= 1 Minute später
Einstellung über Taste [ 1 ]
Taste [ ]
Helligkeitseinstellung
Taste [ 1 ]
1-Minuten-Schritte
Taste [ 5 ]
5-Minuten-Schritte
Taste [60]
Stundenschritte
DE
DE
EN

9
8
6
3.2 Hinweise für die Einstellung
QLOCKTWO 180 lässt sich mit etwas Fingerspitzengefühl auch von der Vorderseite einstellen.
Bei Betätigung der Taste [ 1 ], 1-Minuten-Schritte wird der interne Sekundenzähler auf Null gesetzt.
Dies ermöglicht ein sekundengenaues Einstellen der Zeit.
Anzeige „ES IST“ ein-/ausschalten:
In der Werkseinstellung werden die einleitenden Worte „ES IST“ zur vollen und halben Stunde angezeigt.
>Soll „ES IST“ immer angezeigt werden: Taste [60] ca. 3 Sekunden gedrückt halten.
>Werkseinstellung wieder herstellen: Taste [60] ca. 3 Sekunden erneut gedrückt halten.
Sekundenanzeige ein-/ausschalten:
Sekunden erscheinen auf dem Frontcover mit großen Ziffern.
>Sekundenanzeige einschalten: Taste [ ] ca. 3 Sekunden gedrückt halten.
>Sekundenanzeige ausschalten: Eine beliebige Taste drücken.
Helligkeit einstellen:
Im „Automatikmodus“ (Werkseinstellung) passt sich die Helligkeit automatisch dem Umgebungslicht an.
Die Helligkeit lässt sich auch manuell einstellen.
>Taste [ ] wiederholt drücken.
Die Einstellungen wechseln nach folgendem Muster:
3.3 Infrarot-Fernbedienung
Bedienung:
Alle Einstellungen können auch mit der Fernbe dienung
(Lieferumfang) vorgenommen werden.
>Fernbedienung an die Unterseite der QLOCKTWO 180
halten. Der Infrarot-Empfänger befi ndet sich hinter dem
Logo auf der Vorderseite der QLOCKTWO 180.
>Einstellungen mit der Fernbedienung vornehmen.
Die Funktion der Tasten entspricht den Tasten auf der
Rückseite des Gehäuses.
Batterie austauschen:
Bei schwacher Sendeleistung ist die Batterie der
Fernbedienung auszutauschen.
C
R
2
0
3
2
3V
■Maximale Helligkeit
■Hohe Helligkeit
■Mittlere Helligkeit
■Geringe Helligkeit
■Automatikmodus (Minutenpunkte in den Ecken leuchten kurz auf)
7
3.4 Uhrzeit per App einstellen
Mit der kostenlosen App FLASHSETTER lässt sich die Uhrzeit mit vielen Smartphones einfach und sekundengenau auf
die QLOCKTWO 180 übertragen. Weitere Informationen unter: www.qlocktwo.com/fl ashsetter
3.5 Stromausfall
Bei einem Stromausfall läuft die Uhrzeit ca. 24 Stunden weiter. Wird die Stromversorgung wieder hergestellt, erscheint
automatisch die aktuelle Uhrzeit.
4. Technische Daten
Modell: QLOCKTWO 180
Abmessung QLOCKTWO 180 (H × B × T): 180 × 180 × 3,2 cm
Gewicht QLOCKTWO 180: ca. 90 kg (inkl. Stahfront)
Abmessung Wandhalterung (H × B × T): 162 × 162 × 3,8 cm
Gewicht Wandhalterung: ca. 25 kg
Abmessung Transport Massiv-Holzcase (H × B × T): 210 × 200 × 80 cm
Gewicht Transport Massiv-Holzcase: ca. 180 kg
Gesamtgewicht: ca. 295 kg
Umgebungstemperatur: +15 °C bis +30 °C
Netzgerät, Eingang: AC 100 V − 240 V ~ 50/60 Hz, 1 A
Netzgerät, Ausgang: DC 18 V 3,0 A
QLOCKTWO 180, Eingang: DC 18 V 1,2 A
Fernbedienung, Batterie: CR 2032, 3 V
Ganggenauigkeit: ±8 Sekunden/Monat
Irrtü mer oder Änderungen der technischen Daten bleiben vorbehalten.
Fü r Druckfehler oder Irrtü mer wird keine Haftung ü bernommen.
DE
DE
EN

11
10
2
Instructions for Use
Please read through the instructions carefully for the safe use of the
QLOCKTWO 180 and to ensure its long useful life and keep them in a safe place.
1. Safety Instructions
1.1 Scope of delivery
Unpack and check scope of delivery; see the mounting template.
Contact your specialised dealer in the event of missing or damaged parts.
1.2 Transport and storage
IMPORTANT Please note the following in order to avoid material damage:
■Use the original packaging.
■Avoid knocking, shaking and vibrating during transportation.
■At least 4 persons must transport the clock. The QLOCKTWO 180 weighs approx. 295 kg, included the transport box.
■Store in dry rooms at room temperature and low humidity.
1.3 Place of installation
IMPORTANT Please note the following in order to avoid material damage:
■Do not install the clock in rooms where humidity is high.
■Make sure the clock is placed out of the reach of children and animals.
■Do not place the clock directly adjacent to or onto hard drives, computers, mobile phones, credit cards or other
electronic components that react sensitively to magnets.
■Position your QLOCKTWO 180 so that it cannot fall down in the event of unintentional knocks or pulling the cables.
■Avoid direct heat radiation, for example heat from radiators.
■Avoid direct sunlight.
1.4 Cleaning
CAUTION Polishing cloths and solvents (e.g. turpentine or benzene), and detergents containing alcohol (e.g. spirit)
may damage the surfaces.
Coated stainless steel front cover (BLACK-, WHITE-, RED-, GREY PEPPER, HAZELNUT):
Remove dirt with a soft cloth and water containing a little dishwasher detergent.
Please read the Instructions for Use carefully before assembling and
using your clock in order to exclude injury to persons and damage to property.
3
Front cover GOLD, RUST:
Carefully dust the surfaces with a soft, dry, dust-free cotton cloth or with a soft, fi ne brush without applying any
pressure.
1.5 Maintenance and repairs
Never attempt to repair or dismantle your QLOCKTWO 180 yourself. Have a specialised dealer or the manufacturer
carry out maintenance and repair See the last page of these Instructions for Use for contact details.
1.6 Warranty
The warranty is valid for two years. Only use your QLOCKTWO 180 with original accessories. Failure to observe the
information in these Instructions for Use or modifying, opening or altering your CLOCKTWO 180 will not be covered
by our warranty.
1.7 Disposal
IMPORTANT Improper disposal pollutes the environment.
2. Assembly and Connections
2.1 Safe mounting of the clock
Stainless steel: Stainless steel components are to be recycled as scrap metal.
Stainless steel is a valuable raw material which can be melted and reused.
Electric appliances: Electric appliances may not be disposed of as household waste.
Observe regional disposal regulations. Dealers are obliged to take back appliances.
WARNING
Serious to fatal injury caused by electric power
■Do not pull electric cables; only pull out the plugs.
■Lay cables so that they cannot be bent or get caught and are not found in passages.
■Check all cables for visible damage before connecting them to the power supply.
Do not connect your QLOCKTWO 180 to the power supply in the event of any damage.
■Have electrical connection carried out by electricians.
■Cut off the power supply and check to ensure that there is no voltage before commencing with wall
mounting.
■Comply with acceptable electric data for the power supply, see Section 4 on "Technical Data".
■Do not touch cables and plugs with wet hands.
DE
EN

13
12
4
IMPORTANT Please note the following in order to avoid material damage:
■Observe the load-bearing capacity of the chosen wall and select a suitable fastener for this wall, e.g. dowels and
screws for brickwork.
■No supply lines may be present near the drill holes.
■If you feel resistance when hanging your QLOCKTWO 180 into the wall mounting bracket (e.g. as a result of
unfavourably positioned cables), do not use force to press or turn your QLOCKTWO 180 into the right position.
The mains plug can be damaged if the QLOCKTWO 180 does not engage properly in the wall mounting bracket.
■Use cotton gloves (included with delivery).
2.2 Wall installation
Power supply from a wall connection:
Wall mounting and electrical connection with a
wall connection, see the mounting instructions.
Power supply from a power socket:
Wall mounting, see mounting instructions.
Proceed as follows for an electrical connection
using a power socket:
>Guide the small plug on the mains cable (1)
through the cable duct of the wall mounting bracket (2)
and plug it into the power supply.
>Push the cable relief of the power supply unit into the
cable suspension (3).
>Connect the plug of the power supply to the connection
socket of the QLOCKTWO 180 (4).
>Plug the mains plug into a wall socket (5).
WARNING
Serious crushing and knocks when dropped
■The QLOCKTWO 180 weighs approx. 115 kg.
At least 4 persons must have a safe place to stand when the clock is mounted.
■Scaffolding or a lifting platform is to be provided, depending on the mounting height.
■Choose a standing area height so that the persons can safely hold and mount the QLOCKTWO 180.
■When inserting the QLOCKTWO 180 into the wall mounting bracket, make sure that all 6 suspension
bolts are located in the holders and that the QLOCKTWO 180 engages in the wall mounting bracket.
(3)
(5)
(2)
G E
(1)
(4)
5
3. Functions and Operation
3.1 Time display and control elements
Time of day shown: 07:18 Control elements
Hour display
Set with button [60]
Display in 5-minute steps
Set with button [5]
Each light point
= 1 minute later
Set with button [ 1 ]
[ ] button
Brightness setting
Button [ 1 ]
1-minute steps
Button [ 5 ]
5-minute steps
Button [60]
Hourly steps
DE
EN

15
14
6
3.2 Information on setting a time
QLOCKTWO 180 can also be set from the front with some instinctive feeling. Touching the [ 1 ] 1-minute step button
will set the internal counter for seconds at zero. This makes is possible to set the time precisely to the second.
Switching the "IT IS" display on/off:
The factory setting shows the introductory words "IT IS" for full hours and half hours.
>If "IT IS" is always shown: Keep button [60] pressed for approx. 3 seconds.
>Restoring the factory setting: Keep button [60] pressed for approx. 3 seconds.
Switching the second display on/off:
The seconds appear in large numbers on the front cover.
>Switching the second display on: Keep the [ ] button pressed for approx. 3 seconds.
>Switching the second display off: Press any button.
Setting the brightness:
The brightness level adapts automatically to the surrounding light in the "automatic mode" (factory setting).
The level of brightness can also be set manually.
>Press button [ ] repeatedly.
The settings will change as follows:
3.3 Infrared remote control
Operation:
Settings can all be made with the remote control
(included with delivery).
>Hold the remote control underneath the QLOCKTWO 180.
The infrared receiver is behind the logo on the front of
the QLOCKTWO 180.
>Make settings with the remote control.
The function of the buttons corresponds to the keys
on the back of the casing.
Replacing the battery:
The remote control battery is to be replaced when
the transmission power is weak.
■Maximum brightness
■Strong brightness
■Medium brightness
■Low brightness
■Automatic mode (minute dots in the corners light up briefl y)
C
R
2
0
3
2
3V
7
3.4 Setting the time of day with an app
The time of day can be transferred easily and accurately to the second to your QLOCKTWO 180 with many smart-
phones by using the free FLASHSETTER app. More information available at: www.qlocktwo.com/fl ashsetter
3.5 Power failure
The time of day continues to change for approx. 24 hours in the event of power failure. The current time of day will be
shown automatically when the power supply has been restored.
4. Technical Data
Model: QLOCKTWO 180
Dimensions QLOCKTWO 180 (H × W × D): 180 × 180 × 3.2 cm
Weight QLOCKTWO 180: approx. 90 kg (included the steel front)
Wall mounting bracket dimensions (H × W × D): 162 × 162 × 3.8 cm
Weight of wall mounting bracket : approx. 25 kg
Dimensions solid wooden case for transport (H × W × D): 210 × 200 × 80 cm
Weight solid wooden case for transport: approx. 180 kg
Total weight: approx. 295 kg
Ambient temperature: +15 °C to +30 °C
Power supply unit port: AC 100 V − 240 V ~ 50/60 Hz, 1 A
Power supply unit output: DC 18 V 3,0 A
QLOCKTWO 180 port: DC 18 V 1,2 A
Remote control, battery: CR 2032, 3 V
Precision: ±8 seconds/month
Technical data errors and modifi cations excepted.
No liability is assumed for misprints and errors.
DE
EN

18.28.Q2180.GA.IH.DE/EN.01
B&F Manufacture GmbH & Co. KG
Alemannenstr. 65, DE-73529 Schwäbisch Gmünd
Made in Germany / © All rights reserved
www.qlocktwo.com
Table of contents
Languages:
Other QLOCKTWO Clock manuals